I’ll never forget the sinking feeling I had back in 2018 when I wrapped up what I thought was a flawless $15,000 deck project. The sun was setting over the hills, the homeowner was handing me a check, and I stood back with a cold drink to admire my work. Then I saw them. The stairs. From the side, the composite treads showed off their ugly, plastic-looking “innards”—a honeycomb pattern of recycled polymers that looked like a row of missing teeth. It was a rookie mistake that made a high-end build look like a cheap DIY weekend project. I had spent weeks choosing the right composite decking for its durability, only to fail at the finish line by leaving those raw, cut edges exposed.
Stop Letting Your Stairs Look Like an Unfinished Basement Project
If you’ve spent any time looking for innovative outdoor living ideas with composite decking, you know the material is a miracle of modern engineering. It’s tough, it doesn’t rot, and the wood-grain patterns are stunning—until you make a cross-cut. The moment your saw blade passes through that board, you expose the “sausage-making” inside: the grey, porous core that was never meant to see the light of day. According to data from the National Association of Home Builders (NAHB) at nahb.org, outdoor living spaces are a top priority for modern buyers, but “visible craftsmanship” is the deciding factor in how much value that deck actually adds to your home. I used to think people wouldn’t notice a few raw edges. I was wrong. My neighbor once pointed at my own back steps and asked if the “trim fell off.” Ouch. Today, I’m going to save you that embarrassment. We are going to dive into the best ways to finish the ends of hollow core composite boards so your stairs look like they were designed by a pro.
Does the Extra Trim Work Really Make a Difference?
You might be leaning against your miter saw right now, wondering if it’s worth the extra four hours of work. I get it. You’re tired, and the deck is “functional.” But trust me, once you see a properly finished wrap-around stair stringer, you can never go back. It’s the difference between a custom-tailored suit and something you grabbed off a clearance rack. Beyond the pure aesthetics, properly hiding those edges prevents moisture and organic debris from getting trapped inside the boards, which can lead to nasty mold issues down the road. Have you ever finished a home project only to realize one tiny detail was ruining the whole vibe? Tell me about your most frustrating “oops” moment in the comments—I’ve probably been there too. We also need to consider safety; when you are designing safe and stylish stairs, the way you cap your edges can actually influence the stair tread depth that feels safest. If you slap on a thick fascia board without planning, you might accidentally create a toe-catch that turns your beautiful new deck into a tripping hazard.
The Picture Frame Method is Your Best Friend
The absolute gold standard for finishing stairs is the picture-frame border. Think of it like a frame around a painting; the main treads sit inside a perimeter of boards that have factory-finished edges facing outward. This technique completely hides those “honeycomb” cores. To pull this off, you need to miter the corners at 45 degrees. I’ll be honest, the first time I tried this on a job in Reeds Spring, I didn’t use a sharp enough blade, and the composite melted slightly, leaving a ragged edge. Now, I always use a high-tooth-count carbide blade and slow my cut down. When you are learning how to frame a picture frame border for composite decking, remember that precision is everything. If those miters aren’t tight, the whole look falls apart.
Support the Seams or Watch Them Sag
Here is where most DIYers—and even some “pros”—get into trouble. You cannot just slap a picture frame on a standard stair stringer and call it a day. A standard stringer is usually spaced 12 or 16 inches apart, which doesn’t provide enough meat to screw down both the border board and the internal tread boards where they meet. You have to add “blocking” or extra framing members. If you skip this, the ends of your boards will bounce every time someone steps on them. Understanding the joist spacing secret for a solid feeling composite surface is just as important for stairs as it is for the main deck. I once had a client call me back because their “fancy stairs” felt like a trampoline. I had to go underneath and sister in three extra blocks per step. It was a miserable afternoon spent in the dirt that could have been avoided with twenty minutes of planning during the framing stage.
Using Fascia as a Protective Skin
If picture framing feels too complex for your first project, the second-best option is using fascia boards as a veneer. Fascia is thinner—usually about 1/2 inch to 5/8 inch—and it’s designed to cover the rim joists and stringers. You run your tread boards slightly past the edge of the stringer, then butt the fascia board up tight against the underside of that overhang. This hides the side profile of the stringer, but you still have to deal with the exposed ends of the treads. To fix that, you can “wrap” the fascia up the side. Just be careful: composite expands and contracts like a living thing. You need to know how to install deck fascia boards so they dont buckle in the heat. If you pin it too tight with no room for movement, it will wavy-up like a piece of bacon by August.
Why Closed Risers Change the Game
A lot of older decks have “open” stairs where you can see right through to the ground. That is a nightmare for hiding cut edges because there are twice as many corners to deal with. That is why I always advocate for a closed design. When you realize why your deck stairs should have closed risers for a modern look, you see it’s not just about aesthetics—it’s about hiding the structural guts of the build. By using a matching composite riser board, you create a solid “box” for each step, which makes it much easier to hide the transition between the tread and the stringer. Just make sure you don’t make the the stair stringer measurement mistake that ruins your stride by forgetting to account for the thickness of that riser material when you’re cutting your wood frames.Most homeowners—and even some general contractors—assume that if you use hidden fasteners on the main deck, you should use them on the stairs too. I’m here to tell you that’s a recipe for a wobbly, noisy mess. Everyone says they want that clean, screw-free look, but in my experience, color-matched screws are the only way to go for treads. Hidden clips allow for too much lateral movement; when you’re walking up stairs, you’re not just putting downward pressure, you’re pushing forward and back. Over time, those clips can loosen, leading to the hidden clip mistake that leads to buckling deck boards or, at the very least, a staircase that sounds like a haunted house every time you go for a late-night snack.
Should You Really Trust Hidden Fasteners on Stair Treads?
Technical data from the American Wood Council (AWC) in their Design for Code Acceptance (DCA 6) guide highlights that stair assemblies require specific load-bearing connections that often exceed standard deck surface requirements. If you aren’t using structural screws, you’re asking for trouble. I always tell my clients that the bracket that makes your deck stairs feel rock solid is worth ten times its weight in gold. If you rely solely on nails or light-duty clips, you’ll eventually notice the hidden reason your deck stairs are pulling away from the frame: sheer force. 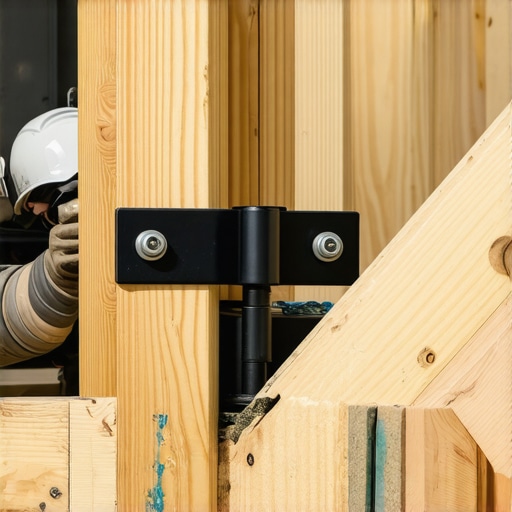
The Structural Move That Finally Kills the Stair Squeak
Another nuance that people miss is the interaction between the composite material and the wood frame. Wood and composite expand at different rates. If you trap moisture between the two, the wood swells and the composite moves, creating a friction point. That’s why your deck stairs squeak and how to silence them forever. My ‘secret’ is applying joist tape to the top of every stringer. It creates a rubberized gasket that prevents that wood-on-composite rubbing. I also make sure to use the joist spacing secret for a solid feeling composite surface, which for stairs means reducing your span. If your stringers are 16 inches apart, your composite treads will feel like a diving board. I never go wider than 12 inches on center for stairs—ever. Have you ever fallen into this trap of skipping the extra framing? Let me know in the comments. Finally, let’s talk about ‘thermal creep.’ Unlike wood, which expands mostly in width, composite expands significantly in length. If you butt your stair treads tight against a post or a wall, they will eventually bow out or push the post out of alignment. You have to leave that 1/8-inch gap, even if it looks ‘wrong’ at first. It’s a common ‘oops’ that even experienced builders forget when they are rushing to finish a project, but taking that extra minute to ensure proper spacing ensures your designing safe and stylish stairs efforts aren’t ruined by the first summer heatwave.Once you’ve mastered the framing and the gaps, you need the right arsenal to make those finishes look factory-perfect. I learned the hard way that a standard framing blade is the enemy of composite decking. It’s too aggressive and leaves a melted, ragged edge that ruins your miter joints. These days, I don’t touch a stair project without a Diablo 80-tooth composite-specific blade. It’s designed to dissipate heat, ensuring those 45-degree cuts for your picture-framed treads stay crisp. For the fasteners, I’ve moved away from standard deck screws on the visible edges. I strictly use the Cortex hidden fastening system for the perimeter boards. It involves pre-drilling and countersinking a screw, then tapping in a color-matched plug made from the exact same decking material. This is why we use hidden clips for the field but screws for the perimeter; it gives you the strength of a screw with the invisibility of a clip. FastenMaster’s technical documentation, specifically report ESR-2147, confirms that this system maintains the board’s structural rating while providing that high-end aesthetic. When you are doing the heavy lifting on the stringers, why I use structural screws instead of lag bolts for stairs comes down to sheer strength—they don’t split the wood, and they pull the framing together tighter than any bolt ever could.
How do I maintain my composite deck stairs over time?
Even the best build will look tired if you don’t treat it right. The biggest mistake I see? Pressure washers. I’ve seen homeowners literally peel the wood-grain texture off their boards because they got too close with a high-pressure nozzle. That is why you should never use a pressure washer on composite decks; instead, stick to a soft-bristle brush and a mild detergent like Dawn or a specific composite cleaner. You also need to keep an eye on debris. Leaves trapped in the gaps between your stairs and the fascia can hold moisture, which eventually rots the wood framing underneath. If you want to take it to the next level, I suggest checking out why I choose mineral core decking for every poolside build—it’s virtually impervious to the moisture issues that plague standard wood-plastic composites. Looking ahead, I predict we’re going to see a massive shift toward advanced heat-reflective technology. As you’ll see in the composite decking trends 2025 guide, manufacturers are finally figuring out how to reflect UV rays so your stairs don’t burn your feet in the July sun. We’re also seeing more people use why a digital designer is the best move for planning a complex backyard deck to visualize these stairs in 3D before a single board is cut. My challenge to you: on your next project, try the Cortex plug system on just one step. Once you see that seamless finish, you’ll never go back to exposed screw heads again. If the complexity feels overwhelming, remember that the benefits of working with a professional deck builder often include the specialized tools and warranty peace of mind they bring to the job site.
The Hardest Lessons I Learned on the Stringer
Over the years, I’ve realized that the difference between a good deck and a truly exceptional one is hidden in the details you cannot see until you are actually standing on them. First, never underestimate the power of the barefoot test. Before you call a project finished, walk those stairs without shoes; if you feel even a hint of a wiggle, it is time to check if you used the bracket that makes your deck stairs feel rock solid. Second, composite batching is a real factor. I once built a set of stairs where the third step was a shade lighter than the rest because I did not mix my boards from different pallets—it drove me crazy for months. Third, remember that the simple way to stop deck stairs from squeaking when you step is to use joist tape religiously. That friction between wood and plastic is the primary culprit of noisy stairs. Lastly, always over-engineer your blocking; if you think you have added enough support for that picture frame border, add one more block for absolute peace of mind.
The Gear I Won’t Step on a Job Site Without
If you want professional results, you have to move beyond homeowner-grade tools. Here are the essentials I currently keep in my truck that I swear by for every project. I only use Diablo 80-tooth blades because they do not melt the polymer core of the board, leaving a crisp edge. For fastening, the Cortex Hidden Fastening System is the only way to achieve a factory-finished look on your perimeter boards. For those working on tricky terrain, especially in the Ozarks, understanding why tiered decks are the superior choice for steeply sloped backyards can save you massive headaches during the initial framing phase. Finally, I always keep a digital copy of the American Wood Council’s DCA 6 guide handy; it is the gold standard for ensuring your stair rise and run are perfectly up to code.
Stop Planning and Start Sawing
It is easy to get paralyzed by the technical side of transforming your outdoor living with custom composite decking ideas, but the best way to learn is to get your hands dirty. Your outdoor space is an extension of your home, and the stairs are the transition that invites people in. By applying these deck builder insights for designing your dream outdoor space, you are not just building a utility; you are crafting a lasting experience. Don’t let the fear of a raw edge stop you from creating the backyard you have always envisioned. Have you ever run into a situation where your stair boards expanded more than you expected in the summer heat? Let me know in the comments below!