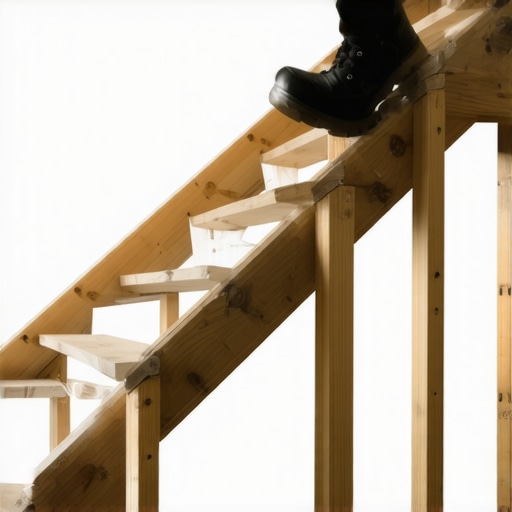
I stood at the top of my brand-new composite deck, cold beer in hand, ready to admire the view. But as I took my first step down, my knee buckled slightly. It wasn’t the beer. It was the jarring “thud” of a bottom step that felt just a hair shorter than the rest. That tiny, nagging inconsistency turned a beautiful project into a daily annoyance and a literal tripping hazard for my kids. I had fallen victim to the most common math error in the world of outdoor living: failing to “drop the stringer.” Today, I’m going to make sure you don’t make that same mistake so your stairs feel as smooth as they look.
Don’t Let Your Bottom Step Become a Liability
It happens to the best of us. You spend weeks researching composite decking trends for 2025 and picking out the perfect boards, but then you rush the stair math. If your stairs feel like a rhythmic exercise until you reach the bottom and suddenly lose your balance, you’ve likely missed a crucial calculation. In my early days as a DIYer, I built a set of stairs where the bottom riser was nearly an inch shorter than the rest. Every time I walked down, it felt like walking off a curb in the dark. This isn’t just about comfort; it’s about the fundamental safety of your modern outdoor space.
Is a half-inch difference really that dangerous?
You might think your brain wouldn’t notice a tiny discrepancy, but humans are creatures of habit. According to the International Association of Certified Home Inspectors, even a 3/8-inch variation in riser height is enough to cause a significant trip hazard. Our “muscle memory” expects every step to be identical. When it isn’t, the result is often a stumble. This is why innovative stair solutions focus so heavily on precision. Have you ever felt that awkward ‘ghost step’ at the bottom of a staircase? That’s exactly what we are trying to avoid here.
Subtract Your Tread Thickness or Pay the Price
Here is the secret that many pros forget to tell you: you must cut the thickness of your tread material off the bottom of your stringer. If you are using durable composite decking that is 1 inch thick, and you do not remove that inch from the base of the wood stringer, your bottom step will be 1 inch taller than every other step once the boards are installed. Conversely, it throws off the relationship with the deck surface itself. Learning the trick to cutting perfect deck stringers saved me from ever having to rip out a staircase again. We want to ensure that every rise, from the ground to the deck, is identical to the millimeter. Next, we will look at how to mark your lumber so you get it right the first time without wasting expensive wood.
Find Your Total Rise Without the Guesswork
To get started, you need the exact distance from the top of the deck surface to the ground where the stairs will land. I used to just eyeball this with a tape measure, but I once ended up with a staircase that hovered two inches above a concrete pad because I didn’t account for the slope of the yard. Now, I use a straight board and a level to find the ‘true’ vertical drop. This measurement is your North Star. Divide that total rise by your desired riser height (usually around 7 inches) to find your step count. If you’re aiming for the stair tread depth that feels safest for kids and the elderly, you want a consistent 10 to 11 inches of foot space.
Account for the Ground Landing
Before you even look at your saw, consider what those stringers are sitting on. If you’re landing on a patio, you’re golden. If it’s bare earth, you need to pour a small pad or use solid blocks to prevent the wood from rotting. I’ve seen beautiful projects ruined because the structural reason your stairs feel like they are leaning is simply that the stringers sank into the Ozark mud.
The Magic Math of the Bottom Cut
This is the moment where most DIYers fail. Imagine your staircase is a series of blocks. If you add a one-inch tread to every block, the top of each step goes up by an inch. But since there is no ‘tread’ under the very bottom of the stringer (where it touches the ground), that first step remains an inch taller than the rest. To fix this, you must cut the thickness of one tread off the very bottom of the stringer. #IMAGE_PLACE_HOLDER_B#
Why the Bottom Step is Different
When I was rebuilding my first wrap-around porch, I forgot this rule and ended up with a ‘stumble-step’ that nearly sent my father-in-law to the ER. I had to unscrew everything, drag the 2x12s back to the miter saw, and shave off exactly one inch. It felt like a defeat, but once I re-installed them, the rhythm was perfect. If you’re using the trick to cutting perfect deck stringers, you’ll mark your rise and run with a framing square and then immediately draw a line at the bottom of the first riser that is exactly the thickness of your board. Cut that off, and your stairs will sit flat, making every step—including the transition to the deck—exactly the same height.
Secure Those Stringers So They Never Budge
Once the math is handled, the physical connection to the deck is your next priority. Many people just nail the stringer into the rim joist, but that’s a recipe for a squeaky, wobbly mess. I always recommend using the bracket that makes your deck stairs feel rock-solid. These specialized metal hangers take the weight off the fasteners and put it directly onto the frame. This also prevents that annoying gap that often forms over time. While you’re at it, don’t forget to apply adhesive to the stringer before screwing down your boards. This is why your deck stairs squeak and how to silence them forever; the glue stops the wood-on-wood rubbing that drives homeowners crazy every time they go out to grill.While many homeowners focus on the aesthetics of their new boards, the real battle is won or lost in the skeleton of the staircase. You might hear people say that a standard three-stringer setup is fine for a 36-inch wide staircase. In my experience, if you’re using composite, that is a recipe for a spongy feel that ruins the premium vibe of the project. Because composite isn’t as structurally rigid as traditional lumber, it requires tighter support to prevent sagging. I always recommend 12-inch on-center spacing for stair stringers, even if the main deck is at 16 inches. This is one of those expert deck builder tips that transforms a good project into a great one. One major trap I see is the over-notch. When you cut into a 2×12 to create your steps, you’re leaving a very small amount of solid wood—the throat—to carry the entire load. This is why your deck stair stringers are cracking at the throat over time. To prevent this, I’ve moved toward a contrarian method: instead of relying solely on the wood, I often incorporate the hidden benefit of using steel deck framing or, at the very least, sistering the stringers with a secondary 2×4 for reinforcement.
Why does the middle of the stair run always feel bouncy?
The bounce isn’t just in your head; it is a structural deficiency. The North American Decking and Railing Association (NADRA) emphasizes that stair stringers carry significantly more concentrated load than deck joists. According to the American Wood Council’s Design for Code Acceptance (DCA 6), the effective depth of a notched stringer is significantly reduced, which is why reinforcing the throat is critical. If you have a long run of more than five or six steps, a standard 2×12 will flex. This is why we always double block the middle of a long stair run for stability. Without that lateral bracing, the stringers can roll slightly under your weight, leading to that unsettling movement. Stop your stair boards from buckling in the sun by respecting thermal expansion. Composite is essentially a giant thermometer. In the summer heat, your treads will grow. If you’ve installed them tight against a wall or without proper gaps, they will buckle or pop their fasteners. Knowing the spacing secret for installing composite decking in winter is vital for anyone building in fluctuating climates. It is better to have a slightly wider gap in February than a buckled board in July. #IMAGE_PLACE_HOLDER_C# Have you ever finished a project only to find a ghost step or a squeak you couldn’t find? Let me know in the comments, and we can troubleshoot your specific layout together.I never touch a framing square without my brass stair gauges anymore. If you’ve ever tried to hold a metal square against a slightly rounded 2×12 while marking a dozen steps, you know the frustration of it slipping just a fraction of an inch. By the tenth step, that error has compounded into a nightmare. These little brass knobs lock onto your rise and run measurements, turning your square into a perfect, repeatable template. This is truly the trick to cutting perfect deck stringers on the first try. For the actual cuts, I’ve swapped my old framing saw for a high-tooth-count carbide blade. Composite is dense; a standard construction blade will tear the fibers of the ‘cap’ layer, leaving a fuzzy edge that looks amateur.
How do I maintain my composite stairs over time?
While the boards won’t rot like wood, they aren’t invincible. The most common call I get is from homeowners wondering how to clean grease stains off composite without ruining the finish after a summer of grilling. My rule: hit it with warm soapy water immediately. For the structure underneath, you have to be proactive. You need to know how to keep your deck joists from rotting under the boards by using joist tape. This simple butyl tape creates a waterproof seal where the screws penetrate the wood. Without it, water sits in the screw holes and rots your stringers from the inside out. Also, spend five minutes a season learning how to keep spiders from building webs on your deck railing so your transition from the yard to the deck stays inviting rather than creepy.#IMAGE_PLACE_HOLDER_D#According to the International Residential Code (IRC) Section R311.7, the greatest riser height within any flight of stairs shall not exceed the smallest by more than 3/8 inch. This isn’t just a suggestion; it’s the legal standard for safety. If you’re building a multi-level masterpiece, I suspect we are moving toward a world where why a digital designer is the best move for planning a complex backyard deck becomes the standard even for small DIY jobs. 3D modeling allows you to see exactly how your stairs will meet the ground before you even buy a single board. I predict that in the next five years, augmented reality (AR) apps will let us ‘project’ our stringer cut lines onto the wood using our phones. But until then, precision and the right hardware are your best friends. I highly recommend you try one thing on your next build: use a dedicated stringer attachment for your circular saw to ensure every vertical cut is perfectly plumb. It’s the difference between a deck that looks ‘built’ and one that looks ‘crafted.’
The Costly Mistakes I Only Made Once
After years of framing, I’ve realized that the small details often cause the biggest headaches. One ‘lightbulb moment’ for me was realizing that not all 2x12s are created equal. I now spend ten minutes at the lumber yard just flipping boards to find the ones with the fewest knots in the center of the span. If a knot sits right where you notch the stringer, you’re creating a built-in failure point. I also learned the hard way that protecting your deck frame from rot for thirty years starts the second you make that first cut. If you don’t treat the exposed end-grain of your stringers with a preservative, you’re basically inviting moisture to rot the wood from the inside out. Finally, always double-check if we prefer 4×4 posts or 6×6 for tall ones based on the height of your stair landing, as stability starts from the ground up.
The Gear That Separates Amateurs from Pros
You don’t need a massive workshop to get professional results, but a few specific tools are non-negotiable for a perfect finish. I never step onto a job site without a set of brass stair gauges; they lock onto your framing square and guarantee every single step is identical. To keep the structure silent and durable, I’ve shifted entirely toward the reason we use structural screws instead of old-fashioned lag bolts. They provide much better pull-down force without the risk of splitting the wood. I also highly recommend using butyl joist tape on top of your stringers; learning how to keep your deck joists from rotting under the boards is the best insurance policy you can buy for your project. These simple tools turn a frustrating math problem into a repeatable, satisfying process. #IMAGE_PLACE_HOLDER_E#
Take the Leap and Build a Staircase That Lasts
Building stairs is often the most intimidating part of any project, but once you master the ‘drop the stringer’ rule and secure your hardware, you’re ahead of 90% of DIYers. Your outdoor space is an extension of your home, and having a set of stairs that feels solid underfoot makes every trip to the grill or the garden a better experience. Whether you’re following the latest inspiring deck and stair ideas for every budget or sticking to a classic layout, the precision you put in now will pay off for decades. For more detailed help on your specific layout, check out my deck builder insights for designing your dream outdoor space. Don’t be afraid to take that first measurement and start cutting. Have you ever reached the bottom of a staircase and felt that awkward ‘half-step’ surprise? Let me know in the comments how you handled the fix!