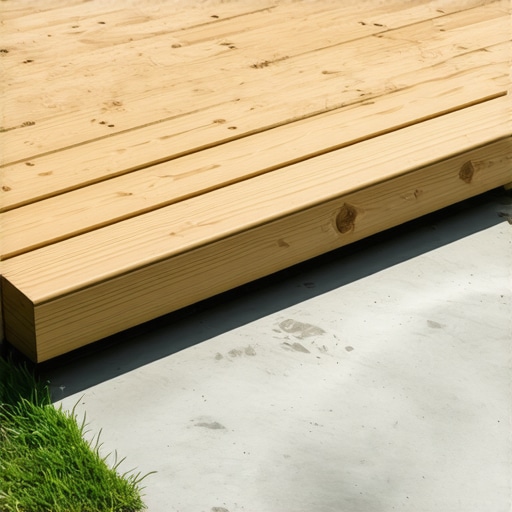
I’ll never forget the sinking feeling—literally—I had about six months after finishing my first ‘dream’ deck project. I had spent weeks obsessing over the [wrap-around staircase](https://deckdesignbuild.com/why-a-wrap-around-staircase-is-the-best-choice-for-multi-level-yards), making sure every cut was precise and every angle was sharp. It looked like a million bucks against the house. But there was one ‘small’ thing I skipped because I was tired and running slightly over budget: I let the bottom of the stairs rest right on the Missouri soil. I figured a few flat rocks and some packed dirt would do the trick. Fast forward through one heavy rainy season, and my beautiful stairs were sinking into the mud, the [stair stringers were starting to crack](https://deckdesignbuild.com/why-your-deck-stair-stringers-are-cracking-at-the-throat) from the uneven pressure, and the bottom tread was a slippery, rotting mess. It was an embarrassing rookie mistake that cost me a full weekend of back-breaking labor to dig out and fix properly. If you want to avoid that same frustration, you need to understand that the connection between your stairs and the earth is the most vulnerable point of your entire build.
Stop Your Stairs From Becoming a Muddy Mess
The truth is, even the most [innovative stairs solutions](https://deckdesignbuild.com/innovative-stairs-solutions-for-safe-outdoor-deck-access) won’t save you if you don’t have a solid foundation. When you build a deck, you naturally focus on the ledger, the posts, and the beautiful [custom composite decking ideas](https://deckdesignbuild.com/transform-your-outdoor-living-with-custom-composite-decking-ideas) that make the space pop. But that spot where the wood meets the ground? That’s where the real battle against nature happens. Without a concrete landing pad, your stairs are basically acting like a giant straw, sucking up moisture from the earth through the end-grain of your lumber. I’ve seen homeowners spend thousands on high-end materials only to have the whole project look shoddy because the stairs settled three inches into the grass. Beyond the rot, you’ll find that [your deck stairs squeak](https://deckdesignbuild.com/why-your-deck-stairs-squeak-and-how-to-silence-them-forever) and groan because the frame is being twisted by the shifting soil. It ruins the peaceful vibe of your outdoor oasis and creates a nagging maintenance task that never truly goes away.
Is a concrete pad actually worth the extra sweat?
I get it. You’re at the end of the project, you’re tired, and pouring concrete feels like a chore you can skip for ‘later.’ But let me tell you from experience: it’s the most important ‘extra’ step you’ll ever take. According to the American Wood Council, direct wood-to-ground contact is the primary cause of premature decay in outdoor structures, even when using pressure-treated lumber, because the wood cannot dry out between rain cycles. A landing pad isn’t just about keeping your shoes clean; it’s about structural stability and safety. It ensures that your [stair rise remains consistent](https://deckdesignbuild.com/why-your-deck-stairs-feel-like-a-ladder-and-how-to-fix-the-rise), which is a huge factor in preventing trips and falls. Have you ever stepped off a deck and ended up ankle-deep in a mud puddle or tripped because the last step was two inches shorter than the rest? It’s jarring and dangerous. Today, I’m going to walk you through exactly why this slab is non-negotiable and how it works with [expert deck builder tips](https://deckdesignbuild.com/transform-your-space-expert-deck-builder-tips-for-stunning-outdoor-living) to create a transition that lasts. We’ll look at how to handle [Ozark runoff](https://deckdesignbuild.com/the-grading-trick-that-saves-branson-landscaping-from-ozark-runoff) and why your future self will thank you for doing the heavy lifting now instead of digging out a rotted mess five years down the road.
Dig Deeper Than You Think Necessary
You cannot just pour a thin skim coat of concrete over the grass and expect it to hold up. Think of your landing pad like the shock absorber on a heavy-duty truck; if it is too flimsy, every step taken by a person or a pet sends a jarring shockwave straight into the stair frame. On a project in Reeds Spring last summer, I learned this the hard way. I thought I could get away with a minimal dig because the ground felt ‘hard enough.’ Two months of Ozark rain later, the pad had tilted 15 degrees, and I was out there with a sledgehammer, breaking up three bags of cured concrete to start over. To avoid my mistake, you need to excavate at least 6 inches of soil. This depth allows for a 2-inch base of compacted gravel followed by a 4-inch thick concrete slab. This drainage layer is critical because it prevents hydrostatic pressure from pushing the slab upward during a freeze-thaw cycle, which is a common reason why your deck post footings keep sinking into the soil. Ensuring that water moves away from the concrete is the primary drainage move that saves your deck footings from sinking and keeps your stairs level for decades. 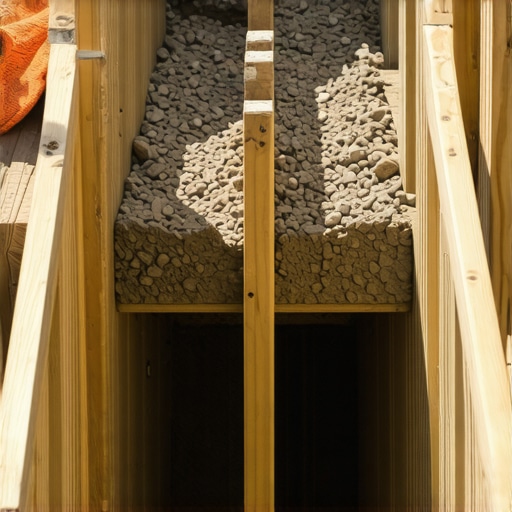
Stop the Rot Before It Starts
Once your hole is dug and your gravel is packed, you need to build a simple wooden form using 2x4s. The pad should extend at least 3 feet out from the bottom step. This creates a safe ‘landing zone’ so you aren’t stepping off the wood and immediately into the mud. Before you even think about mixing the concrete, look at your stringers. You must apply a high-quality preservative to the ends of the wood. Using the best way to seal the end cuts of pressure treated lumber to prevent rot is the only way to keep that bottom tread from turning into mush. Even if you are using high-end materials, choosing the right composite decking for durable low maintenance outdoor areas won’t matter if the structural wood underneath is drinking up ground moisture like a sponge. Treat the end-grain like it is the most vulnerable part of the house, because it is.
Anchor Those Stringers Like Your Life Depends on It
When the concrete is poured and starting to firm up, do not just let the stairs sit there by gravity alone. You want a mechanical connection. I have moved away from old-school nails entirely because they pull out as the wood expands. Instead, I use heavy-duty galvanized or stainless steel brackets that are bolted into the concrete and screwed into the stringer. This is where why I use structural screws instead of lag bolts for stairs becomes a game changer; the grip is significantly stronger and prevents the stairs from walking or shifting over time. If you skip this, you will eventually notice a gap forming at the top of your staircase, which is the hidden reason your deck stairs are pulling away from the frame. Getting this connection tight also prevents that annoying movement that leads to noise; it is actually the simple way to stop deck stairs from squeaking when you step. By anchoring the base, you turn the entire staircase into a rigid, monolithic structure that feels as solid as the house itself. If you want a truly polished look, you can also consider why your deck stairs should have closed risers for a modern look, which hides the brackets and the underside of the wood from view, giving your outdoor space a high-end, finished appearance.Let’s dig deeper into the structural logic that separates a pro build from a weekend DIY attempt. Most people assume that if you pour enough concrete, your stairs are safe forever. But here is a contrarian reality I’ve seen time and again: a massive, heavy concrete pad without a gravel sub-base can actually act like a heat sink and a moisture trap. In the humid Branson summers, the moisture trapped under a thick landing pad doesn’t just evaporate; it cycles. Without a proper capillary break, you are essentially composting your stringers from the inside out. In my years as a builder, I’ve found that bigger isn’t always better; drainage is the absolute king of the job site. If you ignore the subsurface grading, you’re just building a giant anchor that will eventually pull your entire deck away from the house through sheer seasonal movement. One major “oops” factor I see is the “bird’s mouth” cut on the stringer. If you cut too deep to make the steps ‘look right,’ you leave only a tiny sliver of wood—the “throat”—to carry the entire weight of your guests. It’s the primary reason why your deck stair stringers are cracking at the throat and it’s a failure that happens silently until someone heavy walks down. 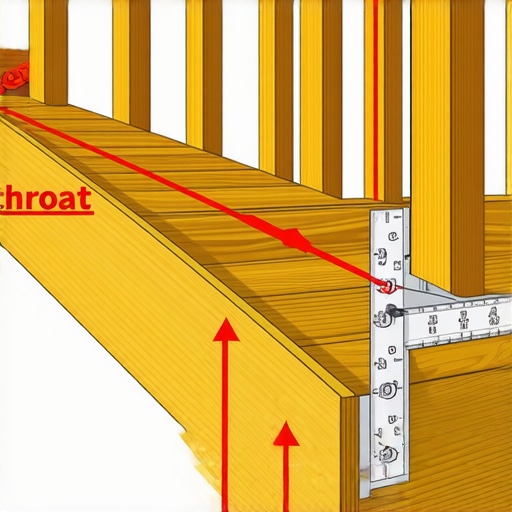
Is composite framing actually a viable option for stairs?
A common question I get from homeowners looking at composite decking trends 2025 the ultimate guide for outdoor enthusiasts is whether they can skip the pressure-treated lumber entirely for the stair frame. The short answer: No. While we are seeing innovative outdoor living ideas with composite decking in 2025 that include steel framing, the actual stringers should never be made of composite boards alone—they lack the structural stiffness to span distances without dramatic sagging. If you try to hack it with leftover deck boards, you’ll end up with the stair stringer measurement mistake that ruins your stride because the steps will flex and bounce underfoot. Even if you use high-quality boards to transform your outdoor living with custom composite decking ideas, the skeleton must be rigid. According to the International Residential Code (IRC) R311.7.7, the greatest riser height within any flight of stairs shall not exceed the smallest by more than 3/8 inch. Even minor settling of an overbuilt, undrained slab can throw this math off and lead to significant trip hazards. To keep that frame from rotting where it meets the boards, never forget the hidden cost of skipping joist tape on a new build. That tape acts as a critical gasket between your beautiful composite and the wet wood. Finally, for those long Ozark runs, why we always double block the middle of a long stair run for stability becomes a non-negotiable step. It stops that lateral “sway” and the vertical “bounce” that makes an otherwise beautiful deck feel cheap and unstable. Have you ever fallen into the trap of skipping the landing pad? Let me know in the comments.
Pick the Right Tools to Save Your Knees and Sanity
I’ve spent years refining my toolkit, and if there’s one thing I’ve learned, it’s that a cheap speed square and a dull circular saw blade are the fastest ways to ruin expensive composite boards. When I am working on creating seamless transitions stairs as key elements in outdoor living, I rely heavily on specialized stair gauges. These small brass cylinders clamp onto your framing square and ensure that every single rise and run is identical throughout the entire stringer. If you are off by even a quarter inch on one step, the human brain notices the rhythm change immediately, creating a trip hazard. For the actual fastening, I have moved away from standard impact drivers for the delicate finish work. I now use a torque-controlled drill to avoid the screw depth trick for a perfectly smooth deck surface backfiring; over-driving a screw into composite creates an ugly “mushroom” of plastic that looks amateur. Beyond hand tools, I highly recommend using digital layout software. Even for a simple set of steps, running your dimensions through a calculator or using deck builder insights designing your dream outdoor space can catch math errors before you make that first irreversible cut into a $100 piece of lumber.
How do I keep my composite stairs looking new for a decade?
Maintenance is where most homeowners drop the ball. They think “composite” means “zero effort,” but that is a dangerous myth. Every spring, I tell my clients to perform a simple walk-through of the structure. Check the brackets we installed into that concrete landing pad. The North American Deck and Railing Association (NADRA) suggests a 10-point safety check annually, which focuses heavily on the “stairs and handrails” section because they are the highest-risk areas for injury. If you see white powdery residue on your hardware, that is oxidation, and it needs a quick wipe and a touch-up with a corrosion-inhibitor. When it comes to cleaning, why you should never use a pressure washer on composite decks is the golden rule you must live by. The high pressure can delaminate the protective “cap” of the board, leaving it prone to deep staining. Instead, use a soft-bristle brush and a specialized composite cleaner. This is also the perfect time to check for any how to fix a bouncy deck without adding new posts issues; sometimes a quick tightening of a structural screw at the stringer base is all it takes to keep the unit silent and solid. 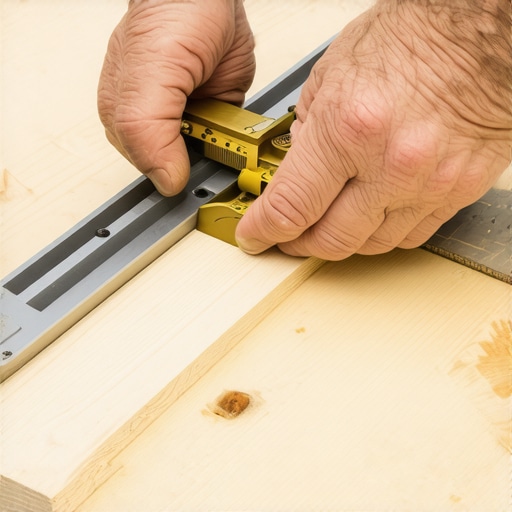 I predict that by 2030, we will see a massive shift toward pre-fabricated, adjustable steel stair systems that bolt directly to the frame. The precision of factory-cut steel is hard to beat, and it completely eliminates the rot issues we constantly fight in the humid Ozark climate. For now, focus on the details that provide immediate impact. I want you to try this one advanced tip: next time you are finishing a stair run, use the lighting trick that highlights the grain of your wood or composite. Side-firing LEDs tucked directly under the stair nosing do not just look high-end—they make every transition visible and hide the mounting hardware perfectly from the person walking down.
Hard-Won Truths from a Decade of Building Missouri Deck Stairs
In my early years as a deck builder in the Ozarks, I assumed that a sturdy frame was all that mattered. I quickly learned that the ground is a living, breathing entity that wants to reclaim your wood. One of my biggest lightbulb moments was realizing that the ‘feel’ of a deck is established the second your foot hits the first step. If that step is on mushy ground, the whole outdoor living experience feels precarious. I’ve also seen how why natural stone beats concrete blocks for high-end branson west hardscaping when you want to blend the landing pad into a more natural environment, but for pure structural stability, nothing beats a poured slab. When designing safe and stylish stairs for outdoor decks in 2025, remember that the landing isn’t just a physical stop—it is a moisture barrier that dictates the lifespan of your entire stair stringer assembly.
The Gear That Actually Makes a Difference for Your Stairs
If you want to avoid the headache of a sagging staircase, you need to look beyond the basic hammer and nails. I never step onto a job site without my Starrett 12-inch combination square; the precision it offers for marking stringers is unmatched. I also recommend every homeowner or DIYer keep a copy of the DCA 6 Prescriptive Residential Wood Deck Construction Guide on hand; it is the ‘bible’ for ensuring your build meets safety standards. For those deeper design questions, I often turn to deck builder insights designing your dream outdoor space to help visualize how the stairs will flow into the rest of the landscape. Finally, don’t underestimate the power of a vibratory plate compactor for your gravel base—renting one for four hours will do more for your landing pad’s longevity than a week of hand-tamping.
#IMAGE_PLACEHOLDER_E#
Building a Legacy Under Your Feet
At the end of the day, your deck is more than just some boards screwed to a frame; it’s where you’ll host summer BBQs, watch the sunset, and watch your kids grow up. Taking the extra time to pour a proper landing pad ensures that those memories aren’t interrupted by a rotting board or a loose step. Investing in quality materials and proper structural techniques is the only way to truly elevate your outdoor living space for the long haul. If the technical side of the build feels overwhelming, you might find that the benefits of working with a professional deck builder in your outdoor projects far outweigh the stress of doing it yourself. Whatever path you choose, don’t cut corners on the foundation. Your future self—and your knees—will thank you every time you walk down those steps. Have you ever dealt with a sinking step or a wobbly railing that drove you crazy? Let me know your horror stories or wins in the comments below, or contact us if you need help planning your next project.