
I remember the day vividly. I was inspecting a deck I’d built just five years prior for a friend. It looked stunning from the top—expensive gray composite boards, sleek black railings, the works. But when I crawled underneath to check a squeak, my screwdriver sank into the top of a joist like it was warm butter. That $20,000 investment was rotting from the inside out, all because I wanted to save $150 and two hours of labor on joist tape. It was a gut-punch moment that changed how I approach every single new build. Today, I am going to show you why skipping that roll of butyl tape is the most expensive ‘saving’ you will ever make. We are going to look at the physics of wood rot and how a tiny strip of adhesive can be the difference between a thirty-year deck and a ten-year teardown. Have you ever pulled up an old deck board only to find the wood underneath looking like wet cardboard?
Your Expensive Composite Boards Will Outlive the Wood Frame
When you spend time [choosing the right composite decking for durable low-maintenance outdoor areas](https://deckdesignbuild.com/choosing-the-right-composite-decking-for-durable-low-maintenance-outdoor-areas), you are making a commitment to longevity. Manufacturers often promise 25 to 50 years of life for those boards. However, the pressure-treated southern yellow pine most of us use for framing is lucky to last fifteen years without protection. It is a massive mismatch. I once made the rookie mistake of thinking the ‘treated’ part of the wood meant ‘invincible.’ I was wrong. Every time you drive a screw into a joist, you are creating a tiny funnel for rainwater. That water sits in the hole, creates a petri dish for fungi, and eats the wood from the inside. According to the American Wood Protection Association (AWPA), moisture trapped between two surfaces—like a deck board and a joist—is the primary driver of fungal decay in residential structures. If you want to [how to protect your deck frame from rot for thirty years](https://deckdesignbuild.com/how-to-protect-your-deck-frame-from-rot-for-thirty-years), you have to break that cycle of moisture.
Does a Little Strip of Tape Actually Do Anything?
I hear this question all the time from DIYers and even some old-school contractors who think it is just a marketing gimmick. They argue that decks have been built without it for decades. Sure, they have, and those decks are currently being ripped out because the joists are split and soft. When you apply a high-quality joist tape, you are creating a waterproof cap. It seals around the fasteners and prevents the ‘sandwich effect’ where water gets trapped between the board and the joist. This is especially critical if you are following the [the joist spacing secret for a solid-feeling composite surface](https://deckdesignbuild.com/the-joist-spacing-secret-for-a-solid-feeling-composite-surface), as more joists mean more potential entry points for water. Taking the time to do this right now saves you from the nightmare of a structural failure ten years down the road when your boards still look brand new but the frame is a safety hazard.
Shield Your Skeleton Before the Boards Go Down
Applying joist tape isn’t rocket science, but it is precision work that requires a bit of patience. Think of your deck frame as the skeleton of your outdoor living space. You wouldn’t go hiking in a monsoon without a waterproof jacket; the tape is that protective layer for your wood. It acts as a barrier that prevents water from ever touching the vulnerable top grain of the joists. When you are deep into the process of building, it’s easy to view this as an extra step, but in reality, it’s the insurance policy for the entire structure. Without it, your expensive composite boards are essentially sitting on a ticking time bomb of moisture. The tape doesn’t just sit there; it creates a self-sealing gasket around every single screw you drive into the frame.
Dry Wood is the Only Wood That Bonds
I learned the importance of surface prep the hard way on a muggy Tuesday back in 2018. I was rushing to beat a rainstorm and slapped the tape onto joists covered in fine sawdust and a layer of morning dew. Half an hour later, the tape was peeling off like a bad sunburn. If the wood isn’t dry and clean, you’re throwing money away. You need to brush off every bit of debris with a stiff broom or even a leaf blower. This is also the perfect time to ensure you know the best way to seal the end cuts of pressure-treated lumber to prevent rot, because those exposed ends are incredibly thirsty for moisture and often get overlooked until it’s too late.
The Rolling Technique That Stops Water Cold
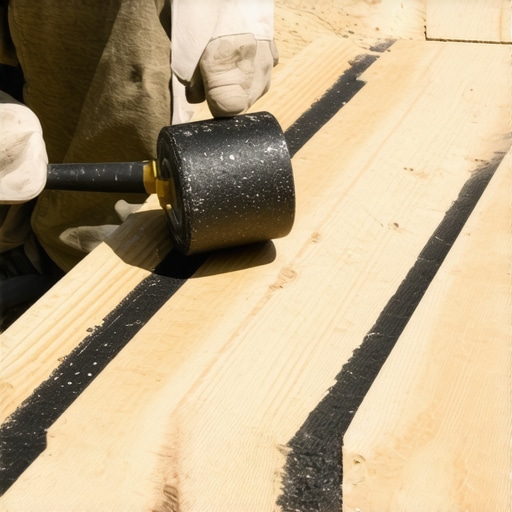
Once the surface is prepped, start at one end and roll the tape out, centering it over the joist. Don’t just lay it down—you have to physically bond it to the wood cells. I use a small J-roller, the kind you’d use for laminate or wallpaper, to make sure there are zero air pockets. Air pockets are just tiny caves where condensation can hide and feed fungi. When you get to areas where boards meet, remember that why we use double joists under every composite seam for a flat floor comes into play. You’ll need to tape both of those joists individually. The tape should ideally overhang the edges of the joist by about an eighth of an inch so water sheds off like a tiny umbrella rather than wicking down the sides.
Stairs Need More Love Than You Think
The most overlooked part of the frame is the stair stringer. Water loves to collect in those sharp inside corners where the tread meets the riser, which is exactly how to prevent your deck frame from rot for thirty years in the hardest-working part of the build. I always use a wider tape for stringers to wrap the top and slightly down the sides of the cutouts. Even if you’ve mastered the trick to cutting perfect deck stringers on the first try, all that geometric perfection is useless if the wood turns to mush after five or six harsh winters. By sealing the ‘throat’ of the stringer, you’re preventing the structural cracks that eventually lead to bouncy, dangerous steps.
Most homeowners believe that because they bought pressure-treated lumber, the skeleton of their deck is essentially invincible. I used to believe that too, until I realized that modern treatment chemicals are only a surface-level defense. According to research from the Forest Products Laboratory, the structural integrity of treated pine depends heavily on its ability to shed water; once moisture levels remain above 20% consistently, fungal rot is inevitable regardless of the treatment. This is the contrarian truth most contractors won’t tell you: your frame is the most volatile part of the build. If you don’t account for the microclimate beneath the boards, you’re essentially building a greenhouse for wood-destroying organisms. This is exactly [how to vent the space under your deck to prevent mold and wood rot] and why airflow is just as critical as the tape we discussed earlier.
The Simple Gap That Saves Your Siding from Damage
One of the biggest ‘oops’ moments I see in high-end builds involves the expansion and contraction of composite materials. I’ve seen $50,000 decks literally tear the vinyl siding off a house because the builder didn’t understand thermal physics. Composite boards are thermal sponges—they expand significantly in the summer heat and shrink in the winter. If you don’t know [how to stop composite boards from expanding into your vinyl siding], you are setting yourself up for a structural collision. You need a dedicated expansion gap at the ledger line. Without it, the force of the expanding boards acts like a slow-motion battering ram against your home’s exterior.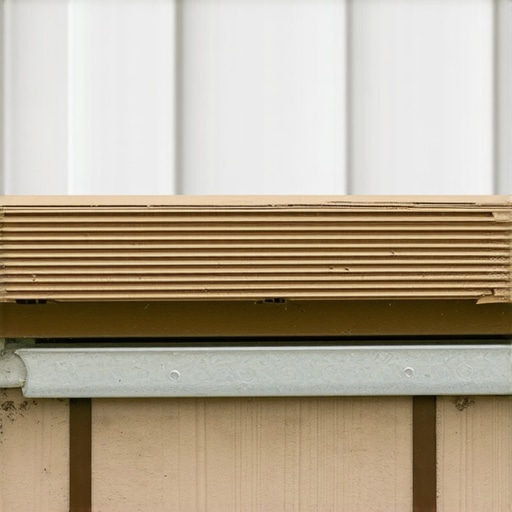
Why is my composite deck buckling when I followed every instruction?
The answer usually lies in a nuanced error called the ‘field versus perimeter’ mistake. Many DIYers assume that hidden fasteners are a universal solution, but [the hidden clip mistake that leads to buckling deck boards] is often failing to use a ‘starter’ or ‘finish’ screw at the ends of each run. When a board is only held by friction clips, it can ‘walk’ over time due to repeated heating and cooling cycles. This is [why we use hidden clips for the field but screws for the perimeter] to create a fixed point that forces the board to expand outward in a controlled direction rather than shifting the entire floor.
Why Joist Spacing Alone Won’t Stop the Bounce
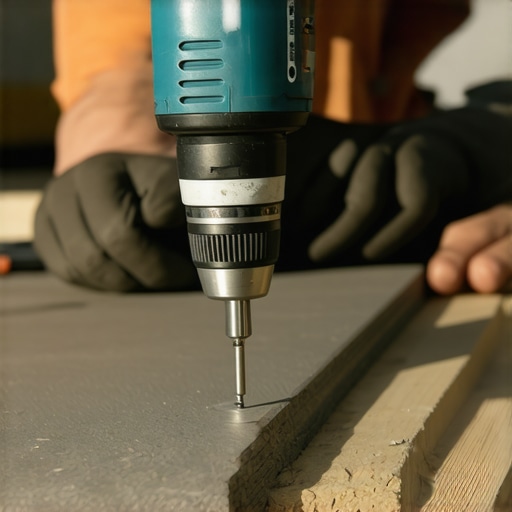
I often hear people complain that their deck feels like a trampoline, even though they used 12-inch on-center spacing. This is a common misconception: spacing provides vertical support, but it does very little for lateral rigidity. If you want to understand [why your deck feels bouncy and the affordable fix to stiffen it up], you have to look at mid-span blocking. Without ‘X’ bridging or solid blocks between the joists, the wood can twist and vibrate under your feet. This is especially true on stairs. Even if you’ve used a heavy-duty stringer, you need [the bracket that makes your deck stairs feel rock solid] to prevent the ‘sway’ that makes people feel uneasy. By adding these mechanical anchors, you turn a collection of individual boards into a single, monolithic structure that doesn’t budge. Have you ever fallen into this trap of over-relying on the wood’s thickness alone? Let me know in the comments.That monolithic feeling doesn’t happen by accident; it’s the result of having the right gear in your truck and a digital-first mindset. I don’t just rely on a tape measure and a prayer anymore. I’ve found that why a digital designer is the best move for planning a complex backyard deck because it allows you to simulate load stresses before you even buy a single 2×10. When it comes to the actual physical labor, I am religious about using a dedicated impact driver with a depth-setting nosepiece. If you over-drive a screw into composite, you mushroom the surface; if you under-drive it, you create a trip hazard. It’s about that surgical precision that separates a DIY weekend project from a professional-grade installation that boosts your home’s value.
How do I keep my composite deck looking brand new for twenty years?
The biggest myth in our industry is that ‘low maintenance’ means ‘no maintenance.’ If you ignore your deck, nature will reclaim it. Every spring, I tell my clients to put away the heavy machinery. You should why you should never use a pressure washer on composite decks, as the high PSI can actually etch the surface of the boards, creating microscopic grooves where mold and algae love to hide. Instead, stick to a soft-bristle brush and a pH-neutral cleaner. For those stubborn spots, knowing the best way to clean bird droppings off dark brown composite boards is essential to prevent permanent staining from the acidic waste. It is also the perfect time to walk the perimeter and check that your the bracket that keeps your railing from wobbling forever is still tight and hasn’t suffered from any seasonal shifting.
Looking ahead to the next decade of outdoor living
As we look toward composite decking trends 2025 the ultimate guide for outdoor enthusiasts, the focus is shifting from simple platforms to fully integrated environments. I’m seeing a massive surge in ‘smart decks’ where lighting, sound, and even heating elements are controlled via smartphone. According to the AZEK Building Products Technical Guide, modern capped polymer boards are now engineered with heat-shielding technology that can reduce surface temperatures by up to 30 degrees, making why dark brown decking gets significantly hotter than light gray boards less of a concern than it was five years ago. We are moving into an era where your deck is as technologically advanced as your kitchen.
If you really want to step up your game and ensure your structure is as safe as it is beautiful, I want you to try one specific advanced framing move on your next project. Don’t settle for standard hardware at the most critical junctions. Take ten minutes to learn the bolt pattern that finally stops railing post wobble for good. It is a small adjustment in geometry that makes a massive difference in how the deck feels when you lean against the rail on a summer evening. This level of detail is what transforms a simple backyard platform into a true private oasis that stands the test of time.
I remember the day vividly. I was inspecting a deck I’d built just five years prior for a friend. It looked stunning from the top—expensive gray composite boards, sleek black railings, the works. But when I crawled underneath to check a squeak, my screwdriver sank into the top of a joist like it was warm butter. That $20,000 investment was rotting from the inside out, all because I wanted to save $150 and two hours of labor on joist tape. It was a gut-punch moment that changed how I approach every single new build. Today, I am going to show you why skipping that roll of butyl tape is the most expensive ‘saving’ you will ever make. We are going to look at the physics of wood rot and how a tiny strip of adhesive can be the difference between a thirty-year deck and a ten-year teardown. Have you ever pulled up an old deck board only to find the wood underneath looking like wet cardboard?
Your Expensive Composite Boards Will Outlive the Wood Frame
When you spend time choosing the right composite decking for durable low-maintenance outdoor areas, you are making a commitment to longevity. Manufacturers often promise 25 to 50 years of life for those boards. However, the pressure-treated southern yellow pine most of us use for framing is lucky to last fifteen years without protection. It is a massive mismatch. I once made the rookie mistake of thinking the ‘treated’ part of the wood meant ‘invincible.’ I was wrong. Every time you drive a screw into a joist, you are creating a tiny funnel for rainwater. That water sits in the hole, creates a petri dish for fungi, and eats the wood from the inside. According to the American Wood Protection Association (AWPA), moisture trapped between two surfaces—like a deck board and a joist—is the primary driver of fungal decay in residential structures. If you want to how to protect your deck frame from rot for thirty years, you have to break that cycle of moisture.
Does a Little Strip of Tape Actually Do Anything?
I hear this question all the time from DIYers and even some old-school contractors who think it is just a marketing gimmick. They argue that decks have been built without it for decades. Sure, they have, and those decks are currently being ripped out because the joists are split and soft. When you apply a high-quality joist tape, you are creating a waterproof cap. It seals around the fasteners and prevents the ‘sandwich effect’ where water gets trapped between the board and the joist. This is especially critical if you are following the the joist spacing secret for a solid-feeling composite surface, as more joists mean more potential entry points for water. Taking the time to do this right now saves you from the nightmare of a structural failure ten years down the road when your boards still look brand new but the frame is a safety hazard.
Shield Your Skeleton Before the Boards Go Down
Applying joist tape isn’t rocket science, but it is precision work that requires a bit of patience. Think of your deck frame as the skeleton of your outdoor living space. You wouldn’t go hiking in a monsoon without a waterproof jacket; the tape is that protective layer for your wood. It acts as a barrier that prevents water from ever touching the vulnerable top grain of the joists. When you are deep into the process of building, it’s easy to view this as an extra step, but in reality, it’s the insurance policy for the entire structure. Without it, your expensive composite boards are essentially sitting on a ticking time bomb of moisture. The tape doesn’t just sit there; it creates a self-sealing gasket around every single screw you drive into the frame.
Dry Wood is the Only Wood That Bonds
I learned the importance of surface prep the hard way on a muggy Tuesday back in 2018. I was rushing to beat a rainstorm and slapped the tape onto joists covered in fine sawdust and a layer of morning dew. Half an hour later, the tape was peeling off like a bad sunburn. If the wood isn’t dry and clean, you’re throwing money away. You need to brush off every bit of debris with a stiff broom or even a leaf blower. This is also the perfect time to ensure you know the best way to seal the end cuts of pressure-treated lumber to prevent rot, because those exposed ends are incredibly thirsty for moisture and often get overlooked until it’s too late.
#IMAGE_PLACE_HOLDER_B#
The Rolling Technique That Stops Water Cold
Once the surface is prepped, start at one end and roll the tape out, centering it over the joist. Don’t just lay it down—you have to physically bond it to the wood cells. I use a small J-roller, the kind you’d use for laminate or wallpaper, to make sure there are zero air pockets. Air pockets are just tiny caves where condensation can hide and feed fungi. When you get to areas where boards meet, remember that why we use double joists under every composite seam for a flat floor comes into play. You’ll need to tape both of those joists individually. The tape should ideally overhang the edges of the joist by about an eighth of an inch so water sheds off like a tiny umbrella rather than wicking down the sides.
Stairs Need More Love Than You Think
The most overlooked part of the frame is the stair stringer. Water loves to collect in those sharp inside corners where the tread meets the riser, which is exactly how to prevent your deck frame from rot for thirty years in the hardest-working part of the build. I always use a wider tape for stringers to wrap the top and slightly down the sides of the cutouts. Even if you’ve mastered the trick to cutting perfect deck stringers on the first try, all that geometric perfection is useless if the wood turns to mush after five or six harsh winters. By sealing the ‘throat’ of the stringer, you’re preventing the structural cracks that eventually lead to bouncy, dangerous steps.
Most homeowners believe that because they bought pressure-treated lumber, the skeleton of their deck is essentially invincible. I used to believe that too, until I realized that modern treatment chemicals are only a surface-level defense. According to research from the Forest Products Laboratory, the structural integrity of treated pine depends heavily on its ability to shed water; once moisture levels remain above 20% consistently, fungal rot is inevitable regardless of the treatment. This is the contrarian truth most contractors won’t tell you: your frame is the most volatile part of the build. If you don’t account for the microclimate beneath the boards, you’re essentially building a greenhouse for wood-destroying organisms. This is exactly how to vent the space under your deck to prevent mold and wood rot and why airflow is just as critical as the tape we discussed earlier.
The Simple Gap That Saves Your Siding from Damage
One of the biggest ‘oops’ moments I see in high-end builds involves the expansion and contraction of composite materials. I’ve seen $50,000 decks literally tear the vinyl siding off a house because the builder didn’t understand thermal physics. Composite boards are thermal sponges—they expand significantly in the summer heat and shrink in the winter. If you don’t know how to stop composite boards from expanding into your vinyl siding, you are setting yourself up for a structural collision. You need a dedicated expansion gap at the ledger line. Without it, the force of the expanding boards acts like a slow-motion battering ram against your home’s exterior.#IMAGE_PLACE_HOLDER_C#
Why is my composite deck buckling when I followed every instruction?
The answer usually lies in a nuanced error called the ‘field versus perimeter’ mistake. Many DIYers assume that hidden fasteners are a universal solution, but the hidden clip mistake that leads to buckling deck boards is often failing to use a ‘starter’ or ‘finish’ screw at the ends of each run. When a board is only held by friction clips, it can ‘walk’ over time due to repeated heating and cooling cycles. This is why we use hidden clips for the field but screws for the perimeter to create a fixed point that forces the board to expand outward in a controlled direction rather than shifting the entire floor.
Why Joist Spacing Alone Won’t Stop the Bounce
I often hear people complain that their deck feels like a trampoline, even though they used 12-inch on-center spacing. This is a common misconception: spacing provides vertical support, but it does very little for lateral rigidity. If you want to understand why your deck feels bouncy and the affordable fix to stiffen it up, you have to look at mid-span blocking. Without ‘X’ bridging or solid blocks between the joists, the wood can twist and vibrate under your feet. This is especially true on stairs. Even if you’ve used a heavy-duty stringer, you need the bracket that makes your deck stairs feel rock solid to prevent the ‘sway’ that makes people feel uneasy. By adding these mechanical anchors, you turn a collection of individual boards into a single, monolithic structure that doesn’t budge. Have you ever fallen into this trap of over-relying on the wood’s thickness alone? Let me know in the comments.That monolithic feeling doesn’t happen by accident; it’s the result of having the right gear in your truck and a digital-first mindset. I don’t just rely on a tape measure and a prayer anymore. I’ve found that why a digital designer is the best move for planning a complex backyard deck because it allows you to simulate load stresses before you even buy a single 2×10. When it comes to the actual physical labor, I am religious about using a dedicated impact driver with a depth-setting nosepiece. If you over-drive a screw into composite, you mushroom the surface; if you under-drive it, you create a trip hazard. It’s about that surgical precision that separates a DIY weekend project from a professional-grade installation that boosts your home’s value.
How do I keep my composite deck looking brand new for twenty years?
The biggest myth in our industry is that ‘low maintenance’ means ‘no maintenance.’ If you ignore your deck, nature will reclaim it. Every spring, I tell my clients to put away the heavy machinery. You should why you should never use a pressure washer on composite decks, as the high PSI can actually etch the surface of the boards, creating microscopic grooves where mold and algae love to hide. Instead, stick to a soft-bristle brush and a pH-neutral cleaner. For those stubborn spots, knowing the best way to clean bird droppings off dark brown composite boards is essential to prevent permanent staining from the acidic waste. It is also the perfect time to walk the perimeter and check that your the bracket that keeps your railing from wobbling forever is still tight and hasn’t suffered from any seasonal shifting.
#IMAGE_PLACE_HOLDER_D#
Looking ahead to the next decade of outdoor living
As we look toward composite decking trends 2025 the ultimate guide for outdoor enthusiasts, the focus is shifting from simple platforms to fully integrated environments. I’m seeing a massive surge in ‘smart decks’ where lighting, sound, and even heating elements are controlled via smartphone. According to the AZEK Building Products Technical Guide, modern capped polymer boards are now engineered with heat-shielding technology that can reduce surface temperatures by up to 30 degrees, making why dark brown decking gets significantly hotter than light gray boards less of a concern than it was five years ago. We are moving into an era where your deck is as technologically advanced as your kitchen.
If you really want to step up your game and ensure your structure is as safe as it is beautiful, I want you to try one specific advanced framing move on your next project. Don’t settle for standard hardware at the most critical junctions. Take ten minutes to learn the bolt pattern that finally stops railing post wobble for good. It is a small adjustment in geometry that makes a massive difference in how the deck feels when you lean against the rail on a summer evening. This level of detail is what transforms a simple backyard platform into a true private oasis that stands the test of time.
How I Learned to Stop Joist Rot Before it Starts
The most expensive lesson I ever learned as a deck builder is that water doesn’t just fall; it migrates. It finds the path of least resistance, which is almost always the dark, damp gap between your beautiful decking and the structural joist. If I could go back to my younger self, I would emphasize that structural integrity isn’t about the wood you can see—it’s about the wood you can’t. Here are my lightbulb moments that changed everything:
- The Sandwich Trap: Water trapped between a board and a joist can’t evaporate, creating a permanent moisture pocket.
- Chemical Limits: Modern copper-based treatments are water-soluble; they can leach out over time if the wood is constantly saturated.
- Airflow is King: No amount of tape can save a deck that has zero ventilation underneath.
Field Tested Gear That Actually Makes a Difference
I don’t just rely on a tape measure and a prayer anymore. My truck is now a curated collection of tools that ensure my builds outlast the mortgage. I highly recommend looking into innovative outdoor living ideas with composite decking in 2025 to see how digital planning tools can save you from framing errors before you even cut a board. For the physical build, switching to specific fasteners is a game-changer. For instance, understanding why I use structural screws instead of lag bolts for stairs was the single best move I made for eliminating stair sway. I also keep a close eye on how hardware interacts with the environment, specifically checking how the TimberTech Fulton rail performs against harsh Utah winters to ensure my material choices can handle local weather extremes.
#IMAGE_PLACE_HOLDER_E#
Build Your Private Oasis with Confidence
At the end of the day, you aren’t just building a wooden or composite platform; you are building a stage for your family’s best memories. Whether you choose to transform your outdoor living with custom composite decking ideas or stick to a simple, clean design, do it with the intention of it lasting. By taking the small, often invisible steps like applying joist tape and ensuring proper ventilation, you’re not just building a deck—you’re building peace of mind. Have you ever pulled up a board on an old deck only to find a rotting frame underneath? Let me know in the comments below—I’d love to hear your ‘lesson learned’ moments.