I watched my brother-in-law lean against the corner post of my first deck project, and my stomach did a somersault. The wood groaned, the post shifted, and for a split second, I saw his life—and my reputation—flash before my eyes. I had used the biggest bolts I could find, but I hadn’t accounted for the simple physics of leverage. That terrifying moment led me to discover the lateral load connector, and I haven’t built a deck without them since.
Stop the Sway Before Someone Gets Hurt
When you’re planning your stunning outdoor living space, it’s easy to get distracted by the grain of the composite or the layout of the stairs. But a railing that moves even half an inch feels like a liability, not a luxury. Early on, I made the classic mistake of thinking that through-bolting a 4×4 post to the rim joist was enough. It’s a common trap. Without the right reinforcement, you’re basically asking a couple of inches of wood fiber to hold back hundreds of pounds of lateral force. This is why the bolt pattern that finally stops railing post wobble for good usually requires a secret weapon hidden under the boards.
Are these brackets actually worth the extra cost?
You might be looking at a pile of galvanized steel and wondering if this is just a way for hardware companies to line their pockets. Trust me, I was the king of “that’s sturdy enough” for years. But according to the North American Deck and Railing Association (NADRA), rail failure is a leading cause of deck-related injuries, often because posts are only attached to the rim joist. Adding a bracket like a DTT2Z or a tension tie isn’t just about code compliance; it’s about the peace of mind that comes when a group of adults leans against your rail to watch a sunset and nothing moves. If you’ve already noticed a gap forming, you need to understand why your deck ledger needs a tension tie to stay secure because the same physics of pull-out force applies to the whole structure. Have you ever felt that heart-sinking “give” when you gripped your railing? Let’s look at how to lock it down forever.
How Your Railing Acts Like a Giant Crowbar
Think of your 36-inch or 42-inch railing post as a lever. When a person leans against the top rail, they are applying force to the end of that lever, and the pivot point is where the post meets the deck. Without a lateral load connector, all that force is concentrated on two bolts through a single 2×8 or 2×10 rim joist. It’s like trying to hold a heavy sledgehammer by the very tip of the handle with two fingers; eventually, the wood fibers compress, the bolts loosen, and the “give” begins. This is why how to fix a loose railing post without tearing up the deck boards becomes a top priority for homeowners who skipped the bracing during the initial build. When a post wobbles, it creates a small gap where the post meets the decking. Every time it rains, water seeps into that gap, sitting against the end grain of your post. This is the fast track to rot. By using lateral load connectors, you keep the joint tight, which actually helps how to protect your deck frame from rot for thirty years by keeping moisture away from the interior of the connection.
Locking the Post to the Frame’s Skeleton
The “meat” of a solid railing is the lateral load connector—specifically something like a DTT2Z. These brackets are designed to transfer the outward “pull” of the post directly into the floor joists of the deck, rather than just the rim joist. I remember a project where we were installing composite decking trends 2025 enthusiasts would love, but the framing was so bouncy we knew the railings would never sit still. We used a long threaded rod that went through the rim joist, through the post, and anchored into a bracket bolted to the side of a perpendicular joist. It essentially ties the railing into the entire “skeleton” of the deck, making it feel like it’s part of the house’s foundation rather than an afterthought.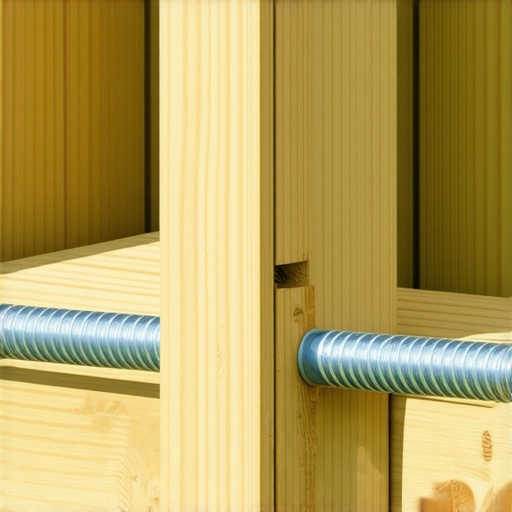
The Support Network Hidden Beneath the Surface
You can’t just slap a bracket on and call it a day. If your post falls between two joists, you need to install solid blocking. This means cutting chunks of joist material to fit snugly between the main framing members, creating a rigid path for the hardware. This technique is similar to why we use double joists under every composite seam for a flat floor; it’s all about creating a solid foundation that prevents independent movement. If you’re working on the stairs, the physics get even more complicated because the angle of the stringer changes how you can mount the hardware. In those cases, the bracket that makes your deck stairs feel rock-solid is often a specialized version of the tension tie designed for angled connections.
Why Precision Matters More Than Power
I once saw a DIYer try to solve a wobble by just over-tightening the bolts until the washers sank half an inch into the wood. All he did was crush the lumber and make the connection weaker. Instead, focus on the the joist spacing secret for a solid-feeling composite surface and ensure your brackets are installed with the specified structural screws or through-bolts. When you use the right hardware, the railing doesn’t just “stay on”—it becomes part of the structure. For those designing more complex layouts, deck builder insights designing your dream outdoor space often emphasize that the safest railings are the ones where the framing was planned around the post locations from day one.Common wisdom says that if two bolts are good, six must be bulletproof. But here’s the contrarian truth: you can actually ‘Swiss cheese’ your framing until it loses all structural integrity. I’ve seen DIYers drill so many holes into a rim joist that they effectively severed the wood fibers meant to hold the weight. According to the American Wood Council’s (AWC) DCA 6 guidelines, the placement and spacing of fasteners are just as critical as the fasteners themselves. If you don’t leave enough ‘edge distance,’ the wood will simply split along the grain under pressure. This is a massive ‘oops’ factor I see in expert deck builder tips for stunning outdoor living where people prioritize quantity over engineering.
The Stringer Throat is Your Weakest Link
The same logic applies to your stairs. Most people focus on the tread, but they ignore the ‘throat’—the uncut portion of the stringer. If you cut too deep to get a wide tread, you leave a tiny sliver of wood to carry the entire load. This is exactly why your deck stair stringers are cracking at the throat and why you should consider the bracket that makes your deck stairs feel rock-solid to reinforce those points. If you’ve ever felt a stair ‘dip’ as you walk, you’re likely feeling the stringer beginning to fail at the notch. This is also why your deck stairs squeak and how to silence them forever, as the movement causes friction between the wood members. 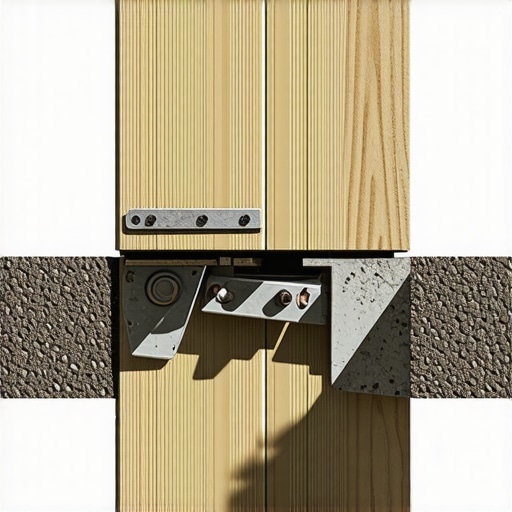
Why do my ‘maintenance-free’ composite boards keep buckling?
It’s a sophisticated question that gets to the heart of material science. People assume ‘low maintenance’ means ‘indestructible,’ but composite material expands and contracts significantly more than wood along its length. If you pin it too tight against the house, it has nowhere to go but up. I’ve seen beautifully installed composite decking trends 2025 enthusiasts would admire turn into a roller coaster because the builder didn’t understand the spacing secret for installing composite decking in winter. You have to account for the temperature at the time of install, or you’ll find how to stop composite boards from expanding into your vinyl siding becomes your next weekend’s headache.
Thermal Expansion is Not a Suggestion
This movement is powerful enough to shear screws or bend flashing. When you are designing safe and stylish stairs for outdoor decks in 2025, you must allow for this movement at the top of the stair run where the boards meet the deck surface. I always recommend using hidden clips for the field but screws for the perimeter because it gives the boards room to breathe without sacrificing the safety of the walking surface. Have you ever fallen into this trap where you thought you were over-engineering something only to make it weaker? Let me know in the comments.
The Tools That Make My Life Easier and Your Stairs Safer
I’ve spent way too many hours nursing a sore shoulder because I was using a standard drill for jobs that required an impact driver. When you are dealing with the dense fibers of high-end composite or the structural requirements of designing safe and stylish stairs for outdoor decks in 2025, you need torque control. My go-to is the Starborn Smart-Bit. It’s not just a drill bit; it’s a countersink and a pilot bit in one that prevents ‘mushrooming’—that ugly ring of displaced plastic that pops up around a screw head in composite. It’s the difference between a deck that looks professional and one that looks like a high school shop project. If you are handling a massive project alone, you should realize the benefits of working with a professional deck builder in your outdoor projects just for the sheer efficiency of their specialized tool trailers.
Stop Your Joists from Rotting Under the Boards
One of the most heartbreaking things I see is a ten-year-old deck with pristine composite boards on top and a frame that is literally crumbling underneath. Water sits on top of those 2×10 joists, trapped by the boards, and slowly turns the wood into wet cardboard. This is why I religiously use butyl joist tape. I apply it to every horizontal surface before a single board goes down. It’s a simple move, but it’s the primary way for how to protect your deck frame from rot for thirty years. To take it a step further, why I paint the tops of my joists black before installing composite is about aesthetics; it hides the light-colored pressure-treated wood in the gaps, creating a deep, clean shadow line that looks incredible at night. 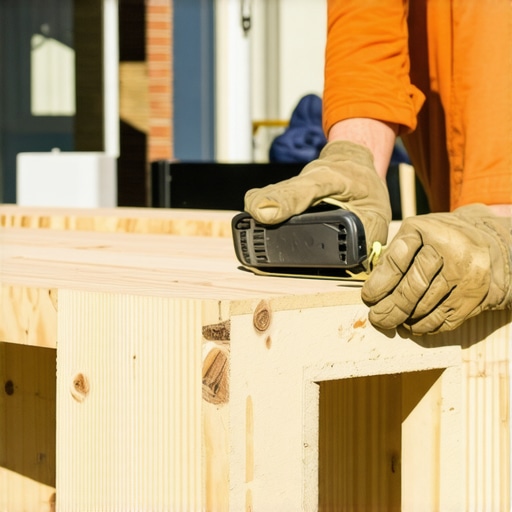
How do I keep my composite deck looking fresh without ruining it?
The biggest mistake I see homeowners make is reaching for the pressure washer the moment they see a pollen stain. Stop. According to the National Design Specification (NDS) for Wood Construction (AWC, 2018), the integrity of wood and composite fibers can be permanently compromised by high-pressure water injection. This is why you should never use a pressure washer on composite decks 2; you will etch the surface and create pores that trap even more dirt. A soft-bristle brush and a bucket of warm, soapy water are all you really need to maintain that composite decking trends 2025 look.
The Future of Decking is Steel and Intelligence
Looking ahead, I predict a massive shift away from wood framing entirely. As wood prices fluctuate and rot concerns grow, the hidden benefit of using steel deck framing instead of wood is becoming too obvious to ignore—it’s perfectly straight and won’t ever decay. We are also seeing ‘Smart Decks’ become the norm. This involves integrated sensors and automated lighting systems. When setting this up, you have to be picky about your power source, which is why I’m constantly researching the best low-voltage transformers for large outdoor lighting projects. If you want to elevate your build today, my advanced tip is this: go buy a roll of G-Tape and apply it to your ledger board and joists—it’s the cheapest insurance policy you’ll ever buy for your home.
The Hard Truth About Post Stability That Most DIY Guides Skip
Over the years, I’ve realized that building a safe deck is about respect—respect for the materials and the physics of leverage. Here are a few lightbulb moments from my career:
- Code is a Floor, Not a Ceiling: Just because a connection passes a basic inspection doesn’t mean it won’t feel “mushy” when a group of people lean on it. I always aim for 20% more rigidity than the minimum requirement to ensure a rock-solid feel.
- Water is the Ultimate Saboteur: You can use the strongest bolts in the world, but if you don’t seal the penetrations, the wood around them will eventually fail. This is why I obsess over how to keep your deck joists from rotting under the boards.
- The Stride Matters: If your framing is rock solid but your stairs are uneven, people will still feel unsafe. Avoiding the common stair stringer measurement mistake that ruins your stride is just as important as the structural bolts you choose.
The Handful of Tools That Save My Reputation on Every Build
I don’t get paid to promote these brands, but I won’t step onto a job site without them because they solve the engineering problems that keep homeowners awake at night.
- Simpson Strong-Tie DTT2Z: This is the specific lateral load connector that changed the game for me. It’s the only way to truly “lock” a post to the frame skeleton.
- Structural Adhesives: Remember, stair treads need more than just screws to stay quiet; a bead of high-quality adhesive prevents the micro-movements that cause those annoying squeaks.
- G-Tape or Butyl Joist Tape: If you want to sleep soundly, this is the cheapest insurance for your subframe.
- NADRA Guidelines: I regularly consult these to ensure every innovative stairs solution for safe outdoor deck access I design meets the highest safety standards.
#IMAGE_PLACEHOLDER_E#
Build a Space That Lasts for Generations
Building a deck is a massive undertaking, but there is nothing quite like the feeling of walking out onto a surface that doesn’t budge or sway. By focusing on the “skeleton” of your project first, you ensure that your stunning outdoor living space remains a place of joy rather than a source of maintenance anxiety. Even after your deck is done, maintenance remains simple—just keep it clean and remember the best way to clean bird droppings off dark brown composite boards to avoid permanent staining. You have the knowledge; now go build something incredible. Have you ever felt that terrifying “give” when someone leaned against your deck railing? Let me know in the comments below!