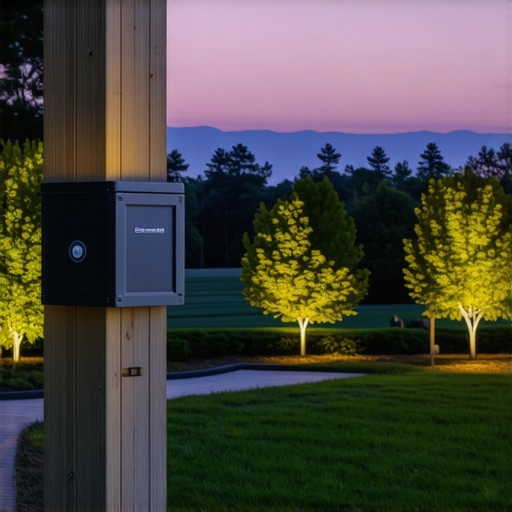
I stood there in the pitch black, remote in hand, ready to show off my brand-new landscape lighting to my wife after a long weekend of digging trenches. I clicked the button. The first three lights near the house were blindingly bright, but as the path stretched toward the back garden, the glow faded into a sad, sickly yellow flicker. It was a classic rookie mistake. I had spent thousands on high-end brass fixtures but tried to save fifty bucks on the transformer that powered them. If you are building an expansive outdoor space, you cannot treat your transformer as an afterthought. It is the heart of the entire operation. I remember the cold sweat that broke out when I realized I had to explain to a client why their lighting package looked like a collection of dying flashlights because I had cut corners. Today, I am going to show you how to avoid the dim-light blues by choosing a transformer that actually has the muscle for a large-scale layout. We will look at why capacity matters more than you think and how to ensure every bulb shines with the same crisp intensity from the first step to the last. [image]
Stop Starving Your Lights with the Wrong Power Source
When I first started as a professional deck builder, I assumed a transformer was just a simple plug with a basic timer. I was wrong. For large projects—think multi-level decks, long walkways, and sprawling perimeter lighting—you are not just moving electricity; you are fighting physics. This is especially true when you are trying to figure out how to choose the right deck lighting transformer for a footprint that spans more than 50 feet. My biggest blunder was ignoring voltage drop. I used thin wire and a weak transformer, and the electricity literally gave up before it reached the last post. According to the International Association of Certified Home Inspectors, voltage drop is a significant concern in low-voltage systems, often requiring heavy-duty transformers with multiple voltage taps to maintain consistent brightness across long wire runs.
Does a High-End Transformer Actually Make a Difference?
You might be skeptical. Why spend $300 on a stainless steel unit when the plastic one at the big-box store says it handles 200 watts? The difference lies in the multi-tap feature. Professional-grade transformers allow you to move your wire to a 13V, 14V, or even 15V lug, pushing just enough extra energy to overcome the resistance of a long wire run. Without this, your glare-free deck stairs will look inconsistent and cheap, with the furthest steps looking like they are barely on. I have seen beautiful homes marred by uneven lighting simply because the owner did not want a heavy-duty power source. Have you ever noticed your lights getting dimmer the further they get from the outlet? Drop a comment or send me a message; I would love to hear if you are battling the same flickering ghost I once did. If you are already planning the best way to light a deck perimeter for parties, getting the transformer right is your first step toward success. Once you have the power secured, the next challenge is the physical installation without making your yard look like a construction zone.
Calculate Your Total Load Before You Buy the Hardware
Building a robust lighting system starts with simple math, but most people treat it like a guessing game. Think of your transformer as a water pump and your wires as garden hoses. If you try to push 50 gallons through a tiny straw, you get nothing but a trickle. To avoid this, I always use the 80% rule. If you have a 300-watt transformer, you should never load it with more than 240 watts of actual lights. I learned this the hard way on a project where we used every single watt available on a cheap unit; by mid-July, the transformer was so hot you could fry an egg on the casing, and it eventually burned out before the first frost. When you are trying to how to choose the right deck lighting transformer, always look for the total wattage of your LED bulbs and then add a 20% cushion for future expansion and wire resistance. This is especially vital if you are also considering other power needs, which is why your deck needs a dedicated circuit for that new outdoor fridge if you are building an integrated outdoor kitchen.
Push More Power to Those Far-Away Lights
The trickiest part of a large layout is the physics of resistance. As electricity travels down a copper wire, it loses energy—this is the dreaded voltage drop. On a recent job involving a massive multi-level structure, we had a run of glare-free deck stairs that sat 75 feet away from the power source. The lights at the top were perfect, but the ones at the bottom looked like dim candles. The fix was using a multi-tap transformer. These units have different lugs for different voltages. Instead of just a 12V output, you might have a 13V, 14V, or 15V option. By plugging the long run into the 14V lug, we pushed the electricity harder at the start, so by the time it fought through 75 feet of wire, it arrived at the bulb as a perfect 12V. 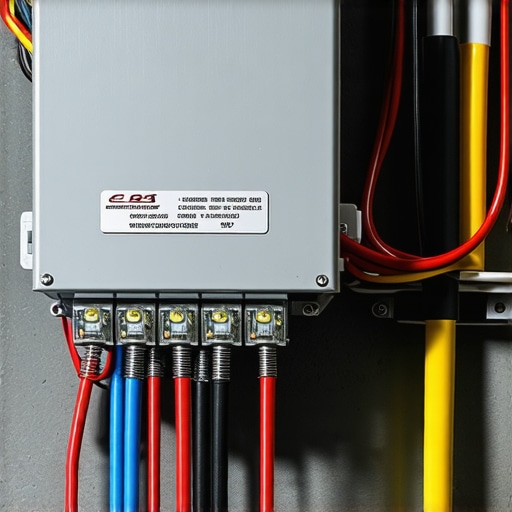
Wire Your Layout in a Hub Pattern for Consistency
Most DIYers use the daisy-chain method, where you run one wire from the transformer and tap every light into it one after another. This is the fastest way to get uneven brightness. Instead, I advocate for the ‘Hub’ method. You run one heavy-duty 12-gauge home-run wire from the transformer to a central junction point near your lights, then branch out to individual fixtures from there. This ensures that every light is roughly the same distance from the ‘hub,’ meaning they all receive identical voltage. While you are doing this, you should also learn how to run wire for deck lights without drilling huge holes to maintain the structural integrity of your joists. I once spent an entire afternoon on my hands and knees in the dirt because I didn’t plan my hub locations correctly, and I ended up with a bird’s nest of wires that took hours to untangle. Proper planning ensures your deck builder insights designing your dream outdoor space translate into a clean, professional finish. If your project includes long vertical runs, remember that why we always double block the middle of a long stair run for stability applies to your wiring paths too; you want secure, vibration-free routes for your cables so they don’t chafe against the framing over time.Even with the perfect transformer setup, a large-scale project can still fail if you fall for the most common myth in modern outdoor living: that composite materials are a ‘set it and forget it’ solution. I have spent years fixing projects where homeowners were promised a maintenance-free oasis, only to find their structure failing from the inside out. While the surface boards might look pristine for decades, the organic wood frame underneath is often left vulnerable to moisture and decay. This is a massive mistake. When choosing the right composite decking for durable low maintenance outdoor areas, you have to realize that the boards are only as good as what is supporting them. I have seen beautiful, expensive decks start to sag because the builder ignored how to keep your deck joists from rotting under the boards using joist tape or proper ventilation.
Stop Ignoring the Thermal Dance of Composite Boards
One of the most frustrating ‘oops’ factors for DIYers and even some pros is thermal expansion. Wood moves with moisture, but composite moves with heat. I once saw a 40-foot span of boards that had buckled into a wave pattern because they were installed tight against a wall on a freezing January morning. When July hit, those boards had nowhere to go. If you don’t understand why your composite boards are expanding more than expected, you are setting yourself up for warped railings and popped fasteners. According to the North American Deck and Railing Association (NADRA), structural failure is often a ‘silent’ process that happens beneath the surface, frequently exacerbated by poor water management and thermal stress. This is why I often steer clients toward the hidden benefit of using steel deck framing instead of wood for large, complex layouts; steel doesn’t rot, and it doesn’t move.
Is Your Choice of Deck Color Making Your Backyard Unusable?
Many people pick their deck color based on a small sample in a showroom, but they forget to factor in the sun. In my experience, choosing a deep espresso or charcoal gray for a south-facing deck in the Midwest is a recipe for burnt feet. I’ve had clients who couldn’t even let their dogs out on the deck in August because why dark brown decking gets significantly hotter than light gray boards is a very real physical limitation of the material. Have you ever fallen into this trap of picking aesthetics over practical temperature? Let me know in the comments.
The Stringer Mistake That Ruins the Stride
Finally, let’s talk about the most dangerous nuance: the stairs. A sophisticated reader knows that a deck is only as safe as its access points. Most builders cut their stringers using a standard template without accounting for the final thickness of the composite tread. This leads to the ‘bottom step stumble,’ where the last step is an inch shorter or taller than the rest. It seems minor until someone trips in the dark. Avoiding the stair stringer measurement mistake that ruins your stride is what separates a master craftsman from a weekend warrior. If your stairs are already built and making noise, check out why your deck stairs squeak and how to silence them forever to learn how to bridge that structural gap. Remember, a professional outdoor space is a symphony of physics, math, and material science—not just a pile of boards.
Building the deck is only half the battle; keeping it in top-tier condition is where the real expertise comes in. One tool I absolutely live by isn’t a saw or a drill, it’s a digital blueprint. I’ve found that [why I never start a complex deck project without a digital 3d walkthrough first](https://deckdesignbuild.com/why-i-never-start-a-complex-deck-project-without-a-digital-3d-walkthrough-first) is because it eliminates the ‘I thought it would look different’ conversation with clients. It allows me to simulate exactly how shadows will fall and how [why dark brown decking gets significantly hotter than light gray boards](https://deckdesignbuild.com/why-dark-brown-decking-gets-significantly-hotter-than-light-gray-boards) might impact the space’s usability during the peak of summer. Using a 3D model catches structural clashes before they become expensive field repairs.
The Hardware Upgrade That Saves Your Shoulders
When it comes to the actual assembly, [the reason we use structural screws instead of old-fashioned lag bolts](https://deckdesignbuild.com/the-reason-we-use-structural-screws-instead-of-old-fashioned-lag-bolts) is about more than just speed. Structural screws, like the Simpson Strong-Tie SDWS series, provide incredible shear strength without the need for time-consuming pre-drilling. I’ve personally watched standard lag bolts snap under the stress of a shifting frame, whereas these modern fasteners flex just enough to stay secure. If you are building near a pool or the coast, remember that [why we always use stainless steel hardware for poolside deck frames](https://deckdesignbuild.com/why-we-always-use-stainless-steel-hardware-for-poolside-deck-frames) is non-negotiable if you want to avoid the ‘rust bleed’ that ruins white fascia boards.
How do I keep my composite deck looking brand new for decades?
Maintenance for composite isn’t about sanding and staining, but it does require a specific touch. I always tell my clients that knowing [how to clean grease stains off composite without ruining the finish](https://deckdesignbuild.com/how-to-clean-grease-stains-off-composite-without-ruining-the-finish) is the difference between a clean deck and a permanent eyesore. According to TimberTech’s technical care guidelines, using a pressure washer with a narrow tip can actually ‘etch’ the grain pattern of the boards, creating a permanent scar that absorbs dirt even faster. Instead, use a soft-bristled brush and a composite-safe cleaner once every six months. Beyond the surface, you must verify the structural health annually. Take ten minutes to perform [the simple way to check if your deck ledger is pulling away from the house](https://deckdesignbuild.com/the-simple-way-to-check-if-your-deck-ledger-is-pulling-away-from-the-house). This single connection point is where most deck failures begin.
The Future of High-Performance Outdoor Living
Looking toward [composite decking trends 2025 the ultimate guide for outdoor enthusiasts](https://deckdesignbuild.com/composite-decking-trends-2025-the-ultimate-guide-for-outdoor-enthusiasts), I predict a massive shift toward ‘smart’ outdoor environments. We are already seeing transformers that integrate with home automation systems to adjust brightness based on the time of day or even the weather. We are moving toward a world where your deck isn’t just a platform, but a fully automated ecosystem. My advice for you today is simple: go outside this weekend and check your ledger bolts. It is the most important safety move you can make to ensure your [deck builder insights designing your dream outdoor space](https://deckdesignbuild.com/deck-builder-insights-designing-your-dream-outdoor-space) remain a safe sanctuary for your family.
Hard-Earned Lessons from the Trenches of High-End Deck Projects
After years of building, I’ve realized that the small details cause the biggest headaches. First, never ignore the physics of your fasteners; using structural screws instead of old-fashioned bolts saves your back and your build’s integrity. Second, if you’re worried about safety, always prioritize the stair tread depth that feels safest for kids and the elderly to ensure everyone can enjoy the space without worry. Finally, remember that moisture is the enemy—even for composite. Using the bracket that makes your deck stairs feel rock solid helps maintain a rigid frame that doesn’t trap water in shifting joints.
The Toolbag Essentials That Never Leave My Truck
I don’t go to any job site without a few specific items. I always recommend a digital 3D walkthrough tool because why a digital designer is the best move for planning a complex backyard deck is that it catches errors before you cut a single board. I also swear by 12-gauge wire for any lighting run over 40 feet to minimize resistance. For the frame, a high-quality flashing tape is my go-to for protecting joists from the inevitable rot that occurs under the boards.
Step Into Your New Backyard Oasis
Your deck is more than just an assembly of boards; it’s a place for family gatherings and quiet mornings. By focusing on the infrastructure—the transformers, the framing, and the drainage—you ensure your deck builder expertise results in a space that lasts decades. Don’t be afraid to invest in the components you can’t see; they are what truly make your project a success. Learn how a skilled deck builder can turn your garden into a private oasis and start your transformation today. Have you ever struggled with a lighting transformer that just wouldn’t stay bright? Let me know in the comments below!