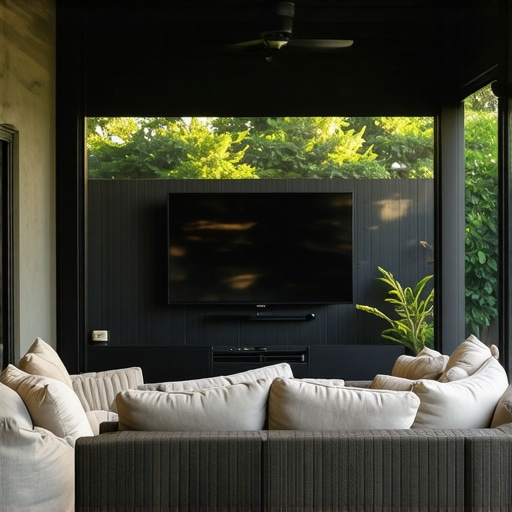
I remember the exact moment I realized I’d made a huge mistake. It was a humid Saturday afternoon, the big game was about to start, and I’d just finished dragging my brand-new flat screen out to my screened-in porch. I had my snacks, my cold drink, and a group of friends ready to relax. But as soon as the sun hit that 4 PM angle, my screen turned into a giant, expensive mirror. Instead of seeing the quarterback, I was staring at a crystal-clear reflection of my own frustrated face and the neighbor’s siding. I spent the next two hours holding up a piece of cardboard to block the light while my guests slowly migrated back inside to the stuffy living room. It was a total failure. If you’ve ever felt that same frustration, you know that just “putting a TV outside” isn’t enough to create the sanctuary you were dreaming of. You need a real strategy to beat the glare and reclaim your afternoons. [IMAGE_PLACEHOLDER]
Stop Fighting the Sun and Start Enjoying the Game
Creating a true outdoor oasis isn’t just about picking out the right furniture or choosing the perfect flooring—though I always recommend chatting with a skilled deck builder to get the structural foundation right. It’s about the small, technical details that make the space actually usable when the sun is high. When I first started setting up my porch, I made the classic rookie mistake: I used a standard, fixed wall mount that I found on sale. I figured the roof of the porch would provide enough shade to keep the screen clear. I couldn’t have been more wrong. The sun moves, and those screens are absolute magnets for ambient light. Now, I’ve shared plenty of thoughts on mounting a TV on your outdoor deck, but the screened-in porch adds a layer of complexity. The screen mesh itself can catch the light and create a hazy “screen door effect” on your viewing experience. According to research on light management from the U.S. Department of Energy, natural light levels can be significantly more powerful than anything your TV can output, meaning without a way to tilt or pivot your screen, you’re essentially playing a losing game of hide-and-seek with the sky. Have you ever found yourself squinting at a dark screen while the weather is absolutely perfect, wishing you could just see the score?
Is it actually worth the hassle to mount a TV outside?
I get this question all the time from neighbors who are worried about the cost and the logistical headaches. They wonder if the glare will always win or if the humidity will just kill the electronics in a month. Here’s the honest truth from someone who has been there: if you don’t do it right, it’s a waste of money. But when you nail the positioning and use the right articulated hardware, it completely transforms your home’s footprint. It’s about more than just “watching TV.” It’s about creating a space where you can entertain without compromise. You have to think about the environment as a whole—like how you install a ceiling fan on a covered deck to keep the air moving so you don’t overheat while watching, or how your stairs and access points affect the flow of people coming in and out for refills. When you combine those elements with a smart mounting strategy, you aren’t just putting a TV outside; you’re building a destination. Today, I’m going to walk you through the mounting solutions that actually work, the specific angles you need to master, and the one piece of gear that finally saved my porch-life and stopped the squinting for good.
Stop Settling for a Fixed Perspective
The biggest mistake people make is treating their screened-in porch like a secondary living room with static lighting. It’s not. It’s a dynamic environment where the ‘ceiling’ is a shifting sun. You need a full-motion, articulated mount. Think of it like the difference between a fixed-lens camera and a high-end zoom; one keeps you stuck, the other lets you adapt. I remember one Tuesday night, trying to catch a late-season baseball game. The sun was dipping just below the eaves, hitting the screen at a 45-degree angle. Because I’d finally swapped my old flat mount for a heavy-duty articulated arm, I just pulled the TV six inches out and tilted it toward the house. Suddenly, the glare vanished. If I’d stayed with that cheap fixed mount, I would’ve been watching a reflection of my own grill for nine innings. This kind of flexibility is key, especially when you’re also trying to wire a deck for sound without leaving visible cables, ensuring your audio matches that crystal-clear picture.
Adjust Your Angle by Following the Sun
Positioning is everything. You want to mount the TV on a wall that faces North or East if possible. This keeps the harshest afternoon light behind the screen rather than reflecting off it. If you’re mounting to a structural post, you have to be sure it can handle the torque of a 50-pound TV extended two feet out. I’ve seen posts warp because they weren’t beefy enough. That’s why we prefer 4×4 posts for short decks but 6×6 for tall ones—structural integrity isn’t just about the floor; it’s about what you’re hanging on the walls. Think of your mounting hardware as the ‘stringers’ of your entertainment system. Just as the stair stringer measurement mistake can ruin the feel of your deck, a poorly measured mount height will leave you with a permanent neck ache by the fourth quarter. 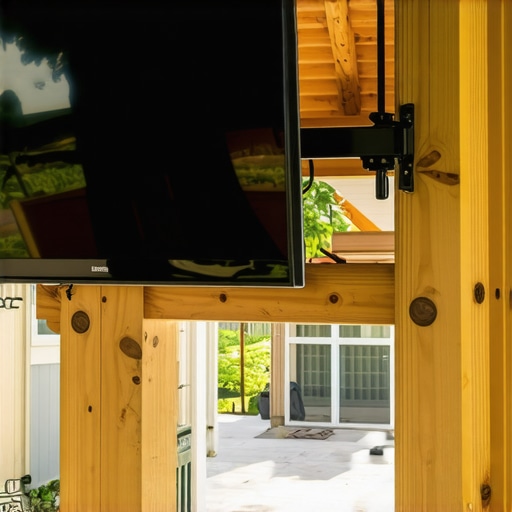
Control the Environment with Smart Shade Placement
Sometimes even the best mount isn’t enough. You need to manage the perimeter of your space. Screened porches are notorious for ‘light bleed’ from the sides. I eventually installed a set of semi-transparent outdoor rollers on the west-facing side of my porch. They don’t block the breeze, but they kill the direct rays that cause the most trouble. It’s the same logic used when you research how to pick a railing that does not block your sunset view; you want the benefits of the outdoors without the structural drawbacks. Integrating these elements creates a flow that makes the transition from the kitchen to the porch feel natural, much like creating seamless transitions with stairs in a multi-level layout. When the lighting is controlled and the screen is angled right, your porch becomes the most popular room in the house, regardless of where the sun is sitting.
While we’re talking about the perfect viewing angle, I have to address a contrarian truth I’ve learned after years of building: most people think composite decking is ‘install and forget.’ They spend thousands on the latest composite decking trends for 2025, assuming the material is bulletproof. But here’s the reality: composite boards don’t rot, but they are incredibly sensitive to temperature. If you don’t understand the physics of thermal expansion, your beautiful ‘maintenance-free’ floor will buckle or pull away from your house within two seasons. I’ve walked onto countless porches where the boards were literally pushing against the siding because someone forgot the spacing secret for installing composite decking in winter. You aren’t just building a floor; you’re building a system that breathes with the weather.
Stop Chasing the Myth of Maintenance-Free Decking
The ‘oops’ factor often starts below the surface. A common mistake is focusing so much on the pretty boards that you ignore the wood skeleton underneath. Even the best durable composite decking won’t save you if the frame rots in ten years. This is why I always warn homeowners that the sub-structure is where the real investment lies. According to the International Code Council (ICC), structural deck failures are rarely about the surface boards and almost always about the ledger connection or joist integrity. If you want a porch that lasts as long as the composite warranty, you have to be obsessive about joist protection and flashing. 
The Structural Reason Your Deck Feels Bouncy When You Walk
Have you ever noticed a slight ‘give’ or vibration when you walk out to adjust your TV? Most people blame the boards, but the structural reason your deck feels bouncy is usually insufficient joist spacing or a lack of blocking. For composite, I never recommend the standard 16-inch center spacing that works for wood. It needs 12 inches to feel ‘rock solid.’ It’s the same logic we apply to stairs; we always double block the middle of a long stair run to prevent that unsettling shimmy. When your foundation is stiff, the whole space feels more like a high-end room and less like a temporary platform. This stability is crucial when you’re integrating innovative stairs solutions for a seamless flow between your porch and the yard.
How do I prevent my composite boards from expanding into the vinyl siding?
The secret isn’t just leaving a gap; it’s about ‘picture framing.’ This is a technique where you install a perimeter board that runs perpendicular to the rest of the floor. Beyond looking sharp, picture framing your deck is a functional move that hides the cut ends and controls where the expansion happens. Without it, you’re looking at jagged edges and potential trip hazards as boards move. I’ve seen homeowners try to save money by skipping this step, only to regret it when the boards expand and trap debris or water against the house. Have you ever fallen into this trap of prioritizing aesthetics over expansion gaps? Let me know in the comments. By focusing on these technical nuances—from joist centers to thermal movement—you ensure your outdoor sanctuary is actually a place of rest, not a source of constant repairs.
Throw away the napkins and go digital
Before I ever drive the first screw, I’ve already built the entire project three times in my head and at least once on a screen. If you’re still sketching ideas on the back of a pizza box, you’re setting yourself up for expensive ‘field adjustments.’ I’ve learned the hard way that why I never start a complex deck project without a digital 3d walkthrough first is about more than just aesthetics; it’s about identifying where that TV glare will hit or where a stair landing might conflict with an irrigation line. Using a digital designer allows you to simulate the sun’s path on June 21st versus December 21st, which is the only way to truly win the battle against reflections on your screened-in porch. It’s also where you decide if you need to transform your outdoor living with custom composite decking ideas that include built-in features like perimeter lighting or hidden storage.
Swap out your old lag bolts for something better
If you look under most decks built ten years ago, you’ll see massive, rusting lag bolts. They were the standard, but they were also a pain to install and often split the wood. Nowadays, I’m a total convert to structural screws. The reason we use structural screws instead of old fashioned lag bolts is simple: they have a higher shear strength and don’t require pre-drilling, which keeps the wood fibers intact and stronger. When you’re hanging a heavy articulating mount for a 75-inch TV on a porch post, you want that connection to be surgical. According to the American Wood Council’s DCA 6 (Design for Code Acceptance), the lateral load connections are the most critical point of failure in any deck structure. Using specialized fasteners like the TimberLOK or Simpson SDWS ensures that your ‘sanctuary’ doesn’t become a structural liability during a high-wind storm. 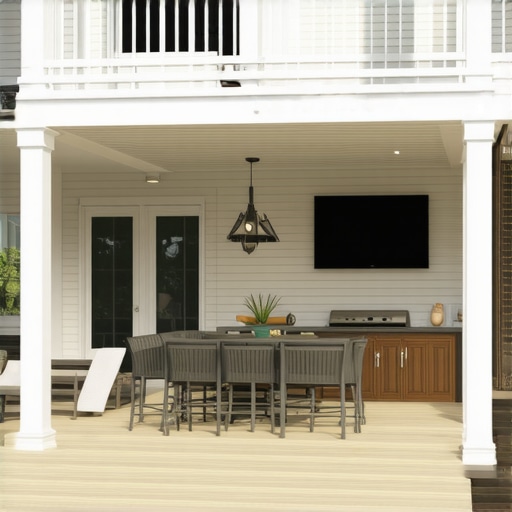
How do I keep my composite deck looking brand new for years?
Maintenance is the part of the dream no one likes to talk about, but it’s actually easier than you think if you have the right routine. The biggest threat to your composite floor isn’t the rain—it’s the Saturday night BBQ. I always keep a bottle of grease cutter nearby because knowing how to clean grease stains off composite without ruining the finish is the difference between a permanent dark spot and a pristine floor. For the skeleton underneath, I recommend a ‘cap-and-tape’ approach. I use butyl joist tape on every single piece of framing. Seeing how to keep your deck joists from rotting under the boards by simply sealing the top of the wood can double the lifespan of your structure. It prevents water from sitting in the screw holes, which is where rot usually starts its slow crawl.
The future of outdoor living is smarter and heavier
Looking ahead to 2025 and beyond, I see a massive shift toward fully integrated ‘outdoor rooms’ that mirror the complexity of indoor kitchens. We are seeing more homeowners requesting heavy stone countertops and built-in appliances on their decks. This is why your outdoor kitchen needs its own structural support separate from the main deck frame. We’re moving away from the idea of the deck as a ‘platform’ and toward the deck as a ‘foundation.’ If you’re planning a project this season, my best advice is to perform a ‘digital dry run’ of your layout. Check your sightlines, measure your sun angles, and for heaven’s sake, use joist tape. It’s the small, invisible technical moves that make the difference between a deck you use and a deck you merely look at from the kitchen window.
My Hardest Lessons in Merging Living Room Comfort with the Great Outdoors
Building a sanctuary is more than just a weekend project; it is a series of lightbulb moments that only come with a bit of sweat and a few ‘oops’ along the way. First, I learned that structural integrity is the silent hero of comfort. If your floor has the slightest wobble or vibration, no amount of high-end furniture can make the space feel truly premium. That is why the bolt pattern that finally stops railing post wobble for good is a detail I never skip anymore; it provides that ‘rock solid’ feeling of an indoor room. Second, I realized that electronics and moisture are only enemies if you let them be. By focusing on how to protect your deck frame from rot for thirty years, you are creating a stable, dry environment where your tech can actually thrive long-term. Finally, I have seen that even the most beautiful deck is useless if you cannot walk across it safely at night. I always prioritize the best way to light stairs for safety without creating a glare to ensure the transition from the porch to the yard is as seamless as the view itself.
The Short List of Tools That Actually Save Your Weekend
I do not believe in owning a thousand tools, but I do believe in having the right ones that prevent rework. Before you drive a single screw, I highly recommend a ‘digital dry run.’ Honestly, why a digital designer is the best move for planning a complex backyard deck comes down to confidence; you see the sun paths and structural obstacles before they cost you money. For the physical build, I trust structural screws over lag bolts for their precision and speed. And for those who feel overwhelmed by the technical nuances of load paths and framing, the benefits of working with a professional deck builder cannot be overstated—sometimes having an expert eye on your layout is the best tool in your belt to ensure your vision matches the reality.
Stop Planning and Start Watching the Sunset from Your New Favorite Spot
You now have the strategy, the technical insights, and the roadmap to beat the glare and build a foundation that lasts. The dream of a perfect outdoor living space is not out of reach; it just requires a bit of patience and a focus on the technical details that others often ignore. Whether you are mounting a 4K screen or laying the final piece of trim, remember that you are creating a backdrop for years of family memories and quiet afternoons. Your porch is waiting to become the most-used room in your house. Have you ever struggled with getting the right mounting angle for your outdoor TV, or did a specific building code catch you off guard during your project? Let me know in the comments below!