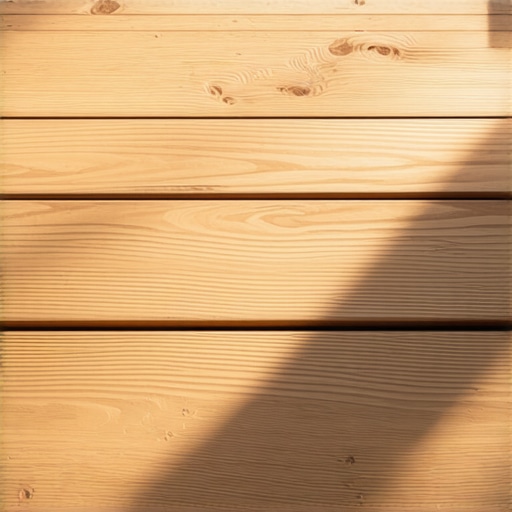
I still remember the sound. It was a crisp November morning, and I was sitting on my porch with a coffee when a loud *pop* echoed from the backyard. I’d spent three weeks of my summer meticulously laying down a gorgeous grey composite deck, pushing every board tight against the next for that ‘seamless’ look I’d seen in magazines. I thought I was being a perfectionist. Turns out, I was just building a ticking time bomb. By the time the temperature dropped forty degrees, those boards had nowhere to go, and they started fighting each other for space.
The Day My Perfectly Straight Deck Turned Into a Rollercoaster
Most people think of composite as ‘plastic wood,’ but it’s actually a high-tech cocktail of wood fibers and polymers. According to research from the Forest Products Laboratory, composite materials can experience significant linear thermal expansion—sometimes moving as much as 1/16th of an inch for every 10 feet with a 50-degree temperature swing. If you don’t account for that, your beautiful investment will warp, heave, and eventually ruin your joists. I learned the hard way that choosing the right composite decking for durable low-maintenance outdoor areas isn’t just about the color; it’s about knowing how the material behaves under the sun. Today, I’m going to walk you through why that gap is your deck’s best friend and how to get it right the first time so you aren’t out there with a pry bar in six months.
Is a tiny gap really going to ruin the aesthetic?
I get it. You want that indoor-hardwood look. You’re worried that gaps will swallow crumbs, wedding rings, or just look ‘unfinished.’ But trust me, a 3/16-inch gap is invisible from a distance, while a buckled board is visible from the neighbor’s house. I’ve seen homeowners try to skip the spacers, only to realize they’ve made the hidden clip mistake that leads to buckling deck boards. When I share deck builder insights with my neighbors, I always tell them: wood rots, but composite moves. Have you ever noticed your deck boards looking a bit ‘wavy’ after a heatwave? Let me know in the comments if you’ve faced this—I’d love to hear your story.
If you’re planning a full backyard overhaul, remember that these technical details apply to every part of your build, from the main floor to designing safe and stylish stairs for outdoor decks. Let’s look at why ‘breathing’ isn’t just for people; it’s the secret to a deck that lasts twenty years.
Let the Boards Breathe Before You Screw Them Down
Before you even think about grabbing your impact driver, you have to let the boards acclimate. Think of your composite boards like a marathon runner’s lungs—they need space to expand and contract as they work. I once rushed a job in late July, pulling boards straight from a hot, dark delivery truck and fastening them down within an hour. By the next morning’s cool dew, those boards had shrunk so much the gaps looked like canyons. Now, I insist on letting the material sit on-site for at least 48 hours. This ensures the boards are at ‘local’ temperature before they are locked into place. If you’re aiming for a high-end look, remember that transform your space expert deck builder tips for stunning outdoor living always start with patience during the staging phase.
The Thermometer Trick for Perfect Spacing
Air temperature is a liar. Just because it’s 70 degrees outside doesn’t mean your dark grey boards aren’t cooking at 110 degrees under direct sun. I’ve started carrying an infrared thermometer in my pocket. If the boards are hot, I gap them tighter because I know they are at their maximum expansion. If it’s a chilly morning, I leave a wider gap. For most brands, a 3/16-inch side-to-side gap is the sweet spot. I highly recommend using the screw depth trick for a perfectly smooth deck surface to ensure your fasteners don’t interfere with this natural movement. When I was building a wrap-around porch last fall, I used a scrap piece of plywood as a consistent spacer, and it saved me hours of measuring. It’s these small physical habits that prevent the hidden clip mistake that leads to buckling deck boards later on.
Don’t Ignore the Butt Joints
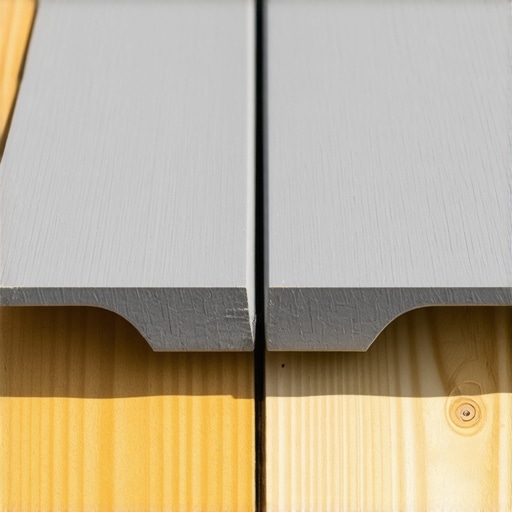
The most common failure point isn’t the long side of the board; it’s where two boards meet end-to-end, known as a butt joint. In my early days, I treated these like indoor hardwood, jamming them tight. Huge mistake. Composite expands mostly along its length. If you don’t leave an end-to-end gap, the boards will push against each other until they literally lift off the joists. Now, I always double-joist at the transitions. This gives each board end its own dedicated landing pad and enough room for a proper 1/8-inch gap. If you’re worried about the joists showing through those gaps, why i always paint the cut ends of pressure-treated lumber with a dark wood sealer is a tip that makes those gaps disappear to the eye. This is especially crucial when how to frame a picture frame border for composite decking, as those mitered corners are the first to open up if the substructure moves.
Why Hidden Fasteners Aren’t Just for Looks
Many DIYers choose hidden clips because they want a clean surface, but I use them because they act as a built-in expansion joint. Most clip systems are designed to allow the board to slide a fraction of a millimeter as it heats up. When you face-screw, you’re pinning the board in a ‘death grip.’ If that board wants to move and the screw won’t let it, the board will crack or the screw head will pop off. This is why i never nail deck boards the screw advantage explained; screws have the tensile strength to handle some shear, but clips are even better. I’ve seen innovative outdoor living ideas with composite decking in 2025 that rely entirely on these clip systems to maintain perfectly straight lines even in extreme desert climates. If you are working on a high-traffic area, why i always use hidden fasteners for high-traffic entryways is a rule I live by to prevent tripping hazards from shifting boards.
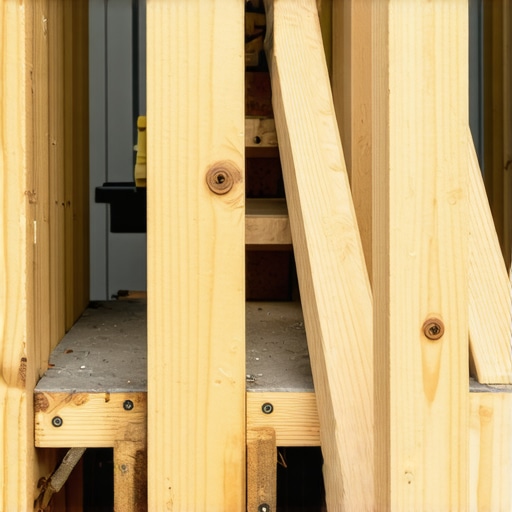
Now, let’s talk about the part of the deck that fails more than any other: the stairs. Most homeowners and even some ‘pros’ assume that if a frame is strong enough for wood, it’s strong enough for composite. That’s a dangerous myth. Composite boards are significantly heavier and less rigid than traditional cedar or pine. According to the American Wood Council’s DCA 6 guide, the maximum span for stair stringers and the spacing between them must be strictly calculated to prevent ‘deflection’—that annoying bounce you feel when walking up. While 16-inch spacing works for a standard floor, composite stairs often require stringers to be set 12 or even 9 inches apart. If you ignore this, you’re not just building a bouncy staircase; you’re inviting the fasteners to shear off under the constant stress of movement.
Why do those expensive stair treads still feel flimsy?
The answer usually lies in the substructure. I see people spend thousands on high-end boards only to mount them on the hidden flaw in pre-built deck stairs from big box stores. Those mass-produced stringers are often made from lower-grade lumber and aren’t designed for the density of modern polymers. When I’m designing safe and stylish stairs for outdoor decks in 2025, I never use pre-cut stringers. I cut my own from 2×12 pressure-treated lumber and I always add ‘sister’ stringers for extra meat. This ensures the boards have a massive surface area to grip. If you’ve ever noticed your stairs feeling more like a ladder than a grand entrance, it’s probably because of why your deck stairs feel like a ladder and how to fix the rise. Proper geometry is just as important as the material itself.
Why Joist Spacing is the Secret to a Rock Solid Foundation
Another major ‘oops’ I see involves the connection at the bottom. Most people just rest their stairs on the grass or a few loose pavers. This is a recipe for disaster. Over time, the soil shifts, and suddenly you have the hidden reason your deck stairs are pulling away from the frame. I’ve seen 500-pound staircases hanging by a few nails because the ground settled. This is why your deck stairs need a concrete landing pad at the bottom. A solid footer prevents sinking and gives you a stable point to anchor the base. It might seem like overkill, but creating seamless transitions stairs as key elements in outdoor living requires a foundation that won’t move an inch. Have you ever fallen into this trap? Let me know in the comments.
Structural Screws Over Standard Bolts
Let’s get even more technical. When attaching that critical stair stringer to the deck frame, many people still reach for old-school lag bolts. In my experience, lag bolts are prone to splitting the wood or loosening over time as the lumber dries out. That’s why i use structural screws instead of lag bolts for stairs. They have a higher shear strength and a smaller diameter, which prevents the wood from cracking while providing a grip that won’t quit. This is the same logic I apply when utilizing transform your space expert deck builder tips for stunning outdoor living—it’s about the hardware you can’t see. If you want a deck that feels like a permanent part of your home’s architecture, you have to sweat these invisible details. Let’s dig deeper into how these choices affect your long-term maintenance and the resale value of your home.
Stop Power Washing Your Investment into Oblivion
I’ve seen too many homeowners treat their high-end composite deck like a concrete driveway. They rent a 4,000 PSI pressure washer and go to town, only to wonder why the finish looks ‘fuzzy’ or faded a week later. You are essentially exfoliating the protective polymer layer right off the wood fibers. I never use anything more than a garden hose and a soft-bristle brush. For the stubborn stuff, I swear by 30 Seconds Outdoor Cleaner—it’s oxygen-based and won’t kill your lawn. I actually wrote a deep dive on how to get grease stains off your composite deck because I’ve spent too many Saturdays scrubbing burger grease after a BBQ. If you treat the surface with respect, you won’t be looking for replacement boards in five years.
The One Tool That Saves My Back Every Single Time
If you’re tackling this build solo, do yourself a favor and buy a BoWrench or a similar board-straightening tool. Composite boards are heavy, floppy, and rarely perfectly straight out of the bundle. Trying to manhandle a 20-foot board into alignment while simultaneously driving a screw is a recipe for a trip to the chiropractor. I use the BoWrench to lock the board against the spacers, ensuring that maximizing space modern designs for composite decks actually results in perfectly parallel lines. And speaking of fasteners, always keep the best tool for removing a single stripped deck screw in your pocket. Nothing halts a project’s momentum like a screw head that shears off half-way into a joist.
#IMAGE_PLACE_HOLDER_D#
How do I keep my composite deck looking new for twenty years?
The secret isn’t a magic chemical; it’s airflow and moisture management. According to the Trex Technical Support Team’s official care guidelines, debris like leaves and pine needles must be cleared from the gaps to allow the substructure to dry. If you let wet mulch sit in those 3/16-inch gaps, you’re creating a rot-chamber for your joists. This is why I always warn clients about the hidden cost of skipping joist tape on a new build. A little bit of butyl tape over the top of the wood keeps the moisture out of the screw holes. When you combine that with choosing the right composite decking for durable low-maintenance outdoor areas, you’re not just building a deck; you’re building a legacy.
The 2025 Shift Toward Heat Management
Looking ahead, the biggest trend I’m seeing in composite decking trends 2025 is heat-reflective technology. We’ve all felt that ‘lava’ sensation on dark boards in July. I’m starting to steer more clients toward mineral-core products. In fact, why i choose mineral-core decking for every poolside build is because it stays significantly cooler and has zero wood fiber to rot. If you’re stuck with a dark color, knowing how to keep your deck cool enough for bare feet in july can be as simple as strategically placing an outdoor rug—just make sure it doesn’t have a rubber backing that traps heat. I challenge you to try this one pro tip: next time you’re driving a hidden fastener, back off your impact driver’s torque by 10%. It prevents the ‘mushrooming’ effect that ruins a smooth surface. Let’s look at the final touches that turn a simple platform into a true extension of your home.
Lessons That Only Come from Making Mistakes
After years of swinging a hammer, I’ve realized that the most expensive errors aren’t made with your hands, but with your assumptions. Here are the lightbulb moments that completely changed how I approach every outdoor project:
- Thermal expansion is physics, not a suggestion. I once tried to ‘fight’ the material by over-fastening boards to a rim joist. The material won, the screws sheared off, and I had to start over. Always respect the gap.
- Composite is a heavy-duty skin on a vulnerable skeleton. Many homeowners forget that the polymer lasts forever, but the wood frame underneath doesn’t. This is why I emphasize the benefits of working with a professional deck builder who understands structural longevity.
- Don’t trap water against the house. A major ‘oops’ I see is boards installed too tight to the siding. I learned that the drainage gap error that traps rot against your house siding can destroy a rim joist in under five years.
- Safety needs to be invisible. When you are finished with the main floor, think about how people will move at night. I always recommend the motion sensor lighting hack for safer backyard transitions to keep those new stairs functional and safe.
#IMAGE_PLACEHOLDER_E#
The Essential Tools for a Professional Finish
You don’t need a truck full of gadgets, but these three items have earned a permanent spot in my tool belt because they prevent the most common DIY headaches:
1. Starborn Smart-Bit: This isn’t just a drill bit; it’s a depth-setter. It ensures every screw head is at the exact same depth, which is the key to the screw depth trick for a perfectly smooth deck surface. No more ‘mushrooms’ popping up across your floor.
2. Butyl Joist Tape: This is the cheapest insurance policy you can buy. Covering the top of your pressure-treated joists prevents moisture from seeping into screw holes. Failing to do this is one of the many reasons for the hidden cost of skipping joist tape on a new build.
3. A Long-Reach Laser Level: Don’t rely on a 4-foot spirit level for a 20-foot deck. A laser ensures that maximizing space modern designs for composite decks doesn’t result in a wavy floor that you’ll notice every time the sun hits it at an angle.
Your Backyard Legacy Starts with One Board
At the end of the day, we aren’t just installing plastic and wood; we are building the stage where your family’s summer memories will happen. Taking that extra hour to check your stair geometry or ensuring your spacing is consistent is what separates a generic platform from a masterpiece. The world of outdoor living is constantly evolving with new materials, but the fundamentals of good craftsmanship remain the same. Go build something that you’ll be proud of twenty years from now. Have you ever finished a project only to realize you forgot a critical gap? Tell me about your ‘learning moments’ in the comments below!