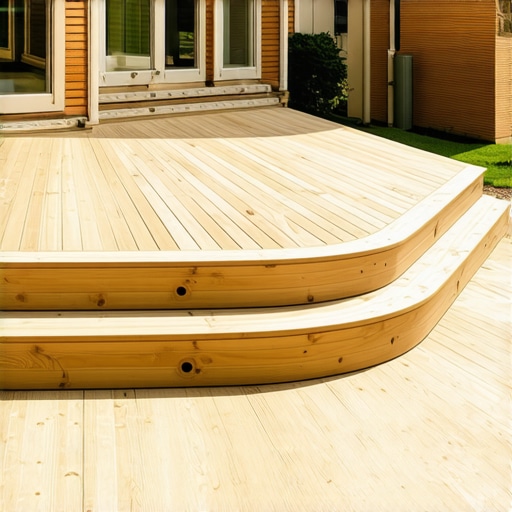
I remember standing on my back porch five years ago, looking out at a steep, grassy slope and thinking a single, massive platform was the answer. I was wrong. By the time I finished that project, the stairs felt like a grueling mountain hike every time I wanted to grab a burger from the grill. It was a classic rookie mistake—I focused on the total square footage and completely ignored the ergonomics of how we actually move. Building a multi-level step-down landing isn’t just about making things look fancy; it is about creating a flow that feels effortless. Today, I’m going to share the exact layout strategy that turned my staircase of doom into a series of inviting transitions that people actually want to linger on.
Stop Fighting the Slope and Start Using Your Levels
Most folks think a deck has to be one big, flat stage, but that’s rarely how we live. When you incorporate a step-down landing, you’re creating seamless transitions that define different rooms in your yard without the need for walls. In my early days, I tried to skip the mid-level landing to save a few bucks on joists. That was a disaster. I quickly learned why your deck stairs should always have a mid-landing: it breaks up the visual ladder effect and provides a safe spot to pause. If your current steps feel more like a workout than a walkway, you might need to realize why your deck stairs feel like a ladder and how to fix the rise before someone takes a spill.
Is all that extra framing actually worth your time?
It is a fair question. Adding a landing means more footings, more posts, and more complex rim joists. However, the International Code Council points out that stair safety isn’t just about the height of the riser, but the consistency of the gait across the entire flight. Beyond the code, the aesthetic payoff is huge. When you are designing safe and stylish stairs for outdoor decks in 2025, a landing acts as a visual anchor that ties the house to the garden. Have you ever felt like your deck stairs were just a bit too steep or awkward for a casual conversation? Let me know in the comments, because I’ve definitely been there. We’re going to fix that today by looking at the specific framing tricks that make these levels rock-solid and beautiful.
Map Out the Walkway Before You Cut a Single Stringer
The biggest hurdle when figuring out how to build a deck over a sloping backyard without massive walls is the math of the “in-between.” You want the landing to feel like a destination, not just a pit stop. I typically aim for a landing that is at least 4 feet by 4 feet. This gives enough room for two people to pass each other without the awkward “sideways shuffle.” When I was working on a project last summer, I tried to squeeze a landing into a tight 3-foot space. It felt cramped immediately, like a hallway in a submarine. I ended up tearing it out and restarting because the ergonomics were completely broken. You need to calculate your total rise and divide it so the landing sits at a natural break in the terrain, usually no more than 7 to 9 steps between platforms.
Treat Your Landing Like its Own Foundation
A step-down landing isn’t just a floating box; it’s a structural anchor. If you just toe-nail it to the stringers, you’re inviting the hidden reason your deck stairs are pulling away from the frame to manifest within two seasons. Instead, I set dedicated 4×4 or 6×6 posts for the landing itself. Think of it as building a tiny, independent deck. This is also where hardware choice becomes critical. This is exactly why i use structural screws instead of lag bolts for stairs—they pull the wood together with incredible force and won’t snap under the shear stress of a shifting slope. Double the rim joists on the landing if you plan on adding a decorative border, as it gives the fasteners the extra surface area they need to bite into. 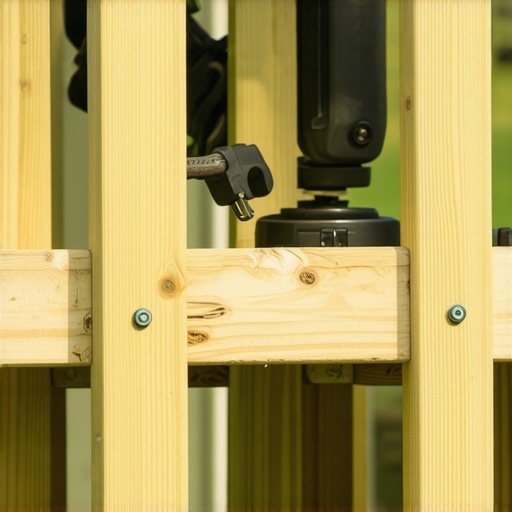
Avoid the Temptation to Shim Your Way to Level
When the ground is uneven, it is incredibly tempting to use scraps of wood or plastic to level things out. Trust me, why i never use plastic shims for stair stringers is a lesson I learned after a landing started clicking and groaning every time someone stepped on it. If your frame is off by even half an inch, take the time to learn the best way to level an uneven deck frame before decking. A level frame is the only way to ensure your composite boards lay flat without those ugly, uneven gaps that catch the light and the eye.
Dress the Transition with a Professional Edge
Once the skeleton is rock-solid, it’s time for the skin. If you’re using composite, don’t just run the boards straight to the edge. It looks unfinished and cheap. I always recommend learning how to frame a picture frame border for composite decking on your landings. It hides the raw, “honeycomb” edges of the boards and makes the transition look intentional rather than accidental. It’s like adding a frame to a piece of art—it defines the space and creates a clear visual signal that the level is changing. On that same project where I initially messed up the landing size, adding the picture frame border at the end was what finally made the stairs feel premium and safe. It creates a bold outline that helps people see the edge in low light, which is just as much about safety as it is about style.
Most Builders Ignore the Thermal Expansion Factor
Everyone tells you that composite is a ‘set it and forget it’ material, but in my experience, that mindset leads to the most common failure in modern deck building. Most people assume the gaps between boards are just for water drainage. In reality, composite moves significantly more than wood throughout the seasons. If you jam your boards tight against a post or a rim joist, the summer heat will force those boards to bow upward like a cheap laminate floor. I’ve spent countless hours fixing the hidden clip mistake that leads to buckling deck boards because a DIYer didn’t account for linear expansion. If you want a deck that stays flat, you have to respect the gap requirements specified by the manufacturer.
Why 12-Inch Spacing is the Only Real Way to Stop Stair Bounce
When you are choosing the right composite decking for durable low-maintenance outdoor areas, you’ll notice the installation guides often say 16 inches on center is acceptable for joists. Here is the nuance: while that might pass a basic inspection for the main deck, it is a recipe for disaster on stairs. Composite is naturally more flexible than southern yellow pine. If you space your stringers at 16 inches, those steps will feel spongy and ‘springy’ underfoot. According to the North American Deck and Railing Association (NADRA), structural integrity isn’t just about weight capacity, but about limiting deflection. For a premium feel, I never space stair stringers more than 12 inches apart. It uses 25% more lumber, but it eliminates that unsettling bounce that makes a staircase feel cheap.
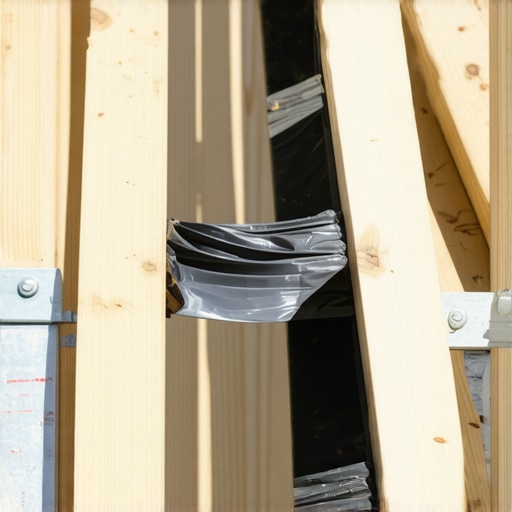
The Invisible Rot Trap Under Your New Boards
The ‘oops’ factor I see most often involves what happens where the screw meets the wood. Because composite lasts 25 years, the framing underneath becomes the weak link. Every time you drive a fastener through the composite into the joist, you’re creating a tiny funnel for rainwater to sit. This is the hidden cost of skipping joist tape on a new build—within a decade, your beautiful expensive boards are held up by rotting, mushy lumber. I’ve seen $30,000 decks need full structural replacement because the builder saved $100 by skipping the flashing tape. Have you ever fallen into this trap or seen a deck that looked great on top but was failing underneath? Let me know in the comments.
When I’m working on high-end projects, I also recommend why i choose mineral core decking for every poolside build or high-traffic area. These materials don’t expand or contract nearly as much as traditional PVC-capped composites, which solves the expansion problem I mentioned earlier. If you’re hiring a professional deck builder, ask them about their joist protection strategy. If they don’t have a plan for moisture management between the board and the frame, they aren’t building for longevity.
Don’t Let the Sun Ruin Your Outdoor Living
Another myth is that all composite colors are created equal for the outdoors. I’ve had clients insist on deep espresso tones only to find they can’t walk on them in July without shoes. It’s vital to understand the truth about composite decking fading in the high desert or sunny regions before you commit. A skilled builder will guide you toward lighter variegated tones that mask both heat and debris, ensuring your innovative outdoor living ideas remain practical for daily use.
Building the deck is only the first half of the battle; the second half is making sure it doesn’t look like a weather-beaten pier in five years. Even when you are choosing the right composite decking for durable low-maintenance outdoor areas, you have to accept that ‘low maintenance’ is a marketing term, not a scientific one. Dust, pollen, and the occasional burger grease spill will still find a home on your boards. I’ve found that the absolute best way to handle this is a biannual scrub with a soft-bristle brush and a pH-neutral cleaner. If you miss a spot during a BBQ, don’t panic, but you should definitely know how to get grease stains off your composite deck before they bake in under the August sun.
The Tools That Separate Amateurs from Craftsmen
When I first started, I used a standard miter saw for everything. It worked, but I could never get those perfectly crisp, long miters on a picture frame border. Now, I never step onto a job site without a track saw. It allows you to trim the ends of your deck boards in one continuous, laser-straight line after they are already fastened down. This technique ensures that your picture frame border for composite decking fits like a piece of fine furniture. Another lifesaver is a dedicated depth-drive tool. If you aren’t using one, you’re likely over-driving screws and mushrooming the composite material. I swear by the screw depth trick for a perfect smooth deck surface because it creates a flush finish that is impossible to achieve by ‘feeling’ the trigger of a standard impact driver.
How do I keep my stair frame from rotting out from under me?
This is the question that keeps most builders up at night. The American Wood Protection Association (AWPA) standard U1 specifies that any wood cut in the field must be treated to maintain its resistance to decay. I take this a step further: every single stringer cut and joist top gets a layer of butyl flashing tape. This prevents the ‘invisible rot trap’ where water sits between the board and the frame. Even if you are designing safe and stylish stairs for outdoor decks in 2025, the prettiest design will fail if the skeleton turns to mush. Eventually, you might run into a stripped fastener while doing a structural check; having the best tool for removing a single stripped deck screw in your bag will turn a two-hour headache into a two-minute fix.
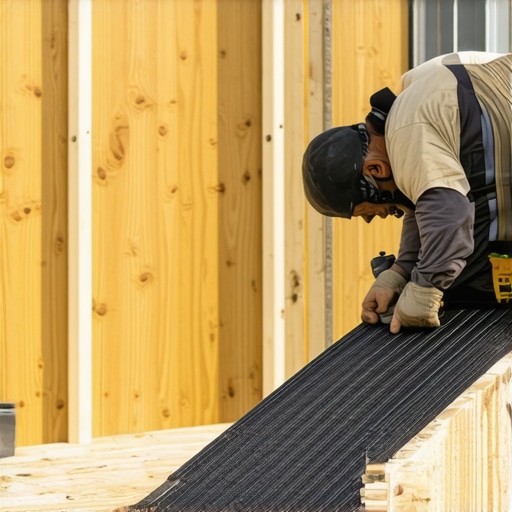
Smart Tech is the Future of Outdoor Living
Looking ahead, I see a massive shift toward integrated deck technology. We are moving beyond simple post-cap lights. I’m already starting to experiment with embedded sensors that can detect moisture levels in the substructure and smart lighting systems that sync with your home security. When you are planning a lighting layout that makes a small deck look twice as big, consider using low-voltage LED systems that can be controlled via an app. This isn’t just about showing off; it’s about longevity. Proper lighting prevents trips and falls, especially on those step-down landings we discussed. My advice for your next project? Don’t just build for today. Buy a roll of joist tape and apply it to every horizontal surface of your frame before you lay the first board. It is the cheapest insurance policy you will ever buy for your home.
Three Landing Mistakes That Taught Me More Than Any Manual
Building a multi-level transition is a psychological game as much as a structural one. I used to think of a landing as just a ‘pause’ in a flight, but I’ve learned that a landing is actually its own destination. If you make it too small, people rush through it; if you make it feel like a platform, they linger. Another huge realization was that the ‘perceived’ safety of a staircase is just as important as the actual load-bearing capacity. If a stair tread flexes even slightly, the brain interprets that as danger, even if the wood is perfectly strong. This is why I obsess over joist spacing and why i use structural screws instead of lag bolts for ledgers and landings—it creates a rigidity that you can feel in your bones.
The Gear That Saved My Sanity on the Job Site
If you want your stairs to look like they were built by a master craftsman rather than a weekend warrior, you need to step up your toolkit. I never start a landing without my track saw; it is the only way to get those decorative picture frame border cuts perfectly flush. I also highly recommend checking out the technical bulletins from NADRA for the latest safety standards. When it comes to the actual boards, I lean on my years of experience to realize that why my favorite deck boards aren’t always the most expensive—sometimes the mid-range variegated options provide better slip resistance and hide dust much better than the high-gloss luxury lines.
Your Journey to a Safer, More Stylish Backyard Starts Here
You now have the blueprint to stop fighting your slope and start embracing the natural levels of your yard. Building a multi-level landing isn’t about complexity; it’s about respect for the user’s experience and the longevity of the materials. By integrating these strategies, you are doing more than just adding value to your home; you are creating a space where transitions feel effortless and every step feels secure. Whether you are using traditional wood or high-end composite decking, the principles of solid framing and moisture management remain your best friends. It’s time to take these top stairs designs for modern outdoor spaces and turn them into your reality. Have you ever felt a ‘bounce’ in your deck stairs that made you nervous, or are you planning your first landing project? Let me know in the comments below!