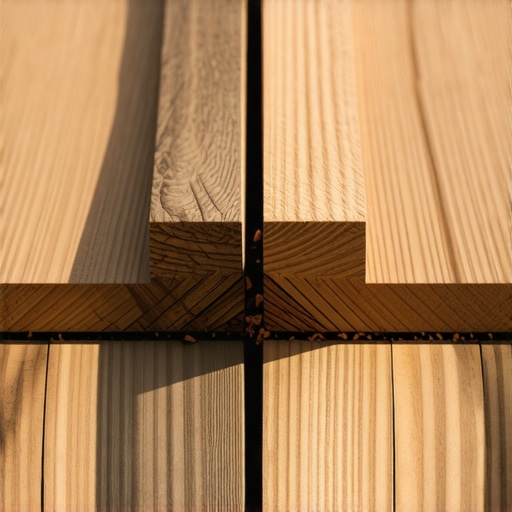
I stood there with a cold drink in my hand, staring at the mitered corners of my brand-new composite deck. It was supposed to be my masterpiece. I had used the best boards, followed the manufacturer’s spacing guide to the letter, and spent hours ensuring every screw was perfectly sunk. But six months later, those beautiful picture-frame borders looked like a roller coaster. The corners had pulled apart, and the boards were sagging between the blocks I’d installed. It was embarrassing. As a deck builder, that was the moment I realized that “good enough” framing is the enemy of a long-lasting outdoor space.
The Day My Beautiful Picture Frame Turned Into a Wavy Mess
I learned the hard way that composite decking is a different beast than pressure-treated wood. It moves. It expands. It contracts. If you’ve ever looked at composite decking trends for 2025, you’ll notice that sleek, border-heavy designs are everywhere. But nobody tells you that the framing underneath those borders needs to be twice as beefy as the rest of the deck. In those early days, I thought I could get away with just adding some blocking between the joists to support the border boards. I was wrong. The blocking eventually twisted, or the nails loosened, and suddenly my perimeter wasn’t level anymore. Now, I never start a perimeter without doubling up. If you want to know how to frame a picture frame border for composite decking correctly, you have to start with the “why.” You’re not just building a deck; you’re building a foundation for a high-performance material that weighs a lot more than cedar. Have you ever noticed your deck boards starting to “dive” at the edges after a heavy rain or a hot summer?
Is Adding Extra Lumber Actually Worth the Hype?
You might be thinking that lumber isn’t cheap and adding a whole extra row of rim joists feels like overkill. I get it. I used to be the guy trying to save forty bucks on a project too. But according to the North American Deck and Railing Association, structural failures often begin at the connections and perimeters where moisture collects and loads are concentrated. By doubling the rim, you aren’t just adding wood; you’re creating a massive “landing pad” for your fasteners. When you use a single joist, you’re trying to crowd the ends of your main deck boards and the side of your picture frame board onto a mere 1.5 inches of wood. It’s a recipe for split ends and missed screws. My biggest mistake was thinking that the hidden clip mistake only happened to other people. It doesn’t. If the wood underneath moves, the clips move with it. Doubling that rim joist gives you a solid three inches of meat to screw into. It allows you to stagger your fasteners and gives the mitered corners the rigidity they need to stay tight through four seasons of weather. It’s the difference between a deck that looks great for a year and one that looks great for a decade.Building a picture frame border isn’t just about the top boards; it’s about the structural skeleton underneath. I treat the perimeter of every deck like a landing pad for a heavy-duty cargo plane. If you don’t have enough surface area for both the border board and the field boards to rest on, your fasteners are going to be hanging on by a prayer.
Build a Landing Pad That Never Sags
To do this right, you need to install a second rim joist right next to your outer one. This gives you a full 3 inches of wood to screw into. When I first started, I used to think I could just ‘sister’ short blocks where the boards met, but that was a nightmare to keep level. Now, I run the full length. This extra volume allows you to follow the joist spacing secret for a solid-feeling composite surface, ensuring that every board end is fully supported. I remember a project in Branson where I tried to save time by only doubling the corners. By the following July, the mid-span of the border board had dipped just enough to catch the homeowner’s toe every time they walked out. I had to rip up three rows of decking just to add the lumber I should have installed on day one. Never again.
Stop the Bounce with Strategic Ladder Blocking
Once your double rim is in, you need to address the area where the field boards meet the border. This is where ladder blocking comes in. Think of it like rungs on a ladder spaced every 12 to 16 inches between the last two joists. This prevents the border from twisting outward under the weight of furniture or people standing at the rail. While you’re at it, don’t ignore the hidden cost of skipping joist tape on a new build. Because you’re doubling up your lumber, you’re creating a wider top surface where water can sit between the boards. A high-quality butyl tape seals those screw holes and keeps the rot at bay for decades.
Tight Miters Start with a Rigid Corner
The biggest aesthetic failure on any composite deck is a mitered corner that opens up like a hungry alligator. This happens because the framing underneath moves. To fix this, I install a diagonal block right under the miter joint. This gives you a solid place to drive screws into both sides of the angle. Before I lay the boards, I also make sure to use the best way to level an uneven deck frame before decking because even a 1/8th inch height difference will make your miter look crooked. I always tell my crew that we aren’t just framing; we’re doing rough-in cabinetry. If the wood isn’t dead-on, the expensive plastic on top will show every flaw. While you’re tightening up that perimeter, don’t forget to install the bracket that keeps your railing from wobbling forever. It’s much easier to bolt those structural post bases to a double rim joist than a single one.
Protect Your Investment by Painting Cut Ends
Composite boards expand and contract, but the pressure-treated framing underneath does too, just at different rates. To slow down the moisture absorption in your framing, why I always paint the cut ends of pressure-treated lumber becomes a critical habit. It’s a five-second step that prevents the wood from checking and splitting around your border fasteners. I once skipped this on a small stair landing, and within two years, the wood had split so badly the screws literally fell out. It’s the small details that keep the meat of your deck from falling apart and ensures the the hidden reason your deck stairs are pulling away from the frame doesn’t apply to your new build.People often ask me if they should just buy the most expensive board on the rack. My answer usually surprises them because why my favorite deck boards aren’t always the most expensive comes down to how they handle heat and traction, not just the brand name. While choosing the right composite decking for durable low-maintenance outdoor areas is vital, expensive boards won’t fix a cheap frame. One major contrarian view I hold: stop obsessing over 12-inch joist spacing if you aren’t also addressing lateral load. You can have the stiffest boards in the world, but if the deck sways, the fasteners will eventually shear.
Can You Truly Prevent Composite Boards from Creeping?
The ‘creeping’ effect—where boards slowly shift toward one end over several seasons—is the bane of many high-end builds. This happens because the thermal expansion isn’t controlled. Most builders just slap on clips and walk away. To avoid the hidden clip mistake that leads to buckling deck boards, you need a ‘dead-fastening’ point. I drive two screws through the center of every board into a joist, then use hidden fasteners everywhere else. This forces the board to expand outward from the center equally, rather than pushing all the tension to one end. Then there’s the ‘oops’ factor with stairs. I see so many DIYers fall for the hidden flaw in pre-built deck stairs from big-box stores—the rise and run are almost never consistent with your specific deck height. The International Residential Code (IRC) Section R311.7.5.1 states that the greatest riser height within any flight of stairs shall not exceed the smallest by more than 3/8 inch. If you miss this, you’re creating a trip hazard that your brain won’t anticipate. This is usually why your deck stairs feel like a ladder and how to fix the rise becomes the most searched fix on my site. When I’m designing safe and stylish stairs for outdoor decks in 2025, I also make sure to use why I use structural screws instead of lag bolts for stairs because the sheer strength is simply superior for Ozark weather. Have you ever fallen into this trap of thinking the material matters more than the math? Let me know in the comments.I used to think a hammer and a level were the only essential tools until I started working with high-end composite materials. Now, my trailer isn’t complete without the Camo Lever. It’s an absolute game-changer for solo builders because if you’ve ever fought a bowed composite board, you know it feels like wrestling a greased pig. The Lever locks onto the joist and forces the board into place so you can use why I always use hidden fasteners for high-traffic entryways without losing your mind or your alignment. For those moments where you need to face-screw, I swear by the Starborn Smart-Bit. It prevents those ugly ‘mushrooms’ around the screw head, giving you the screw depth trick for a perfectly smooth deck surface that separates professional builds from weekend DIY projects. If you happen to strip a head during installation, keep the best tool for removing a single stripped deck screw nearby; a 1/4-inch left-handed drill bit has saved me hours of frustration on more than one occasion.
How do I keep my composite deck looking brand new for years?
Most people think composite means zero maintenance, but that is a dangerous myth. You need to keep organic debris out of the gaps to prevent moisture traps and mold. But whatever you do, remember why you should never use a pressure washer on composite decks. High pressure can etch the surface and ruin the synthetic wood grain forever. Instead, use a soft bristle brush and a dedicated composite cleaner once or twice a year. If you have a summer BBQ mishap, knowing how to get grease stains off your composite deck quickly with Dawn dish soap and warm water is a total lifesaver. This simple routine ensures your transform your outdoor living with custom composite decking ideas stay looking as sharp as the day they were installed. According to the American Wood Council’s DCA 6 Prescriptive Residential Wood Deck Construction Guide, the longevity of any deck is tied directly to the management of water and the integrity of the hardware.
Why Mineral Core is the Future of Outdoor Spaces
Looking ahead, the industry is moving away from traditional wood-plastic blends. I am increasingly seeing innovative outdoor living ideas with composite decking in 2025 focusing on mineral-core technology. That’s why I choose mineral core decking for every poolside build lately. It doesn’t expand or contract nearly as much as PVC, which means those tight mitered corners will actually stay tight through the winter. This is how you transform your space with expert deck builder tips for stunning outdoor living that actually lasts. If you want to make your deck truly bulletproof, grab a roll of butyl joist tape before your next build—it is the single cheapest way to double the life of your wooden frame. Give it a try on your next project and see the difference in wood preservation for yourself.
Hard-Won Secrets from the Job Site
After years of fixing decks that looked great for only three months, I’ve realized that patience at the framing stage is the only thing that saves you from a costly callback. One of the biggest shifts in my thinking was treating composite like it is alive. Unlike wood, which mostly reacts to moisture, composite is a thermal engine—it moves significantly with the sun. If you don’t give it a solid dead-fastening point in the middle of every board, your beautiful lines will eventually walk right off the edge of the frame. I also learned that deck builder insights designing your dream outdoor space often come down to the things you cannot see, like the specific density of your blocking. If your blocks are too wet when you install them, they will shrink and pull your picture frame out of alignment. Always source the straightest, driest lumber for your perimeter work. #IMAGE_PLACEHOLDER_E#
The Gear That Keeps My Decks Standing
Building a high-performance deck requires more than just a standard drill; it requires precision instruments. If you are tackling this solo, a Camo Lever is your best friend because it acts as a second set of hands to hold stubborn boards tight. For anyone wondering about the benefits of working with a professional deck builder in your outdoor projects, it is often these specialized tools and the knowledge of how to use them that make the difference. I also never step on a job site without a box of structural screws—forget the lag bolts—and a high-quality butyl tape to seal every joist. These are the insurance policies for your investment. If you want to get creative, look into transform your outdoor living with custom composite decking ideas that utilize hidden fasteners to keep the surface barefoot-friendly and sleek.
Build Something That Outlasts the Season
There is a unique satisfaction in stepping back from a finished project knowing that the miters are tight, the stairs are safe, and the frame is rock solid. By focusing on creating seamless transitions stairs as key elements in outdoor living, you turn a simple platform into a true extension of your home. Don’t rush the skeleton of your deck. The extra afternoon you spend doubling joists and taping the wood will pay dividends in twenty years when the structure is still as level as the day you built it. You have the knowledge now to avoid the wavy mess I dealt with early in my career. Go out there and build a space that your family will enjoy for decades. Have you ever had a mitered corner open up on you after a cold winter? Let me know in the comments how you handled the fix!