
I still remember the sinking feeling in my gut when I walked back onto that cedar deck I’d finished just three summers prior. At the time, I thought I was a master deck builder, but the sight of dozens of silver nail heads poking up like tiny, jagged mushrooms told a different story. My client’s young daughter had stubbed her toe, and frankly, I felt like a failure. That was the moment I realized that while nails are fast, they are fundamentally at odds with how nature works. If you are planning your dream outdoor living area, you need to know that those shiny galvanized nails are a ticking time bomb for your feet and your investment. Today, I’m diving into the screw advantage and why I haven’t touched a hammer for deck boards in over a decade. Have you ever spent a Saturday afternoon hammering down ‘popped’ nails only to have them rise again a month later? It’s a cycle of frustration we’re going to break right now.
The day my ‘perfect’ deck started fighting back
When I first started out, I made the classic rookie mistake of prioritizing speed over physics. I used standard 16d galvanized nails because that’s what everyone did. But wood is alive; it breathes, it swells in the humidity, and it shrinks when the sun beats down. This constant movement acts like a slow-motion pry bar. According to the American Wood Council, the expansion and contraction of lumber can exert incredible pressure on fasteners, leading to mechanical withdrawal. When you use durable composite decking or even pressure-treated pine, you need a fastener that actually bites into the joist.
Is switching to screws actually worth the extra cost?
Many homeowners worry that the price of high-quality structural screws or hidden clips will blow their budget. I get it. But when you factor in the cost of replacing boards that have warped or the sheer labor of constant maintenance, screws pay for themselves before the first season is over. Plus, if you want that high-end look, mastering the screw depth trick is the secret to a surface that feels like an indoor hardwood floor.
Why wood and nails are a recipe for disaster
The truth is that nails rely entirely on friction. Once that friction is broken by the wood’s movement, there is nothing holding the board down. On the other hand, the threads on a screw create a mechanical bond that resists those prying forces. This is even more critical when you are building stairs or complex transitions where safety is paramount. If you’re working with a professional deck builder, they’ll tell you the same: the integrity of your frame depends on how well those boards stay put. Let’s look at what actually happens under the surface when things start to move.
Stop the slow-motion pry bar effect
The mechanical bond of a screw thread is like a series of tiny anchors locking into the wood fibers. When you use a nail, you’re basically just jamming a smooth metal peg into a hole; eventually, the wood dries out, the hole gets bigger, and the nail slides right out. I learned this the hard way on a lakeside build where I tried to save time on the stairs. Within two seasons, the treads were rattling like a loose tooth. Now, I always insist on structural screws. In fact, why I use structural screws instead of lag bolts for stairs comes down to the sheer pull-out resistance they provide. When someone steps on a stair tread, they aren’t just applying downward pressure; they’re applying a lateral force that tries to shear the fastener. Nails just can’t handle that math over the long haul.
The trick to avoiding mushrooming and splinters
If you’re working with durable composite decking, you can’t just drive a screw in and call it a day. Composite material is denser than wood, and a standard screw head will often displace the plastic upward, creating an ugly “mushroom” around the hole. This is where the screw depth trick becomes your best friend. I remember a project where I forgot to adjust the clutch on my drill and ended up with dozens of these little plastic volcanoes. I had to spend hours with a mallet and a wood block trying to flatten them back down. Use a dedicated smart-bit or a depth-setting driver to ensure every head sits exactly 1/16th of an inch below the surface.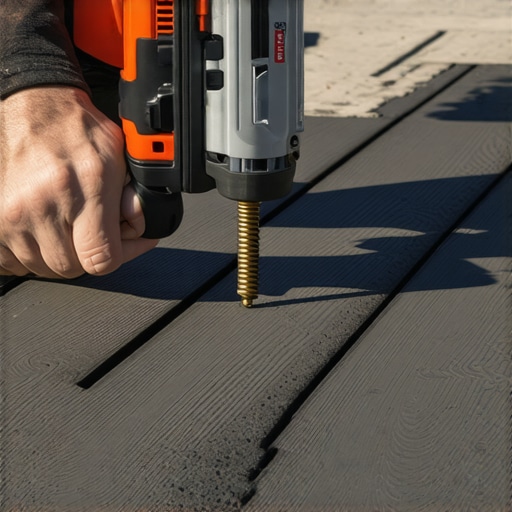
The right way to secure high-traffic transitions
Your outdoor living space is only as good as its weakest connection point. This is especially true where the deck meets the house or where the main platform transitions into a staircase. If you are a deck builder aiming for longevity, you have to account for the way composite decking expands along its length. If you pin it too tightly with nails, the boards will buckle. I’ve seen this happen in the Ozarks quite a bit; the high humidity causes massive expansion. Speaking of regional challenges, why most Branson West hardscaping projects fail on sloped Ozark yards often relates back to poor fastener choice and unstable framing.
How to handle hidden fasteners without the headaches
Many modern homeowners want a “fastener-free” look, which usually means using hidden clips that slide into the grooves of the boards. While this looks incredible, it’s easy to mess up. The hidden clip mistake that leads to buckling deck boards usually happens when someone overtightens the clips at the start of the row, leaving no room for the material to breathe. When I’m installing these, I use a spacer to ensure a consistent gap. It’s a bit slower than just blast-nailing everything down, but it means you won’t be calling a professional deck builder in two years to fix a warped floor.But even if you get the clips right, there is a much more insidious threat lurking beneath your feet that most DIYers—and even some pros—completely ignore. We spend thousands on composite decking because it doesn’t rot, yet we install it over a wooden frame that does. This is the biggest ‘oops’ factor in modern outdoor living. When you drive a fastener through a joist, you are creating a tiny funnel for water to sit in. Over time, that water eats the wood from the inside out. I always tell my clients that the hidden cost of skipping joist tape on a new build isn’t just a few hundred dollars; it is the entire lifespan of the structure. By applying a butyl-based tape to the top of every joist, you create a waterproof seal that protects the frame as long as the boards last.
Stop the rot before it starts with a simple roll of tape
In my experience, the most overlooked step is treating the lumber you just cut. People assume ‘pressure-treated’ means ‘invincible,’ but once you saw through a 2×10, you’ve exposed the untreated heartwood. According to a study by the American Wood Protection Association (AWPA), these cut ends are the primary entry points for fungal decay and moisture ingress. This is why a veteran deck builder will never leave an end-cut raw. Knowing the best way to seal the end cuts of pressure-treated lumber to prevent rot is the difference between a deck that lasts 15 years and one that lasts 40. I’ve seen beautiful projects crumble because the builder saved ten minutes by skipping the copper naphthenate solution on the joist ends.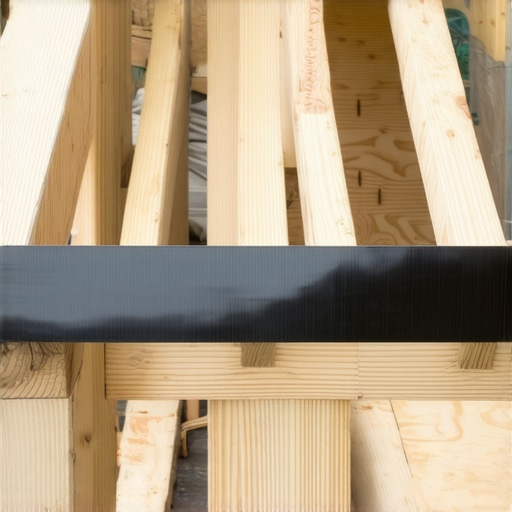
The 16-inch joist myth that ruins the feel of your deck
Everyone says that 16-inch on-center joist spacing is the industry standard. Well, I’m here to tell you that for composite, it’s often not good enough. While it meets the building code, 16-inch spacing can leave a composite surface feeling slightly ‘bouncy’ or soft compared to traditional wood. If you want that rock-solid, high-end feel, the joist spacing secret for a solid feeling composite surface is to tighten that gap to 12 inches on-center. It uses a bit more lumber, but the difference in foot-feel is night and day. It transforms the deck from a ‘platform’ into an extension of your home’s foundation. This is especially vital when you are implementing expert deck builder tips for stunning outdoor living, as high-traffic areas will show that ‘bounce’ more over time.
Why do your deck stairs feel more like a ladder than a transition?
Have you ever walked up a set of stairs and felt like you had to work too hard? That’s usually because the builder followed the minimum code for ‘rise’ instead of designing for human comfort. The International Residential Code (IRC) allows for a variety of heights, but the ‘sweet spot’ for a comfortable stride is often much narrower than the legal limit. If your steps are too steep, you’re dealing with why your deck stairs feel like a ladder and how to fix the rise. Beyond the math, most people forget the landing. A set of stairs should never just end in the grass; why your deck stairs need a concrete landing pad at the bottom comes down to stability and preventing the wood from sucking up ground moisture. Have you ever fallen into this trap of focusing only on the surface while the structure or the ergonomics were neglected? Let me know in the comments.
The tools that actually survive my truck bed
After twenty years as a deck builder, I’ve learned that the most expensive tool isn’t always the best, but the wrong tool is always the most costly. When I’m installing composite decking, my go-to is the Camo Marksman Pro. I don’t just use it because it’s trendy; I use it because it forces a consistent 3/16-inch gap and drives fasteners into the side of the board, leaving the surface pristine. If you’ve ever had to swap out a single damaged board in the middle of a finished floor, you know it’s a nightmare. Having the best tool for removing a single stripped deck screw in your bag can save an entire afternoon of frustration when things go sideways. I also swear by a dedicated impact driver over a standard drill; the hammer action prevents the bit from slipping, which is the number one cause of ruined fastener heads.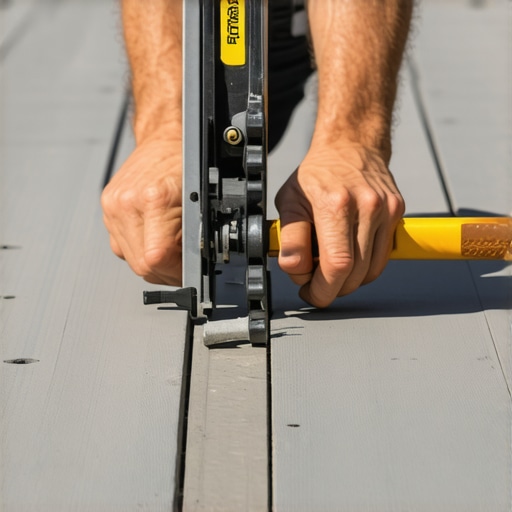
How do I maintain composite decking over time?
While we often sell outdoor living projects as ‘maintenance-free,’ the reality is they are ‘low-maintenance.’ To keep that high-end look, you need a simple semi-annual routine. First, put down the power washer. I’ve seen more boards ruined by high-pressure water than by actual foot traffic; it can etch the surface and leave permanent scars. There is a specific reason why you should never use a pressure washer on composite decks, as it can compromise the protective cap. Instead, a soft-bristle brush and a bucket of mild soapy water do wonders. If you’re a fan of backyard BBQs, keep a bottle of degreaser handy for the inevitable burger flip gone wrong. Knowing how to get grease stains off your composite deck immediately prevents the oils from bonding with the material.
Why mineral core is the future of the industry
Looking ahead, I see the market shifting away from traditional wood-plastic composites toward mineral-based cores. My prediction is that by 2030, these will be the standard for any high-end outdoor living space. These boards don’t expand or contract nearly as much as PVC or WPC, meaning your miters stay tight and your stairs stay silent. In fact, why I choose mineral core decking for every poolside build comes down to its incredible heat dissipation and slip resistance. According to the USDA Forest Products Laboratory Technical Report FPL-GTR-158, moisture management within the substructure is the ultimate factor in the longevity of these composite systems. If the frame fails, the boards don’t matter. Stay ahead of the curve by checking out composite decking trends 2025 the ultimate guide for outdoor enthusiasts to see what’s coming next for your backyard. If you want to take your build to the next level of professionalism, I strongly suggest you try painting the tops of your joists black; it makes the frame vanish underneath the gaps and creates a much more expensive, polished look.
What Two Decades of Splinters Taught Me About Longevity
Reflecting on my journey as a deck builder, I’ve realized that the ‘lightbulb moment’ isn’t when the last board is laid; it’s five years later when that deck still looks and feels brand new. I’ve learned that building to code is just the starting point—it’s the minimum allowed by law, not the standard for a masterpiece. Over the years, I’ve found that moisture is far more patient than we are; it will find the one raw end-cut you didn’t seal or the one joist you didn’t tape. My biggest takeaway? Never trade an hour of labor today for a week of repairs tomorrow. Whether you are tackling stairs or a massive wraparound, the integrity of your outdoor living space depends on your commitment to those invisible details that most people never see.
#IMAGE_PLACE_HOLDER_E#
The Gear I Trust to Get the Job Done Right
You don’t need a massive workshop to build a professional-grade structure, but you do need tools and resources that respect the materials. For composite decking, I never leave home without my depth-setting driver to ensure those screws sit perfectly every time without mushrooming. If you’re worried about the lifespan of your frame, I strongly suggest you look into the hidden cost of skipping joist tape on a new build; it is the single most effective way to protect your investment from the inside out. I also recommend checking out deck builder insights designing your dream outdoor space for planning tips that go beyond the basic blueprints. These resources have saved me from countless headaches and will do the same for your project.
Create a Space Where Memories Actually Last
At the end of the day, your project is about more than just lumber and fasteners; it’s about creating a sanctuary for your family. When you understand how a skilled deck builder can turn your garden into a private oasis, you see the potential for your home to expand into the beauty of the outdoors. Don’t be intimidated by the technical side of designing safe and stylish stairs for outdoor decks in 2025—take it one measurement at a time and focus on the ergonomics. You have the knowledge now to build something that isn’t just a platform, but a legacy for your home. Your dream outdoor living area is waiting for you to bring it to life. What’s the one part of your deck project that has you feeling the most nervous or excited? Let’s talk about it in the comments below.