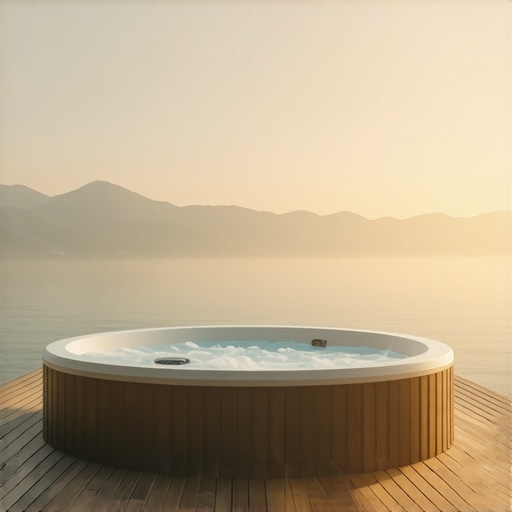
I remember the exact moment I realized I had made a massive mistake. I was sitting in my brand-new, seven-person hot tub, the jets were humming, and the water was a perfect 102 degrees. But instead of looking at the rolling hills I’d moved here for, I was staring at a four-foot-high wall of cheap wood. I had successfully ‘hidden’ the tub, but I’d also successfully deleted my backyard’s best feature. It felt like I was soaking in a very expensive wooden box. It was a classic rookie error that many homeowners make when trying to balance privacy with aesthetics.
Stop Letting Your Spa Block Your Backyard Horizon
The struggle is real: you want the tub to be private and tucked away, but you don’t want it to dominate the entire deck or eat your scenery. When I started out as a skilled deck builder, I used to think the only way to hide a tub was to build a wall around it. I was wrong. Early on, I learned why avoiding standard lattice is the first step to a high-end look. It’s flimsy, it’s dated, and it’s a visual dead end. It blocks the breeze and the view without giving you any real style points.
Today, we’re going to look at how to integrate your spa into your tiered deck design so it feels like a natural part of the landscape. We’ll solve the height problem, the access problem, and most importantly, the ‘I can’t see my garden anymore’ problem. According to experts at the National Association of Realtors, a poorly placed outdoor feature can actually detract from a home’s perceived value by breaking the visual flow of the yard. We aren’t going to let that happen to you. We are going to make that tub disappear while your sunset remains front and center.
Will a sunken tub just rot out my deck frame?
This is the number one fear I hear from homeowners. They love the idea of a flush-mount spa, but they’re terrified that trapping all that heat and moisture under the boards will turn their substructure into mush within three years. It’s a valid concern! If you don’t vent the space properly, you’re basically building a sauna for termites. But with the right view-friendly railing height and proper drainage, you can have your cake and eat it too. I’ve seen projects where people didn’t account for the weight and the moisture, and it’s a mess. I want to make sure you avoid those structural headaches. Have you ever started a backyard project and realized halfway through that you were accidentally blocking your favorite view? I’d love to know if I’m not the only one who has had that ‘lightbulb’ moment a little too late.
Lower the Profile to Keep Your Horizon Clear
The most effective way to prevent a spa from looking like an alien spacecraft that just landed on your patio is to sink it. You don’t want to bury it completely—that makes maintenance a nightmare—but dropping it 15 to 18 inches into the deck frame is the sweet spot. This allows the rim of the tub to act as a natural bench, making it easy to swing your legs in without a ladder, while also keeping the bulk of the unit below your line of sight. I once worked on a project in Branson West where the client wanted to preserve their view of Table Rock Lake. We meticulously measured the tub height and sunk it exactly 17 inches. It looked incredible, like a custom-built pool. But I made a classic rookie mistake: I forgot to account for the swing radius of the heavy-duty cover lifter. When we finally installed the cover, it hit the railing every time it opened. We had to disassemble a section of the rail and rebuild it four inches further back. It was a tedious, three-day correction that taught me to always measure the ‘swing’ before the first joist is hung.
Stop Moisture Rot with Proper Airflow
Once you drop that tub into a hole, you’ve essentially created a humidity trap. If you don’t learn how to vent the space under your deck, the evaporation from the spa will saturate your wooden joists and lead to structural failure faster than you can say ‘dry rot.’ I always insist on leaving at least a two-inch gap between the tub cabinet and the deck framing. This isn’t just for airflow; it gives you room to reach in if a pipe leaks. To go the extra mile, I paint the tops of my joists black with a high-quality protective coating or use joist tape. It hides the bright pressure-treated wood from view and adds a critical layer of water protection right where the moisture sits. 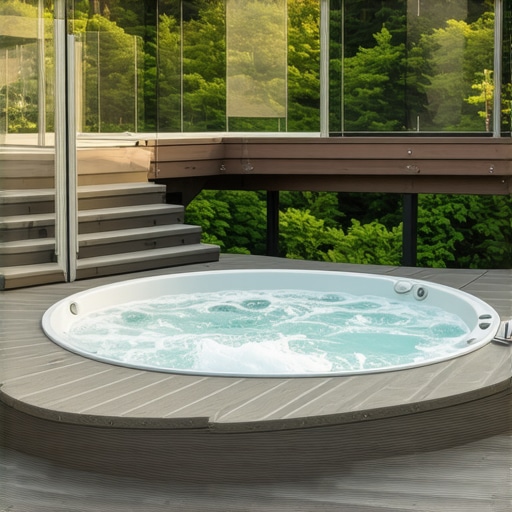
Why Mineral Core Decking Wins the Wet Zone Battle
Standard wood or even some basic composites can struggle with the constant ‘splash zone’ environment around a hot tub. This is why I choose mineral core decking for almost every spa build I handle now. Unlike wood-plastic composites, mineral-core boards don’t expand and contract as much when they get wet or hot. They are virtually waterproof and offer superior traction, which is a big deal when you’re stepping out of a tub with wet feet. Think of it like choosing a tile floor for a bathroom instead of carpet; you want the material that thrives in the moisture rather than just tolerating it.
Keep Your View Intact with Glass and Steel
If you’ve gone through the trouble of sinking the tub to save the view, don’t ruin it with thick wooden balusters. I’ve found that the best way to maintain safety without creating a visual cage is to install glass balusters. They disappear into the landscape, allowing you to see the garden even while you’re sitting low in the water. If glass isn’t in the budget, thin black metal spindles are the next best thing; the eye tends to look past the black lines, whereas white or thick wood blocks the scene entirely.
Build Smarter Access with Wide Stairs
You need a clear path to the tub that feels inviting, not cramped. Instead of a narrow set of steps, consider innovative stairs solutions that wrap around a corner or feature extra-deep treads. This turns the stairs into a transition zone where people can kick off their flip-flops or set down a towel without cluttering the main walking path. A wide, cascading stair design makes the transition from the upper deck to the spa level feel intentional and luxurious rather than an afterthought.
While we’ve covered the basics of sinking your spa, let’s dig deeper into the structural nuances that separate a DIY weekend project from a professional-grade outdoor living space. Most people assume that once they’ve picked a pretty board color, the hard work is done. But the truth is, composite decking behaves very differently than pressure-treated lumber, especially when you introduce the heat and weight of a 5,000-pound hot tub into the mix.
Stop Thinking Composite is a Set-and-Forget Material
I’m going to challenge a common belief here: many homeowners think the term ‘maintenance-free’ means you can ignore the deck once it’s built. In my experience, if you treat composite like it’s indestructible, you’re in for a rude awakening. While choosing the right composite decking is a great start, the material actually moves more than wood does. It expands and contracts significantly with temperature swings. I’ve seen beautiful decks literally pull themselves apart because the builder didn’t account for this movement. If you pin the boards down too tightly without the right hardware, they will buckle or snap the heads off your screws.
The 12-Inch Secret for a Rock-Solid Surface
Here is a professional ‘oops’ factor to avoid: standard deck joists are usually spaced 16 inches apart. For wood, that’s fine. For composite, it’s often a recipe for a ‘bouncy’ deck. When you are walking around a hot tub, you want that floor to feel like concrete, not a trampoline. I always recommend the joist spacing secret for a solid-feeling surface, which involves pulling those joists in to 12 inches on center. This extra lumber adds negligible cost but provides the stiff foundation necessary to support the dynamic loads of people moving in and out of the water. 
Why do my deck stairs feel like a ladder even when they are up to code?
This is a sophisticated question I get from clients who notice their new stairs feel ‘off.’ Even if your stairs meet the local building inspector’s minimum requirements, they can still feel awkward. The nuance lies in the relationship between the rise and the run. According to the American Wood Council (AWC), maintaining a consistent stair geometry is vital for safety, but for luxury outdoor spaces, we prefer a ‘relaxed’ stride. If the rise is too high, it feels like a climb. I often see the stair stringer measurement mistake where builders ignore the ‘rule of 25’ (two rises plus one tread should equal roughly 25 inches). If you ignore this, you’ll find why your deck stairs feel like a ladder the hard way every time you try to carry a tray of drinks to the tub.
Don’t Let Your Fascia Board Turn Into a Rollercoaster
Another common trap is the fascia—the vertical boards that wrap the edge of your deck. Because these boards are thin and often dark-colored, they soak up the sun and expand like crazy. If you don’t know how to install deck fascia boards so they don’t buckle, they will eventually look like a wavy rollercoaster. You have to use oversized holes and specific fasteners that allow the board to slide behind the screw head. It’s a tiny detail that makes a massive difference in how the deck looks three years down the road. I once saw a $40,000 deck look like a funhouse mirror because the installer didn’t understand the hidden clip mistake that prevents thermal warping. Have you ever fallen into this trap or noticed your deck boards ‘wandering’ in the heat? Let me know in the comments—I’d love to help you troubleshoot it.
It’s easy to get caught up in the aesthetics, but once the sawdust clears, you are left with the reality of ownership. I’ve seen homeowners drop $50k on a tiered masterpiece only to treat it like a concrete driveway. If you want that composite to last, you have to put down the wand. Seriously, why you should never use a pressure washer on composite decks isn’t just a suggestion; it’s a rule. High-pressure water can actually ‘fuzz’ the surface of the boards, creating micro-fissures where algae and dirt can move in permanently. Instead, I use a soft-bristle brush and a pH-neutral cleaner—it takes longer, but your deck stays smooth for decades.
Ditch the Pressure Washer to Save Your Surface
When you are dealing with the ‘splash zone’ around a hot tub, you’ll notice a white, chalky residue from time to time. That’s usually just calcium buildup from the spa water. Instead of blasting it, a simple mixture of white vinegar and water usually does the trick. I also tell my clients to prioritize the high-traffic zones. I’ve found that why I always use hidden fasteners for high-traffic entryways is because it makes cleaning a breeze—you aren’t scrubbing around individual screw heads where grime likes to hide. It keeps the surface flush and easy to wipe down, just like a kitchen floor.
The Tool Box Every Pro Swears By
If you’re going to maintain or build these structures yourself, you need more than just a drill. I never go to a job site without a dedicated board-straightening tool, like the BoWrench. Composite boards are rarely perfectly straight out of the package, and trying to manhandle a 20-foot mineral core board into place is a losing battle. For structural integrity, I’ve moved away from traditional lag bolts entirely. According to the technical bulletins from Simpson Strong-Tie, specifically their Deck Connection and Fastening Guide, using why I use structural screws instead of lag bolts for stairs and ledgers provides superior shear strength with less risk of splitting the wood. And if you ever have to swap a board? Do yourself a favor and get the best tool for removing a single stripped deck screw; it will save you three hours of swearing and a ruined joist. 
Maintenance: How do I stop my outdoor investment from fading or rotting?
The secret isn’t a magic spray; it’s airflow and barrier protection. Every six months, I take a leaf blower and clear the gaps between the boards. If organic debris sits in those gaps, it holds moisture against the core of the board. I also believe the hidden cost of skipping joist tape on a new build is one of the biggest mistakes you can make. That tape is the only thing standing between your frame and a slow, wet death. Looking ahead at composite decking trends 2025, we are seeing a huge shift toward ‘cool-deck’ technology—materials that reflect heat rather than absorbing it. This is a game-changer for hot tub decks where you’re often walking barefoot. If you’re building now, look for those high-reflectivity ratings. My final advanced tip for you: go buy a roll of high-quality butyl joist tape today and apply it to every horizontal surface of your frame before the decking goes down; it’s the single best way to double the life of your deck. You won’t regret it when your neighbors are tearing their decks out in ten years and yours is still rock solid.
Secrets I Learned from the Spa Decks I Wish I Could Rebuild
One detail often missed is that dark composite boards around a steaming tub can become surprisingly hot. Even with the latest composite decking trends 2025, I always suggest choosing lighter, variegated tones for the immediate ‘splash zone’ to protect bare feet. Another lightbulb moment came when I realized the importance of sound dampening; placing rubber isolation pads beneath the tub cabinet prevents the motor’s hum from vibrating through the entire frame and into your home. It’s a small addition that makes a world of difference for peace and quiet.
I’ve also learned to build access panels twice as large as the manufacturer suggests. If a technician can’t reach the pump easily, they might have to cut into your beautiful boards. This is why I advocate for the benefits of working with a professional deck builder in your outdoor projects—we’ve already made these mistakes so you don’t have to.
The Blueprint Essentials I Never Build Without
To keep everything rock solid, I rely on the Simpson Strong-Tie Deck Connection Guide for every structural joint. If things ever feel a bit unstable, knowing how to fix a bouncy deck without adding new posts by using cross-bracing is a literal lifesaver. For the finish work, my BoWrench board straightener is non-negotiable for keeping those long composite runs perfectly parallel. I also encourage homeowners to look at designing safe and stylish stairs for outdoor decks in 2025 to ensure the walk down to the spa level is as beautiful as the tub itself.
Your Sanctuary Awaits Beyond the Blueprints
True outdoor living isn’t just about the hardware; it’s about the feeling of stepping into a space that was built specifically for your relaxation. When you focus on the structural integrity and the subtle design touches, the stress of the build fades into the joy of the first soak. Don’t let the technical details intimidate you. Take it one joist at a time, and soon you’ll have a retreat that rivals any high-end resort. #IMAGE_PLACEHOLDER_E#
Have you ever worried that a hot tub would completely ruin your backyard’s visual flow? Let me know your biggest design fear in the comments below!