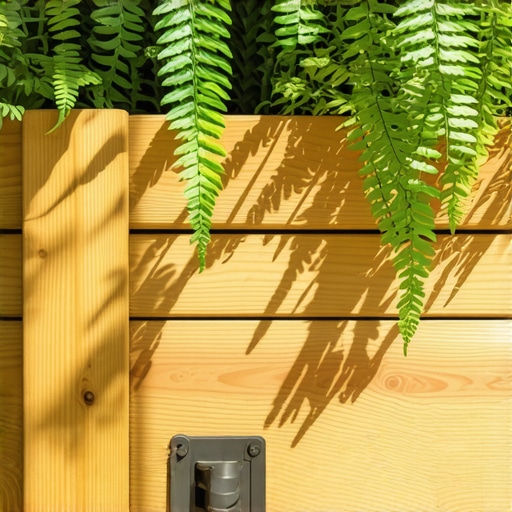
I’ll never forget the sinking feeling I had three summers ago when I decided to rearrange my patio furniture. I dragged a large, beautiful terracotta planter across my cedar boards, only to find a dark, slimy circle of rot staring back at me. It felt like I’d personally invited a termite convention to dinner. I had spent thousands of dollars and dozens of weekends working with a professional deck builder to get my outdoor space perfect, and here I was, killing it with a handful of petunias and poor planning. That was the day I realized that most DIY planters are actually wood-rot Trojan horses designed to trap moisture right where it does the most damage.
Stop Trapping Water Against Your Expensive Decking
If you are tired of worrying about moisture damage every time you water your herbs, you’re in the right place. Today, I’m going to show you how to build a planter that keeps your greenery happy while ensuring water moves away from your deck structure as fast as possible. We aren’t just talking about a couple of holes in the bottom; we’re talking about a full drainage strategy involving internal liners and sloped exit points. By the time we’re done, you’ll have a garden feature that actually protects your investment rather than degrading it. Before you even pick up a saw, you should check for existing damage; if your boards feel soft, you might need to look at the best way to seal the end cuts of pressure treated lumber to prevent rot to ensure your foundation is still solid. Have you ever noticed dark spots or lingering dampness under your pots after a rainy week?
Won’t the weight of a full planter just crack my boards anyway?
It’s a fair question. Dirt is heavy, and wet dirt is even heavier. But the real enemy isn’t usually the sheer weight—it’s the stagnant moisture that weakens the wood fibers over time. When I first started out, I made the classic mistake of sitting my planters directly on the deck surface. No feet, no airflow, nothing. According to the USDA Forest Products Laboratory, wood that remains at a moisture content above 20% is essentially an open buffet for decay fungi. By lifting the planter and directing the flow, we bypass that risk entirely. For those building on a larger scale, you might even consider the hidden benefit of using steel deck framing instead of wood to handle those massive, custom-built permanent garden boxes without any fear of structural failure. Next, we’ll look at the specific materials that make this drainage trick work.
Seal the Interior Like a Boat Hull
To stop rot, you have to treat the inside of your planter like it is going to be permanently underwater. I use a heavy-duty rubberized liner or a professional-grade pond liner stapled firmly to the interior walls. This creates a literal waterproof wall between the wet soil and your wood structure. If you are building with wood, remember why I never use standard wood for deck railings anymore—it is because moisture eventually finds its way into every grain. By lining the box, you are ensuring the planter itself does not become a giant, heavy sponge. I learned this the hard way with a cedar box that looked great for six months until the sides started bowing because the wood was water-logged and losing its structural integrity.
Make Your Soil Float on a Drainage Layer
Once the liner is in, do not just dump dirt in. You need a sump area to prevent the roots from drowning. I put about two inches of large river stones or specialized plastic drainage cells at the very bottom. On top of that, lay down a piece of high-quality landscape fabric. This keeps the fine soil from washing down and clogging your drainage holes. 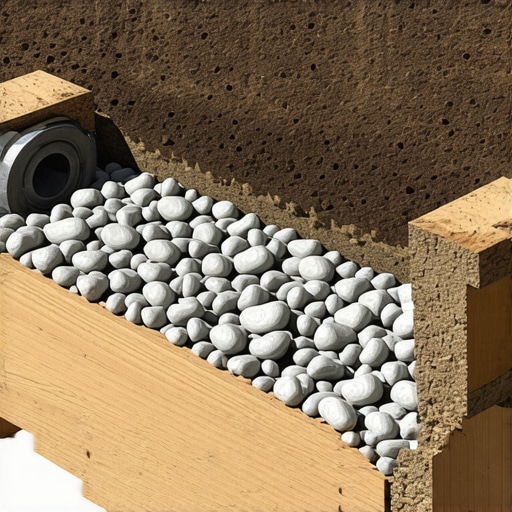 It is exactly like the drainage layer secret that keeps pet-friendly artificial grass from smelling like a kennel—you need space for water to move freely beneath the surface. Avoiding that swamp effect at the bottom of the pot is what keeps the roots healthy and prevents the bottom of the planter from rotting out from the inside.
Punch Your Exit Holes Where They Matter
Those drainage holes need to lead somewhere specific. If you are building a custom box, drill your holes in the bottom but then install a small PVC weep pipe that directs the water out the side or away from the center of the deck boards. If you just let it drip straight down through the planter floor, you are creating a concentrated rot point on your deck. I once had a beautiful row of marigolds that were thriving, but every time I watered them, the runoff sat right on a critical joist. If you have not checked your sub-structure lately, learn the simple way to check if your deck ledger is pulling away from the house to make sure years of runoff have not already caused hidden damage. Redirecting that flow ensures your deck stays dry while your plants stay hydrated.
Give the Planter Some Breathing Room
The biggest mistake is a flat-bottomed planter sitting flush on the decking. It is a death sentence for the wood or composite underneath. I use pot feet or build the planter on a small hidden frame that lifts it at least two inches off the surface. This allows air to circulate and dries out any spills immediately. It is the same logic behind how to vent the space under your deck to prevent mold and wood rot. Air is your best friend in the battle against fungal decay. I remember a specific July where the humidity was so high my deck never seemed to dry; the only spots that did not grow green algae were the ones where I had lifted my furniture and pots. When I finally moved the one planter I had not raised, the wood underneath was soft enough to push a screwdriver through. If you are worried about the aesthetic, how to hide the ugly edge of a composite stair tread techniques can be applied to the base of your planter to keep it looking sleek while still providing that crucial gap for airflow.Most people think that once they switch to composite, their worries are over. It is the ultimate ‘maintenance-free’ dream, right? But here is the truth: composite decking behaves very differently under weight than traditional lumber. While cedar might rot, composite can ‘creep’ or sag if the temperature fluctuates and the weight of your new garden features isn’t distributed perfectly. I’ve seen stunning custom composite decking ideas ruined because the homeowner didn’t realize that why dark brown decking gets significantly hotter than light gray boards impacts the material’s flexibility. When the boards get hot, they become more pliable, and if they are supporting a heavy, water-filled planter, they will begin to mold themselves around your joists.
Why Your Composite Deck Might Sag Under That New Planter
The biggest ‘oops’ factor I see in the field relates to joist spacing. Most DIYers stick to the standard 16 inches on center because that is what they read on a basic forum. But if you are planning a permanent heavy feature like the ones we’ve discussed, you need to know the joist spacing secret for a solid feeling composite surface. According to engineering standards from the American Wood Council (AWC), concentrated loads on residential decks require significantly more structural support to prevent long-term deflection. If you ignore this, those boards will eventually dip, creating a puddle point and a trip hazard right next to your innovative stairs solutions for safe outdoor deck access.
Does a heavy garden box change my required joist spacing?
Absolutely. For standard residential foot traffic, 16 inches is fine. But under a planter that weighs 400 pounds when wet? You should be looking at 12 inches or even 10 inches on center in that specific zone. I always tell my clients that why I prefer solar cap lights over hardwired is a minor aesthetic choice, but structural spacing is a safety mandate. I once consulted on a project where the homeowner used the right composite decking but the wrong framing layout; within two years, the deck looked like a rolling sea because the substructure couldn’t handle the localized weight. 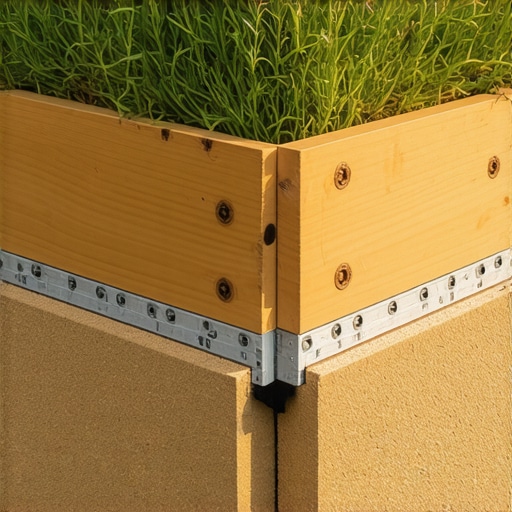
The Connection Trap Most Builders Ignore
Another nuance often missed is how we handle the transitions. People focus so much on the deck surface they forget the stairs. I’ve fixed dozens of jobs where the stair stringer measurement mistake that ruins your stride made the whole area feel clunky and unsafe. If your deck is solid but your stairs are shaky or pulling away, the whole project feels cheap. This often happens when builders skip why your deck stairs need a concrete landing pad at the bottom, leading to frost heave that twists the entire frame. Don’t let the marketing brochures fool you—even the best materials require a builder who understands the physics of weight and water. Have you ever fallen into this trap of over-loading your deck without checking the frame? Let me know in the comments.
Stop Guessing and Start Measuring with Pro Tools
To keep these heavy setups from becoming a maintenance nightmare, I rely on a few specific tools that most homeowners completely overlook. First, stop guessing about moisture levels in your substructure. I personally use a Lignomat Ligno-Scanner SD because it is pinless and will not mar the finish of my cedar or leave holes for water to enter. Before you apply any sealant or place a heavy, soil-filled planter, you need to verify the wood is below 15% moisture content. If you seal the boards while they are damp, you are effectively trapping the rot inside a waterproof coffin. Also, keep the best tool for removing a single stripped deck screw in your primary tool bag. When you are dealing with planters that have been in place for years, you will eventually find a rusted-out head that refuses to budge during an inspection, and having the right extractor saves you hours of frustration. 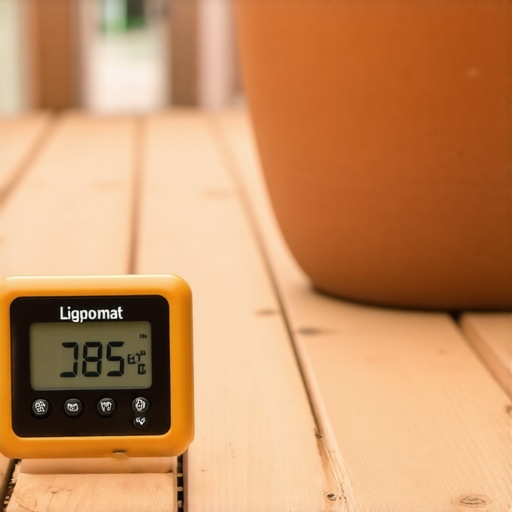
How do I maintain these heavy garden features over time?
Maintenance is not just about a spring cleaning; it is a strategic inspection routine. Every six months, I slide my planters to the side—even the ones on feet—to check the decking for white, fuzzy growth or dark staining. According to the American Wood Council’s DCA 6 (Prescriptive Residential Wood Deck Construction Guide), residential decks are typically designed for a 40 psf live load, but a large, saturated planter can easily exceed this in a concentrated footprint. If you notice any deflection or the boards feel ‘spongy,’ it is time to reinforce the joists using why I use structural screws instead of lag bolts for stairs and frames to ensure maximum shear strength. You should also be aware of why you should never use a pressure washer on composite decks-2. High-pressure water can etch the surface of composite materials, making them more porous and susceptible to permanent staining from the organic tannins in your potting soil. Instead, use a soft bristle brush and a pH-neutral deck cleaner. For those who like to pair their planters with outdoor textiles, make sure you know how to keep your outdoor rug from staining your deck boards by using breathable, non-rubberized pads that allow our intense Ozark humidity to evaporate rather than sit against the wood.
Smart Tech is Coming to Your Backyard
Looking ahead, the DIY world is moving toward integrated monitoring. I am already seeing early adopters experiment with composite decking trends 2025-the ultimate guide for outdoor enthusiasts that include smart sensors. We are talking about miniature moisture probes embedded directly into the joist tape that can send an alert to your smartphone if they detect a persistent leak under a built-in planter. It sounds futuristic, but when you consider the cost of replacing a structural ledger board, a fifty-dollar sensor is cheap insurance. I predict that within the next five years, high-end professional deck builder projects will include these diagnostic tools as standard features to protect the homeowner’s long-term investment. I challenge you to try one advanced tip this weekend: grab a pinless moisture meter and audit the boards under your favorite planter. You might be surprised by what the numbers tell you about your drainage efficiency. If the moisture is high, it is time to rethink those feet or the liner before the summer heat kicks the decay fungi into high gear.
The Reality of Dirt and Water I Wish I’d Known Sooner
After years of building and fixing, I’ve realized that a healthy deck isn’t about avoiding water—it is about mastering its exit. When you integrate planters into your outdoor living area, you are essentially adding a biological engine that needs both fuel (water) and exhaust (drainage). One lightbulb moment for me was realizing that most ‘all-weather’ wood is only all-weather if it can dry out between soakings. If you are struggling with a complex layout, seeing expert deck builder tips for stunning outdoor living can help you visualize how to tuck these planters into corners without compromising the structure. I also learned that choosing the right composite decking is only half the battle; the other half is ensuring your sub-frame doesn’t become a swimming pool. Lastly, never underestimate the power of a simple two-inch gap; air is the cheapest and most effective rot-preventer you’ll ever find. #IMAGE_PLACEHOLDER_E#
Gear That Keeps My Backyard Projects from Rotting
I don’t just buy whatever is on the end-cap at the big box store. For any planter project, I stick to tools and materials that have proven their worth in the humid Ozark air. I always recommend a pinless moisture meter to check my joists before I ever place a heavy pot. If you are working on a budget, inspiring deck and stair ideas for every budget can provide some great low-cost alternatives for drainage layers. I also trust structural screws over standard hardware because they won’t snap when the wood expands and contracts. For those who want a truly high-end finish, seeing how a skilled deck builder can turn your garden into a private oasis is the best way to find inspiration for custom-integrated planter benches.
Ready to Change Your Outdoor Space Forever?
You now have the blueprints to build something that doesn’t just look beautiful this summer but stays structurally sound for the next decade. Building rot-proof features is about respecting the physics of moisture while enjoying the beauty of your garden. Don’t be afraid to pull up a board or crawl under the frame this weekend to see what’s really happening down there. Your outdoor living space is an investment in your home’s value and your own peace of mind. Have you ever discovered a hidden spot of rot under a planter you thought was safe? Let me know in the comments below so we can troubleshoot it together.