I still remember the pit in my stomach the day I felt that sickening “squish” under my boots while inspecting a friend’s decade-old deck. I pulled back a sliver of cedar siding, expecting a bit of dirt, but what I found was a ledger board that had the structural integrity of a wet sponge. It is the kind of discovery that keeps a homeowner up at night. That board is the only thing standing between your family and a catastrophic deck collapse, yet most people treat it like an afterthought. I have spent years fixing these “hidden” disasters, and if there is one thing I have learned, it is that water does not just sit on wood; it hunts for a way in.
The Invisible Enemy Tearing Your Deck Apart
We often obsess over the pretty stuff. We pick out the perfect composite decking trends for 2025 or fret over whether our deck stairs feel too much like a ladder. But none of that matters if the connection to your house is rotting from the inside out. My big mistake early on? I trusted a bead of cheap caulk and a prayer. I thought that as long as it looked sealed, it was safe. I was wrong. Water is patient. It gets behind the siding, stays there, and slowly turns your expensive pressure-treated lumber into mulch. [IMAGE_PLACEHOLDER]
Is rot-proofing actually worth the extra effort?
You might be thinking, “Hey, I used pressure-treated wood, I am fine, right?” Not exactly. Even the best treated wood cannot survive constant moisture trapped against a house rim joist. According to the International Association of Certified Home Inspectors (InterNACHI), most deck failures occur because of a failure in the ledger board connection. It is not about the strength of the wood; it is about the management of the water. Today, I am going to show you how to break that cycle of rot before it starts.
Stop Trapping Water Against Your Home
The secret is not just better wood; it is better physics. For years, I simply bolted the board tight to the house, but that is exactly the drainage gap error that traps rot. You need air. You need a way for the water to escape. That is why I have become a huge advocate for why your ledger board needs a gap from the house siding. It allows the house to breathe and keeps the wood dry. I have also realized that the fasteners we use play a huge role in the long-term health of the frame. I shifted away from old-school methods because I found structural screws are far superior to lag bolts for maintaining a tight, water-resistant seal over time. Have you ever noticed water stains appearing on the siding right under your deck and wondered where they were coming from? Tell me in the comments, because that is usually the first warning sign that your ledger is in trouble. We are going into the specific flashing techniques and the hidden benefits of using joist tape to ensure your outdoor oasis stays standing for decades, not just a few seasons.
Stopping rot starts with the right sequence. First, you have to realize that siding is not a waterproof seal; it is a rain screen. If you just bolt a ledger through it, you are creating a highway for moisture. I remember a job in Branson West where I spent an entire Tuesday afternoon fighting with a piece of custom-bent copper flashing. I was sweating through my shirt, the wind was whipping my hair, and I was convinced I was wasting my time on a detail no one would ever see. But six years later, that house is bone dry while the neighbors’ deck is already starting to peel. You need that “Z” shaped flashing tucked up under the house wrap and over the top of the ledger. This simple move is how you learn how to stop your deck from staining your house siding and rotting your rim joist.
Kill the Rot Before it Starts
The Metal Shield That Actually Works
Your flashing is like an umbrella for your ledger. If water gets behind it, you have already lost. Use high-quality aluminum or copper Z-flashing and ensure it is integrated with your house’s weather-resistive barrier. If you are working with an existing structure, you might need to learn the secret to a rock-solid deck-to-house connection on old siding to make it work. #IMAGE_PLACE_HOLDER_B#
Make Your House Breathe with an Air Gap
Most guys just slam the board against the house. That is the drainage gap error that traps rot. When I say gap, I do not mean a massive cavern. You are looking for a 3/8 to 1/2-inch space. I often use a series of stainless steel washers or specialized deck spacers that slide over the fastener. I once skipped this on a small porch build in my early twenties, thinking it was overkill. Three years later, the client called because ants had turned the wet, trapped debris into a luxury high-rise. Now, I never build without ensuring why your ledger board needs a gap from the house siding is part of the blueprint.
Choose Structural Screws Over Rusty Lags
Stop pre-drilling giant holes for lag bolts. They weaken the wood and leave huge gaps for water to enter. I have found that structural screws are far superior to lag bolts because they have a built-in washer head that pulls the connection tight without splitting the fibers. This same logic applies when you are building the stairs; I always tell people why I use structural screws instead of lag bolts for stairs as well. It provides a more precise, long-lasting hold that won’t loosen after a single winter.
The Five-Minute Fix That Saves Decades
Butyl tape is your insurance policy. Apply it to the top of the ledger and let it wrap slightly over the sides. It creates a gasket seal around your screws, meaning even if water sits on the ledger, it cannot find a path into the screw holes. This is one of those “hidden” steps that separates a weekend warrior from a skilled deck builder who understands longevity. Don’t underestimate the hidden cost of skipping joist tape on a new build because replacing a ledger costs five times more than taping one. If you want a clean finish for your stairs too, consider why your deck stairs should have closed risers for a modern look, which also helps shield the inner stringers from the elements.
I still remember the pit in my stomach the day I felt that sickening “squish” under my boots while inspecting a friend’s decade-old deck. I pulled back a sliver of cedar siding, expecting a bit of dirt, but what I found was a ledger board that had the structural integrity of a wet sponge. It is the kind of discovery that keeps a homeowner up at night. That board is the only thing standing between your family and a catastrophic deck collapse, yet most people treat it like an afterthought. I have spent years fixing these “hidden” disasters, and if there is one thing I have learned, it is that water does not just sit on wood; it hunts for a way in.
The Invisible Enemy Tearing Your Deck Apart
We often obsess over the pretty stuff. We pick out the perfect composite decking trends for 2025 or fret over whether our deck stairs feel too much like a ladder. But none of that matters if the connection to your house is rotting from the inside out. My big mistake early on? I trusted a bead of cheap caulk and a prayer. I thought that as long as it looked sealed, it was safe. I was wrong. Water is patient. It gets behind the siding, stays there, and slowly turns your expensive pressure-treated lumber into mulch. [IMAGE_PLACEHOLDER]
Is rot-proofing actually worth the extra effort?
You might be thinking, “Hey, I used pressure-treated wood, I am fine, right?” Not exactly. Even the best treated wood cannot survive constant moisture trapped against a house rim joist. According to the International Association of Certified Home Inspectors (InterNACHI), most deck failures occur because of a failure in the ledger board connection. It is not about the strength of the wood; it is about the management of the water. Today, I am going to show you how to break that cycle of rot before it starts.
Stop Trapping Water Against Your Home
The secret is not just better wood; it is better physics. For years, I simply bolted the board tight to the house, but that is exactly the drainage gap error that traps rot. You need air. You need a way for the water to escape. That is why I have become a huge advocate for why your ledger board needs a gap from the house siding. It allows the house to breathe and keeps the wood dry. I have also realized that the fasteners we use play a huge role in the long-term health of the frame. I shifted away from old-school methods because I found structural screws are far superior to lag bolts for maintaining a tight, water-resistant seal over time. Have you ever noticed water stains appearing on the siding right under your deck and wondered where they were coming from? Tell me in the comments, because that is usually the first warning sign that your ledger is in trouble. We are going into the specific flashing techniques and the hidden benefits of using joist tape to ensure your outdoor oasis stays standing for decades, not just a few seasons.
Stopping rot starts with the right sequence. First, you have to realize that siding is not a waterproof seal; it is a rain screen. If you just bolt a ledger through it, you are creating a highway for moisture. I remember a job in Branson West where I spent an entire Tuesday afternoon fighting with a piece of custom-bent copper flashing. I was sweating through my shirt, the wind was whipping my hair, and I was convinced I was wasting my time on a detail no one would ever see. But six years later, that house is bone dry while the neighbors’ deck is already starting to peel. You need that “Z” shaped flashing tucked up under the house wrap and over the top of the ledger. This simple move is how you learn how to stop your deck from staining your house siding and rotting your rim joist.
Kill the Rot Before it Starts
The Metal Shield That Actually Works
Your flashing is like an umbrella for your ledger. If water gets behind it, you have already lost. Use high-quality aluminum or copper Z-flashing and ensure it is integrated with your house’s weather-resistive barrier. If you are working with an existing structure, you might need to learn the secret to a rock-solid deck-to-house connection on old siding to make it work. #IMAGE_PLACE_HOLDER_B#
Make Your House Breathe with an Air Gap
Most guys just slam the board against the house. That is the drainage gap error that traps rot. When I say gap, I do not mean a massive cavern. You are looking for a 3/8 to 1/2-inch space. I often use a series of stainless steel washers or specialized deck spacers that slide over the fastener. I once skipped this on a small porch build in my early twenties, thinking it was overkill. Three years later, the client called because ants had turned the wet, trapped debris into a luxury high-rise. Now, I never build without ensuring why your ledger board needs a gap from the house siding is part of the blueprint.
Choose Structural Screws Over Rusty Lags
Stop pre-drilling giant holes for lag bolts. They weaken the wood and leave huge gaps for water to enter. I have found that structural screws are far superior to lag bolts because they have a built-in washer head that pulls the connection tight without splitting the fibers. This same logic applies when you are building the stairs; I always tell people why I use structural screws instead of lag bolts for stairs as well. It provides a more precise, long-lasting hold that won’t loosen after a single winter.
The Five-Minute Fix That Saves Decades
Butyl tape is your insurance policy. Apply it to the top of the ledger and let it wrap slightly over the sides. It creates a gasket seal around your screws, meaning even if water sits on the ledger, it cannot find a path into the screw holes. This is one of those “hidden” steps that separates a weekend warrior from a skilled deck builder who understands longevity. Don’t underestimate the hidden cost of skipping joist tape on a new build because replacing a ledger costs five times more than taping one. If you want a clean finish for your stairs too, consider why your deck stairs should have closed risers for a modern look, which also helps shield the inner stringers from the elements.
Beyond just the look of the risers, the structural math of your stairs is where most projects fail. Most homeowners—and honestly, quite a few “pros”—believe that if you want a staircase to be strong, you just need to add more wood. I used to think the same until I realized that more wood often just means more places for water to hide. If you’ve ever felt like you’re climbing a mountain just to get to your patio, it’s probably because of why your deck stairs feel like a ladder and how to fix the rise. The industry standard often prioritizes speed over ergonomics, but your knees will tell you the truth after the first summer.
Cantilevers Often Beat a Forest of Posts
Here is a contrarian take that usually gets me some funny looks: I actually prefer why I’m using fewer post bases and more cantilevers this year. People assume more posts mean a sturdier deck. In reality, every post is a potential point of failure where the wood meets the concrete. By using smart cantilevers, you reduce the “footprint” of rot and create a much cleaner look underneath. This isn’t just my opinion; studies by the North American Deck and Railing Association (NADRA) emphasize that structural integrity depends on the quality of connections, not just the quantity of lumber. 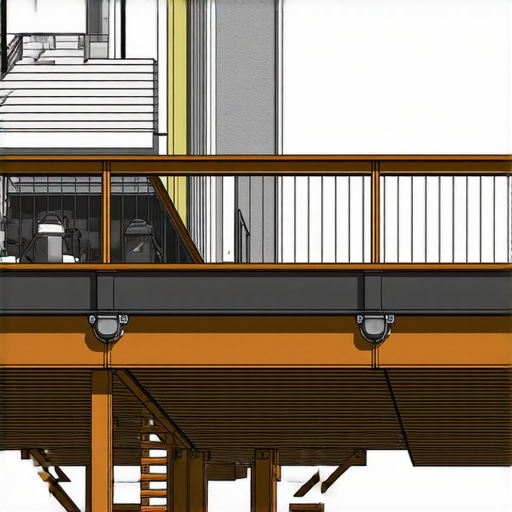
Why do deck stairs always seem to rot faster than the deck itself?
It is the “Oops” factor of the big-box store mentality. People buy the hidden flaw in pre-built deck stairs from big box stores thinking they are saving time. But these pre-cut stringers are often made from lower-grade lumber and rarely account for the specific height of your landing, leading to that dangerous “trip-step” at the bottom. Even worse, people forget that why your deck stairs need a concrete landing pad at the bottom. If those stringers sit on dirt, they are basically straws drinking up groundwater.
Your Stairs Deserve Better than the Big Box Special
When you’re making the jump to high-end materials, the mistakes get even more expensive. If you are following the composite decking trends for 2025, remember that composite expands and contracts much more than wood. I have seen beautiful boards buckle like a wave because the builder ignored the joist spacing secret for a solid-feeling composite surface. A skilled deck builder knows that a “bouncy” deck isn’t just annoying; it’s a sign that the frame isn’t supporting the specific flex of composite materials.
Have you ever fallen into this trap of over-building the wrong parts or skipping the landing pad? Let me know in the comments. It is better to learn from a comment section than from a structural failure. I have found that why I never nail deck boards and instead use the screw depth trick for a perfectly smooth deck surface is the only way to ensure the finish looks as good in five years as it does on day one. Your outdoor living space is an investment, so don’t let a few “standard” shortcuts turn it into a liability.
Investing in a rock-solid frame is only half the battle; keeping that frame from deteriorating requires a specific set of tools and a post-build ritual that most people ignore until it is too late. I have found that the difference between a deck that lasts fifteen years and one that lasts fifty comes down to the gear you use during the build and how you treat the wood once the last screw is driven. I do not just mean grabbing whatever is on sale at the local hardware store. I am talking about the specific gear that solves the problems you do not even know you have yet.
The Impact Driver that Changed How I Frame
If you are still using a standard drill for deck framing, you are killing your wrists and stripping your hardware. I swear by my sub-compact impact driver, specifically for its ability to fit between joists spaced 12 inches on center. When you are trying to drive structural screws into a tight corner, that extra two inches of clearance is the difference between a perfect connection and a mangled mess. I always pair it with T25 or T30 Torx bits because Phillips heads are a relic of the past that lead to frustration. If you do run into a disaster, knowing the best tool for removing a single stripped deck screw can save your entire afternoon from spiraling into a series of swear words and wasted lumber.
How do I maintain my outdoor living space over time?
Maintenance is not about a once-a-decade overhaul; it is about the small habits. For wood frames, the most critical step happens before the boards even go down. I am a stickler for the I still remember the pit in my stomach the day I felt that sickening “squish” under my boots while inspecting a friend’s decade-old deck. I pulled back a sliver of cedar siding, expecting a bit of dirt, but what I found was a ledger board that had the structural integrity of a wet sponge. It is the kind of discovery that keeps a homeowner up at night. That board is the only thing standing between your family and a catastrophic deck collapse, yet most people treat it like an afterthought. I have spent years fixing these “hidden” disasters, and if there is one thing I have learned, it is that water does not just sit on wood; it hunts for a way in.
The Invisible Enemy Tearing Your Deck Apart
We often obsess over the pretty stuff. We pick out the perfect composite decking trends for 2025 or fret over whether our deck stairs feel too much like a ladder. But none of that matters if the connection to your house is rotting from the inside out. My big mistake early on? I trusted a bead of cheap caulk and a prayer. I thought that as long as it looked sealed, it was safe. I was wrong. Water is patient. It gets behind the siding, stays there, and slowly turns your expensive pressure-treated lumber into mulch. [IMAGE_PLACEHOLDER]
Is rot-proofing actually worth the extra effort?
You might be thinking, “Hey, I used pressure-treated wood, I am fine, right?” Not exactly. Even the best treated wood cannot survive constant moisture trapped against a house rim joist. According to the International Association of Certified Home Inspectors (InterNACHI), most deck failures occur because of a failure in the ledger board connection. It is not about the strength of the wood; it is about the management of the water. Today, I am going to show you how to break that cycle of rot before it starts.
Stop Trapping Water Against Your Home
The secret is not just better wood; it is better physics. For years, I simply bolted the board tight to the house, but that is exactly the drainage gap error that traps rot. You need air. You need a way for the water to escape. That is why I have become a huge advocate for why your ledger board needs a gap from the house siding. It allows the house to breathe and keeps the wood dry. I have also realized that the fasteners we use play a huge role in the long-term health of the frame. I shifted away from old-school methods because I found structural screws are far superior to lag bolts for maintaining a tight, water-resistant seal over time. Have you ever noticed water stains appearing on the siding right under your deck and wondered where they were coming from? Tell me in the comments, because that is usually the first warning sign that your ledger is in trouble. We are going into the specific flashing techniques and the hidden benefits of using joist tape to ensure your outdoor oasis stays standing for decades, not just a few seasons.
Stopping rot starts with the right sequence. First, you have to realize that siding is not a waterproof seal; it is a rain screen. If you just bolt a ledger through it, you are creating a highway for moisture. I remember a job in Branson West where I spent an entire Tuesday afternoon fighting with a piece of custom-bent copper flashing. I was sweating through my shirt, the wind was whipping my hair, and I was convinced I was wasting my time on a detail no one would ever see. But six years later, that house is bone dry while the neighbors’ deck is already starting to peel. You need that “Z” shaped flashing tucked up under the house wrap and over the top of the ledger. This simple move is how you learn how to stop your deck from staining your house siding and rotting your rim joist.
Kill the Rot Before it Starts
The Metal Shield That Actually Works
Your flashing is like an umbrella for your ledger. If water gets behind it, you have already lost. Use high-quality aluminum or copper Z-flashing and ensure it is integrated with your house’s weather-resistive barrier. If you are working with an existing structure, you might need to learn the secret to a rock-solid deck-to-house connection on old siding to make it work. #IMAGE_PLACE_HOLDER_B#
Make Your House Breathe with an Air Gap
Most guys just slam the board against the house. That is the drainage gap error that traps rot. When I say gap, I do not mean a massive cavern. You are looking for a 3/8 to 1/2-inch space. I often use a series of stainless steel washers or specialized deck spacers that slide over the fastener. I once skipped this on a small porch build in my early twenties, thinking it was overkill. Three years later, the client called because ants had turned the wet, trapped debris into a luxury high-rise. Now, I never build without ensuring why your ledger board needs a gap from the house siding is part of the blueprint.
Choose Structural Screws Over Rusty Lags
Stop pre-drilling giant holes for lag bolts. They weaken the wood and leave huge gaps for water to enter. I have found that structural screws are far superior to lag bolts because they have a built-in washer head that pulls the connection tight without splitting the fibers. This same logic applies when you are building the stairs; I always tell people why I use structural screws instead of lag bolts for stairs as well. It provides a more precise, long-lasting hold that won’t loosen after a single winter.
The Five-Minute Fix That Saves Decades
Butyl tape is your insurance policy. Apply it to the top of the ledger and let it wrap slightly over the sides. It creates a gasket seal around your screws, meaning even if water sits on the ledger, it cannot find a path into the screw holes. This is one of those “hidden” steps that separates a weekend warrior from a skilled deck builder who understands longevity. Don’t underestimate the hidden cost of skipping joist tape on a new build because replacing a ledger costs five times more than taping one. If you want a clean finish for your stairs too, consider why your deck stairs should have closed risers for a modern look, which also helps shield the inner stringers from the elements.
Beyond just the look of the risers, the structural math of your stairs is where most projects fail. Most homeowners—and honestly, quite a few “pros”—believe that if you want a staircase to be strong, you just need to add more wood. I used to think the same until I realized that more wood often just means more places for water to hide. If you’ve ever felt like you’re climbing a mountain just to get to your patio, it’s probably because of why your deck stairs feel like a ladder and how to fix the rise. The industry standard often prioritizes speed over ergonomics, but your knees will tell you the truth after the first summer.
Cantilevers Often Beat a Forest of Posts
Here is a contrarian take that usually gets me some funny looks: I actually prefer why I’m using fewer post bases and more cantilevers this year. People assume more posts mean a sturdier deck. In reality, every post is a potential point of failure where the wood meets the concrete. By using smart cantilevers, you reduce the “footprint” of rot and create a much cleaner look underneath. This isn’t just my opinion; studies by the North American Deck and Railing Association (NADRA) emphasize that structural integrity depends on the quality of connections, not just the quantity of lumber.
Why do deck stairs always seem to rot faster than the deck itself?
It is the “Oops” factor of the big-box store mentality. People buy the hidden flaw in pre-built deck stairs from big box stores thinking they are saving time. But these pre-cut stringers are often made from lower-grade lumber and rarely account for the specific height of your landing, leading to that dangerous “trip-step” at the bottom. Even worse, people forget that why your deck stairs need a concrete landing pad at the bottom. If those stringers sit on dirt, they are basically straws drinking up groundwater.
Your Stairs Deserve Better than the Big Box Special
When you’re making the jump to high-end materials, the mistakes get even more expensive. If you are following the composite decking trends for 2025, remember that composite expands and contracts much more than wood. I have seen beautiful boards buckle like a wave because the builder ignored the joist spacing secret for a solid-feeling composite surface. A skilled deck builder knows that a “bouncy” deck isn’t just annoying; it’s a sign that the frame isn’t supporting the specific flex of composite materials.
Have you ever fallen into this trap of over-building the wrong parts or skipping the landing pad? Let me know in the comments. It is better to learn from a comment section than from a structural failure. I have found that why I never nail deck boards and instead use the screw depth trick for a perfectly smooth deck surface is the only way to ensure the finish looks as good in five years as it does on day one. Your outdoor living space is an investment, so don’t let a few “standard” shortcuts turn it into a liability.
Investing in a rock-solid frame is only half the battle; keeping that frame from deteriorating requires a specific set of tools and a post-build ritual that most people ignore until it is too late. I have found that the difference between a deck that lasts fifteen years and one that lasts fifty comes down to the gear you use during the build and how you treat the wood once the last screw is driven. I do not just mean grabbing whatever is on sale at the local hardware store. I am talking about the specific gear that solves the problems you do not even know you have yet.
The Impact Driver that Changed How I Frame
If you are still using a standard drill for deck framing, you are killing your wrists and stripping your hardware. I swear by my sub-compact impact driver, specifically for its ability to fit between joists spaced 12 inches on center. When you are trying to drive structural screws into a tight corner, that extra two inches of clearance is the difference between a perfect connection and a mangled mess. I always pair it with T25 or T30 Torx bits because Phillips heads are a relic of the past that lead to frustration. If you do run into a disaster, knowing the best tool for removing a single stripped deck screw can save your entire afternoon from spiraling into a series of swear words and wasted lumber.
Hard-Earned Lessons from a Decade of Deck Failures
After tearing down dozens of rotted structures, I’ve realized that the biggest enemy isn’t the rain—it’s the stagnant air. If you don’t provide a path for moisture to evaporate, you are essentially building a giant wooden sponge. I’ve seen 4×4 posts snap like twigs because the owner thought painting the outside was enough, ignoring why I always paint the cut ends of pressure-treated lumber to seal the thirsty internal fibers. Another lightbulb moment? Realizing that the hidden reason your deck stairs are pulling away from the frame is almost always a lack of proper tension ties, not just “old age.” Building for longevity means assuming water will get in and making sure it has a way out.
The Pro-Grade Kit That Saves Your Back and Your Lumber
If you want results that look professional, you have to stop using homeowner-grade fasteners. I never start a ledger job without a box of structural wood screws and a high-quality butyl joist tape. These aren’t just “upgrades”; they are requirements for a modern build. I also keep a specialized scribe tool handy to ensure a tight fit against the house, which helps avoid the drainage move that saves your deck footings from sinking. For those interested in the finer details, I highly recommend checking out deck builder insights for designing your dream outdoor space to understand how structural choices impact your aesthetic options. There are massive benefits of working with a professional deck builder when the math of a cantilever or a stair-stringer gets complex.
Build Your Legacy in the Backyard
Taking the time to rot-proof your ledger and correctly frame your stairs isn’t just about safety—it’s about peace of mind. When you know every connection is sealed and every stair is solid, you can actually relax in your outdoor living space instead of worrying about the next inspection. Whether you are using composite decking trends for 2025 or classic cedar, the bones of the project are what count. Don’t be afraid to take the slow path; your future self will thank you for the extra afternoon spent with a roll of flashing tape. Have you ever discovered a “squishy” board on your own home that forced a sudden renovation? Let me know in the comments below.