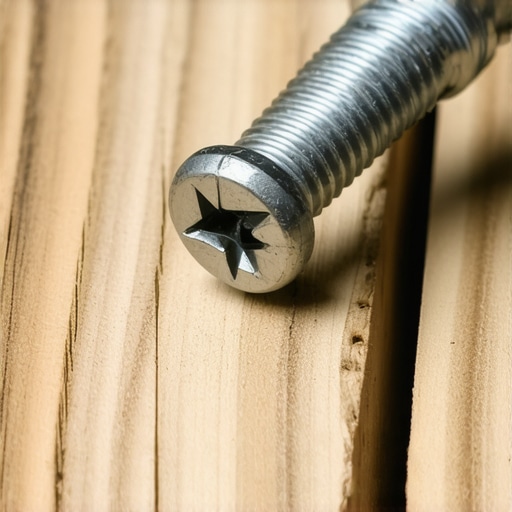
There I was, sweat stinging my eyes and the sun beating down on my neck, just one screw away from finishing a beautiful transition between a new deck and the stairs. Everything was perfect until the drill slipped. That dreaded ‘zip’ sound of metal grinding on metal echoed across the yard. I had stripped the head of a three-inch stainless steel screw perfectly flush with the board. I tried to force it, which was my first big mistake, and ended up marring the surface of a brand-new composite plank. It is a moment every DIYer and even many a professional deck builder knows all too well. You are at the finish line, and one tiny piece of hardware decides to hold your entire Sunday afternoon hostage.
The Frustrating Reality of the One Stripped Screw
It feels silly, doesn’t it? You have managed to design a dream outdoor space, handled heavy framing, and mastered the miter saw, yet a single bit of mangled metal brings everything to a grinding halt. When I first started out, I thought I could just ‘muscle’ through it. I would grab a pair of pliers and try to grip the microscopic edge of the screw, only to slip and gouge the wood. Or worse, I would try to drill it out with a standard bit, generating so much heat that the screw basically welded itself to the joist. I learned the hard way that why I never nail deck boards is because screws offer superior hold, but they are unforgiving when they fail. This is not just about a screw; it is about protecting your investment. According to research from the National Institute of Standards and Technology, fastener failure often stems from improper torque application or metallurgical fatigue, which is exactly what happens when we get tired and let the drill tilt.
Will a specialized extractor actually save my afternoon?
You might be skeptical. I was. I used to think these specialized extractors were gimmicks designed to separate me from my hard-earned cash. I would tell myself that a steady hand and a flathead screwdriver could fix anything. I was wrong. The time I spent cursing at that one screw could have been spent enjoying a cold drink on my new 2025 trend-setting composite deck. Today, I am going to show you the one tool that changed everything for me—a tool that makes short work of those stubborn, headless nightmares without ruining your expensive decking material. Have you ever been stuck on that ‘last screw’ for more than an hour? I would love to hear your horror stories. We are going to solve this right now so you can get back to the fun part of outdoor living.
Try the Rubber Band Trick Before Panicking
Before you reach for the heavy machinery, start with a low-tech solution that actually works about half the time. Take a wide, thick rubber band and lay it flat over the stripped head of the screw. When you insert your driver bit, the rubber fills the gaps where the metal has been chewed away, providing just enough friction to catch. It is like wearing a grippy glove to open a stubborn pickle jar. I used this trick recently while applying the the screw-depth trick for a perfectly smooth deck surface, and it saved me from having to switch tools entirely. Use your drill on its lowest speed and apply significant downward pressure. If the screw moves even a fraction of an inch, keep that slow, steady pace until it is out. If it does not budge, do not keep spinning the bit; you will only create heat and make the extraction harder later.
Reach for Locking Pliers if the Head is Exposed
If you are lucky enough to have even a millimeter of the screw head sitting above the board, stop using the drill immediately. Grab a pair of high-quality locking pliers (Vise-Grips). Tighten them onto the perimeter of the screw head until they click into place with enough force that they feel like an extension of the metal itself. Once locked, slowly turn the pliers counter-clockwise. I remember a particularly humid afternoon working on innovative stairs solutions for safe outdoor deck access where I had three screws strip in a row. I was tempted to just hammer them in, but using pliers allowed me to back them out without leaving a single mark on the expensive stair treads. It is tedious work, but it preserves the integrity of your material.
The Power of the Reverse-Thread Extractor Bit
When the head is buried or completely hollowed out, the specialized screw extractor is your only real friend. These tools come in two parts: a burner and an extractor. The burner end is essentially a small drill bit that creates a clean, conical hole in the center of the stripped screw. This clears away the mangled metal and creates a landing zone for the second step. 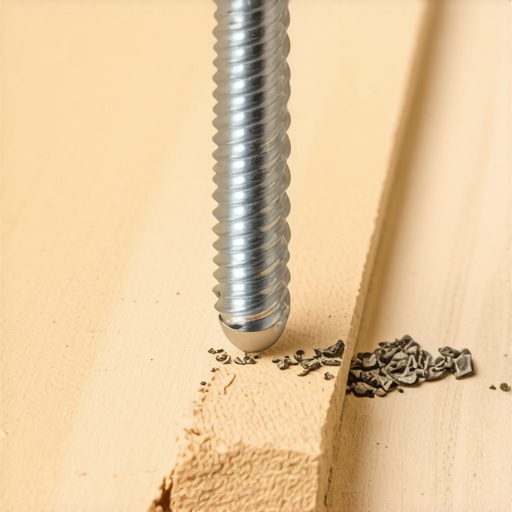 After you have drilled the pilot hole, flip the bit to the extractor side. This side has reverse-cut threads. As you run your drill in reverse, the extractor bites deeper into the screw as it turns. It is a mechanical paradox: the harder it resists, the tighter the tool grips. This is the gold standard for anyone choosing the right composite decking for durable low-maintenance outdoor areas because it prevents you from having to pry up boards or gouge the surface.
Avoid Overheating the Metal
The biggest mistake I see DIYers make is running the drill at high speeds. Friction creates heat, and heat causes metal to expand and soften. If you get that screw too hot, it becomes more like butter than steel. I once learned this the hard way while trying to fix some how to install deck fascia boards so they dont buckle in the heat; I ran the drill so fast the extractor bit actually snapped off inside the screw. Now you have a hardened steel obstruction inside a stainless steel screw—a total nightmare. Keep your RPMs low and your pressure high. This ensures the tool ‘bites’ rather than ‘rubs,’ allowing the threads to do the work they were designed for. When you feel that first ‘pop’ of the screw breaking its seal with the wood, you have won the battle.Once that screw is finally out, you might feel the urge to drive the replacement in with twice the force. Resist that temptation. A common myth in the DIY world is that ‘tighter is always better,’ but when you are choosing the right composite decking for durable low-maintenance outdoor areas, over-tightening is a recipe for disaster. Composite materials are designed to move. If you pin them down too hard, you will likely encounter the hidden clip mistake that leads to buckling deck boards. The boards need to expand and contract as temperatures swing. 
Stop Over-Tightening Your Hidden Fasteners
Most people assume that a firm grip prevents wobbling, but in reality, if you do not leave room for thermal expansion, the board will eventually shear the screw head right off or warp into an unsightly wave. I see the benefits of working with a professional deck builder in your outdoor projects becoming clearest when you observe how they leave specific ‘breathing’ gaps at the ends of runs.
Why does my deck creak even with professional hardware?
It is usually not the hardware itself; it is the friction between the board and the joist. This is the ‘Oops’ factor most homeowners miss: skipping the joist tape. I consider the hidden cost of skipping joist tape on a new build to be one of the most expensive mistakes you can make. Without that protective barrier, moisture sits between the board and the wood joist, leading to premature rot and that annoying squeaking sound. According to the North American Deck and Railing Association (NADRA), early structural failure is frequently tied to water trapped at these specific connection points.
The Invisible Decay Hiding Under Your New Boards
If you are building a staircase, the stakes are even higher. I have walked onto many jobs where the homeowner could not figure out the hidden reason your deck stairs are pulling away from the frame. They used the right screws, but they ignored the physics of the load. Advanced builders know that the ‘throat’ of the stringer is the weakest point. If you over-cut your notches by even a quarter inch, you have created a snap-point. To ensure a premium feel, I always recommend the joist spacing secret for a solid feeling composite surface: keep your stringers 12 inches on center rather than the standard 16. It makes the stairs feel like a permanent part of the house rather than a bouncy trampoline. Have you ever fallen into the ‘more is better’ trap with your hardware? Let me know in the comments below.If you are tired of stripped screws and aching wrists, it is time to stop using that old-school cordless drill for everything. I made the switch to a dedicated sub-compact impact driver years ago, and I have never looked back. Unlike a standard drill that relies on constant torque, an impact driver uses rapid-fire internal hammers to ‘pulse’ the screw into place. This is why I always use it for high-torque tasks like why I always use hidden fasteners for high-traffic entryways. The pulse action prevents the bit from camming out of the screw head, which is the number one cause of the stripping nightmare we just discussed. I personally swear by the brushless 18V models because they offer a finer level of control—essential when you are trying not to over-drive a screw into a delicate stair tread.
How do I keep my composite deck looking like new for years?
Maintenance on a modern deck is less about sanding and more about preventing chemistry from working against you. The most common question I get is how to handle seasonal grime. My rule is simple: put the pressure washer away. I have seen too many homeowners accidentally ‘etch’ permanent lines into their boards by using too much PSI. Instead, stick to a soft-bristle brush and a specialized composite cleaner. This is a core part of choosing the right composite decking for durable low-maintenance outdoor areas; you want a surface that sheds water rather than absorbing it. According to the American Wood Council (AWC) Design for Code Acceptance (DCA) 6, proper drainage and ventilation are the two biggest factors in preventing the structural decay of the wood frame beneath your fancy boards.  If you allow leaves and pine needles to sit in the gaps, you are basically creating a wet sponge that rots your joists from the top down. This is also why I advocate for why I paint the tops of my joists black before installing composite; it provides an extra layer of moisture protection while hiding the bright pressure-treated wood from view.
The Mineral Core Revolution is the Future of Outdoor Living
Looking ahead, I see a massive shift in how we think about composite decking trends 2025. We are moving away from traditional PVC-capped wood flour and toward mineral-core technology. Why does this matter? Thermal expansion. Standard composite can grow or shrink by up to half an inch over a 20-foot span. Mineral-core boards are virtually stable. This is why I choose mineral core decking for every poolside build now; it stays cooler underfoot and does not warp when the sun hits it. If you are planning designing safe and stylish stairs for outdoor decks in 2025, look for these stable materials to ensure your miters stay tight for a decade, not just a season. I strongly encourage you to try the joist-painting trick on your next repair—it is a small step that makes a world of difference in the finished look.
Lessons My Sore Back Taught Me About Deck Hardware
One thing you realize after thousands of installs is that metal has a ‘memory.’ If you feel the bit slip once, do not try again with the same pressure. Stop immediately. I have also learned that why I use structural screws instead of lag bolts for stairs comes down to the sheer strength and the fact that they are much harder to strip in the first place. Another ‘lightbulb moment’ was realizing that why your deck stairs squeak and how to silence them forever isn’t just about the boards—it is about the friction in the fasteners. If you use the wrong screw, you are basically building a giant wooden instrument that groans every time you step on it.
The Gear I Actually Keep in My Truck
I do not leave for a job site without a few specific items that have saved my reputation more than once. First, a high-quality impact driver is non-negotiable for why I always use hidden fasteners for high-traffic entryways. #IMAGE_PLACEHOLDER_E# Second, I always carry a roll of joist tape to prevent the hidden cost of skipping joist tape on a new build from haunting me five years later. Finally, if you are dealing with tricky edges, mastering the secret to scribing deck boards against an uneven stone wall will make you look like a master craftsman compared to someone who just leaves a massive gap filled with messy caulk.
Take Your Backyard Back One Board at a Time
Building a deck should be a source of pride, not a source of constant frustration. Whether you are tackling the job yourself or realizing the benefits of working with a professional deck builder in your outdoor projects, the goal is always a safe, beautiful space for your family. Don’t let one stubborn screw or a tricky layout ruin your vision for outdoor living and premium composite decking. What is the one ‘tiny’ project mistake that turned into a whole-day ordeal for you? I am reading every comment, so let me know below!