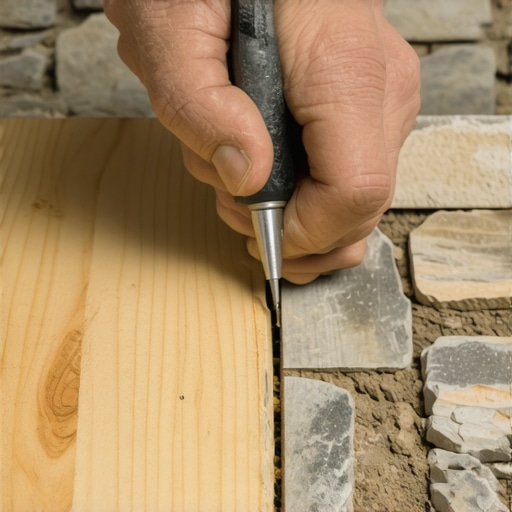
I stood there with my hands on my hips, looking at a $15,000 pile of premium composite decking and the most beautiful, uneven, frustrating stone retaining wall you’ve ever seen. Every rock stuck out at a different angle, creating a jagged silhouette that looked impossible to match. On my very first build years ago, I panicked. I just ran the boards straight, left a massive, yawning gap against the stone, and tried to hide it with a thick, globby bead of color-matched caulk. It looked terrible. It looked like I didn’t care. But that failure taught me that the difference between a DIY project and a masterpiece is all in how you handle those tricky transitions. Today, I am going to share the exact technique that finally clicked for me, so you can stop staring at those gaps and start enjoying a deck that looks like it was precision-molded to your home’s masonry. [IMAGE_PLACEHOLDER_1]
Stop Hiding Your Deck Gaps with Ugly Trim
The real secret isn’t a fancy laser or a specialized power tool; it is a simple compass and a bit of patience. When you are transforming your outdoor living with custom composite decking ideas, the wall is your biggest hurdle. I made the mistake early on of trying to measure each bump in the stone with a tape measure. Total disaster. I ended up with a board that looked like a jagged saw blade that didn’t fit anywhere. Scribing is the art of copying the wall profile onto your board using a physical guide. It is the same technique master carpenters use for crown molding, and it is the only way to make a deck board sit flush against a rugged stone surface.
Does This Extra Effort Actually Matter in the Long Run?
You might be wondering if you can just get away with a close enough fit. I get it. Scribing takes time, and when you are out in the sun, you just want to get the floor down. However, data from the American Wood Council suggests that proper spacing and fitting are not just about looks; they actually prevent debris buildup that leads to moisture traps. If you leave a messy gap, leaves and dirt will clog that space, and even the best protection for your deck frame from rot will not save you from a localized compost pile against your house. Plus, a tight fit is a hallmark of a professional deck builder’s touch. It is that one detail guests always point out and ask, how did you do that?
Avoid the Expensive Mistake of Ignoring Board Expansion
Before you grab your jigsaw, we need to talk about the rookie move that cost me three whole boards of high-end timber on a job years ago. I scribed the board so tight against the stone that there was zero room for movement. Then, the July sun hit. Composite decking expands linearly, and because I had not checked the spacing secret for installing composite decking, my perfectly cut board buckled and popped a fastener. You need to scribe the shape of the wall but leave just enough of a hair-thin gap for the material to breathe. Have you ever spent hours on a cut only to watch the board warp a month later? It is a heartbreak I want to save you from. When you design your dream outdoor space, you have to account for the elements as much as the aesthetics.
Get Your Board in the Right Starting Position
Before you even touch your compass, you have to lock the board into a parallel position. I remember a job in the humid mountains where I tried to scribe a board that was just ‘floating’ near the wall. I bumped it halfway through the trace, the line shifted, and I ended up wasting a sixteen-foot length of premium capped composite. Now, I always tack the board down or use heavy-duty clamps to ensure it stays exactly parallel to the rest of the deck. This is critical for maintaining your layout, especially if you are trying to align deck boards perfectly across a 40-foot wide span. If that board is crooked when you scribe it, the entire run will look like a zig-zag mess once it is installed.
Let the Compass Do the Heavy Lifting
The compass is your translator; it speaks the language of the stone and writes it down for the board. Set the point of the compass on the furthest ‘out’ point of the stone wall and the pencil on the board. This distance is your offset. As you drag the point along the rugged face of the masonry, the pencil replicates every bump and dip onto your composite material. This stage requires a steady hand and a bit of a ‘zen’ mindset. On that $15,000 project I mentioned earlier, I found that if I rushed this part, the pencil would jump over small ridges in the rock, leaving me with a fit that looked amateur. When you are choosing the right composite decking for durable low-maintenance outdoor areas, you owe it to the material to be precise. 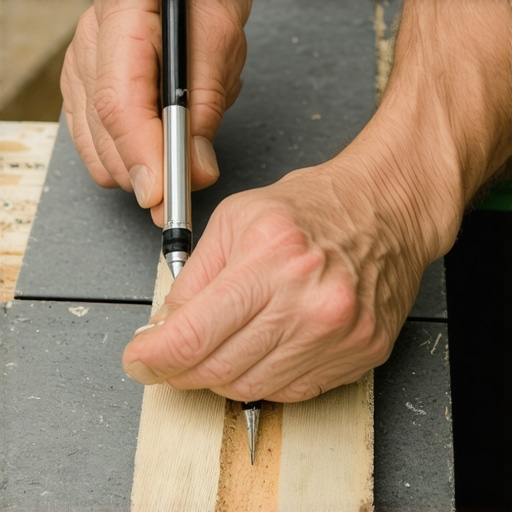
Why You Should Back-Cut Every Single Edge
Once your line is drawn, it is time to cut, but don’t just cut straight down. I learned the hard way that a 90-degree vertical cut often hits a hidden bulge in the stone below the surface, preventing the top edge from sitting flush. I now ‘back-cut’ at a 5-degree inward angle. This creates a sharp, clean top edge that meets the stone perfectly while the ‘meat’ of the board is carved away underneath to allow for irregularities. It is similar to the trick to cutting perfect deck stringers on the first try—it is all about anticipating how the pieces will actually sit in 3D space.
Slow Down When the Jigsaw Comes Out
Composite decking is denser than pressure-treated pine, and it generates a lot of heat. If you move too fast, the friction can actually melt the plastic in the board, leaving a ragged, goopy edge. Use a clean, sharp blade—preferably one designed specifically for composite or fine-finish wood. I once tried to use a rough framing blade because I was in a hurry to finish a set of safe and stylish stairs for outdoor decks, and I spent twice as much time sanding the melted burrs off the edge as I would have spent just cutting slowly. If the project is complex, it helps to visualize the fit beforehand; this is why I never start a complex deck project without a digital 3d walkthrough first. It keeps the ‘surprises’ to a minimum.
The Final Fit and That Vital Expansion Gap
When you finally slide that board into place, it should click against the stone like a puzzle piece. But remember the expansion rule: if you are installing in the cold, leave a slightly larger gap (about 1/8th of an inch) than if you are installing in the heat of summer. You are essentially learning how to hide the gap between your deck and the house siding by making the gap so consistent that the human eye simply ignores it. A perfectly scribed board follows the ‘chaos’ of the stone so closely that it looks like the deck grew right out of the wall.
Let’s dig deeper into what separates a ‘good enough’ project from one that stands the test of time. Most people think that once the boards are down, the job is done. But I’ve spent years fixing mistakes that occurred because homeowners bought into the myth that composite is 100% maintenance-free. While you won’t be staining it every summer, the truth about maintenance-free decking claims is that these materials still require strategic care, especially at the joints. I once saw a deck where the owner ignored the debris in the gaps, and the resulting moisture trap actually started to rot the substructure, even though the surface looked pristine. When you are transforming your space with expert deck builder tips for stunning outdoor living, you have to look beneath the surface.
Your Stair Stringers are Thinner Than You Think
The most common ‘oops’ factor I encounter involves stairs. Many DIYers take a standard 2×12 and cut deep notches for the steps, not realizing they are significantly weakening the structural integrity of the wood. If you cut too deep, you leave a narrow ‘throat’ that is prone to snapping under heavy loads. This is why your deck stair stringers are cracking at the throat and why I always recommend reinforcing those cutouts. I used to trust standard nails for these connections until I realized they pull out over time as the wood cycles through seasons. Now, I advocate for the bracket that makes your deck stairs feel rock-solid, ensuring that the connection to the rim joist isn’t just hanging by a few threads of wood fiber. 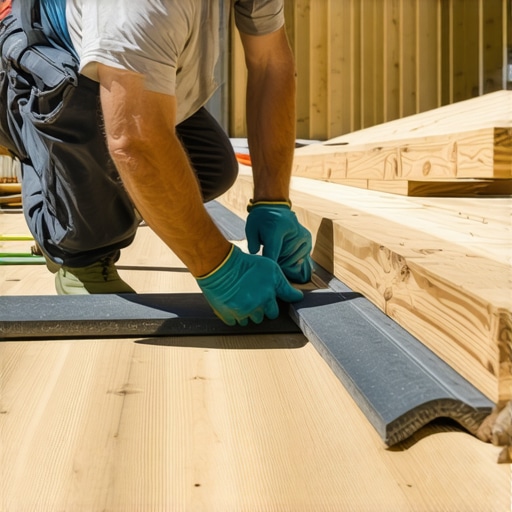
Why Do Your Stair Treads Squeak Even After You’ve Screwed Them Down?
It is incredibly frustrating to finish a beautiful set of safe and stylish stairs for outdoor decks only to have them squeak like an old haunted house every time you step. Most people assume the screw is loose, so they drive another one in, but the real culprit is usually friction between the tread and the stringer. The hidden nuance here is using a bead of construction adhesive along the top of the stringer before laying the tread. This creates a permanent bond that prevents the slight ‘micro-rubbing’ that causes noise. This is one of the many reasons why stair treads need more than just screws to stay quiet. According to the North American Deck and Railing Association (NADRA), structural failures often begin at high-stress points like stairs, making these ‘small’ details a matter of safety rather than just aesthetics.
Stop Using Lag Bolts for Every Connection
There is a persistent belief in the DIY community that a big, chunky lag bolt is the strongest fastener available. In reality, modern structural screws have higher shear strength and don’t require the massive pilot holes that can actually split your framing. This is why I use structural screws instead of lag bolts for ledgers and critical stair attachments. Especially in coastal or high-humidity environments, you need to be incredibly picky about your hardware. Choosing the best fastener for building a deck in a high-moisture area can prevent the ‘bleeding’ of rust that ruins the look of light-colored composite boards. Have you ever fallen into the trap of thinking ‘bigger is always better’ with your hardware? Let me know in the comments below, and let’s keep the conversation going!
The One Tool That Saved My Shoulders and My Sanity
When I first started, I thought a standard wood blade on my miter saw was good enough for everything. I was wrong. Composite material is dense, and it’s essentially half plastic; it doesn’t cut like cedar. To get those surgical fits against a stone wall or a complex picture frame border on a deck, I exclusively use a 60-tooth carbide-tipped blade. Why? Because it prevents the ‘mushrooming’ effect where the screw or the blade pushes the plastic upward, creating a nasty bump on the surface. If you’re looking for expert deck builder tips for stunning outdoor living, start with your blade choice. It’s the difference between a ragged edge and a factory-finish look. I also never step onto a job site without a dedicated hidden fastener tool. While we use hidden clips for the field but screws for the perimeter, having a tool that ensures consistent gapping is vital for the health of the deck.
How do I keep my composite deck looking brand new for decades?
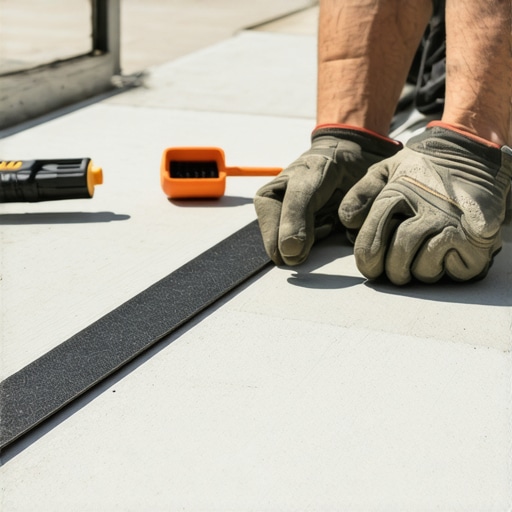
The biggest lie in this industry is that composite is zero-maintenance. It’s low-maintenance, not ‘no-maintenance.’ Over time, organic matter like pollen and leaf tannins can settle into the embossed grain. To prevent permanent staining, I recommend a semi-annual deep clean with a pH-neutral soap. But the real maintenance happens where you can’t see. According to the American Wood Council’s National Design Specification (NDS), moisture trapped between a non-porous surface (like composite) and a wood joist is the primary cause of premature structural failure. This is exactly how to keep your deck joists from rotting under the boards: use joist tape. It’s a small upfront cost that adds twenty years to the life of your frame. If you ignore this, you’re basically building a beautiful house on a crumbling foundation.
The Future of Deck Building is Smarter Than You Think
As we look toward innovative outdoor living ideas with composite decking in 2025, the trend is shifting toward total environment control. I’m seeing a massive spike in requests for integrated ‘smart’ decks—think built-in sensors that trigger safety lighting for stairs without creating a glare the moment you step outside. We are moving away from just ‘platforms’ and toward fully functional outdoor rooms. This evolution means you need to be thinking about your layout early on, perhaps even picture framing your deck for structural and aesthetic reasons to accommodate these tech integrations. My prediction? In five years, we won’t just be building decks; we’ll be installing outdoor ecosystems that manage their own drainage and lighting. To get ahead of the curve, I challenge you to try one advanced move on your next project: skip the standard hardware and switch to high-performance structural screws for your next stair build. You will feel the difference in stability immediately.
The Mistakes That Taught Me More Than Success Ever Could
Looking back at my first few attempts at scribing, I realized that I was trying to fight the material rather than work with it. One major ‘lightbulb moment’ was understanding that composite decking has its own set of rules compared to wood. Unlike cedar, which might forgive a tight fit, composite will punish you if you don’t respect its expansion and contraction cycle. I once had a client call me back six months later because a board I had scribed perfectly against a limestone wall had actually pushed a stone loose! This is why I always emphasize composite decking trends for 2025 that focus on movement-ready designs.
Another hard lesson was the ‘Tape Measure Trap.’ I used to think I could measure my way to a perfect fit. I would take twenty different measurements along a five-foot span of wall, only to find the board still didn’t fit. The day I put down the tape and picked up a simple compass was the day my work jumped from ‘good DIY’ to ‘professional grade.’ It taught me that our eyes are much better at detecting flow than numbers are at calculating chaos. When you are maximizing space with modern designs for composite decks, the fluid connection between the deck and the home’s architecture is what creates that high-end, integrated feel.
What I Keep in My Truck for Every Scribing Job
If you want to achieve these results, you don’t need a trailer full of specialty tools, but you do need the right ones. First, a high-quality carpenter’s compass with a locking nut is non-negotiable. If the nut is loose, your offset will change halfway through the scribe, and you’ll be left with a piece of expensive scrap. I also swear by a variable-speed jigsaw. Being able to slow down the stroke prevents the plastic in the board from melting, which is critical when you’re trying to execute innovative stairs solutions for safe outdoor deck access where every cut is visible.
Finally, I never start a project without a fresh box of structural screws and a set of carbide-tipped blades. The blades give you that factory-edge finish, and the screws ensure that once your perfectly scribed board is in place, it stays there without the risk of shearing. If you ever feel overwhelmed by the technical details, remember that even the pros started with a single, shaky cut. If you need a second set of eyes on your plans, don’t hesitate to contact us for guidance on your specific layout.
Now It Is Your Turn to Build Something Iconic
The beauty of a well-built deck isn’t just in the wide-open floor space; it is in those tiny, quiet details where the composite meets the stone and the stairs meet the ground. By taking the time to scribe your boards and reinforce your structure, you are doing more than building a platform—you are creating a legacy for your home. This level of craftsmanship is the hallmark of a true expert deck builder. Go slow, trust your scribed line, and don’t be afraid to back-cut. Your future self, sitting on that deck with a cold drink in hand, will thank you for the extra hour you spent getting it right today. Have you ever tried scribing a board only to have it fail on the first cut? Let me know what happened in the comments below!