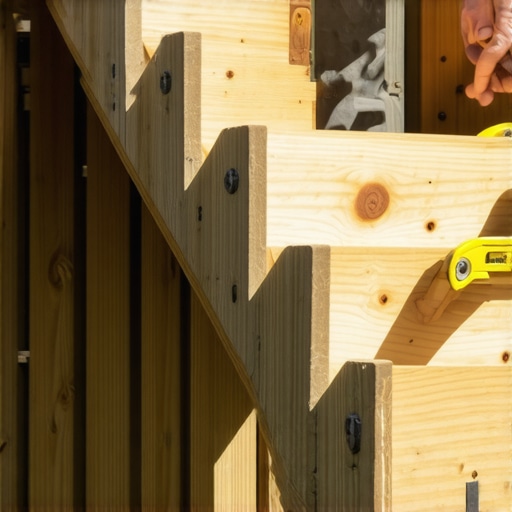
I remember the first time I hosted a summer BBQ on my newly finished DIY deck. I was beaming with pride until I saw my neighbor, Bill, trying to carry a tray of burgers up from the yard. He wasn’t walking; he was practically mountain climbing. His knees were hitting his chest, and he had to use his free hand to steady himself against the railing. That was my ‘aha’ moment—or more accurately, my ‘oh no’ moment. I had prioritized saving space in my small yard and, in doing so, I had built a ladder, not a staircase. It was steep, it was awkward, and quite frankly, it was a mistake I see homeowners and even some pros make all too often. If you feel a sense of dread every time you have to haul a cooler up to your seating area, you aren’t alone, and you aren’t imagining things. We are going to dive into exactly how to fix that vertical struggle today. We will look at why your current setup feels so ‘climb-y’ and how to calculate a rise and run that feels like a natural extension of your home rather than a CrossFit station.
Fix Your Footing and Stop Scaling Your Deck Like a Mountain
When I first started out, I fell into the trap of the stair stringer measurement mistake that ruins your stride. I thought that as long as the steps were even, it didn’t matter how high they were. I was wrong. The human body has a very specific ‘comfortable rhythm’ when it comes to walking. If your rise—the vertical height between steps—is too high, your glutes and knees have to do double the work. Most building codes allow for a maximum rise of about 7.75 inches, but just because it’s legal doesn’t mean it’s comfortable. I’ve found that aiming for a 7-inch rise with a deeper tread makes a world of difference. When you are designing safe and stylish stairs for outdoor decks in 2025, you have to balance the physics of the climb with the aesthetics of the build. Have you ever felt like you had to physically ‘pull’ yourself up your deck stairs?
Does a two-inch difference really change how your knees feel?
Absolutely. It sounds minor, but according to research published in the American Journal of Emergency Medicine, over a million people are treated in emergency departments for stair-related injuries annually, often due to improper dimensions that cause trips or overexertion. A slightly steeper angle changes your center of gravity. By adjusting your layout to include the stair tread depth that feels safest for kids and the elderly, you turn a utility feature into a luxury experience. In my early days, I didn’t realize that adding just one more step to the run could lower the rise of every other step enough to make the climb feel effortless. We’re also going to look at innovative stairs solutions for safe outdoor deck access to ensure that once you fix the height, the structure itself stays rock solid. I even started using structural screws instead of lag bolts for stairs because they pull the stringer tighter to the frame, preventing that annoying bounce that makes steep stairs feel even more like a rickety ladder. Let’s get into the math so you can stop climbing and start strolling.
Measure Twice to Avoid the One-Step Stumble
The math is the most intimidating part for most DIYers, but it is really just simple division. You need to find your total rise—the exact distance from the top of the deck surface to the ground where the stairs will land. I learned the hard way on a job in Branson that if you do not factor in the thickness of your landing pad, your last step will be a different height than the others, creating a massive trip hazard. You should learn how to level a deck frame on uneven ground without using a laser to ensure your base is perfectly flat before the first stringer even touches the ground. Once you have that total height, divide it by 7. That gives you the number of steps. If you get a fraction, round up or down and divide again to find the exact rise per step. Aiming for that sweet spot makes the transition feel like you are walking on level ground rather than climbing a ladder.
Protect the Structural Integrity of Your Stringers
When you start cutting into a 2×12 to create your stringers, you are effectively removing the strength of the board. The ‘throat’—the uncut portion of the wood behind the steps—is all that is holding the weight of whoever is walking up. I have seen countless decks where your deck stair stringers are cracking at the throat because the builder over-cut the notches. To prevent this, I always use a handsaw to finish the corner of the cut rather than over-cutting with a circular saw. It takes an extra ten minutes, but it prevents those tiny stress fractures that turn into structural failures five years down the line.
Stop the Sway with Lateral Blocking
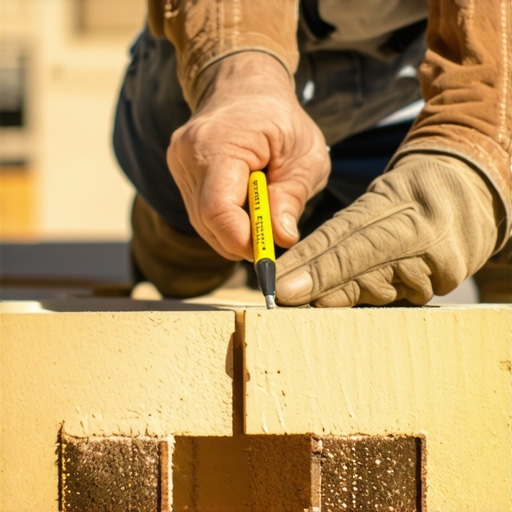
Even a perfectly cut set of stairs can feel ‘shaky’ if they are not braced. If your run is longer than four steps, you need to add internal support. I have found that why we always double-block the middle of a long stair run for stability is the secret to that rock-solid feeling. Without that blocking, the stringers can slightly bow outward as you step, which creates a subtle, unsettling vibration. By sandwiching 2×4 or 2×6 blocks between the stringers, you turn individual boards into a single, rigid unit.
The Connection That Never Fails
Most people just toe-nail their stringers into the rim joist and call it a day. That is a recipe for disaster. Over time, the weight of people and the natural movement of the wood will pull those nails loose. This is often the hidden reason your deck stairs are pulling away from the frame. Instead of relying on nails, I use specialized steel connectors. Specifically, the bracket that makes your deck stairs feel rock solid ensures that the downward force of the stairs is transferred directly into the deck’s main frame. It is a cheap insurance policy against a very expensive—and dangerous—failure.
Choosing Materials That Survive the Seasons
If you are using composite boards for your treads, remember they are not structural. They need more support than traditional wood. You will want to check out choosing the right composite decking for durable low-maintenance outdoor areas to ensure your material can handle the span between stringers. Usually, this means placing your stringers 12 inches on center instead of the standard 16 inches. I remember a project where I ignored this and the homeowner complained the steps felt ‘spongy.’ I had to crawl back under there and add two more stringers to fix the flex. It is much easier to do it right the first time by understanding the joist spacing secret for a solid feeling composite surface.
The Myth of Maintenance-Free Outdoor Living
Many homeowners believe that switching to composite decking means they can finally ‘set it and forget it.’ I hate to be the bearer of bad news, but that is a dangerous misconception. While you won’t be out there with a sander and a bucket of stain every two years, composite materials bring a whole new set of physical challenges that wood simply doesn’t have. Most DIYers treat composite like lumber, but it behaves much more like a high-end polymer. It expands and contracts significantly more than wood ever will. I once visited a site where the stairs were literally popping off the frame because the builder didn’t understand how to manage thermal movement. To avoid this, you need to look at transform your outdoor living with custom composite decking ideas that prioritize material physics alongside aesthetics.
The Buckling Trap Most DIYers Fall Into
The most common ‘oops’ factor I see in the field is the hidden clip mistake that leads to buckling deck boards. Because composite boards are engineered, they need room to breathe. If you butt them up tight against a rim joist or a stair stringer without a proper gap, the summer sun will turn your beautiful flat surface into a wavy mess. This is especially true for stair treads. I have seen 12-inch treads bow upward because they were pinned too tightly between a railing post and a fascia board. It is vital to learn how to install deck fascia boards so they dont buckle in the heat to ensure the entire system moves in harmony.
How do you account for thermal expansion in a rigid stair system?
This is where the pros separate themselves from the amateurs. According to studies by the Forest Products Laboratory, wood-plastic composites can expand up to 1/16 of an inch for every ten degrees of temperature change. In a climate where the temperature swings forty degrees in a single day, a twenty-foot deck can move half an inch. If your stairs are anchored at the top and bottom without a ‘slip’ joint or the right fastening pattern, something is going to break. That is why we use hidden clips for the field but screws for the perimeter. The screws act as an anchor point, forcing the expansion to happen in a predictable direction rather than pushing your stairs away from the house.
Advanced Stability Secrets for Modern Decks
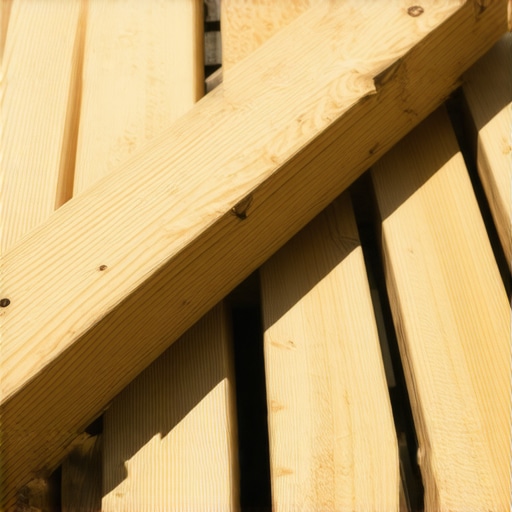
If you want that ‘rock-solid’ feel that lasts a decade, you have to get the skeleton right. Even the best boards will feel ‘spongy’ if you don’t respect the joist spacing secret for a solid feeling composite surface. For stairs, this often means tripling your stringers or using thicker blocking than you think is necessary. I often tell my clients that the benefits of working with a professional deck builder in your outdoor projects come down to these invisible details. We aren’t just building a platform; we are building a structural machine that has to survive rain, snow, and the pounding of a hundred BBQ guests. If you are debating between high-end wood or synthetic, make sure you understand the maintenance reality of owning an ipe hardwood deck versus the engineering requirements of composite. Have you ever fallen into this trap where your ‘low maintenance’ deck ended up needing a major repair? Let me know in the comments.
The tools I carry in my truck today are very different from what I started with. If you want to avoid the stair stringer measurement mistake that ruins your stride, you need a high-quality framing square and brass stair gauges. These small brass nuts clamp onto your square so you can repeat the exact same rise and run for every single notch. It removes the human error of ‘eyeballing’ the line every time. For the fasteners, if you’re building anywhere near the water, I can’t stress enough why we use the only fastener we trust for coastal decks exposed to salt spray. Standard galvanized screws will weep rust within two seasons. I’ve also switched almost exclusively to impact drivers for stair assembly. A standard drill can strip heads, but the concussive force of an impact driver ensures that the screw seats deeply into the stringer without destroying the wood fibers. This is particularly important when you’re following designing safe and stylish stairs for outdoor decks in 2025 protocols that require extreme precision in fastening patterns.
How do I keep my composite stairs looking new for a decade?
Maintenance is mostly about what you do not do. I see so many people ruin their investment because they think ‘more power’ equals ‘more clean.’ This is why you should never use a pressure washer on composite decks-2. The high pressure can actually score the plastic surface, creating microscopic grooves where mold and dirt will thrive later. Instead, use a soft-bristle brush and a mild detergent. If you have specific issues, like the best way to clean bird droppings off dark brown composite boards, specialized cleaners designed for polymers are your best friend. A little seasonal elbow grease is all it takes to keep your innovative outdoor living ideas with composite decking in 2025 looking sharp.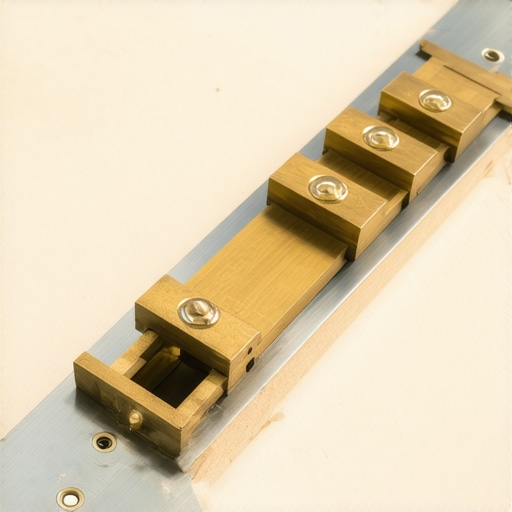
The Blackout Trick for a Disappearing Frame
One of my favorite advanced moves is purely aesthetic but makes a huge impact. It’s why I paint the tops of my joists black before installing composite. When you look at a deck from an angle, you often see the bright green or tan of the pressure-treated frame through the 3/16-inch gaps between boards. Painting the top of the joists (or using joist tape) creates a shadow line that makes the frame disappear, giving it a much more professional finish. According to the North American Deck and Railing Association (NADRA), maintaining the skeletal structure is just as important as the surface; their annual safety checks remind us that rot starts where the water sits, which is exactly why protecting those joist tops is a dual-purpose win for looks and longevity. According to NADRA’s technical documentation, over 40 million decks in the U.S. are currently in need of safety-related repairs, and moisture at the joist-to-board interface is a leading cause.
Where Outdoor Living is Heading in 2026
I predict we are going to see a massive shift toward fully integrated smart systems. We’re already seeing why a digital designer is the best move for planning a complex backyard deck to map out things like automated shade sails and zoned lighting. I’ve started using the lighting trick that highlights the grain of your wood to create paths of travel that feel intuitive. We aren’t just building platforms anymore; we’re building outdoor rooms that react to the time of day. If you want to take your project to the pro level, try this one tip: Buy those brass stair gauges I mentioned. It’s a tiny investment that ensures every step on your deck feels exactly like the one before it.
Hard-Earned Lessons from a Decade in the Trenches
Over the years, I have learned that the smallest oversights often lead to the biggest headaches. One of my biggest lightbulb moments was realizing that perceived stability is just as important as structural stability. If a guest feels a slight vibration under their feet, they will never feel safe, even if the stairs are built to hold a truck. This is why the simple way to stop deck stairs from squeaking when you step involves more than just extra nails—it is about managing friction between the tread and the stringer. Another lesson? Never underestimate the power of the first step. If your landing pad is even slightly off-level, every single measurement thereafter is a gamble. I also learned that the benefits of working with a professional deck builder in your outdoor projects often come down to their ability to anticipate how wood will shrink three years after the last screw is driven.
The Tools That Saved My Reputation
If you are serious about getting this right, there are three things you absolutely need. First, grab a pair of brass stair gauges; they turn a standard framing square into a precision instrument that prevents the stair stringer measurement mistake that ruins your stride. Second, I cannot recommend the bracket that makes your deck stairs feel rock solid enough. It bridges the gap between the deck frame and the stringer in a way that standard hangers just can’t match. Finally, keep a tub of joist tape in your bag. It is a tiny expense that prevents rot at the most vulnerable point of your staircase. For those who want to push the aesthetic further, check out elevate your home top stairs designs for modern outdoor spaces for inspiration on how to make the stairs a focal point rather than just a utility.
#IMAGE_PLACEHOLDER_E#
Your Path to a Better Backyard
Building a great set of stairs isn’t just about following code; it is about creating a sense of transition. When your rise and run are dialed in, you stop thinking about the ‘climb’ and start enjoying the destination. Whether you are designing safe and stylish stairs for outdoor decks in 2025 or simply fixing a wobbly step, take your time with the math and don’t cut corners on the hardware. Your knees, and your neighbors like Bill, will thank you. Have you ever started a project only to realize the math was way more complicated than you thought? Let me know your biggest DIY ‘uh-oh’ moment in the comments below.