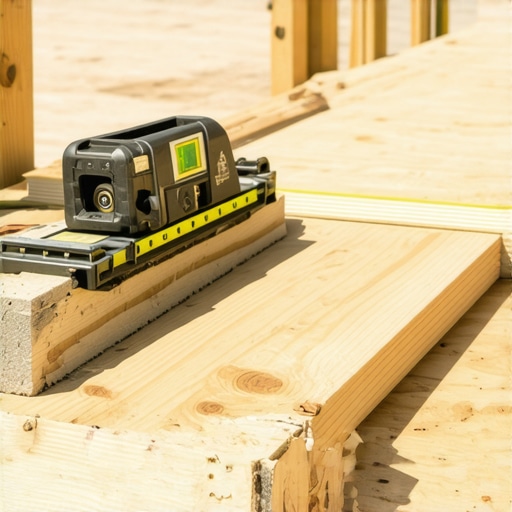
I stood there, sweat dripping off my chin, looking at a pile of pressure-treated lumber and a backyard that sloped like a playground slide. It was my first big project as a homeowner, and I had foolishly promised my family a level surface for our new outdoor living space by the weekend. I didn’t own a fancy rotating laser, and my budget was already tapped out on screws and joist hangers. I spent four hours with a standard 4-foot level, shimmying posts up and down, only to realize by sunset that the far corner was a full three inches lower than the ledger. I felt defeated. I almost called a professional deck builder just to bail me out of the mess. But then, an old carpenter neighbor leaned over the fence, saw my struggle, and handed me a clear plastic hose and a bucket of water. That moment changed everything for me.
Stop Chasing Bubbles and Trust the Physics
Getting a deck frame perfectly level on a nasty slope isn’t about how much you spent at the tool store. It’s about understanding how to manipulate the space you have. Whether you are dealing with the trick to a perfectly level deck on a sloped yard or trying to figure out how to get a perfectly level deck on an uneven concrete patio, the solution is surprisingly low-tech. Today, I am going to walk you through the string-line and water-level methods that have saved my hide on dozens of builds. We are going to ensure your frame is dead-on so you don’t end up with the structural reason your deck feels bouncy or, worse, a surface where your coffee mug slides right off the table.
Can a simple string line really beat a high-tech laser?
You might be skeptical. We live in an era where there is an app or a gadget for everything. But here is a surprising fact: the Great Pyramids were leveled using water trenches, and they are more level than many modern skyscrapers. In fact, a basic water level is often more accurate than a cheap $100 laser level, which can have a variance of 1/4 inch over just 30 feet in bright outdoor conditions. If you have ever struggled with a laser that is impossible to see in the noon sun, you know exactly what I am talking about. Have you ever found yourself squinting at a red dot that seems to disappear the moment you need it?
Learn from My Most Expensive Leveling Disaster
When I first started, I thought I could eye-ball the transit from the house to the outer posts. I did not realize that even a 1-degree error at the house turns into a massive gap ten feet out. This misalignment often leads to major issues down the road, including why your deck stairs are the first thing to rot because water pools in places it should not. I learned the hard way that gravity is the only tool that never needs its batteries charged. By the time we are done here, you will have a frame that stays solid for decades. We will even touch on how to protect your deck frame from rot for thirty years so your hard work actually lasts.
Establish a Zero Point You Can Actually Count On
To get a deck level, you need a fixed point of truth. Usually, this is your ledger board—the piece of lumber that physically connects your deck builder project to your house. Everything else flows from this line. I start by snapping a chalk line on the house wall, ensuring it is perfectly straight. But here is the catch: if your house is older, the siding or even the rim joist might not be perfectly level. I learned this the hard way on a 1920s bungalow where I blindly followed the siding line, only to realize the deck sloped two inches toward the foundation. Now, I always double-check the ledger level with a manual 8-foot level before I even think about the posts. This is also the best time to apply the flashing secret that prevents ledger board rot, because a level deck that rots out from the house in five years is a failure no matter how flat it is.
Build Your Own Water Level for Five Dollars
If you want to beat the pros without a $500 laser, go to the hardware store and buy thirty feet of clear vinyl tubing. Fill it with water (add a drop of food coloring to make it easier to see) and leave about a foot of air at each end. This works on the principle of communicating vessels: gravity pulls on the water equally at both ends, so the water level is always identical. I remember using this on a particularly brutal job site in the rain where my digital tools were glitching out. My client thought I was crazy for pulling out a garden hose, but once we marked the posts and verified them, the frame was within 1/16th of an inch across a twenty-foot span. It was a victory for physics over electronics. 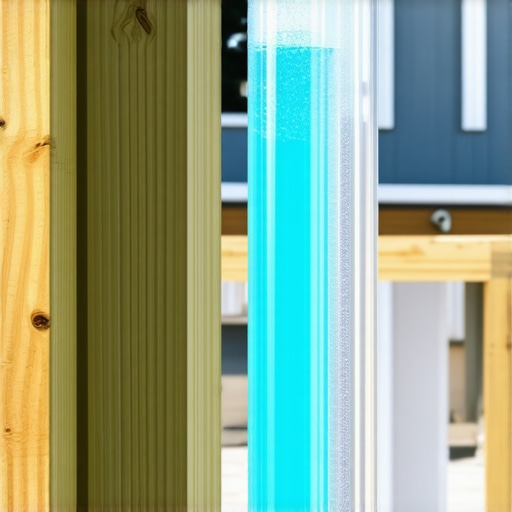
Transfer Your Marks Without Any Tech Frustrations
Hold one end of the tube against your ledger board (the zero point) and have a partner take the other end to your first 4×4 or 6×6 post. When the water stops moving, the top of the water line on the post end is perfectly level with the mark on the house. Mark it with a sharp pencil. Move from post to post, repeating the process. This method is foolproof because it doesn’t matter if the ground is uneven or if there are obstacles in the way; the water finds level around corners and over humps. This precision is vital, especially if you are planning innovative stairs solutions for safe outdoor deck access later. If your main deck frame is off by even half an inch, your stair stringers will be a nightmare to install, often leading to the structural reason your stairs feel like they are leaning.
Protect Your Skeleton Before the Boards Go Down
Once your posts are cut and the beams are set, you have a perfectly level skeleton. But don’t rush to lay down that durable, low-maintenance composite decking just yet. A level frame can still trap water if the joists aren’t protected. I always apply joist tape to the top of every piece of pressure-treated lumber. This prevents moisture from sitting in the screw holes, which is how to keep your deck joists from rotting under the boards. On a job last summer, we found a frame that was perfectly level but completely soft to the touch because the previous builder skipped this five-minute step. Keeping it level is about geometry; keeping it standing is about moisture management. Using the bracket that makes your deck stairs feel rock solid at this stage ensures that as you build outward, the structural integrity matches the precision of your leveling work.
I used to think that once the bubble was centered on the level, the job was done. But that is where most beginners—and even some seasoned pros—get slapped by reality. Let’s dig deeper into the nuances that separate a DIY weekend project from a high-end deck builder masterpiece. One of the most common myths in the industry is that a deck surface should be perfectly level in every direction. In reality, a truly professional build often incorporates a subtle 1/8-inch-per-foot slope away from the house foundation. Why? Because water is the ultimate enemy of your home’s envelope. The International Residential Code (IRC) emphasizes that while the structure must be stable, improper drainage and flashing are the leading causes of ledger failure and rot. If your deck is perfectly level, a heavy rain can leave standing water against your siding, leading to expensive repairs down the road.
Is your “perfectly level” frame actually a recipe for puddles?
When you are working with durable, low-maintenance composite decking, this slope is even more critical. Unlike wood, which can absorb a bit of moisture, water sits on top of composite. If your frame is even slightly cupped or dead-level, you will end up with unsightly puddles that leave mineral rings and attracts dirt. This is especially true if you are using cheap composite decking from big box stores, which may not have the same rigid embossing as premium lines. I have seen beautiful projects ruined because the owner obsessed over a level bubble but ignored how water would actually move across the surface. Have you ever fallen into this trap? Let me know in the comments.
Avoid the Expansion Trap That Ruins High-End Composite
The biggest “oops” factor I see involves thermal expansion. Wood shrinks over time, but composite boards expand and contract significantly with temperature changes. If you level your frame and install your boards tight against a wall in the winter, those boards will have nowhere to go when the July sun hits. I have walked onto jobs where the boards have literally buckled and popped their fasteners because the builder didn’t understand why your composite boards are expanding more than expected. You must use the spacing secret for installing composite decking in winter to ensure that your perfectly level frame doesn’t look like a roller coaster by next season. Physics does not care about your aesthetic goals; it only cares about heat and pressure.
Why Your Seams Look Uneven After the First Summer
Another nuance that novices miss is the structural support at the seams. If you are spanning a 40-foot wide area, you will have joins where two boards meet. A standard single joist is never enough for these transitions. Over time, the pressure of foot traffic and the natural slight movement of the house will cause those ends to become uneven, leading to the structural reason your deck feels bouncy when you walk. This is why I always use double joists under composite seams. It provides a wider landing for the fasteners and ensures that both board ends stay on the exact same plane for the life of the deck. This same attention to detail applies to your stairs. If you don’t master the trick to cutting perfect deck stringers on the first try, your innovative stairs solutions for safe outdoor deck access will eventually feel like a trip hazard. Leveling is the foundation, but managing movement and moisture is what makes a deck last thirty years.
I used to spend half my day pre-drilling holes for massive lag bolts, sweating through my shirt while wrestling with a heavy-duty drill. Then I discovered structural screws, and I never looked back. If you want to scale your project from a basic platform to a professional-grade masterpiece, you need to stop using outdated hardware. I personally rely on 5-inch structural screws because they offer incredible shear strength without the need for a pilot hole. This is the reason we use structural screws instead of old-fashioned lag bolts on every single ledger and post-to-beam connection. It saves hours of labor and reduces the risk of splitting the wood, which is crucial when you are trying to maintain that level frame we worked so hard to establish.
Grab Your Impact Driver and Ditch the Lag Bolts
When you are building out the perimeter, the fasteners you choose dictate the finished look. For a clean, high-end appearance, I always move toward hidden systems. This is why I prefer hidden fasteners for poolside decks or any high-traffic area where bare feet are common. Nothing ruins the vibe of innovative outdoor living faster than a stray screw head catching a toe. If you are aiming for a truly high-end finish, check out the American Wood Council’s DCA 6 documentation; it is the industry bible for safe, code-compliant deck construction and will help you understand the physics behind these fastener choices. Following these standards ensures your deck is as safe as it is beautiful.
How do I keep my deck looking brand new for twenty years?
Maintenance is where the fantasy of a “zero-work” backyard usually dies. While we often hear about durable, low-maintenance composite decking, you still have to deal with the elements. I tell my clients that the real work is in the prevention. You should be checking your flashing and joist tape annually to ensure water isn’t sneaking into the skeleton. If you do get a spill during a summer BBQ, you need to know how to clean grease stains off composite without ruining the finish immediately. A quick wash with mild soap and a soft brush is usually all it takes, but let it sit for a month in the sun, and you might have a permanent reminder of that burger. This is the truth about maintenance-free decking claims—they are low maintenance, not no maintenance.

Design Your Space Digitally Before You Cut a Single Board
Looking toward 2025 and beyond, the biggest shift I am seeing is the move away from hand-sketched plans toward immersive technology. I used to think 3D modeling was just for architects with expensive degrees, but now it is a vital tool for any serious deck builder. Using software allows you to visualize how creating seamless transitions with stairs will actually function in your specific yard. This is why a digital designer is the best move for planning a complex backyard deck; it catches mistakes in the virtual world before they cost you thousands in lumber. I’ve had projects where a 3D walkthrough revealed that the stairs were going to block a basement window—a mistake that would have been a nightmare to fix mid-build. I strongly encourage you to try a simple 3D modeling app for your next upgrade; it’s the best way to ensure your vision for custom composite decking ideas actually fits your lifestyle.
Why I Stopped Obsessing Over the Bubble and Started Watching the Rain
After years of wrestling with various slopes, I’ve realized that the most important skill isn’t just reading a level, but anticipating how the structure will live in the real world. Here is the insider wisdom I’ve gathered from dozens of builds:
- The ground is a living thing: I once built a perfectly level deck on what I thought was packed soil, only to watch it tilt two inches after a heavy spring thaw. Now, I never skip the specific framing moves that account for soil settling and pest prevention.
- Aesthetics can hide sins, but physics won’t: You can disguise a slightly crooked cut with a clever picture-frame border, but you cannot hide a frame that isn’t square once the decking goes down.
- Noise is the first sign of a leveling failure: If your frame is under tension because it was forced into place, your stair treads will squeak and groan as the wood expands. Leveling isn’t just about flatness; it’s about silence.
#IMAGE_PLACEHOLDER_E#
The Low-Tech Kit That Beats a Thousand-Dollar Laser
I’ve spent a small fortune on gadgets, but these are the few things that actually earn their keep on every job site. I personally trust the DCA 6 Prescriptive Residential Wood Deck Construction Guide as my ultimate reference—it removes the guesswork and ensures every connection is safe. For hardware, choosing structural screws over lag bolts has saved my wrists and my project timelines more times than I can count. Finally, never underestimate a 30-foot clear hose; it is the only tool that remains 100% accurate in blinding noon-day sun where laser dots simply vanish.
From a Sloped Mess to Your Personal Outdoor Oasis
Building your own deck is more than just a home improvement task; it is about reclaiming your backyard for family time and relaxation. Whether you are installing high-performance composite decking or figuring out the complex geometry for a new set of stairs, remember that every professional deck builder started with one confusing slope and a pile of lumber. By focusing on a rock-solid, level foundation and smart moisture management, you are ensuring your outdoor living space remains a sanctuary for decades. A skilled deck builder isn’t someone who never makes a mistake, but someone who knows how to use gravity to fix them. Have you ever encountered a surprise slope or a foundation height that completely threw off your initial deck measurements? Let me know your story in the comments below!