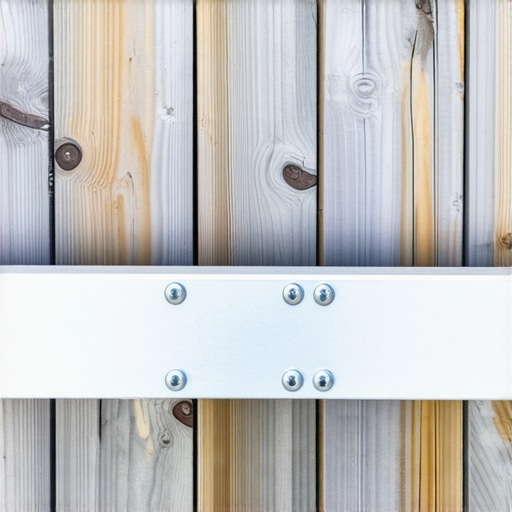
I’ll never forget the sound—a low, rhythmic groan that happened every time my dog, a 70-pound Lab, ran across the deck to chase a squirrel. I used to tell myself it was just the wood “settling” or maybe a loose joist hanger, but deep down, in that place where your gut knows you messed up, I knew better. Years ago, when I first started out as an aspiring craftsman, I made the rookie mistake of thinking I could just lag-bolt a ledger board right through the old, brittle T1-11 siding and call it a day. It looked fine from the outside. I thought the siding was sturdy enough to act as a spacer, and I was too lazy to cut into the house’s exterior. I was wrong. Dead wrong. When I finally gathered the courage to pull a few boards up to investigate why the railing felt “spongy,” the “rock-solid” connection I’d bragged about to my neighbors was actually a mushy mess of wet pulp, gray mold, and rusted fasteners that I could have pulled out with my bare hands. It was a sobering realization that nearly cost me my porch—and potentially someone’s safety.
Stop Bolting Your Deck to Mushy Siding
If you’re standing in your backyard, looking at your weathered siding and wondering if you can just sandwich it between your house and a new ledger, let me save you a massive, expensive headache: do not do it. We are here to solve the riddle of the dangerous “ledger sandwich” today, ensuring your outdoor space stays exactly where it belongs—permanently attached to your home’s rim joist. Whether you’re a weekend warrior or looking for the benefits of working with a professional deck builder, getting this critical connection right is the absolute difference between a lifetime of BBQs and a structural catastrophe. The fundamental problem with old siding isn’t just that it’s soft; it’s that it acts like a sponge. When you bolt a structural board directly over it, you’re creating a dark, airless pocket where moisture is trapped forever. I learned this the hard way on a project early in my career. I ignored the specialized flashing and just relied on a thick bead of “high-quality” caulk and a prayer. Within just three short seasons, the deck ledger was pulling away from the house because the structural sheathing behind the siding had turned into something resembling wet oatmeal. It’s a terrifying sight to see daylight through a gap that’s supposed to support thousands of pounds.
Will cutting into my old siding cause massive water leaks?
It’s the number one fear I hear whenever I talk to neighbors about their renovation plans. “If I cut a hole in my house’s protective skin, won’t the rain get in and rot my living room?” It sounds completely counterintuitive, but cutting away a clean strip of that old siding to mount your ledger directly to the solid wood of the rim joist is actually the only way to keep your house truly dry and safe. By using proper metal Z-flashing and a high-quality self-adhering membrane, you create a waterproof connection where the deck meets the wall that will likely outlast the siding itself. Have you ever noticed a weird, growing gap opening up between your deck boards and the house siding during a heavy rain? If you have, you aren’t alone—have you faced this specific problem before, or are you seeing the warning signs right now? Interestingly, the International Association of Certified Home Inspectors (InterNACHI) reports that more than 60 percent of deck collapses are related to the ledger board connection. Most of these failures happen while the deck is fully occupied, which makes the “good enough” approach a gamble I’m no longer willing to take. We’re going to walk through the exact steps to strip back that old siding, find the structural meat of your home, and build a connection that is actually built to last for decades.
The Surgery: Peeling Back the Layers to Find Real Wood
Before you even touch a saw, you need to think like a surgeon performing a bypass. You aren’t just “attaching a board”; you are integrating two separate structures. The first step is identifying the exact location of your home’s rim joist. This is the heavy-duty structural lumber that sits vertically on your foundation wall. If you miss this, your deck is literally hanging on a prayer. I remember a project early on where I didn’t double-check the interior floor height. I ended up driving three-inch screws into the void of a floor truss system instead of solid wood. I had to pull the whole thing off and start over, which is why deck builder insights are so vital—they help you visualize what’s happening behind the wall before you make a single mark.
Precision Cutting Without Hitting the Plumbing
Once you’ve marked the height of your deck (accounting for the thickness of your future boards), it’s time to cut the siding. Use a circular saw, but here is the trick: set the blade depth to be exactly 1/8 inch deeper than the siding itself. You want to kiss the sheathing, not carve through it. I once saw a guy zip through his T1-11 siding and accidentally nick a main electrical line because he had the blade set to its maximum depth. It was a shower of sparks and a very expensive call to an electrician. Take it slow and use a sacrificial blade you don’t mind ruining on old nails.#IMAGE_PLACE_HOLDER_B#
The Waterproofing Sandwich That Actually Works
With the siding removed, you’ll likely see the plywood sheathing. This is your chance to prevent the “oatmeal” rot I mentioned earlier. You need to apply a high-quality, self-adhering flashing tape directly to the house wrap or sheathing. This creates the secret to a waterproof connection where the deck meets the wall. Then, and only then, do you install the metal Z-flashing over the top of the ledger. This acts like a little umbrella, shedding water away from the house and over the front of the ledger. It’s the difference between a dry basement and a moldy nightmare.
Drive the Right Fasteners for a Lifelong Bond
Gone are the days of struggling with a heavy impact wrench and massive lag bolts that require pre-drilling. These days, the reason why I use structural screws instead of lag bolts comes down to sheer efficiency and holding power. These screws are engineered to bite deep and stay put without splitting the wood. As you secure the ledger, ensure you are following a staggered pattern. This prevents the rim joist from splitting under the concentrated load. It’s also the perfect time to think about your layout; the joist spacing secret for a solid-feeling composite surface starts right here at the ledger. If your spacing is off by even half an inch here, it will telegraph all the way to the outer rim, making the final installation of my favorite deck boards a total headache. A solid ledger is the foundation of every other aesthetic choice you’ll make.Most homeowners focus entirely on the aesthetic of the boards, but the real structural story is told in the shadows where the frame meets the house. While we’ve tackled the ledger, there is a dangerous myth that once that board is bolted, you’re in the clear. In my years of inspecting failed builds, I’ve found that even a perfect ledger can’t save a deck if you ignore the stair connection or the joist tops. In fact, many builders argue that a standard ledger is the only point of failure, but I’ve found that [reasons your stair stringers might be cracking](https://deckdesignbuild.com/why-your-deck-stair-stringers-are-cracking-at-the-throat) often start with how they were initially notched—a mistake that turns a structural member into a ticking time bomb. According to a study by the North American Deck and Railing Association (NADRA), nearly 40 million decks in the U.S. are over 20 years old, and a staggering number of them suffer from localized rot at the stair-to-deck transition because builders treated the stairs as an afterthought rather than a primary load point.
The Moisture Trap Nobody Talks About
Even if your ledger is flashed like a submarine, the very joists you just installed are at risk the moment you lay down your composite boards. There is a common belief that composite decking protects the wood beneath it from rain. In reality, the gap between the boards acts like a funnel, directing water directly onto the top of your pressure-treated joists. Because composite holds heat and limits airflow, that water doesn’t evaporate; it sits there, slowly eating away at the wood. This is exactly [the hidden cost of skipping joist tape on a new build](https://deckdesignbuild.com/the-hidden-cost-of-skipping-joist-tape-on-a-new-build). I’ve seen 10-year-old frames that looked 40 years old because the tops of the joists had turned into compost. To combat this, I’ve started [painting the tops of my joists black](https://deckdesignbuild.com/why-i-paint-the-tops-of-my-joists-black-before-installing-composite) before the decking goes down—not just for the sleek look that hides the frame, but to add an extra layer of protection against the elements. Have you ever noticed your frame looking weathered even though your boards are brand new? Let me know in the comments if you’ve seen this kind of ‘hidden’ rot on your own projects.#IMAGE_PLACE_HOLDER_C#
Is your ledger strong enough for a 400-gallon hot tub?
This is a question I get from almost every client who dreams of a spa day on their new deck. A standard ledger connection is designed for a live load of 40 pounds per square foot. A full hot tub can easily exceed 100 pounds per square foot. If you try to bolt a hot tub deck to your house using standard methods, you are asking for a collapse. You need to transition to a [sturdier deck frame for heavy hot tubs](https://deckdesignbuild.com/how-to-build-a-deck-for-a-heavy-inflatable-hot-tub-safely) which often involves adding dedicated footings near the house so the ledger isn’t carrying the entire weight of the water. Another often overlooked detail is the ‘bounce’ factor. If your frame feels like a trampoline, it’s usually because the joists are undersized for the span. You can find an [affordable fix to stiffen it up](https://deckdesignbuild.com/why-your-deck-feels-bouncy-and-the-affordable-fix-to-stiffen-it-up) by adding mid-span blocking, which stops the joists from twisting and distributes the load more evenly. Finally, don’t forget the importance of airflow. If you wrap your deck in tight fascia without [venting the space under your deck](https://deckdesignbuild.com/how-to-vent-the-space-under-your-deck-to-prevent-mold-and-wood-rot), you’re creating a tropical rainforest under your feet that will rot the best frame in record time. Have you ever fallen into this trap of over-sealing your deck for looks? It’s a mistake that’s easier to make than you’d think.I’ve spent thousands of dollars on tools over the last decade, and if there’s one thing I’ve learned, it’s that a cheap impact driver is the fastest way to ruin a high-end project. When you’re driving structural screws into a rim joist, you need consistent torque without the ‘cam-out’ that strips heads and leaves you frustrated. I personally swear by the Milwaukee M18 FUEL Surge; it’s a hydraulic driver that’s quieter than a standard impact, which is a godsend when you’re working close to a neighbor’s window. This tool is essential for ensuring that the only fastener we trust for coastal decks exposed to salt spray actually seats correctly every single time.
Keep the grime away without ruining the finish
Once the structural heavy lifting is done, the focus shifts to the long game: maintenance. Most people think composite means ‘no maintenance,’ but that’s a dangerous myth. You still have to deal with pollen, tannins from falling leaves, and the occasional spilled burger grease. I always tell my clients that why you should never use a pressure washer on composite decks comes down to the high-pressure stream potentially delaminating the capped surface. Instead, a simple solution of Dawn dish soap and a soft-bristle brush is all you need. If you’ve gone for a darker aesthetic, you might notice that the best way to clean bird droppings off dark brown composite boards involves a quick rinse followed by a microfiber wipe-down to prevent streaks. #IMAGE_PLACE_HOLDER_D#
How do I maintain my deck structure over time?
Maintenance isn’t just about the surface; it’s about the skeleton. Every spring, I recommend doing a ‘flashlight walk.’ Get under the deck and look for any signs of water tracking back toward the house. If you see white, crusty mineral deposits on your joists, your flashing might be failing. This is also the time to check your stairs. Because the hidden reason your deck stairs are pulling away from the frame is often related to seasonal ground heave, you want to ensure your concrete landing pad is still level. According to the American Wood Council’s Design for Code Acceptance (DCA) 6 – Prescriptive Residential Wood Deck Construction Guide, the connection between the stair stringer and the deck frame is one of the most frequently under-engineered areas in residential construction. Ensuring you have proper tension ties can prevent a catastrophic failure during a large gathering.
Why the future of decking looks like a skyscraper frame
Looking ahead, I see a massive shift toward the hidden benefit of using steel deck framing instead of wood. While pressure-treated lumber is the current standard, the straight lines and rot-resistance of light-gauge steel are becoming the ‘gold standard’ for high-end builds. It allows for longer spans and perfectly flat floors that wood simply can’t match over a twenty-year period. As we move toward more composite decking trends for 2025, expect to see integrated ‘smart’ features like built-in sensors that can detect moisture levels behind your ledger board. My advice for your next project? Don’t just build for this summer; build for the summer of 2045. Try this: next time you’re at the hardware store, skip the standard lag bolts and pick up a box of specialized ledger screws. They cost more, but the time you save—and the peace of mind you gain—is worth every penny.
The Hardest Lessons I Learned Above the Rim Joist
Looking back at my years as a craftsman, the most expensive mistakes weren’t made with a saw, but with my assumptions. I used to assume that if a house looked solid, the framing underneath was perfect—but a true deck builder always verifies the structural integrity of the home first. If you find a soft spot in your rim joist, fix it now; a new deck won’t hide a rotting house forever. Another lightbulb moment was realizing that ‘waterproof’ is a system, not a single product. It’s about how every layer overlaps to shed water away from the structure. Finally, never underestimate the power of creating seamless transitions between your home and your new outdoor space.
My Personal Toolkit for a Bulletproof Build
If you’re serious about longevity, there are a few resources I never start a job without. First, the DCA 6 Guide is the industry standard for ensuring your project meets safety codes. For the actual construction, I always keep a bottle of end-cut solution nearby. Taking the time to learn the best way to seal the end cuts of pressure treated lumber to prevent rot is the single most effective way to add a decade to your frame’s lifespan. I also recommend studying designing safe and stylish stairs for outdoor decks in 2025 to ensure your project stays modern and secure. These tools turn a stressful DIY into a professional-grade outdoor living masterpiece.
Build Your Stage for the Next Twenty Summers
At the end of the day, we aren’t just bolting wood to a house; we are creating the backdrop for morning coffees, family BBQs, and quiet sunsets. When you take the extra step to strip that old siding and flash the ledger properly, you’re investing in years of peace of mind. By following these expert deck builder tips for stunning outdoor living, you ensure your deck remains a sanctuary for your family. Don’t be afraid to take it slow and build it right the first time. Your future self will thank you when your structure is still rock-solid twenty years from today.
#IMAGE_PLACE_HOLDER_E#
Have you ever discovered unexpected rot when pulling back siding for a project? Let me know your horror stories—or your wins—in the comments below!