I remember the smell of wet cedar and the sickening sight of mold creeping up the drywall inside my dining room like it was yesterday. It wasn’t the rain’s fault; it was mine. I’d built what I thought was a masterpiece, but I’d ignored the most critical three inches of the entire project: the ledger board connection. I spent weeks picking out the best composite decking and obsessing over modern stairs designs, yet I trusted a five-dollar tube of caulk to protect my home’s skeleton. Spoiler alert: it didn’t.
Stop Letting Water Seep Behind Your Siding
When I finally peeled back the siding to fix a deck that started to pull away, the wood underneath looked like soggy oatmeal. It was a heart-sinking moment that every DIYer and even some pros fear. The reality is that the gap where your deck meets the house is a magnet for moisture. If you don’t manage that water, it won’t just sit there; it will find a way into your rim joist, your wall studs, and eventually, your living room. Today, I’m going to share the exact layering technique I use now to ensure a bone-dry transition. We’re going to talk about Z-flashing, high-quality joist tape, and why you should keep your deck joists from rotting by focusing on the ledger first.
Does This Extra Layer of Protection Really Matter?
You might be thinking that modern house wraps are enough to handle a little splashing, but the physics of water says otherwise. Capillary action can pull moisture upward and behind traditional barriers if they aren’t integrated perfectly. According to the International Association of Certified Home Inspectors, nearly 90% of all deck collapses are related to the failure of the ledger board connection, often caused by long-term water intrusion and rot. It’s not just about keeping things dry; it’s about making sure your deck ledger stays secure for the next thirty years. Have you ever noticed a soft spot on your siding or a weird musty smell near your back door after a heavy storm? [image_placeholder] That’s the house’s way of screaming for help. I made the mistake of ignoring those signs once, and I ended up spending thousands on structural repairs. We aren’t going to let that happen to you. We’ll look at how to properly integrate flashing with your house wrap and why using structural screws is only half the battle if the wood they’re biting into is soft.
Strip It Back and Seal the Rim Joist First
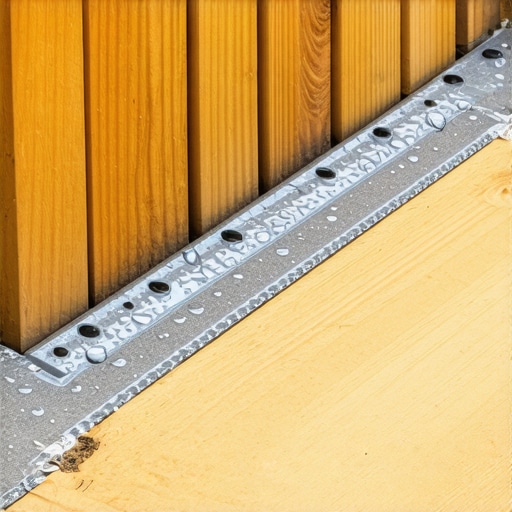
The first thing I do now—and what I wish I’d done on that first disaster—is clear enough space to actually see the structural skeleton. You need to remove at least two courses of siding above where the deck will sit. I once tried to tuck flashing under existing vinyl siding without removing it to save an hour of labor. It was like trying to put on a raincoat while wearing a backpack; everything looked okay on the outside, but water found the gaps and soaked my “dry” clothes underneath. Now, I expose the house’s rim joist completely. This is where you apply a high-quality, self-adhering flashing membrane. Think of this as your secondary skin. It needs to extend at least 6 inches above and below the ledger board location to ensure no moisture can migrate sideways.
Ditch the Lags for Modern Structural Screws
When you finally go to mount that board, you need to understand the reason we use structural screws instead of old-fashioned lag bolts. In the old days, we spent half our time pre-drilling massive holes and fighting with washers and wrenches. Now, structural screws zip right in, but more importantly, they don’t split the wood grain, which prevents creating tiny channels for water to enter the core of the beam. I always use a staggered pattern to distribute the load. If you line them all up in a single horizontal row, you’re essentially creating a perforated line that makes it easier for the wood to split under the weight of your composite decking later on.#IMAGE_PLACE_HOLDER_B#
The Z-Flashing Secret for a Water-Tight Seal
Metal Z-flashing is the “umbrella” of your deck’s structural connection. It sits on top of the ledger and goes up the wall behind the house wrap. This is the most common place where DIYers fail. I’ve seen people put the flashing over the house wrap, which is the equivalent of tucking your umbrella into your shirt—the water just runs straight down into your belly. The house wrap must overlap the vertical leg of the Z-flashing so that every drop of water is guided out and away from the wood.
Tape Every Single Joist Top Before Boarding
Once the ledger is secure and flashed, don’t stop there. You need to learn how to protect your deck frame from rot for thirty years by applying butyl joist tape to the top of every single framing member. Water loves to sit in the tiny gap between your deck boards and the joists. Without tape, that moisture gets trapped against the wood grain and starts the rot process from the top down. I remember a job where I skipped the tape to save fifty bucks; five years later, the homeowner called because the screws were pulling out of “mushy” wood. It’s the cheapest insurance policy you can buy for your outdoor living space.
Why Rigid Framing Protects Your Seals
Even with perfect flashing, a deck that moves is a deck that eventually leaks. This is why your deck ledger needs a tension tie to stay secure and prevent the deck from pulling away from the house. When a deck sways, it tugs on the flashing and breaks the caulk seals. Keeping it rigid ensures your water-proofing layers stay intact. You should also look at how to hide the gap between your deck and the house siding to give it that finished look without compromising the drainage path you just worked so hard to create.I often hear homeowners say they want a maintenance-free backyard. Let’s get one thing straight: the truth about maintenance-free decking claims is that ‘low maintenance’ is not the same as ‘no maintenance.’ One of the biggest nuances pros know—that most DIYers miss—is the reality of thermal expansion. While wood moves primarily with moisture, composite decking moves significantly with heat. If you install your boards tight against the siding during a cool morning, they will likely buckle into a wavy mess by the heat of July. Understanding why your composite boards are expanding more than expected is the difference between a project that looks professional and one that needs a total redo in two years.
Stop Chasing the Maintenance-Free Unicorn
Many people believe that once the boards are down, the job is done forever. However, the nuance lies in the gap. If you’re trying to figure out how to pick a deck color that complements your siding, you also need to consider that darker colors absorb more UV rays, leading to more dramatic expansion and contraction cycles. This movement puts stress on your fasteners every single day. In my experience, a skilled deck builder doesn’t just look at the aesthetics; they plan for the physics of the material. #IMAGE_PLACE_HOLDER_C#
Why ‘Meeting Code’ Usually Isn’t Enough
Here is a contrarian view: building to ‘code’ is essentially building to the lowest legal standard. Just because a joist span meets the local building inspector’s minimum requirements doesn’t mean it won’t feel like a trampoline when you walk across it. The structural reason your deck feels bouncy when you walk is often because the framing is right at the deflection limit. According to the American Wood Council, standard span tables are designed for safety, not necessarily for the ‘stiff’ feel homeowners expect from high-end outdoor living. This is specifically why I always use double joists under composite seams; it provides a wider landing for the fasteners and eliminates that annoying ‘see-saw’ effect when someone steps on the end of a board.
Does Your Staircase Pass the Coffee Cup Test?
If you walk down your deck stairs with a full cup of coffee, does the liquid splash? If it does, your stringers are likely under-supported or improperly spaced. Many builders cut three stringers and call it a day, but for composite treads, you often need four or even five to prevent sagging. This is why we always double block the middle of a long stair run for stability. It’s a hidden structural move that keeps the stairs from swaying laterally. Beyond stability, you have to consider the ergonomics of the climb; the stair tread depth that feels safest for kids and the elderly is usually slightly deeper than the code minimum. We’re aiming for creating seamless transitions where the stairs feel like a natural extension of the home, not a shaky ladder. Have you ever fallen into the ‘maintenance-free’ trap or felt a deck bounce that just didn’t feel right? Let me know in the comments below.
Stop Guessing and Use a Digital Blueprint
I spent my early years as a builder fighting the ‘eyeball’ method. I’d stand back, squint, and hope my stairs were level. It worked, until it didn’t. Now, I’ve realized that the tools in my truck are only as good as the software on my laptop. This is why I never start a complex deck project without a digital 3D walkthrough first to catch framing conflicts before they become expensive field mistakes. A digital designer is the best move for any serious homeowner because it allows you to visualize exactly how your custom composite decking ideas will integrate with your existing roofline. Looking ahead, I predict we’ll see more augmented reality (AR) apps where you can walk your finished deck in your backyard using your phone before a single hole is dug.
How do I maintain my composite deck over time?
Even the highest-end durable composite decking needs a little love. You aren’t staining or sanding anymore, but you are managing the environment. I tell my clients to focus on the ‘breathing’ of the deck. Every spring, you should be checking the gaps between boards. If they are clogged with needles or dirt, you’re trapping moisture against the joists. I recommend learning the best way to clean bird droppings off dark brown composite boards early on, because the high acidity in waste can eventually dull the finish if left in the baking sun. If you do happen to drop a heavy grill lid or a sharp tool, don’t panic—there are specific ways to repair a hole in your composite decking without replacing the entire board. According to the North American Deck and Railing Association (NADRA), a yearly ‘check-up’ of your ledger bolts and joist hangers is the single most effective way to prevent catastrophic failure. 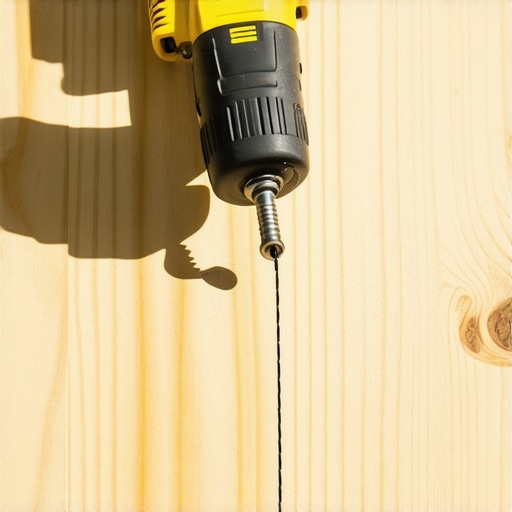
Invest in Tools That Save Your Joints
If you’re building this yourself, stop using a standard drill for your structural fasteners. You need a high-torque impact driver. It’s not just about speed; it’s about the impact mechanism preventing the screw from stripping, which ensures the head sits perfectly flush with the wood. When you’re working on the transition to the yard, using the bracket that makes your deck stairs feel rock-solid is worth every penny of the ten-dollar investment. It eliminates the ‘bounce’ that makes people feel uneasy. For the electrical side, I always suggest getting a pro to help you choose the right deck lighting transformer. If you undersize it, your glare-free stair lights will flicker and burn out prematurely.
The Maintenance Moves Most People Skip
Don’t overlook the simple things like keeping pests at bay. Learning how to keep spiders from building webs on your deck railing isn’t just about aesthetics; it’s about making the space actually usable. If you have a second-story project, consider how to hide the ugly underside of a second story deck using an under-deck drainage system. This doubles your usable square footage and keeps the framing bone dry. My advanced tip for you: next time you’re cleaning, grab a flashlight and look at the ledger board from underneath. If you see any staining on the siding below the ledger, your flashing has failed. Catching it now vs. five years from now is the difference between a $200 fix and a $10,000 structural nightmare. If you’re ready to get your project planned the right way, reach out to a professional deck builder who can help you navigate these technical hurdles before you break ground.
The Hidden Hard-Earned Truths of Modern Decking
Over the years, I’ve realized that the difference between a deck that lasts fifteen years and one that lasts fifty comes down to the things you can’t see once the project is finished. First, never assume your house wrap is a perfect seal; I always double-up with a liquid-applied flashing around the screw penetrations to be safe. Second, thermal expansion isn’t just a suggestion—it’s a law of physics. If you don’t leave the proper gap, your high-quality composite decking will fight the house and lose every time. Finally, the best designs incorporate airflow. If you box in your frame too tightly without ventilation, you’re creating a humid cave that speeds up rot, no matter how much tape you use.
The Gear That Actually Lives in My Truck
I don’t get paid to promote specific brands, but these are the resources I rely on to sleep at night. I always use a high-torque impact driver specifically for structural screws to ensure they seat without stripping. For safety standards, I constantly reference the NADRA (North American Deck and Railing Association) guidelines to ensure every set of stylish stairs I build is beyond reproach. I also recommend checking out how specific products like the TimberTech Fulton rail handle extreme weather, especially if you live in a climate with harsh winters. These tools and references are the backbone of my daily workflow.
Build a Space That Lasts for Decades
Your home is likely your biggest investment, and your deck should be an extension of that security, not a liability. Whether you are doing the work yourself or working with a professional deck builder, focusing on these structural details ensures your outdoor living space remains a sanctuary for your family. Don’t be afraid to take it slow and double-check your flashing layers; your future self will thank you when the rain starts pouring. [image_placeholder_final] Have you ever discovered rot behind your siding after removing an old deck? Let me know your story in the comments below.