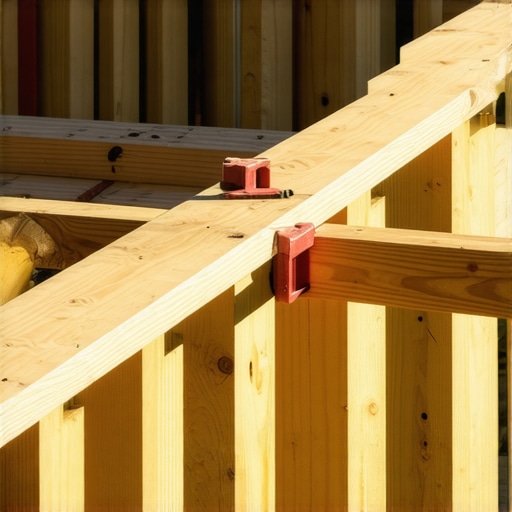
I’ll never forget the feeling of standing back, cold drink in hand, looking at my first solo framing job only to realize the middle joist was a full half-inch higher than the rest. It looked more like a topographic map of the Ozarks than a flat floor. I tried to convince myself that once I screwed down those heavy boards, the wood would just obey and flatten out. Spoiler alert: it didn’t. In fact, that dip became a literal tripping hazard that mocked me every time I walked out to the grill. If you are staring at a frame that looks more like a roller coaster than a foundation, take a deep breath. We’ve all been there, and today, I’m going to show you how to flatten that thing out so your decking lies as smooth as glass.
Your Deck Frame is Wonky and That is Okay
Most homeowners assume that if they bought straight lumber from the yard, the frame would be straight. But pressure-treated wood is a living, breathing, warping thing. By the time it gets to your backyard, it is often twisted, crowned, or bowed. When I was first learning the ropes as a deck builder, I made the rookie mistake of ignoring the crown of the joist. I just threw them up and figured the weight of the composite decking would settle the frame. It never happened. Instead, I ended up with a bouncy, uneven mess that felt cheap underfoot. If you’re noticing that some joists sit higher than others, you aren’t failing; you’re just at the stage where the pros separate themselves from the amateurs. Leveling the frame now is the difference between a high-end outdoor living space and a project that looks like a weekend mishap. Trust me, you don’t want to find out why your deck feels bouncy after you have already spent thousands on premium boards. Have you ever stepped on a deck and felt that weird, unsettling dip in the floor? That is exactly what we are going to fix before the first board goes down.
Does spending hours with a plane and shims actually matter?
You might be thinking that a few sixteenths of an inch won’t be visible once the furniture is out. The truth is that an uneven frame puts constant stress on your fasteners. If a board is forced to bend over a high joist, it is perpetually pulling against the screws. According to the North American Deck and Railing Association (NADRA), structural integrity issues, often starting with framing inconsistencies, are a primary cause of long-term deck fatigue. Beyond the safety aspect, a flat surface is essential for the joist spacing secret that makes composite feel like solid ground. Before you even think about the hidden cost of skipping joist tape, we need to ensure the skeleton of your project is dead-on level. Let’s get into the actual tools and techniques I use to save a crooked frame from itself.Every joist has a personality, and in the world of lumber, personality usually means a ‘crown.’ This is that slight upward arch in the wood. If you ignore this, you are basically building a mountain range that your future table and chairs will wobble on for eternity. I always mark the crown on every single board before it even touches a joist hanger. Put the hump up. Gravity and the weight of your furniture will eventually try to push it down, but if you put the crown down, that joist is only going to sag further over time. I learned this the hard way on a lakeside project where the homeowner’s table literally rocked back and forth because I was too lazy to flip three joists that were ‘smiling’ instead of ‘frowning.’
Stretch a String Line for Total Accuracy
Forget the four-foot level for a moment because over a twenty-foot span, that level is a liar. To get a truly flat surface, you need to pull a mason’s line tight across the entire width of the frame. This gives you a ‘zero’ point to measure from. You can see instantly which joists are ‘proud’—sitting too high—and which ones are ‘shy’—too low. It is the most effective how to level a deck frame on uneven ground without using a laser trick in my arsenal. When that string is taut, even a sixteenth of an inch gap sticks out like a sore thumb, allowing you to address the problem before the expensive boards go down. 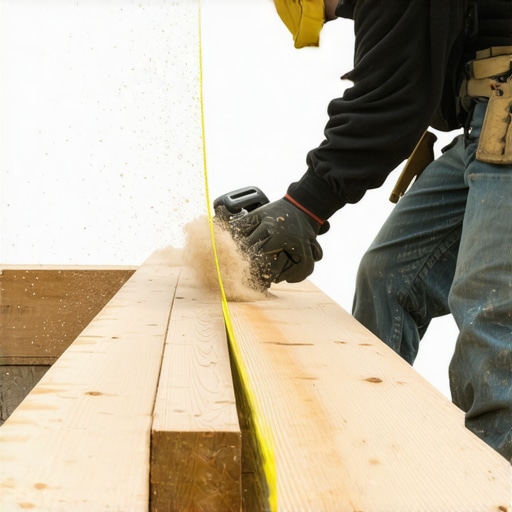
Shave the Highs and Shim the Lows
Once you have identified the culprits, it is time for some surgical intervention. For the high joists, an electric power plane is your best friend. Do not go crazy; take off thin shavings at a time until the wood just kisses the string. If a joist is too low, I usually ‘sister’ it. This means taking a scrap piece of lumber and bolting it alongside the low joist so the new piece sits perfectly flush with the string line. If the gap is tiny, you can use specialized PVC shims. Whatever you do, avoid using wood shims; they will eventually rot out and leave you wondering why your deck stairs feel like a ladder when the landing starts to sink into the frame.
Why Double Joists Create a Seamless Finish
A common mistake I see in DIY builds is trying to land two deck boards on a single 1.5-inch wide joist. It never stays flat. This is why we use double joists under every composite seam. It gives you a much wider target for your fasteners and prevents the boards from ‘lipping’ or curling up at the ends. When you have that extra width, you can ensure the transition is as smooth as a high-end interior floor. Once the frame is dead-on level, I always take one more step to protect the work: why I paint the tops of my joists black before installing composite. It hides the bright pressure-treated wood in the gaps and protects the freshly planed surfaces from the elements. If you are choosing the right composite decking for your project, you owe it to the material to provide a skeleton that will not warp or shift underneath it.
Ensure the Stair Transition Does Not Trip You Up
When moving from the main deck to the steps, precision is everything. If your frame is off by even a quarter inch at the rim joist, your first step will feel awkward and unsafe. This inconsistency is often the root of why your deck stairs squeak—uneven pressure on the stringers causes them to rub against the frame. By ensuring the frame is perfectly flat where the stairs attach, you create a solid, silent anchor that will not shift as the seasons change.Let’s dig deeper into a common industry myth: the idea that composite decking is inherently ‘stronger’ because it costs more. In reality, composite is significantly more flexible than traditional pressure-treated lumber. While a 2×10 joist provides the structural stiffness, composite boards act like a heavy, flexible skin. If your frame has even a slight wave, the composite will follow that contour like a wet noodle. To prevent this, I always employ the screw depth trick for a perfectly smooth deck surface. Setting your impact driver too deep creates micro-dimples that collect water and ruin the visual plane you worked so hard to level. When you are aiming for a high-end outdoor living space, these tiny details determine if the project looks professional or like a DIY experiment. Stop treating composite like it is a rigid beam; treat it like a veneer that reveals every flaw of the skeleton beneath it. Then there is the ‘Oops’ factor regarding your stairs. Most DIYers cut their stringers and call it a day, but the American Wood Council (AWC) warns that the ‘effective throat’—the uncut portion of the stringer—must be sufficient to handle the load without shearing. If you over-cut your notches even by a quarter inch, you will eventually discover why your deck stair stringers are cracking at the throat. I always reinforce this critical junction using the bracket that makes your deck stairs feel rock solid. This prevents the stringers from pulling away from the rim joist as the wood seasons and shrinks. 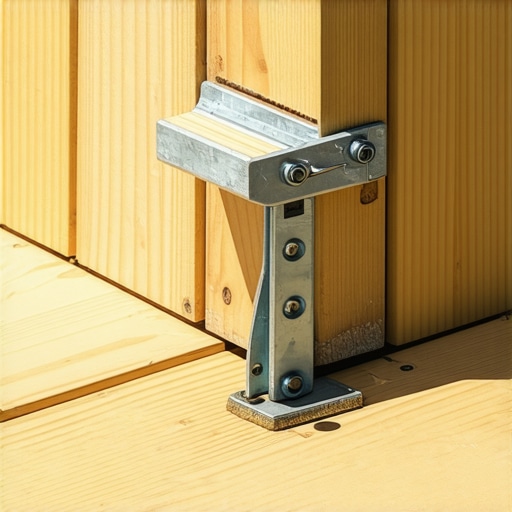
Why does a level frame still result in buckling boards?
Even if your frame is laser-level, you might see your expensive boards arching up in the summer heat. This usually is not a framing failure; it is a failure to account for thermal expansion. Composite decking expands and contracts lengthwise much more than wood does. If you butt it tight against the house siding without a gap, it has nowhere to go but up. Learning how to stop composite boards from expanding into your vinyl siding is a master-level skill that separates a truly skilled deck builder from someone who just follows the basic instructions on the pallet. This is the ‘hidden nuance’ of choosing the right composite decking—you have to plan for its movement from day one. Have you ever fallen into this trap where your ‘perfectly’ level project started moving on its own? Let me know in the comments.It is incredibly frustrating to see those boards move after you have put in all that sweat equity, but once the structure is dead-level, the focus has to shift to preservation and using the right gear. If you treat your new platform like a concrete driveway, you are going to regret it within two seasons. One of the biggest mistakes I see homeowners make is reaching for the high-pressure spray to get rid of a little pollen or dirt. This is why you should never use a pressure washer on composite decks. The high pressure can actually etch the surface of the boards, creating tiny pits that trap more dirt and mold later. Instead, a simple soft-bristle brush and a bucket of warm, soapy water is all you really need to keep that choosing the right composite decking looking like it was installed yesterday.
How do I keep my composite looking brand new for a decade?
Beyond avoiding the pressure washer, maintenance is all about being proactive with organic material. If leaves or pine needles sit in the gaps, they rot and hold moisture against the frame. For specific messes, like during grilling season, you need to know the best way to clean bird droppings off dark brown composite boards without scrubbing the finish off. I also tell my clients to inspect their railings once a year. If things feel a bit shaky, learning how to fix a loose railing post without tearing up the deck boards can save you an entire weekend of frustration.
Switch to Structural Screws and Save Your Back
When it comes to the heavy lifting, I have completely walked away from old-school lag bolts. If you are still pre-drilling and ratcheting down massive bolts, you are working too hard. This is why I use structural screws instead of lag bolts for stairs and ledgers. They have a higher shear strength and require zero pre-drilling, which means less chance of splitting the wood. According to the American Wood Council (AWC) DCA6 guidelines, the lateral load connections on a deck are the most common point of failure. By using modern structural fasteners and the bracket that keeps your railing from wobbling forever, you are building a structure that outlasts the mortgage. #IMAGE_PLACE_HOLDER_D#
The Shift Toward Steel Frames and Smarter Materials
Looking ahead at composite decking trends 2025, we are seeing a massive move toward light-gauge steel framing. While wood is great, steel stays perfectly straight for fifty years. If you want the ultimate outdoor living experience with zero sag, steel is the future. For now, focus on the details I have shared here. Try the structural screw and bracket technique on your next set of steps—it is the fastest way to add ten years of life to your project.
The Costly Lesson My First String Line Taught Me About Frame Prep
The biggest lightbulb moment in my career happened when I realized that composite decking doesn’t hide mistakes—it highlights them. I used to think ‘within a quarter inch’ was fine until I saw the late-afternoon sun hitting a dark grey board. Every tiny hump in the joists looked like a mountain. Now, I use the ‘Reflection Test’ on every project: if you can’t look across the frame and see a perfectly straight line, you aren’t ready for boards. Another hard-earned tip is to never plane a joist and leave it exposed to the sun for days. Freshly cut wood absorbs moisture differently, so get that joist tape and your composite decking down as soon as the leveling is done.
The Essential Gear for Every High-End Deck Frame
If you want a professional result without the professional price tag, you need to upgrade your bag beyond a standard hammer. I never step onto a job site without an electric power plane for those stubborn high spots; it’s faster and more precise than any hand sander. I also swear by a high-visibility braided mason’s line—standard twine stretches too much and gives false readings. For fastening, I’ve entirely swapped to structural screws because they pull the wood tight without the risk of shearing that you get with cheap hardware. These are the same expert deck builder tips that help create a surface that remains flat for twenty years. If you’re tackling stairs for outdoor decks, a set of heavy-duty stair gauges for your framing square is also non-negotiable for consistent rises.
#IMAGE_PLACEHOLDER_E#
Ready to Build an Outdoor Space That Lasts Decades?
Building a deck is about more than just square footage; it’s about creating a place where your family feels safe and relaxed. By taking the extra time to level your frame now, you are ensuring that your investment in outdoor living pays off every time you walk outside. If the process feels overwhelming, remember that even a professional deck builder started with their first crooked joist. Take it one string line at a time, and don’t be afraid to pull a board up if it isn’t perfect. You’re not just building a deck; you’re crafting a private oasis that will stand the test of time. What is the biggest challenge you’ve faced while trying to get a frame perfectly level? Let me know in the comments!