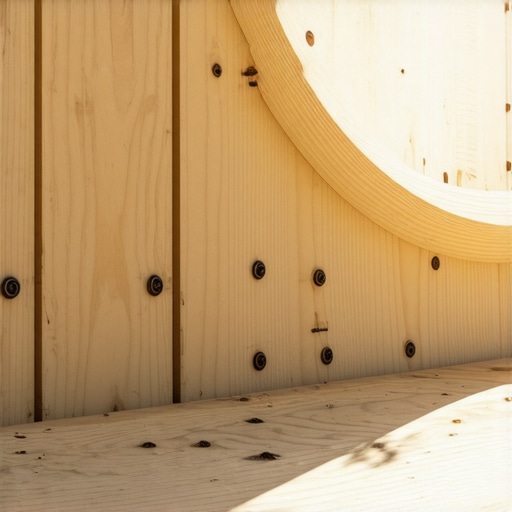
I remember standing in my backyard three years ago, staring at a stack of expensive boards and a blueprint that demanded a soft, sweeping radius. I didn’t own a $3,000 heat box, and my attempt to ‘gently’ force a bend resulted in a crack that sounded exactly like a gunshot—there went eighty bucks in a heartbeat. It’s a visceral kind of frustration when your vision for innovative outdoor living ideas hits the reality of physics and a limited tool budget. But that failure taught me that you don’t need to bake your boards like a sourdough loaf to get that high-end look. Today, I am going to show you exactly how to frame a curved deck corner using structural geometry rather than heat, ensuring your stairs and perimeters look professional without the specialized gear.
That One Time I Heard My Composite Board Snap
I’ve made plenty of mistakes as a professional deck builder, but the most expensive ones always involve forcing materials to do things they weren’t designed for. Early on, I thought I could simply screw down the ends of a board and let the sun ‘settle’ it into a curve. Spoiler alert: it didn’t work. Instead, I ended up with buckling deck boards that looked like a roller coaster by mid-July. To get a curve right without heat, you have to change how you think about the skeleton underneath. You aren’t bending the wood; you’re creating a faceted series of supports that allow the decking to follow a smooth arc. Have you ever started a project only to realize the ‘right’ tool is way out of your price range?
Is a Curved Corner Really Worth the Extra Sweat?
Skepticism is healthy here. Most people ask if the added framing is just a vanity play. According to the North American Deck and Railing Association (NADRA), custom architectural features like curves can significantly boost the ROI of outdoor projects, often making the difference between a standard platform and a true ‘private oasis.’ The secret lies in the ‘pie-cut’ joist method. Instead of standard 16-inch centers, we move toward a radial pattern. I once forgot to double joist under the seam on a radius, and the resulting dip was enough to trip a toddler. We won’t let that happen to you.
Framing Secrets for a Radius That Doesn’t Sag
When you’re designing your dream outdoor space, the curve starts with the rim joist. Since we aren’t steaming wood, we use multiple layers of thinner pressure-treated plywood or flexible composite trim to create the ‘sweep.’ It’s about building a solid, multi-layered laminate that provides a continuous fastening surface. This approach is essential when you want to frame a picture frame border that actually stays put. By the time we’re done, your neighbors will be asking which expensive rental shop you got your heating blankets from, and you can just smile and point to your miter saw.
Fan Your Joists Like a Hand Fan
To get that smooth radius without forcing the material, you have to throw the standard 16-inch-on-center rule out the window. When I was working on a project to seamlessly connect a custom deck to a high-end Reeds Spring landscape, the homeowner wanted a curve that mimicked the natural stone path. I realized then that the frame needs to look like an open hand fan. The joists should radiate out from a common center point. This ensures that no matter where you are on the arc, the joist spacing secret for a solid feeling composite surface remains intact. If your joists are too far apart at the outer edge of the curve, your boards will feel like a trampoline. I usually keep the outer gap between joists to a maximum of 12 inches to prevent any flex, especially when choosing the right composite decking for durable, low-maintenance outdoor areas.
The Lamination Secret for Sharp Curves
Since a standard 2×10 rim joist has the flexibility of a steel girder, you have to build your own ‘bendable’ beam. I use a technique called structural lamination. Instead of one thick board, I rip three or four layers of 1/2-inch pressure-treated plywood into strips that match my joist height. I remember one humid July afternoon trying to bend a single thick board; it fought me like a hooked marlin until the screws literally stripped out of the wood. Now, I glue and screw those thinner layers together one by one against the ‘pie-cut’ ends of my radiating joists. Each layer adds incredible strength and holds the shape permanently. 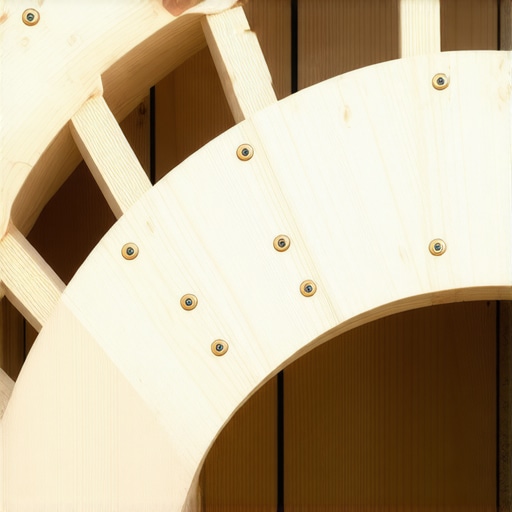
Seal Your Cuts to Prevent Future Rot
When you are cutting all those radial angles and ripping plywood, you’re exposing the raw, untreated heart of the wood. I’ve seen beautiful curved decks fail in five years because the builder forgot this one step. You must use a copper naphthenate solution to protect your deck frame from rot for thirty years. Applying this to every cut end is the difference between a legacy project and a tear-down.
Block Your Picture Frame Like a Pro
If you want to frame a picture frame border for composite decking on a curve, you need solid backing for every single board end. This means installing ‘ladder blocking’ between your radial joists. Think of it like adding extra ribs to a skeleton. I once skipped the extra blocking on a small 45-degree corner, thinking the rim joist would be enough. By next spring, the boards had expanded and the perimeter was sagging just enough to catch a toe. Since then, I always double joist under every composite seam or perimeter transition to ensure the floor stays perfectly flat. It’s more work upfront, but it prevents the dreaded service call two years later when the material starts to move.
Most DIYers—and even some seasoned pros—fall into the trap of thinking that once the frame is built, the hardest part is over. But here is the contrarian truth: the frame is just a suggestion to the decking, and the decking has a mind of its own. Everyone says a 1/4-inch gap is the gold standard for drainage, but in my experience, a fixed gap is a recipe for disaster on a curved perimeter. Composite material is essentially a giant thermometer. It expands and contracts significantly more than wood, and when you are working on a radius, that movement isn’t just linear—it’s geometric. If you wedge your boards too tight during a cool morning install, by the time the afternoon sun hits, you’ll see the hidden clip mistake that leads to buckling deck boards firsthand. The boards have nowhere to go but up.
Stop Trusting the Standard One-Size-Fits-All Gap Rule
The nuance most people miss is the ‘installation temperature’ factor. If it’s 90 degrees out, I set my gaps tight because I know the boards are at their maximum expansion. If it’s a crisp 50-degree spring morning, I leave a much wider gap. According to the North American Deck and Railing Association (NADRA), high-performance composites can move as much as 1/16 of an inch for every 10 feet of length per 30-degree temperature swing. On a sweeping curve where boards are mitered or butted against a picture frame, that cumulative movement can tear screws right through the ‘pie-cut’ blocking we discussed earlier. This is why I always recommend transform your space with expert deck builder tips by using specialized expansion fasteners that allow the board to slide slightly while maintaining its grip.
What Happens When the Summer Sun Hits Your Dark Composite Radius?
This is the advanced question I get most often from homeowners who chose those beautiful, deep espresso tones. Darker colors absorb more UV rays, leading to higher internal temperatures and, consequently, more thermal expansion. If you haven’t accounted for this in your stair transitions, you’ll hear it before you see it. You might notice your how to stop your deck boards from creaking in the summer heat efforts were in vain because the boards are literally grinding against each other at the radius points. 
The Hidden Trap of Moisture Traps in Laminated Frames
Another common mistake involves the very lamination technique used to create the curve. While those layers of plywood or flexible trim provide the shape, they also create dozens of tiny ‘seams’ where water can sit. I’ve seen curved rims rot out in half the time of a straight rim because the builder skipped the flashing. This is the hidden cost of skipping joist tape on a new build. On a curve, you must tape the entire top surface of your multi-layered rim joist. If you don’t, capillary action will pull rainwater between those layers, and since they are squeezed tight together, that moisture never evaporates. It’s a slow-motion car crash for your structural integrity.
When you are designing safe and stylish stairs for outdoor decks, this becomes even more critical. Stair stringers are already prone to cracking, and adding a curve increases the torque on every connection. Have you ever fallen into this trap? Let me know in the comments. I’ve learned that the ‘easy’ way usually ends up being the most expensive way. Also, remember that while you want it clean, why you should never use a pressure washer on composite decks applies double to curved areas where the grain is often stressed; high pressure can delaminate the surface of a bent board much faster than a straight one. Keeping up with composite decking trends 2025: the ultimate guide for outdoor enthusiasts means respecting the physics of the material as much as the aesthetics.
The right tools make the difference between a weekend project and a professional masterpiece. When I’m securing those laminated layers, I reach for 3-inch GRK structural screws; it’s exactly why I use structural screws instead of lag bolts for stairs and heavy curves—they don’t snap and they pull the wood together with immense force. For the actual composite cuts, a dedicated 60-tooth carbide blade is essential to prevent the ‘melting’ effect that standard blades often cause. If you’re choosing the right composite decking for durable, low-maintenance outdoor areas, you also need to invest in a high-quality impact driver that allows for fine-tuned torque. Over-driving a screw into a radius is a mistake you can’t easily hide; it creates a mushrooming effect on the board surface that is nearly impossible to sand down.
The Specialized Gear That Makes or Breaks a Curve
I’ve found that using a jigsaw for the final trim of the radius is a trap—it’s nearly impossible to keep the blade perfectly vertical through thick composite. Instead, I use a router with a flush-trim bit once the boards are fastened, using the frame itself as my guide. This ensures the edge is perfectly square and ready for the fascia.
How do I maintain this intricate design over time?
Maintaining a curved deck isn’t much different from a straight one, but the stakes are higher because the joints are more complex. You have to be diligent about debris. Pine needles and organic matter love to settle in the small gaps of a radius. I tell all my clients that the best way to clean bird droppings off dark brown composite boards or general dirt is a simple soft-bristle brush and mild soap. To truly protect your deck frame from rot for thirty years, check the flashing around the curve every spring. If you see water pooling or the tape peeling, address it immediately. And please, for the sake of your warranty, remember why you should never use a pressure washer on composite decks; it can ruin the grain pattern on your expensive border boards in seconds. 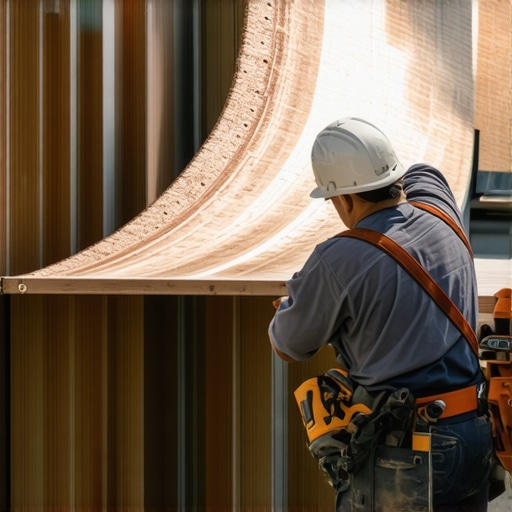
The Future of Your Backyard Oasis
I predict that the days of DIY-ing curves with plywood lamination are numbered. We are already seeing the rise of pre-fabricated curved steel components that offer a lifetime of stability. According to the TimberTech Technical Installation Guide, the industry is shifting toward systems that prioritize maximum airflow and thermal management over simple aesthetics. In the next few years, I expect why a digital designer is the best move for planning a complex backyard deck to become common knowledge, as 3D modeling allows us to order pre-bent boards directly from the factory. This eliminates the ‘guesswork’ of heat-bending or the labor of lamination. For now, mastering the joist spacing secret for a solid feeling composite surface on a radius remains the hallmark of a true craftsman. Go ahead and try that structural lamination technique on your next corner; it will change the way you look at framing forever.
The Hardest Lesson I Learned About Curve Physics
Don’t fight the material; guide it. I used to think I could out-muscle a board into a curve, but the material always wins. The ‘pie-cut’ framing we discussed isn’t just about support—it’s about managing the internal tension of the wood. When you work with curves, you have to accept that wood and composite are living, breathing elements of your design.
- Shadow lines are your secret weapon. On a radius, small gaps are more visible. I always paint the tops of my joists black to make sure any movement in the decking looks intentional rather than messy.
- Fastener placement is non-negotiable. If you are too close to the edge of a ‘pie-cut’ joist, you will split the grain. Pre-drilling is your best friend.
- Composite moves more than you expect. On a hot day, that beautiful curve can expand and push against your border. Always leave room for the material to breathe.
Gear That Saves My Sanity on the Job
Building a high-end curved deck requires more than just a standard hammer. Over the years, I’ve narrowed down my must-have list to these specific items that ensure a professional finish:
- GRK Structural Screws: These are exactly why I use structural screws instead of lag bolts for stairs and curved rims; they pull those laminated layers together with surgical precision.
- High-Quality Joist Tape: You cannot ignore the hidden cost of skipping joist tape on a new build. It prevents water from rotting out your multi-layered rim joists from the inside out.
- Copper Naphthenate: This is the only way to effectively seal the end cuts of pressure-treated lumber. Every time you cut a radial angle, you must treat it.
#IMAGE_PLACEHOLDER_E#
Your Future Backyard Oasis Awaits
Every great outdoor living project starts with a single bold decision. Whether you are building a custom deck or transforming your space with custom composite decking ideas, the curve is where your personality shines through. Don’t be intimidated by the geometry; embrace the process of building something that looks impossible. Your yard deserves that unique touch that only a radius can provide. Have you ever attempted a curved corner only to have the boards fight you? Let me know in the comments below!