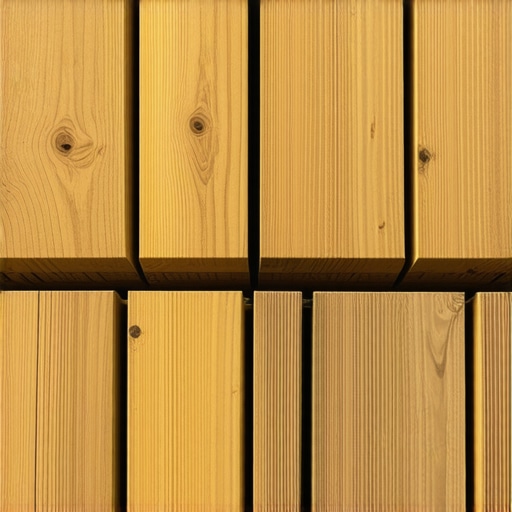
I remember the first time I hosted a barbecue on my brand-new composite deck. I had spent weeks agonizing over choosing the right composite decking to ensure every board was perfectly aligned and the color was just right. The surface looked like a million bucks. But then, my brother-in-law dropped his phone between the railing slats. When he leaned over the side to look for it, he pointed out the giant elephant in the room: the massive, green-tinged, salt-stained pressure-treated beams staring back at us from underneath. It was like wearing a tailored tuxedo with muddy hiking boots. I realized in that moment that a truly skilled deck builder does not just care about what you walk on; they care about the view from the yard. Today, I want to show you how to finish your project so you never have to feel that same cringe I did. We are going to dive into the art of using fascia to turn those industrial-looking structural members into a seamless part of your home’s aesthetic.
Stop Letting Your Structural Lumber Ruin the Backyard Vibe
It is a common trap for many homeowners. We get so focused on innovative outdoor living ideas and the latest composite decking trends that we treat the underside of the deck as an afterthought. Those heavy-duty beams are designed for strength, not beauty. Leaving them exposed is a missed opportunity to elevate your home. When I first started out, I actually made the mistake of thinking I could just slap on some thin pine trim to hide the mess. Huge mistake. Within one Missouri summer, those boards twisted like pretzels because they could not handle the moisture cycles of the beams behind them. Now, I know better. Proper fascia installation requires a bit of planning, especially when you are creating seamless transitions where the deck meets the ground or a patio.
Is Adding Fascia Actually Worth the Extra Work?
You might be asking yourself if this is just an expensive vanity project. After all, the beams are usually in the shadows. However, according to the American Wood Council, protecting your primary structural members from direct UV exposure and constant moisture cycles can actually help maintain the integrity of the wood over time. Beyond the structural perks, it is about the finished look. If you are already designing safe and stylish stairs, why would you leave the supporting beams looking like a construction site? Have you ever noticed your neighbors’ deck looks slightly more ‘high-end’ than yours but couldn’t figure out why? It is almost always the fascia. Have you ever felt like your deck looks ‘unfinished’ despite the boards being brand new? Let me know in the comments if those green beams are bugging you too. We are about to walk through the exact steps to cover them up the right way.
Think of fascia as the trim in your living room. You wouldn’t leave the drywall edges exposed, so why leave your joists bare? The goal is to create a shell that makes the deck look like a solid, intentional architectural feature rather than a platform sitting on sticks. To get there, you have to start with a trick that most DIYers skip because it feels like extra work, but it is the difference between a pro finish and an amateur one.
Paint the Frame to Make the Gaps Vanish
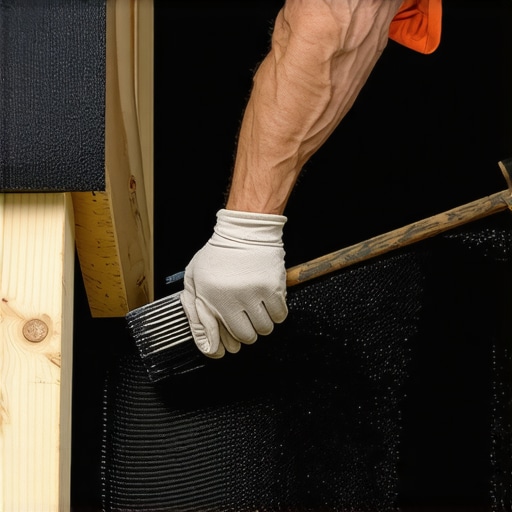
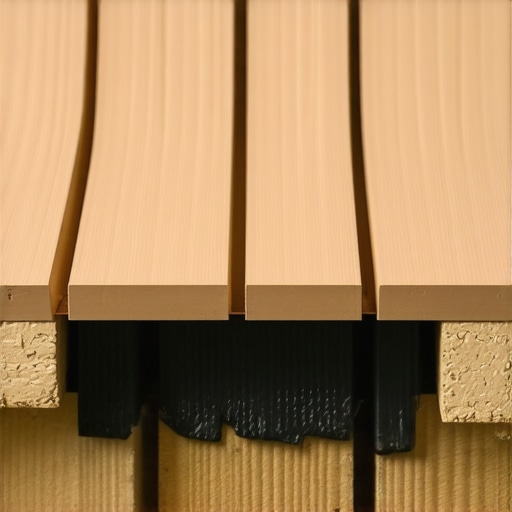
Before you even touch a piece of fascia, grab a can of black exterior-grade paint or some joist tape. If you look closely at a composite deck, there is always a small gap between the fascia board and the deck surface. If the wood behind it is bright green pressure-treated pine, that line will glow like a neon sign. I learned this the hard way on a job in Branson West. I spent hours perfectly mitering the corners, only to have the client point out the ‘green stripes’ visible through the gaps. Now, I always paint the tops of my joists black before installing composite. It creates a shadow line that hides the lumber and makes the colors of your boards pop. It is like putting mascara on your deck; it defines the edges and hides the imperfections.
Choose the Right Thickness to Avoid the Pretzeling Effect
Not all fascia boards are created equal. Many manufacturers offer thin trim boards (about 1/2 inch) and true fascia boards (closer to 1 inch). If you are choosing the right composite decking, check the specs for the matching fascia. Those thin boards are tempting because they are cheaper, but they have no structural rigidity. I once used thin trim on a south-facing deck in the middle of July. By August, the heat had caused the boards to expand and contract so violently that they pulled right over the heads of the finish nails. If you want a flat, clean look, stick to the thicker boards and ensure you are checking your joist spacing to provide enough backing for the fasteners.
Secure the Fascia with More Than Just Luck
Gravity and heat are the enemies of your fascia. To keep it from sagging or buckling, you need a specific fastening pattern. I recommend using three screws every 12 inches. Because fascia boards are often 12 inches wide, they want to ‘cup’ or curl away from the beam. Using the proper screw depth trick ensures the heads are flush without cracking the material. If you are working on the stairs, this becomes even more critical. You need to hide the ugly edge of a composite stair tread by wrapping the fascia around the stringers, which requires precision cuts. On a particularly tricky build last year, I found that using structural screws instead of lag bolts for the framing behind the fascia allowed for a much flatter surface to mount to. If your framing is lumpy, your fascia will be lumpy, and no amount of expensive material can fix a crooked bone structure.
Master the Miter for Seamless Transitions
The corners are where most people give up. When you are creating seamless transitions between the main deck and the stair wrap, those 45-degree angles have to be perfect. Composite material expands lengthwise much more than wood does. If you tight-butt your miters in the winter, they will crush each other in the summer. I leave a tiny 1/8-inch gap and use a color-matched sealant or a ‘glue and screw’ method to keep those corners tight. It is about expert deck builder tips that account for the weather, not just the way it looks the day you finish. By treating the fascia with the same respect as the flooring, you turn those ‘industrial’ beams into a cohesive part of your innovative outdoor living ideas.
Stop Treating Fascia Like a Decorative Sticker
Most DIY guides and even some professionals will tell you that fascia is purely aesthetic—a simple mask to hide the ‘ugly’ pressure-treated lumber. I completely disagree. In my years as a deck builder, I have seen more structural damage caused by poorly installed fascia than by almost any other finishing detail. When you slap a wide, non-porous composite board directly against a moisture-wicking wood beam without a plan for airflow, you aren’t just hiding the wood; you are creating a terrarium for rot. If you have ever noticed a weird ‘musty’ smell coming from your outdoor living space after a rain, you might already be falling into this trap. Have you ever noticed water pooling behind your trim boards? Let me know in the comments if you’ve seen those mysterious damp spots on your own project.
Why is my fascia warping even though I used composite?
The biggest myth in composite decking is that it is ‘set it and forget it.’ While the boards won’t rot, they are incredibly sensitive to thermal expansion. If you don’t account for the ‘Oops Factor’ of trapped heat and moisture, the fascia will buckle. The North American Deck and Railing Association (NADRA) emphasizes that proper ventilation is the primary defense against premature structural decay. To prevent this, I always recommend a 1/8-inch drainage gap between the top of the fascia and the bottom of the deck boards. This is why the drainage gap error that traps rot against your house siding is such a critical lesson; the same principles apply to your perimeter beams. If the water can’t get out, the wood behind that expensive composite will turn into mush within five to seven years.
Seal Your Ends or Face the Rot
One of the most ‘expert-level’ nuances that separates a hobbyist from a skilled deck builder is how they treat the hidden parts of the wood. When you cut your pressure-treated beams to size, you are exposing the untreated core of the lumber. Simply covering it with fascia doesn’t protect it. I make it a non-negotiable rule to seal the end cuts of pressure-treated lumber to prevent rot before the fascia is ever mounted. When you combine this with the hidden cost of skipping joist tape on a new build, you are essentially building a waterproof ‘cap’ that ensures your structure lasts as long as your 25-year composite warranty.
Perfecting the Vertical Transition on Stairs
When you are designing safe and stylish stairs, the fascia becomes even more complex. You aren’t just dealing with horizontal runs; you are wrapping stringers and risers. Most people try to use multiple small scraps to cover these areas, but that creates a dozen failure points for moisture to enter. Instead, try to use full-length boards and scribe them to the shape of the stairs. This level of detail is a hallmark of expert deck builder tips for stunning outdoor living. It takes three times as long, but it eliminates the ‘puzzle-piece’ look that screams DIY. By focusing on these hidden nuances—ventilation, end-sealing, and continuous runs—you ensure that your innovative outdoor living ideas don’t just look good in 2025, but stay rock-solid for decades to come.
The Precision Gear That Makes These Details Possible
Building a high-end deck isn’t just about the sweat; it is about the kit you bring to the dirt. If you try to cut composite fascia with a standard 24-tooth framing blade, you are going to end up with ragged, melted edges that look like they were chewed by a beaver. I personally never step onto a job site without a dedicated 80-tooth carbide-tipped blade on my sliding compound miter saw. This high tooth count allows for a surgical cut that leaves the composite looking factory-finished. When I am transforming your space, I also rely heavily on a torque-controlled impact driver. Why? Because composite material varies in density. If you don’t have fine control over the depth, you’ll sink the screw too deep and create a ‘mushroom’ of plastic on the surface. If you do mess up, I’ve found that having the best tool for removing a single stripped deck screw is the only thing that saves me from having to pry up an entire board in frustration.

How do I maintain my composite fascia over time?
The biggest lie in the outdoor living industry is that composite is ‘maintenance-free.’ It is actually ‘low-maintenance.’ Over time, dust, pollen, and spider webs will congregate in that 1/8-inch drainage gap we discussed earlier. Every spring, I take a soft-bristle brush and a bucket of warm, soapy water to my own deck. You might be tempted to blast it with a power tool, but you must remember why you should never use a pressure washer on composite decks. The high-pressure stream can actually etch the plastic surface, leaving permanent ‘ghost’ lines that catch more dirt in the future. Instead, a simple garden hose and a gentle scrub are all you need to keep that fascia looking like it was installed yesterday. If you notice any movement or ‘bouncing’ in the structure while cleaning, it is worth investigating how to fix a bouncy deck without adding new posts to ensure the frame remains as rigid as the day it was built.
The Future of Deck Building in 2030
I predict that within the next five years, we are going to see a massive shift toward ‘cool-deck’ technology in all fascia and stair components. According to the Simpson Strong-Tie Deck Connection and Fastening Guide, lateral load requirements are becoming stricter every year to prevent deck collapses during high-occupancy events. This means the framing behind your fascia is going to get more complex, requiring more specialized hardware. On the material side, we are seeing the rise of heat-reflective polymers. This is a game-changer for composite decking because it reduces the thermal expansion that causes boards to buckle against the fascia. We are moving toward a world where your deck is smart enough to handle 100-degree Missouri heat without moving a fraction of an inch. I challenge you to try one advanced move on your next project: stop using standard wood screws for your trim and switch to a color-matched plug system. It is a small change that makes the fasteners completely invisible, and once you see the result, you will never go back to exposed screw heads again.
The Hardest Lesson I Learned About Composite Decking and Fascia
If there is one thing I have learned after years in the mud and sun, it is that the expansion of composite decking is relentless. I once thought I could skip the 1/8-inch gap on a long fascia run, and by the next July, the board had buckled so hard it snapped the screw heads right off. Don’t underestimate the power of the sun. Another ‘lightbulb moment’ for me was realizing that moisture isn’t just a surface problem; it is an internal one. I never install a single piece of trim without checking for the drainage gap error that traps rot against your house siding, because saving the structure is more important than hiding the wood. Finally, remember that your deck is a living project; treat the end cuts of your lumber with the same care you treat the surface by learning the best way to seal the end cuts of pressure-treated lumber to prevent rot.
My Essential Gear for a Professional Outdoor Living Finish
To get that high-end look, you need more than just a hammer. I swear by using high-quality joist tape on every beam; it is a small expense compared to the hidden cost of skipping joist tape on a new build. For the heavy lifting, I have moved away from old-school hardware in favor of speed and strength, which is why I use structural screws instead of lag bolts for stairs. And if you really want to impress the neighbors, master the art of the stair wrap to hide the ugly edge of a composite stair tread. These tools and techniques transform a simple platform into a piece of architectural art.
Your New Chapter in Outdoor Living
At the end of the day, being a deck builder is about creating a stage for your family’s best memories. Whether you are following deck builder insights for designing your dream outdoor space or just trying to fix a small corner of your yard, the effort you put into these hidden details will pay off for decades. Your outdoor living area should be a source of pride, not a list of chores. Take your time, focus on the fascia, and build something that lasts. #IMAGE_PLACE_HOLDER_E#
Have you ever noticed your deck trim warping or pulling away after a hot summer? Let me know in the comments below!