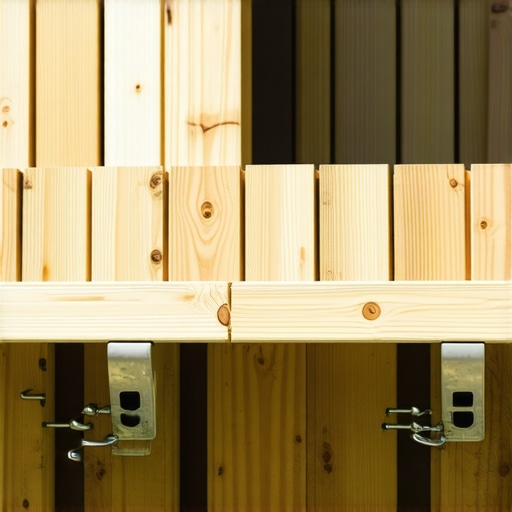
I remember sitting on my patio last July, ice-cold lemonade in hand, looking up at the framework of my brand-new deck. I had spent thousands on premium boards, but all I could see were those glaring, industrial-looking galvanized joist hangers. They stuck out like a sore thumb against the beautiful wood. It felt like I’d bought a luxury car but left the engine block exposed for everyone to see. My wife told me I was being too picky, but every time we hosted a BBQ, my eyes drifted upward to that shiny metal. I knew I had to find a fix that didn’t involve tearing the whole thing apart.
Stop Letting Industrial Hardware Ruin Your Outdoor Vibe
When you invest in custom composite decking ideas, you’re usually focused on what’s happening on top. But for those of us with walk-out basements or elevated platforms, the view from below matters just as much. I made the classic rookie mistake of thinking the metal would ‘weather’ and blend in over time. Spoiler alert: it doesn’t. It just gets dull and dusty, staying just as visible as the day it was installed. If you are working on maximizing outdoor space, leaving those hangers exposed is the fastest way to make a high-end project look like an unfinished DIY job. Today, I’m going to show you how to camouflage that hardware so your under-deck area feels like a finished room rather than a construction site.
Is obsessing over metal hangers actually worth the effort?
I get it—it seems like a small detail. But according to research from the University of Minnesota Extension, the visual harmony of an outdoor space significantly increases its ‘perceived value’ and the psychological comfort of the people using it. When I finally addressed my own hangers, the whole patio felt five degrees cooler and twice as expensive. Have you ever caught yourself staring at a piece of hardware that just shouldn’t be there?
Why Painting Joists Is My Go-To Move
Before we talk about physical covers, I have to share a hard lesson I learned. Early in my career, I tried to slap some leftover house paint on those hangers. Within two weeks, the heat and moisture caused the paint to flake off in giant, ugly scales. Now, why I paint the tops of my joists black is a secret I share with everyone, but doing the same for the hangers requires a specific prep process. If you’re planning a dry patio below your deck, you need a solution that stands up to the damp environment. We’re going to look at some clever trim tricks and the right way to use specialized coatings that actually stick to galvanized steel.
Make the Metal Disappear with Proper Paint Prep
Trying to paint galvanized steel without preparation is like trying to stick a postage stamp to a buttered pan. The galvanization process leaves a factory-applied oily film that rejects standard latex or oil-based paints almost instantly. When choosing the right composite decking for durable low-maintenance outdoor areas, you have to treat your hardware with the same respect as your boards. I learned this the hard way on a project in Reeds Spring. I spent a whole afternoon meticulously brush-painting forty hangers with a high-end exterior trim paint. A week later, a heavy thunderstorm rolled through, and by morning, the paint was literally sliding off the metal in long, gummy ribbons. It looked like the deck was shedding its skin. I had to scrub every single hanger clean and start over because I skipped the most important part: the etch.
The Simple Vinegar Wash That Saves Your Sanity
To get paint to actually bite into that slick zinc coating, you need a mild acid. A simple 50/50 mix of white vinegar and water is your best friend here. Wipe down every hanger with a rag soaked in this solution. You’ll notice the metal loses that greasy sheen and takes on a slightly duller, ‘toothed’ texture. This is similar to the hidden cost of skipping joist tape on a new build; it’s a small step that prevents massive headaches later. Once it’s dry, use a Direct-to-Metal (DTM) primer. These are specifically formulated to bond with non-ferrous metals. Only then should you apply your topcoat—usually a matte black or deep bronze to match the shadows under the deck. 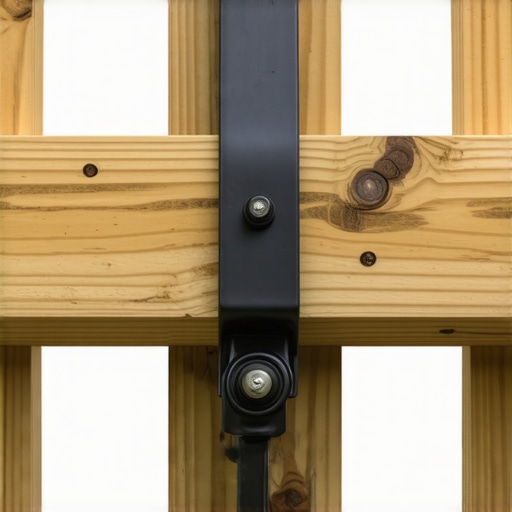
Hide the Hardware Behind a Proper Fascia Board
If painting feels like too much maintenance, your next best move is physical concealment. This is where you use trim to create a visual barrier between the eye and the structural guts of the deck. When you transform your space with expert deck builder tips for stunning outdoor living, you learn that the ‘fascia’ is the secret weapon for a clean finish. By installing a slightly oversized rim joist cover, you can effectively create a shadow line that tucks those hangers out of sight.
Master the Art of the Overhang
The trick is to let your fascia board sit about an inch lower than the actual framing. This ‘skirting’ effect works like a valance over a window. It hides the mechanical bits—the hangers, the bolts, and the messy wood grain—while providing a crisp, straight line for the eye to follow. You must be careful with the installation, though. Knowing how to install deck fascia boards so they dont buckle in the heat is crucial because if that trim board warps, it will actually draw more attention to the very hardware you’re trying to hide. I always suggest pre-drilling and using oversized holes for the fasteners to allow the material to expand and contract without pulling away from the joists.
Use Composite Scraps for Custom Hanger Shields
For those really stubborn areas where a hanger is still visible through a gap, I use the ‘shield’ method. Take small off-cuts of your composite decking—the thin pieces left over from rip cuts—and screw them directly to the face of the joist just in front of the hanger. It creates a seamless look that matches your floor boards perfectly. This is a common technique used when maximizing space with modern designs for composite decks, especially on multi-level structures where you spend a lot of time looking up from a lower patio. It turns a piece of industrial hardware into a deliberate architectural detail.While hiding those hangers solves the visual clutter, the real soul of a deck lies in what you can’t see once the boards are down. Many homeowners believe that once they pick the right boards, the hard work is over. I see this mistake constantly. In my experience, the low-maintenance label leads people to neglect the very foundation that makes composite look good for decades. The biggest myth? That standard wood framing rules apply perfectly to composite materials.
Why 16-inch spacing is the biggest lie in decking
Standard building codes might allow for joists to be 16 inches apart, but if you want a premium feel, that is a recipe for disaster. Composite boards are far more flexible than natural wood. If you stick to the 16-inch standard, you will often end up with a spongy walk that feels like you are on a trampoline. I always tell my clients that the joist spacing secret for a solid-feeling composite surface is to drop down to 12 inches on center. It adds a bit to your lumber bill, but it completely eliminates that cheap, bouncy sensation underfoot. Have you ever fallen into this trap? Let me know in the comments.
Does thermal expansion really matter if I use high-end boards?
The short answer is: more than you think. A common trap is installing your boards on a 90-degree afternoon and butting them tight against each other. When the temperature drops in the winter, those boards shrink, and suddenly your seamless look is full of massive, debris-catching gaps. Conversely, if you install them tight during a cold snap, they will buckle and warp by July. This is often the root cause of the hidden clip mistake that leads to buckling deck boards. According to the North American Deck and Railing Association (NADRA), improper gapping is one of the top reasons for premature deck failure and warranty denials. You must account for the ambient temperature of the material at the moment of installation. 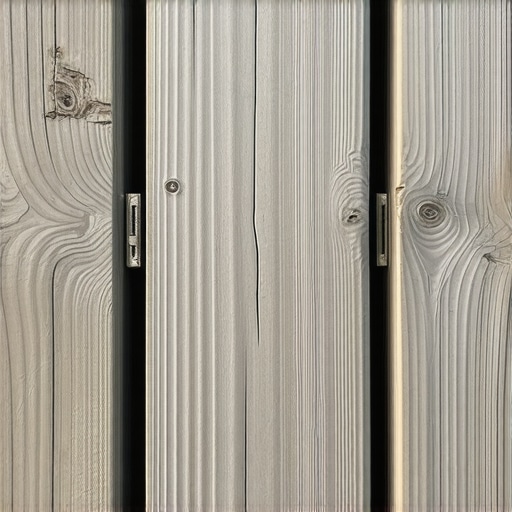
Stop over-tightening your hidden fasteners
There is a specific oops factor I see with DIYers and even some veteran pros: driving the screws too deep. When you learn why I always use hidden fasteners for high traffic entryways, the goal is a clean, fastener-free surface. But if you crank that drill until the clip bites deeply into the board, you are essentially pinning the material in place. Composite needs to breathe. It needs to slide slightly within those clips as it expands and contracts. If you lock it down too hard, the board has nowhere to go but up, resulting in those ugly humps in the middle of your floor. I have found that using a torque-setting on your driver is the only way to ensure consistency across the entire project. If you are currently struggling with a bouncy frame or weird gaps, do not panic. Sometimes why your deck feels bouncy and the affordable fix to stiffen it up involves adding mid-span blocking rather than a full structural rebuild. It is all about these hidden nuances that separate a good enough deck from a true masterpiece.
The One Tool That Changed My Build Speed Forever
I used to spend half my time on a job site fighting with warped boards. Even the highest-quality composite can arrive with a slight bow, and trying to manhandle a twenty-foot plank into a straight line is a recipe for a sore back and crooked gaps. That all changed when I invested in a dedicated board-straightening lever. This tool locks onto your joists and allows you to pull or push a board into perfect alignment with one hand, leaving your other hand free to drive the fasteners. When choosing the right composite decking for durable low-maintenance outdoor areas, you want the final result to look like a single, uniform sheet of wood. Without a lever tool, you will almost certainly end up with ‘creep,’ where your gaps slowly widen or narrow across the deck’s width. I never step onto a frame without one anymore.
How do I maintain my composite deck over time?
The term ‘low maintenance’ is often misinterpreted as ‘zero maintenance.’ If you want your investment to look as good in year ten as it did on day one, you need a rhythm. Every spring, I do a simple walk-through. I look for any boards that might have shifted and check the integrity of the railings. If you find a wobble, knowing how to fix a loose railing post without tearing up the deck boards can save you a weekend of frustration. For cleaning, keep it simple. A soft-bristle brush and mild soap are usually all you need. I cannot stress this enough: why you should never use a pressure washer on composite decks is a lesson you don’t want to learn the hard way. High pressure can etch the surface of the boards, creating tiny pores that trap dirt and encourage mold growth, effectively ruining the ‘cap’ layer that protects the core.

Safety Standards Beyond the Surface
While we obsess over the aesthetics, the structural safety of your stairs is where the real stakes are. According to the American Wood Council’s DCA 6 guidelines, stair stringer connections are one of the most critical failure points in residential decking. Most DIYers simply nail the stringers to the rim joist, which relies entirely on the shear strength of a few nails. As a professional, I always use specialized structural connectors or ‘stringer hangers’ to ensure that the weight of someone walking down the stairs is transferred directly into the frame. This is a key part of elevate your home top stairs designs for modern outdoor spaces. A deck that looks modern but feels shaky is a failure. To finish the look safely, I highly recommend integrated LEDs. Finding the best way to light stairs for safety without creating a glare involves placing the lights under the tread overhang so they illuminate the step below without blinding you as you walk up.
The Future of Outdoor Living in 2025
As we look toward the next year, the trends are shifting away from massive, single-level platforms toward more intimate, ‘zoned’ environments. I’m seeing a huge surge in multi-functional spaces where the deck acts as an extension of the kitchen. Checking out the composite decking trends 2025 the ultimate guide for outdoor enthusiasts shows that homeowners are prioritizing built-in features like perimeter benches and integrated planters. This shift is why how a skilled deck builder can turn your garden into a private oasis is becoming a more common conversation; it’s about the lifestyle, not just the square footage. If you’re currently in the planning phase, I challenge you to try one advanced move: instead of a standard railing, look into a cocktail rail that uses a deck board as the top cap. It provides a perfect place to set a drink and ties the whole color scheme together perfectly.
Hard-Won Truths From the Underside of a Deck
Over the years, I’ve realized that the difference between a deck that looks good for a year and one that looks good for twenty lies in the details you can’t even see from the curb. First, never underestimate the power of protection; the hidden cost of skipping joist tape on a new build is usually a rot-filled frame ten years down the line. Second, always double-check your anchor points. I’ve seen beautiful structures fail because someone didn’t know the simple way to check if your deck ledger is pulling away from the house. Lastly, remember that your deck is a living thing—it expands, it contracts, and it breathes. If you fight the physics of the material, the material will eventually win.
#IMAGE_PLACEHOLDER_E#
Gear That Will Save Your Back and Your Budget
If you’re taking on this project yourself, there are a few items that have earned a permanent spot in my tool chest. I stopped using old-school bolts long ago; why i use structural screws instead of lag bolts for stairs comes down to speed and superior holding power. For lighting, I’ve moved away from complex wiring when possible; why i prefer solar cap lights over hardwired for distant deck posts is because they offer a clean look without the headache of digging trenches for conduit. Finally, a high-quality DTM primer is the only thing that will make that hardware camouflage actually last.
Bring Your Dream Outdoor Space to Life
Transforming your backyard isn’t just about adding square footage; it’s about creating a sanctuary where you actually want to spend your time. Whether you are following the latest composite decking trends 2025 the ultimate guide for outdoor enthusiasts or sticking to a timeless classic design, the effort you put into hiding those hangers and securing your frame will pay off every time you step outside. If you find yourself overwhelmed by the technical details, don’t hesitate to contact us for expert guidance. Your perfect composite decking project is well within reach—just take it one joist at a time. Have you ever found a nasty surprise under your deck framing while trying to renovate? Let me know in the comments below!