
I remember the summer of 2018 like it was yesterday. I had just finished installing a beautiful set of composite decking boards and felt like the king of the cul-de-sac. My family was gathered on the lower concrete patio for a birthday BBQ, but then the Missouri clouds opened up. Within minutes, my ‘sheltered’ patio turned into a cold shower. Water didn’t just leak; it poured through the gaps, carrying dirt and debris right onto the burger buns. It was a soggy, muddy mess that forced everyone inside. That was the day I realized that having a second-story deck is only half the battle. If you don’t manage the water, you’re essentially wasting fifty percent of your outdoor living potential.
Reclaim That Soggy Space Beneath Your Deck
If you have a raised deck, you are sitting on a goldmine of unused real estate. Think about it. That’s a built-in ceiling for a screened-in porch, a dry workshop, or a luxury outdoor kitchen. But you can’t just slap some patio furniture down and hope for the best. You need a way to divert the rain before it ever touches your head. This is where hidden drainage systems come into play. When I first started looking into this, I made a massive mistake: I tried to save a few bucks by stapling heavy-duty plastic sheets to the bottom of my joists. It was a disaster. The water pooled, the plastic sagged, and the trapped moisture started to rot my frame faster than I could believe. I learned the hard way that standard wood alone can’t handle trapped moisture without a proper exit strategy. Today, we are going to look at the systems that actually work—the ones that keep your patio bone-dry and your joists protected.
Will an Under-Deck System Actually Save My Joists?
It is a fair question to be skeptical about. Many homeowners worry that by installing a ceiling, they are just trapping moisture and inviting mold. However, a high-quality under-joist system is designed to act like a gutter for every single inch of your deck floor. According to the North American Deck and Railing Association (NADRA), moisture trapped against the tops of joists is a primary driver for structural decay. By using the right drainage trick, you aren’t just creating a dry room; you are actually extending the life of your deck by shielding the wooden frame from the elements. If you’ve been on the fence about whether a professional deck builder is worth the investment for this specific upgrade, consider the cost of replacing your entire frame in ten years because of rot. Have you ever walked under your deck after a storm only to find a muddy swamp? It doesn’t have to be that way.
Why Surface-Level Drainage Beats the DIY Alternatives
When we talk about the ‘best’ systems, we are usually looking at trough-style setups that sit on top of the joists before the deck boards go down. This is the gold standard. It catches the water at the highest point, keeping the joists themselves completely dry. Whether you are designing safe stairs that need to stay slip-free or just want to ensure your deck joists don’t rot, catching the water early is the key. It prevents the ‘teacup effect’ where water sits in the wood grain and slowly eats away at your investment. In the next section, we’ll dive into the specific brands and installation moves that make the difference between a leaky ceiling and a truly dry outdoor oasis.
Start with the Trough System Before the Boards Go Down
If you want a truly dry space, you have to think like a roofer, not just a carpenter. The gold standard in modern deck construction is the trough-style system, which uses flexible membranes draped between the joists. While you are browsing composite decking trends 2025, you should be planning this step before a single board is fastened. These membranes act like a series of small, interconnected valleys that catch every drop of water that falls through the gaps. Unlike under-joist systems that can trap moisture and cause wood rot, an over-the-joist membrane ensures that the lumber itself stays shielded from the rain. When I first started using these, I realized that the secret to hidden drainage systems under a second story deck isn’t just the material—it is the tension. If the membrane is too loose, water pools; if it is too tight, it can tear at the fastener points.
Why a Quarter-Inch Slope is Non-Negotiable
Think of your joist bays as mini-gutters. I once helped a neighbor in a rush who thought ‘level’ was the goal for his under-deck ceiling. We spent a miserable humid Saturday a month later watching water sit perfectly still in his troughs until it turned into a mosquito breeding ground. You must ensure a slope of at least 1/4 inch per foot toward the outside beam. This ensures that gravity does the heavy lifting, pulling moisture away from your home and preventing the ‘swamp effect.’ 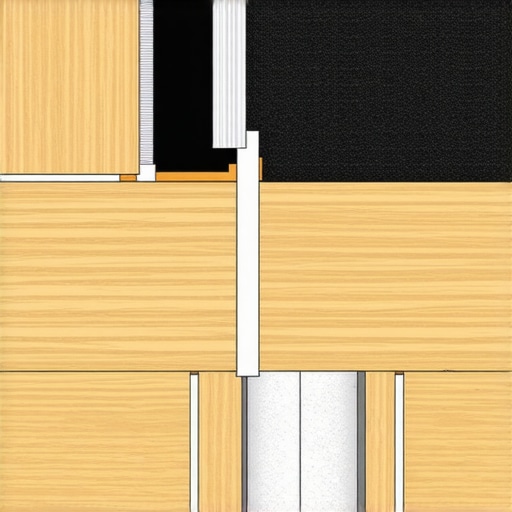
The Ledger Connection That Saves Your Siding
The most common failure point for any deck is where it meets the house. If you don’t nail the secret to a waterproof connection where the deck meets the wall, you are literally inviting rot into your home’s framing. You need to use a high-quality butyl flashing tape that integrates with your drainage membrane. This creates a seamless transition that directs water into the troughs rather than letting it seep behind the ledger board. This is arguably more important than the deck boards themselves because a rotten ledger is a structural catastrophe waiting to happen.
Install the Collection Gutter and Downspout
Once the water travels down the sloped troughs, it needs somewhere to go. This is where you install a standard gutter system along the inside of the outer rim joist. I’ve seen people try to let the water just ‘drip’ off the edge, but that just creates a muddy splash zone right where you want to put your patio furniture. By using the drainage trick for creating a dry storage space under your deck, you channel that runoff into a dedicated downspout. This not only keeps the patio dry but also helps in how to keep your deck joists from rotting under the boards because it prevents back-splash and high-humidity zones under the structure.
Don’t Forget the Airflow
The biggest mistake I see when homeowners try to enclose their under-deck space is sealing it up too tight. Even with a perfect drainage system, you need ventilation. If you don’t allow for airflow, the temperature difference between the damp ground and the dry ceiling will create condensation. This is why when designing safe and stylish stairs for outdoor decks in 2025, I always suggest leaving a small gap in the fascia or using perforated soffit material. This keeps the air moving and the wood healthy for decades.
Let’s dig deeper into a hard truth most contractors won’t tell you: there is no such thing as a zero-maintenance deck. I often hear homeowners say they want composite decking because they never want to touch it again. While you won’t be staining every two years, the structural nuances beneath those boards are actually more demanding than a traditional wood deck. In my experience, if you don’t account for the unique thermal expansion of synthetic materials, your high-end investment will eventually buckle. You have to understand why your composite boards are expanding more than expected before you even pick up a drill. Many DIYers assume they can just butt the boards tight against the house, but without knowing how to stop composite boards from expanding into your vinyl siding, you are basically building a ticking time bomb for your home’s exterior.
Stop Treating Joist Tape Like an Optional Extra
One of the most common ‘oops’ factors I see in modern deck building is the omission of joist flashing tape. Everyone says the drainage system is enough, but in reality, the drainage trough creates a micro-climate where humidity can spike. Even if the liquid water is diverted, that moisture-rich air sits against the top of your joists. The Forest Products Laboratory highlights that even ‘rot-resistant’ lumber can fail in less than a decade if it’s subjected to constant wetting-and-drying cycles without the protection of a physical moisture barrier. This is why how to protect your deck frame from rot for thirty years always starts with high-quality butyl tape. I also make it a point to use a specific visual trick: why I paint the tops of my joists black before installing composite isn’t just about aesthetics; it hides the wood from peeking through the gaps and adds another layer of defense.

Is Your Hidden Drainage System Secretly Rotting Your Frame?
This is the question that keeps serious deck builders up at night. If you use a system that attaches to the bottom of the joists, you are essentially creating a wooden ‘sandwich’ that can’t breathe. I have seen countless frames destroyed because water got behind the ledger flashing and was trapped inside the ceiling. This is why I advocate for the trough-style systems mentioned earlier, but with a twist: you must ensure the ledger is dead-on. If you aren’t sure, check the simple way to check if your deck ledger is pulling away from the house before you seal it up. Furthermore, a professional professional deck builder will tell you that stability is key. If the frame moves, the drainage seals break. If you notice a ‘give’ when you walk, you need to find the structural reason your deck feels bouncy when you walk before installing the dry-space system.
The Expansion Gap Mistake That Ruins Professional Projects
Another nuance people miss is the support for those beautiful composite seams. Because composite isn’t as stiff as lumber, the ends of the boards can sag or ‘lip’ over time. I’ve seen beautiful decks look like a wavy mess after one hot Missouri summer. The fix is simple but often ignored: why we use double joists under every composite seam for a flat floor. This provides a wider surface for the hidden clips to bite into and ensures the board ends stay perfectly flush. If you’re building stairs, the stakes are even higher. A squeaky, wobbly staircase is the hallmark of a rushed job. I always insist on using the bracket that makes your deck stairs feel rock solid to prevent the stringers from shifting. Have you ever fallen into the ‘set-it-and-forget-it’ trap? Let me know in the comments.
I have learned that the difference between a deck that lasts fifteen years and one that stays solid for thirty often comes down to the literal nuts and bolts used during the final stretch. If you are serious about your build, stop reaching for those old-fashioned lag bolts. In my personal kit, I swapped them out years ago for timber screws. Understanding the reason we use structural screws instead of old-fashioned lag bolts is vital because they offer superior shear strength without the need for pre-drilling that can weaken the wood fibers. When I am working on a complex layout, I also rely heavily on a specialized hidden fastener lever tool. This allows me to pull bowed composite boards into alignment effortlessly, ensuring that every gap is uniform across the entire surface. If you are going for that high-end look, remember that why picture framing your deck is more than just a style choice—it is about protecting the vulnerable end-cut cores of your composite boards from moisture infiltration.
How do I keep my outdoor living space looking brand new for twenty years?
Maintenance is where most homeowners drop the ball. They assume ‘low maintenance’ means ‘no maintenance.’ The reality is that organic debris like pollen and leaves can settle in the gaps, trapping moisture against the joists. I recommend a deep clean at least twice a year using a soft-bristle brush and a pH-neutral cleaner. Whatever you do, resist the urge to blast the surface with high pressure. I have seen many beautiful finishes ruined because someone didn’t know why you should never use a pressure washer on composite decks. The high-intensity water stream can actually etch the plastic capping, creating permanent ‘scars’ that trap dirt even faster. According to the Simpson Strong-Tie Technical Bulletin T-C-DECKB21, even the best hardware requires a visual inspection annually to check for corrosion or loosening due to seasonal shifts. If you notice a change in how the floor feels, don’t ignore it. It is much easier to apply an affordable fix to stiffen up a bouncy deck now than to wait for structural failure later.

Looking ahead, I predict that the next five years will see a massive shift toward ‘smart’ outdoor living. We are already seeing the beginning of this with integrated low-voltage systems. When you are planning your layout, don’t just think about where the chairs go; think about the ambiance. I’ve found that picking the right deck lighting color temperature is the secret to making a backyard feel like a five-star resort rather than a construction site. We are moving toward decks that act as extensions of our smart homes, with sensors that can detect moisture levels or even automated shades built into the railing systems. Whether you are designing safe and stylish stairs for outdoor decks in 2025 or just looking to refresh your current setup, the goal remains the same: create a space that serves your family without becoming a second job. My best advice? Take one afternoon this weekend to walk your deck, check your ledger, and clear out those joist gaps. Your future self will thank you.
Lessons Bought with Sweat and Rainy Saturdays
Building a deck that lasts isn’t about the wood you see; it’s about the water you don’t see. I learned that even the most expensive low-maintenance decking can’t save a poorly drained frame. My ‘lightbulb moment’ came when I realized that a deck is a living system that needs to breathe just as much as it needs to shed water. If you’re building a dry space, don’t forget how to vent the space under your deck—it is the difference between a cozy room and a moldy basement. I also realized that the extra two hundred dollars spent on high-quality flashing tape saves you twenty thousand in frame replacement down the road.
My Trusty Toolbox for Outdoor Success
For the results you’re after, skip the hardware aisle at the big-box store and look for these specifically. First, always go for 304 or 316 stainless steel if you’re anywhere near humidity—it is the only fastener we trust for long-term hold without rust streaks. I also highly recommend the Deck Evaluation Checklist from NADRA; it is a professional-grade resource that ensures your structure is safe for your family. Lastly, keep a specialized board-straightening tool in your kit—it makes installing composite boards significantly easier when they aren’t perfectly straight out of the bundle.
#IMAGE_PLACEHOLDER_E#
The Best Time to Build Your Sanctuary
There is something incredibly satisfying about sitting outside during a thunderstorm, bone-dry and listening to the rain hit the deck above you. It turns a simple backyard into a true retreat. You have the knowledge and the plan; now it is just about taking that first step toward your dream outdoor living space. Don’t let the technical details intimidate you—every master builder started with a single joist and a lot of questions. Your future self, sitting on that dry patio, is going to thank you for the effort you put in today.
Have you ever tried to tackle a drainage project only to have the rain find a new way in? I’d love to hear your triumphs and ‘learning moments’ in the comments below!