
I vividly remember the first time I hosted a barbecue on my newly finished deck. I had the grill fired up, the sun was hitting the boards just right, and I finally felt like a pro. Then, my neighbor set his heavy glass of iced tea on the wide top rail I’d worked so hard on. Within seconds, the glass began a slow, agonizing crawl toward the spindles. I realized right then that “close enough” isn’t good enough when it comes to a flat surface designed for drinks. It wasn’t just a leveling issue; it was a structural oversight that made my hard work look amateur.
Stop the Slow Slide of Your Favorite Beverage
Building a deck that looks good is one thing, but building one that functions perfectly for outdoor living is where the real challenge lies. Most people think a cocktail rail—that flat board on top of your railing—is just a decorative cap. In reality, it’s a high-traffic shelf that needs to be as level as your kitchen counter. Early in my career, I made the mistake of thinking I could just “eye” the posts and shim the rail later. I quickly learned that using standard wood for railings often leads to warping that ruins your level line within a single season. Today, we’re going to walk through the exact process to ensure your rail stays flat, stable, and ready for every party you host. According to the North American Deck and Railing Association (NADRA), railing safety is paramount as thousands of injuries occur annually due to structural failures, so getting this right is about more than just not spilling your drink.
Is a cocktail rail actually worth the extra effort?
Some folks argue that a flat rail just catches more pollen and dirt, or that it’s harder to maintain than a traditional bread-loaf style. I’m here to tell you that the utility of having a place to set your plate or drink far outweighs the occasional wipe-down. If you’ve ever felt cramped on a small deck, a well-installed cocktail rail is basically a built-in table that doesn’t take up any floor space. However, if your railing posts wobble even a fraction of an inch, your rail will never stay level. We need to start with a foundation that doesn’t budge. Have you ever dealt with a railing that felt more like a rollercoaster than a flat surface? Let me know in the comments—I’ve seen some doozies in my time.
The Secret Starts with Rock-Solid Post Alignment
You can’t put a level board on top of crooked posts. It sounds obvious, but it’s the hurdle where most DIYers (and even some pros) stumble. When I was first learning the ropes, I ignored the slight tension in my post-to-joist connections, assuming the weight of the rail would pull everything into place. Spoiler: it didn’t. To get that perfect horizontal line, we have to look at the brackets that keep your railing from wobbling. If those aren’t plumb, your cocktail rail is doomed from the start. We’re going to look at how to prep those posts so your top cap sits flush every single time.
Build a Rigid Spine with a Sturdy Sub-Rail
I’ll never forget a project in Branson where I thought I could skip the sub-rail to save twenty minutes. I screwed a gorgeous piece of tigerwood directly into the post tops, and it looked like a million bucks on Friday afternoon. By Monday morning, after a heavy Missouri rain followed by blistering sun, the board had cupped so badly it looked like a Pringles chip. That was the last time I ever installed a top cap without a structural spine. To prevent this, you need to install a 2×4 or a dedicated railing bracket between your posts. This creates a continuous, flat surface for your drink rail to sit on. If you are choosing the right composite decking for this top layer, that sub-rail acts as the structural backbone that keeps the composite from sagging or warping under the heat of the summer sun.
The Secret to Gap-Free Mitered Corners
When you’re working with 45-degree miters on a cocktail rail, precision is your best friend and a dull blade is your worst enemy. I always use a scrap piece of the actual railing material to test my angles first because posts are rarely perfectly square to each other. Once you have your angle, don’t just glue it. Use a specialized fastener that can handle the tension of the wood moving. Using the best way to finish the ends of hollow-core composite boards involves ensuring your cuts are crisp and any exposed cores are capped or painted to match for a seamless aesthetic. This level of detail is especially vital if your rail is near a high-traffic area like designing safe and stylish stairs, where guests will be grabbing and leaning on the rail constantly throughout the evening.
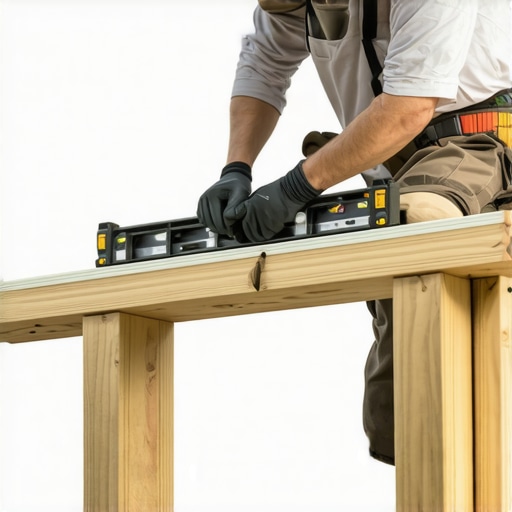
Screw from the Bottom to Keep the Top Smooth
Nothing ruins the look of a sleek outdoor bar surface like a row of jagged screw heads or unsightly plastic plugs. To get that high-end look, I use the screw depth trick for a perfectly smooth deck surface. By pre-drilling from the underside of the sub-rail up into the cocktail board, you keep the top surface completely blemish-free. Think of it like high-end cabinetry for your backyard. If you’re working as your own expert deck builder, this one detail is what separates a basic DIY weekend project from a custom architectural feature. It’s also where you need to be extremely careful about thermal expansion. If you’re using composite, leave a tiny 1/8-inch gap where the rail meets the house to avoid boards expanding into your vinyl siding and causing structural buckling during a heatwave.
Why Your Framing Decides Your Railing Fate
One of the biggest headaches I see is when the railing posts aren’t blocked correctly below the deck surface. If your posts can move even a hair, your drink rail will eventually crack at the joints and your level line will disappear. I always recommend using the bolt pattern that finally stops railing post wobble for good to ensure those vertical supports are immovable objects. When your posts are stiff, you can pull your top rail tight across several spans, creating a monolithic structure that feels like a solid part of the house frame. This level of rigidity is exactly what a professional deck builder prioritizes because it ensures the safety and longevity of the entire outdoor living space, making sure that your horizontal surfaces stay horizontal for years to come.
The Joist Spacing Myth That Ruins Your Walk
Many homeowners think that spending top dollar on premium boards will guarantee a rock-solid floor for their outdoor living space. In my experience, even the thickest boards feel like a trampoline if the framing underneath isn’t dialed in. If you want that concrete feel underfoot, you need to master the joist spacing secret for a solid feeling composite surface. While 16 inches on center is often the legal minimum for code, a professional deck builder knows that 12 inches is the real gold standard for composite to prevent that subtle, annoying bounce that eventually rattles your railing joints loose.
Stop Over-Tightening Your Fasteners
Here is a trap I see even seasoned pros fall into: securing boards so tightly they have no room to breathe. Composite decking isn’t a static material; it is a living, moving polymer-wood hybrid. According to research published in the Journal of Materials in Civil Engineering, wood-plastic composites can expand significantly based on temperature fluctuations and moisture absorption. If you do not account for this, you will eventually see the hidden clip mistake that leads to buckling deck boards within the first year of a project. It is not just about the gaps between the boards; it is about how to stop composite boards from expanding into your vinyl siding or popping the screws right out of the joists during a Missouri heatwave.
Does the color of my decking actually affect its lifespan?
You would be surprised how much thermal gain impacts the structural integrity of your railing and stairs over time. I have found that why dark brown decking gets significantly hotter than light gray boards isn’t just a concern for your bare feet—it is about the heat causing the underlying pressure-treated framing to dry out and shrink faster than intended. This accelerated movement leads to the hidden reason your deck stairs are pulling away from the frame. What starts as a simple creak can eventually become a structural failure if your fasteners cannot handle the stress of the heat-warped wood.
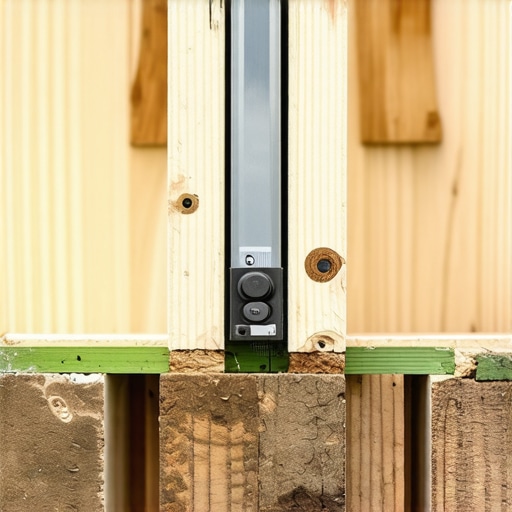
Mechanical Fasteners Beat Old-School Lag Bolts
Everyone tells you to use heavy lag bolts for stair stringers because they look tough. I disagree. In my builds, why I use structural screws instead of lag bolts for stairs comes down to the superior shear strength and the way they pull the wood together without splitting the grain like a thick lag bolt can. When you combine these modern fasteners with the bracket that makes your deck stairs feel rock solid, you eliminate the swaying that eventually destroys your cocktail rail’s level line. Have you ever fallen into the trap of over-building the surface while ignoring the skeleton underneath? Let me know in the comments.
The One Tool I Wont Step on a Job Site Without
After twenty years in the sun, I’ve learned that even a professional deck builder is only as good as the tools they trust. I personally swear by the BoWrench board bender. If you’ve ever wrestled with a piece of lumber that wants to kick out of alignment, this tool is your savior. It allows you to pull a stubborn board into a perfectly straight line with one hand while you drive your fastener with the other. It’s the difference between a deck that looks tight and one with wavy gaps that catch your eye every time you sit down to relax. When you are transforming your space, these micro-adjustments are what separate a weekend project from a masterpiece.
How do I maintain my composite deck over the long haul?
The biggest mistake I see homeowners make is reaching for the high-pressure wand the second they see a spot of dirt. I can’t emphasize this enough: why you should never use a pressure washer on composite decks is a lesson usually learned through ruined finishes and frayed fibers. According to the Trex Care and Cleaning Guide (Technical Bulletin #12), using high pressure can permanently damage the protective shell of the board, leading to staining and moisture intrusion. Instead, a simple bucket of warm water and Dawn dish soap does more for innovative outdoor living ideas than any industrial cleaner ever could. A soft-bristled brush and a garden hose are all you need to keep that surface looking like it was installed yesterday.
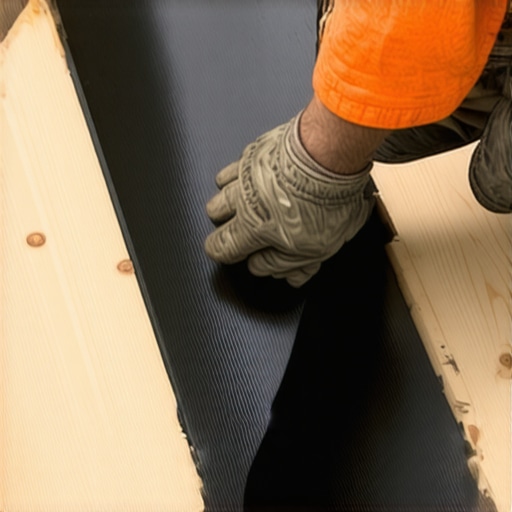
The Hidden Step for a Thirty Year Frame
Even if you are choosing the right composite decking for the top layer, remember that the skeleton underneath is likely still wood. I’ve started applying butyl joist tape to the top of every single frame I build. This simple barrier prevents water from sitting between the deck board and the joist, which is where rot usually starts. It effectively doubles the lifespan of your substructure for just a few extra dollars per project. If you want a deck that remains stable and squeak-free, this is the most important non-negotiable step in the process.
Where the Outdoor Living World is Heading in 2030
Looking at the current composite decking trends for 2025 and beyond, I predict a massive shift toward fully integrated smart environments. We are already seeing prototypes for boards with embedded sensors that can detect moisture levels or structural shifting before the human eye can see it. Your deck will eventually tell you when it needs a wash or if a post footing is starting to settle. If you want to stay ahead of the curve, try the joist tape trick on your next repair—it’s an advanced move that protects your investment from the inside out.
The Hardest Lesson I Learned About Railing Stability
Looking back on my two decades in the field, I’ve realized that a cocktail rail is a literal litmus test for the entire project. If your frame is weak, that top rail will reveal it within months. I used to think a few extra nails would solve a wobble, but real stability comes from the skeleton. One major lightbulb moment was realizing that you can never assume a post is plumb just because you used a level; you must check it against the house and the string line simultaneously to avoid compound errors. Furthermore, the one-eighth inch rule for expansion is non-negotiable for composite decking; I’ve seen beautiful miter joints explode in the heat because they had nowhere to go. Investing in the hidden cost of skipping joist tape on a new build is also the single best way to ensure the framing under your rail doesn’t rot while the boards above look brand new. Finally, a good enough screw is a myth; always opt for why i use structural screws instead of lag bolts for stairs because the superior shear strength and pull-down power are what keep your rail from shifting when a guest leans on it.
My Essential Toolkit for Level Lines and Tight Joints
You don’t need a truck full of gear, but these specific items change the game for any expert deck builder looking for precision. First is Butyl Joist Tape, which I consider a thirty-year insurance policy for the pressure-treated frame. Next is the BoWrench Board Bender; this is my secret weapon for forcing bowed boards into a straight line without breaking my back. I also never start a project without the NADRA Deck Safety Guides to ensure every rail and stair run I build meets the highest structural standards. Lastly, a high-torque impact driver is essential for driving structural fasteners deep into the framing without stripping the heads or splitting the wood.
Turn Your Vision into a Solid Reality
Building a deck that lasts isn’t about being the fastest on the block; it’s about respecting the physics of the materials and the local climate. When you take the time to transform your space with these pro-level details, you aren’t just building a platform; you’re creating a sanctuary. Whether you are designing safe and stylish stairs or perfecting that flat drink rail, remember that the quality of your work is what allows your family to relax in your outdoor living area without a second thought. You have the tools, the plan, and the knowledge—now it’s time to build something incredible. Have you ever dealt with a cocktail rail that warped after just one season? Let me know in the comments below!