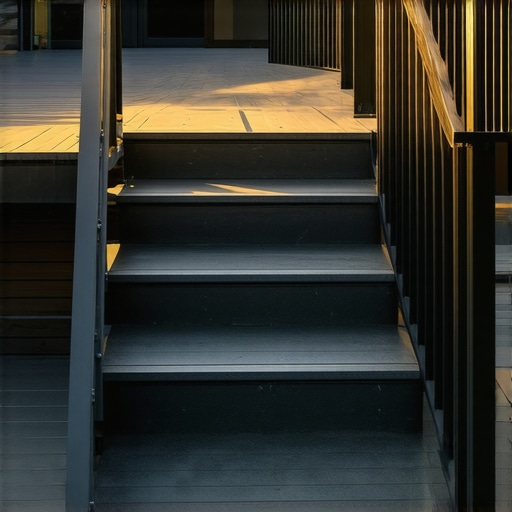
I’ll never forget the first time I invited the neighbors over to see my “finished” deck. I was so proud of the new boards, but as we sat in the grass for a BBQ, I realized all anyone could see were the dusty underside of the treads, some cobwebs, and a pile of old scrap wood I’d tucked away “temporarily.” It looked unfinished, like a house without siding or a car missing its hubcaps. That was my lightbulb moment. Open risers make even the most expensive deck look like a construction site from the ground up, whereas closing them in creates a solid, architectural feel that screams high-end craftsmanship. Today, I’m going to show you why making the switch to closed risers is the single most effective way to achieve a sleek, contemporary look without rebuilding your entire staircase.
Stop Treating Your Stairs Like a Functional Ladder
Many of us view stairs as just a way to get from point A to point B, but in the world of modern design, they are a primary visual anchor. When you leave those gaps open, you’re essentially leaving a hole in your home’s exterior design. By using top stairs designs for modern outdoor spaces, you create a “waterfall” effect where the material seems to flow down from the deck surface to the ground. In my early days as a builder, I made the classic mistake of thinking open stairs felt “airier.” In reality, they just looked flimsy. Closing those risers adds a perceived weight and permanence that defines modern luxury. It also helps in creating seamless transitions between your elevated living area and your yard.
Are closed risers just a trap for trapped moisture and rot?
This is the biggest concern I hear from skeptics, and honestly, it’s a valid fear. If you just slap a board over the gap without thinking, you could be inviting trouble. Early in my career, I once tightly sealed a set of risers with standard wood and no airflow, only to find the stringers starting to soften two years later. The key is to understand how to vent the space under your deck correctly. When done right, you get all the beauty of a solid look with none of the decay. Beyond aesthetics, closed risers are a massive safety win. According to data from the National Association of Home Builders (NAHB), modern home buyers increasingly prioritize “finished” outdoor structures that mimic indoor comfort. Have you ever felt that slight sense of vertigo looking through the gaps of a high deck staircase? [IMAGE_PLACEHOLDER] If so, you’re not alone. I’ve found that the stair tread depth that feels safest is often enhanced by the visual boundary of a closed riser. It’s about more than just looks; it’s about the peace of mind that comes with a solid foundation. Tell me, have you ever caught your heel in an open riser or felt like your stairs were just a bit too “see-through” for comfort?I once spent a whole Saturday trying to retrofit risers on an old cedar deck. I figured I could just nail some boards in and be done. By Sunday, the stairs squeaked so loudly my dog wouldn’t go down them. It was a mess because I hadn’t accounted for the “throat” of the stringer or the way the boards would move.
Turn Your Stringers into a Solid Foundation
The first mistake most DIYers make is assuming the stringer is perfectly square. It never is. Before you cut a single piece of fascia or composite, you need to check the structural integrity. If your stairs feel a bit bouncy, you’re looking at a framing issue, not just a cosmetic one. I’ve found that the affordable fix to stiffen it up often involves adding mid-span blocking. Once the frame is solid, you can start the “skinning” process. Think of the riser as the “backsplash” of your stairs. It doesn’t carry the weight, but it takes the beating from toes and kicks. When I’m working on innovative outdoor living ideas with composite decking, I always match the riser material to the border of the deck. This creates a cohesive look.
The Gap That Saves Your Wood
Don’t shove the riser board tight against the tread above it. This is where most people fail. You need a tiny “weep gap”—think of it like the expansion joint in a sidewalk. If you seal it up completely, moisture gets trapped behind the board. I learned this the hard way on a project where the humidity turned the back of the risers into a mushroom farm. Use a small spacer to leave about an 1/8-inch gap at the top. This is a critical part of how to vent the space under your deck properly while maintaining that solid appearance. 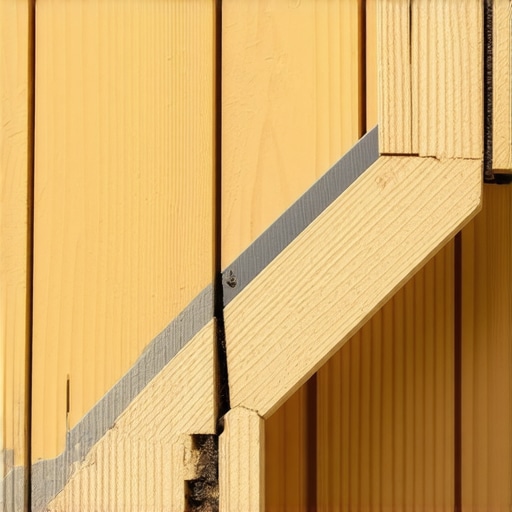
Master the Fastening Game
If you’re using composite, you can’t just drive a nail through the face and hope for the best. Composite expands like a balloon in the sun. I’ve seen beautiful stairs buckle and warp because the installer used the wrong screws. To get a professional finish, you should use the screw depth trick for a perfectly smooth surface. This involves countersinking the screws and using color-matched plugs. It’s the difference between a “home-made” project and one that looks like it was handled by a professional deck builder.
Stop the Squeak Before it Starts
Nothing kills a high-end vibe faster than a loud creak every time you step. When you install the riser, apply a bead of high-quality construction adhesive to the face of the stringer. It acts as a gasket, dampening the vibration between the wood and the riser board. This is the simple way to stop deck stairs from squeaking that most people overlook until it’s too late. When I started doing this, the feedback from my clients changed from “it looks great” to “it feels solid.”
Handling the Cut Edges
If you are using hollow-core boards for your risers, you’ll have ugly ends showing at the side of the stairs. This is where how to hide the cut edges of a wrap-around stair stringer comes into play. You can miter the corners or use a “picture frame” technique to hide the “honeycomb” interior of the board. It’s like putting a frame on a piece of art; it hides the messy bits and focuses the eye on the design.Most homeowners think that once the risers are on and the edges are hidden, the job is done. But here’s the contrarian truth: a “pretty” staircase is often a ticking time bomb if you haven’t addressed the structural physics. Everyone says standard pressure-treated wood is the only way to go for the skeleton, but in my years as a professional deck builder, I’ve seen wood stringers twist and “smile” within just three seasons. This happens because the “throat” of the stringer—the narrowest part of the wood—is incredibly prone to cracking under load. I’ve found that why your deck stair stringers are cracking usually comes down to moisture cycles and poor internal support that no amount of fascia can hide.
Why does your solid staircase still feel like it is bouncing
Even if you’ve followed the standard code of 36 inches wide, three stringers aren’t enough for modern composite materials. Unlike traditional timber, composite lacks structural “stiffness.” If you don’t use the joist spacing secret for a solid-feeling surface, those treads will flex under your weight, eventually loosening the fasteners in your new risers and creating that annoying creak. It’s a common trap: people spend thousands on custom composite decking ideas but skimp on the skeleton. According to a study by the Forest Products Laboratory, wood-plastic composites have a significantly lower modulus of elasticity than solid lumber, meaning they need more frequent support points to prevent that “spongy” sensation. To fix this, I always double up the middle stringer or use the bracket that makes your deck stairs feel rock-solid.
The Over-Fastening Trap That Ruins Composite
One massive “oops” I see all the time is the over-fastening trap. Builders often think that if two screws are good, four must be better to prevent the boards from moving. With composite, the opposite is true. If you pin the board too tightly, it has nowhere to go when the sun hits it. This leads to the hidden clip mistake that leads to buckling as the material tries to expand and physically cannot. 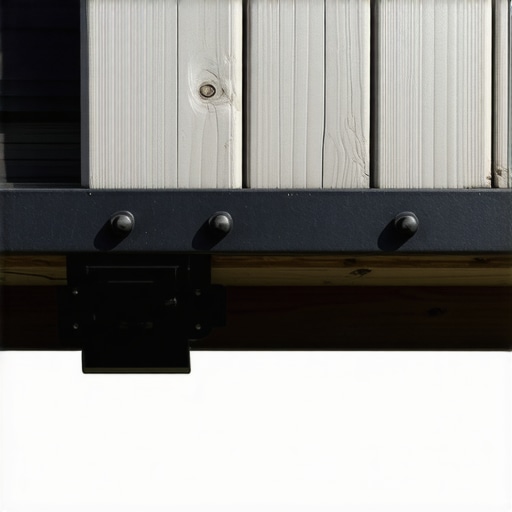 You are essentially fighting the laws of thermal expansion. Always allow for movement with proper spacing and high-quality fasteners. Have you ever noticed your stairs look slightly bowed in July compared to January? That’s the material breathing. Have you ever fallen into this trap of over-engineering your fasteners? Let me know in the comments below.
The Gear That Saved My Sanity on Stair Jobs
After blowing through three different cordless drills on a single wrap-around staircase project, I realized that high-performance builds require more than just enthusiasm; they require a very specific set of tools. If you’re serious about a professional finish, you need to stop using standard bits. I swear by the smart-bit depth setter. This little tool ensures every single screw is driven to the exact same depth, which is the cornerstone of the screw depth trick for a perfectly smooth deck surface. When I’m working with dense composite, standard bits often cause ‘mushrooming’—that ugly little ring of plastic that pops up around the screw head. A depth setter with a felt-covered stop prevents this and keeps your boards pristine. I also never step onto a job site without a dedicated impact driver; the high torque prevents the stripping that often happens when you’re trying to secure structural screws instead of lag bolts for stairs. Using the right fasteners isn’t just about speed; it’s about ensuring the frame stays tight for twenty years, not just twenty days.
How do I keep my composite stairs looking new for a decade?
Maintenance is where most homeowners accidentally destroy their investment. I’ve seen people take a high-psi pressure washer to their stairs thinking they are being thorough, only to etch permanent zebra stripes into the wood-grain finish. This is exactly why you should never use a pressure washer on composite decks. Instead, the real pro move is much simpler: a soft-bristle brush and a bucket of warm, soapy water twice a year. For those stubborn spots, like sap or grease from a BBQ, I recommend a specialized composite cleaner that won’t strip the UV inhibitors. Also, keep an eye on the gaps. Debris like pine needles and wet leaves can build up in the ‘weep gaps’ I mentioned earlier, trapping moisture against your stringers. A quick pass with a putty knife or a shop vac once a season ensures your ventilation remains clear, which is vital for how to keep your deck joists from rotting over the long haul. 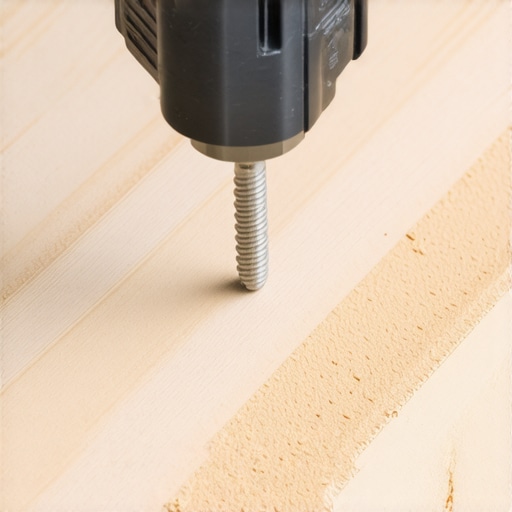
The Future of Outdoor Living is Smart and Cool
Looking ahead, I predict we are going to see a massive shift toward heat-dissipating technology in stair treads. We already know why dark brown decking gets significantly hotter than light gray boards, but new polymer blends are hitting the market that stay 30% cooler even in direct July sun. We’re also seeing a rise in ‘smart stairs’ that incorporate integrated, low-voltage sensors. Imagine your stair lights gradually brightening as you approach the first step at night. This isn’t just sci-fi anymore; it’s becoming a standard request for a professional deck builder aiming for the ultimate luxury experience. According to the International Code Council (ICC) in their ES reports for deck safety, the focus is shifting heavily toward ‘lateral load’ resistance, meaning the way we tie our stairs to the house is becoming more regulated and much safer. I challenge you to take one of these tips—maybe it’s checking your joist tape or finally buying that depth-setter bit—and apply it to your next weekend project. You’ll see the difference in the very first board.
Hard Lessons from the Muddy Side of the Stringer
Throughout my years in the field, I’ve realized that the small details we try to hide are usually the ones that cause the biggest headaches later. One lightbulb moment for me was discovering that even a perfectly built frame can feel ‘off’ if you make the stair stringer measurement mistake that ruins your stride. It’s not just about the math; it’s about how the human body naturally anticipates the next step. Another hard-earned lesson? Don’t settle for a basic straight run if your yard has any character at all. I’ve found that why a wrap around staircase is the best choice often comes down to the way it opens up the flow of your yard, making the transition feel organic rather than forced. Finally, remember that wood and composite are living things in a sense—they breathe and move. If you don’t respect their expansion cycles, they will eventually fight back by buckling or squeaking. [IMAGE_PLACEHOLDER]
The Gear That Never Leaves My Truck
If you want to move from amateur results to a finish that lasts decades, your toolkit needs an upgrade. I never start a stair project without structural-grade fasteners; understanding why I use structural screws instead of lag bolts for stairs was a total game-changer for my speed and the connection’s strength. I also highly recommend investing in a dedicated stringer layout tool—it’s a small expense that prevents massive errors. For cleaning, skip the harsh chemicals and stick to a pH-neutral composite soap and a soft-bristle brush; it preserves the UV-protective cap and keeps that ‘day one’ color vibrant. These aren’t just gadgets; they are the bridge between a project that looks good for a summer and one that stays solid for twenty years.
Your Path to a Master-Level Sanctuary
Building a deck isn’t just about adding square footage; it’s about crafting an environment where your family feels safe and inspired. Whether you are experimenting with custom composite decking ideas or finally closing up those old open risers, every choice you make adds to the narrative of your home. If the technical side feels overwhelming, remember the benefits of working with a professional deck builder who can help navigate the structural nuances of modern outdoor living. Your outdoor space is an extension of your life—don’t be afraid to take that first step toward a more architectural, finished look. Have you ever felt that annoying bounce on your current stairs, or are you planning a total rebuild this season? Let me know in the comments below.