I remember standing on my back porch about ten years ago, sweating through my t-shirt and staring at what I thought was a masterpiece. I had just finished my first DIY installation using hollow-core composite boards. The price point was right, and the color looked great under the summer sun. But then I walked down the newly built stairs and looked back. It was a disaster. Every board end was wide open, exposing that ugly, plastic honeycomb structure. It looked like I had built my deck out of giant drinking straws. My wife asked if I was ‘going to plug those holes,’ and that was the moment I realized that building a deck is easy, but finishing one takes real craft.
Stop staring at those ugly honeycomb holes
If you have spent any time researching choosing the right composite decking, you know that hollow boards are a fantastic way to save money without sacrificing durability. However, those open ends are more than just an eyesore; they are a magnet for dirt, spider webs, and moisture. Early in my career as a professional deck builder, I made the mistake of thinking ‘nobody will see the rim joist.’ I was wrong. Homeowners always see it. Today, I am going to show you exactly how to hide those ends so your neighbors will swear you spent twice as much on solid-core timber. We will talk about why picture framing your deck is the gold standard, how to use fascia boards correctly, and even a few ‘cheat codes’ like end-caps for those tight corners. Have you ever looked at your deck and felt like it just looked… unfinished? You are definitely not alone.
Is finishing the ends actually worth the extra effort?
Some folks will tell you to just leave it. They claim that the thermal expansion makes it too hard to keep things aligned. It is true that composite materials are dynamic. According to the North American Deck and Railing Association (NADRA), composite boards can expand and contract significantly depending on temperature swings, often moving as much as 1/16th of an inch for every 10 feet of length. If you do not account for this, your beautiful finish work can buckle or pop off. But does that mean you should leave it looking like a construction site? Absolutely not. You just need to know how to install deck fascia boards so they can move with the seasons without creating gaps. We are going to dive into the mechanical fasteners and adhesives that actually hold up against the elements, ensuring your outdoor living space looks as good five years from now as it does today. Let’s get into the nitty-gritty of the three best methods for a clean finish.
Make Those Hollow Ends Vanish with a Picture Frame Border
Picture framing is like putting a matte and a frame on a fine piece of art. Instead of running every board straight out to the edge and leaving the raw ends exposed, you run a border board around the entire perimeter of the deck. This ensures that the only thing visible from the yard is the finished, factory-sealed edge of the board. I learned the hard way that this isn’t just about aesthetics; why picture framing your deck is more than just a style choice becomes clear the first time you try to sweep debris off the deck. Without that border, dirt and wet leaves get trapped in those little honeycomb holes and stay there forever, creating a rot risk for the wood below.#IMAGE_PLACE_HOLDER_B#
Why You Need Double Joists for a Level Perimeter
To pull off a picture frame, you cannot just nail a board on the end and hope for the best. You need to provide structural support where the main decking meets the border. This means installing double joists or extra blocking around the edges of the frame. I remember a job on a steep hill where we had to be incredibly precise with the stairs as key elements in outdoor living, and if we hadn’t doubled up the joists, the whole transition would have felt spongy. That is why we use double joists under every composite seam for a flat floor. It creates a solid platform so your miters stay tight and your walking surface remains dead level, even as the seasons change.
Stop the Sag by Mastering Fascia Installation
If you do not want to go the picture frame route, your next best bet is a fascia board. This is a thinner, wider board that fastens directly to the rim joist, covering the edge of the decking like a skirt. However, this is where most DIYers fail. Composite fascia is notorious for expanding. If you pin it too tight, it will wave like a flag in the wind by July. You have to learn how to install deck fascia boards so they dont buckle in the heat by using specific oversized holes and specialized screws. I once watched a fascia board on a west-facing deck in the height of August literally pop its screws because the installer did not account for why your composite boards are expanding more than expected. It looked like the deck was melting.
The Quick Fix End Caps That Save Your Sunday
Sometimes, the layout of your deck or a tight corner makes complex framing impossible. This is where end-caps come in. These are plastic plugs or veneers that glue onto the end of the hollow board. They are essentially Band-Aids for decking. While they work in a pinch, you must be careful with the adhesive. If you use a cheap construction adhesive, they will fall off during the first freeze-thaw cycle. When figuring out how to hide the cut edges of a wrap around stair stringer, these caps can be a lifesaver, but they require a steady hand and high-quality PVC cement. Remember that why stair treads need more than just screws to stay quiet often comes down to the glue you use on those finish pieces. On a project last summer, I spent four hours just gluing caps on a set of tricky deck stringers, and while it was tedious, the result was a seamless look that the client raved about. It turns a standard DIY project into a professional masterpiece.
Stop trying to hide every gap on your deck
Most DIYers and even some entry-level contractors believe that a ‘tight’ deck is a high-quality deck. They push those composite boards right up against each other, trying to achieve a hardwood floor look outdoors. I am here to tell you that this is the fastest way to ruin your investment. In my years as a professional deck builder, I have seen more ‘beautiful’ decks destroyed by thermal expansion than by actual rot. Composite material is essentially a giant thermometer; it grows when it is hot and shrinks when it is cold. If you do not leave room for this dance, your boards will eventually warp, buckle, or even rip their fasteners right out of the joists.
Why does my deck feel like it is moving under my feet?
It probably is. If you installed your boards during a cold snap, you need to master the spacing secret for installing composite decking in winter. A study by the American Wood Council (AWC) emphasizes that while wood expands mostly with moisture, composites are primarily driven by temperature. This means a 20-foot board can move significantly over a 40-degree temperature swing. I have seen homeowners try to save face by caulking those gaps, which is another huge mistake. Caulk prevents drainage and traps heat, leading to even more movement. Instead, you should be focused on how to stop composite boards from expanding into your vinyl siding by leaving a ‘breather’ gap at the house connection.
The stair stringer mistake that ruins your weekend
If you are building stairs for outdoor decks in 2025, there is one technical detail that most people overlook: the ‘throat’ of the stringer. This is the uncut wood remaining after you have notched out the steps. I once saw a deck where the builder cut the notches so deep—to get a wider tread—that there was only about three inches of wood left holding the weight. That is why your deck stair stringers are cracking at the throat. When three grown adults stand on those stairs at once, that stringer acts like a giant lever, and the wood will snap like a matchstick. Always ensure you have at least five inches of solid wood left in that throat, and if you are worried about stability, you should know that double blocking the middle of a long stair run is a non-negotiable for a pro-level finish. 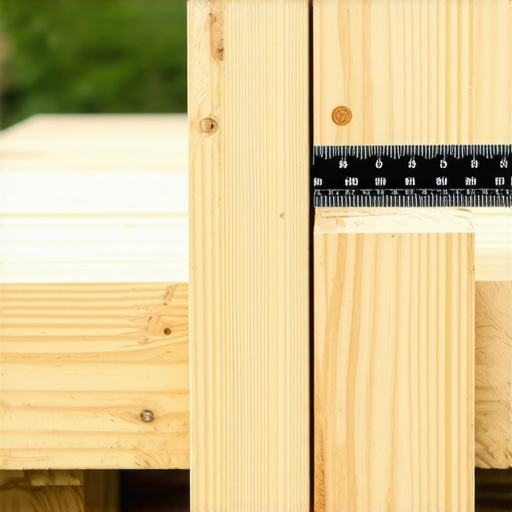
Don’t let your ‘oops’ moment become a permanent fixture
One of the most common traps I see is the ‘over-tightened’ fascia board. People treat fascia like trim in a living room, but on a deck, it needs to be hung loosely. If you pin it down with too many screws, the board will ripple like a ribbon when the sun hits it. This is a nuance many people miss until they see their outdoor living space looking wavy in mid-July. Have you ever fallen into this trap of trying to make things too tight? Let me know in the comments. Whether it was a buckled board or a stair stringer measurement mistake, sharing these ‘oops’ moments is how we all get better at our craft. If you are stuck on a layout, don’t be afraid to contact us for a quick consultation to avoid these expensive errors.
If you are serious about moving from a weekend warrior to a legitimate craftsman, you need to upgrade your toolkit beyond the basic hardware store specials. I am not talking about just buying more expensive hammers; I am talking about switching to fasteners that actually respect the physics of your build. I spent years wrestling with lag bolts that would split the rim joist before I finally discovered the reason we use structural screws instead of old-fashioned lag bolts. These screws zip in with a standard impact driver and provide a pull-out strength that meets or exceeds code without the pre-drilling nightmare that often leads to split wood. While you are at it, do not forget the frame. Most people focus on the top of the deck because that is what they see, but the real failure happens underneath. I always tell my clients that learning how to keep your deck joists from rotting under the boards with high-quality joist tape is the cheapest insurance policy you can buy. It prevents water from sitting in those screw holes and turning your expensive framing into mush over a decade of rain.
How do I keep this deck looking new for twenty years?
Maintenance on a composite deck is significantly lower than wood, but it is definitely not zero. If you think you can just blast it with a 3,000 PSI pressure washer every spring, you are in for a heartbreak. Why you should never use a pressure washer on composite decks comes down to the surface texture; high pressure can tear the protective cap right off the board, leaving the porous core exposed to the elements. According to the TimberTech Care and Cleaning Guide, a simple mixture of mild soap and water with a soft-bristle brush is all you need to keep the manufacturer warranty intact. For those living in areas with heavy tree cover, you will eventually need to know the best way to clean bird droppings off dark brown composite boards without leaving a permanent ‘ghost’ stain behind. It is about being gentle but consistent with your care routine.
#IMAGE_PLACE_HOLDER_D#
The future belongs to the digital deck designer
Looking ahead, the way we plan innovative outdoor living ideas with composite decking in 2025 is shifting rapidly away from napkins and pencil sketches. We are seeing a massive surge in augmented reality and 3D rendering in the planning phase. This is why a digital designer is the best move for planning a complex backyard deck because it allows you to see how shadows will fall across your seating area and where the furniture actually fits before you even dig a single footing. If you want to take your next project to the elite level, I want you to try this one specific tip: use butyl joist tape on every single horizontal surface of your frame. It is a small, relatively inexpensive step that adds decades to the life of the structure. If you are building near the water, make sure you are using the only fastener we trust for coastal decks exposed to salt spray—stainless steel is your only real friend in those environments. Do not let your hard work rot from the inside out because you skipped the small details.
Hard-Earned Lessons from the Joist Trenches
After years of acting as a professional deck builder, I have realized that the difference between a project that looks ‘okay’ and one that looks ‘magazine-ready’ is about twenty extra minutes of planning. One lightbulb moment for me was the ‘Sun Test.’ I used to install everything at high noon, but I quickly learned that you need to account for why dark brown decking gets significantly hotter than lighter shades, which affects how much the boards will shrink by nightfall. Another hard lesson? Never trust a single joist for a transition. Always double up. A clean finish isn’t just about what you see on the surface; implementing hidden drainage systems underneath ensures that your beautiful trim work doesn’t trap moisture and rot your structural wood from the inside out.
My Field-Tested Toolbox for a Professional Edge
If you want to achieve that high-end look without the trial and error I went through, there are a few resources and tools I swear by. First, I never start a complex layout without a digital designer. It takes the guesswork out of how those picture frame corners will meet your siding. For physical tools, I recommend a high-quality miter saw with a dedicated composite blade; it prevents the ‘melting’ effect you get with standard wood blades. For fasteners, I only use the best fastener for high-moisture areas—specifically 305 or 316-grade stainless steel—to ensure no rust streaks ever ruin your fascia boards. Finally, check the North American Deck and Railing Association (NADRA) site for the latest safety codes on stair geometry to ensure your build is as safe as it is beautiful.
Build a Space That Outlasts the Seasons
At the end of the day, your deck is more than just a collection of composite decking and screws; it is the stage for your family’s summer memories. Taking the extra time to hide those hollow ends and secure your stairs properly isn’t just about vanity—it’s about pride of craft. When you step out into your outdoor living space, you should feel a sense of relief, not a list of chores or ‘oops’ moments you have to hide. Focus on the small details today, like protecting your deck frame from rot for thirty years, and the structure will take care of you for a lifetime. Which method are you planning to use to hide those hollow ends—picture framing or fascia? Let me know in the comments below!
#IMAGE_PLACE_HOLDER_D#