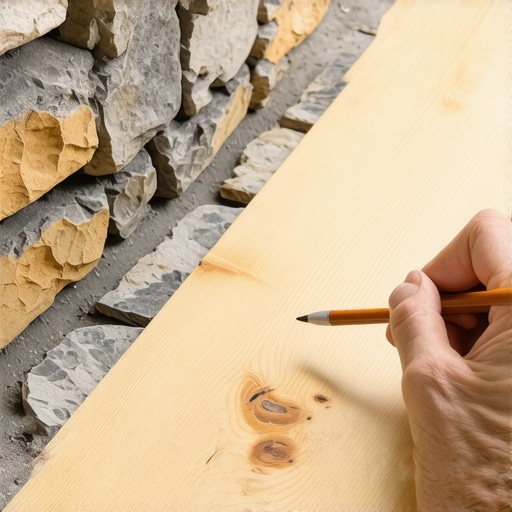
I remember the first time I faced a fieldstone chimney as a rookie deck builder. I had just purchased a pallet of premium boards and was feeling pretty confident about my [innovative outdoor living ideas with composite decking in 2025](https://deckdesignbuild.com/innovative-outdoor-living-ideas-with-composite-decking-in-2025). Then I hit the stone. I tried to eyeball the cuts, moving the board back and forth like a frustrated surgeon. By the time I was done, the gap was so wide and jagged that I spent the rest of the afternoon wondering if I could hide the mess with a very large potted plant. It was a disaster. That failure taught me one thing: if you want your deck to look like a million bucks, you have to master the scribe. Today, I’m going to show you exactly how to take that jagged, bumpy stone profile and transfer it onto your deck board so perfectly that people will ask if the stone grew around the wood. This isn’t just about aesthetics; it’s about the pride you feel when you step back and see a seamless connection between nature and your craftsmanship. Have you ever stared at a crooked wall and considered just filling the gap with an entire tube of caulk? Trust me, there is a better way.
Stop Hiding Your Bad Cuts with Caulk
If you’ve spent any time [choosing the right composite decking for durable low-maintenance outdoor areas](https://deckdesignbuild.com/choosing-the-right-composite-decking-for-durable-low-maintenance-outdoor-areas), you know these materials aren’t cheap. You don’t want to ruin a fifteen-foot plank because you were too intimidated to try a scribe. The beauty of a stone chimney is its texture, but that same texture is a nightmare for a straight-edged board. Many DIYers try to use a tape measure for every bump, but stone is too irregular for that. I’ve seen seasoned pros make the [the hidden clip mistake that leads to buckling deck boards](https://deckdesignbuild.com/the-hidden-clip-mistake-that-leads-to-buckling-deck-boards) simply because they were rushing the perimeter details. Scribing is the process of using a compass or a dedicated scribing tool to mirror the wall’s profile onto your material. It’s the difference between a ‘good enough’ job and the kind of work that defines a [professional deck builder in your outdoor projects](https://deckdesignbuild.com/the-benefits-of-working-with-a-professional-deck-builder-in-your-outdoor-projects). When you get this right, you don’t just close a gap; you create a transition that looks intentional and high-end.
Is this pro-level trick actually worth the extra effort?
The short answer is a resounding yes. While it might add thirty minutes to your install, it saves you years of looking at a sloppy joint. According to industry experts at the North American Decking and Railing Association, the precision of your perimeter cuts is one of the first things a home inspector or a prospective buyer looks at when evaluating deck quality. Beyond the resale value, a tight fit prevents debris and small pests from nesting in those oversized gaps between your deck and the house. One mistake I made early on was not allowing for a tiny bit of expansion. Even when scribing, you need to account for how the material moves. Using [the secret to scribing deck boards against an uneven stone wall](https://deckdesignbuild.com/the-secret-to-scribing-deck-boards-against-an-uneven-stone-wall) involves finding that ‘sweet spot’ where the board looks tight but doesn’t crush itself when the summer sun hits it. If you mess up a cut, don’t panic—just reach for [the best tool for removing a single stripped deck screw](https://deckdesignbuild.com/the-best-tool-for-removing-a-single-stripped-deck-screw) and try again. Precision takes patience, but the results are permanent.
Get Your Board in the Perfect Starting Position
Before you even touch a pencil, you need to lock your board down. Think of this board as a template that cannot move. If it shifts by even an eighth of an inch, your final cut will look like it was done by a blindfolded apprentice. Lay your plank so it’s perfectly parallel to the final installation line, overlapping the stone as much as possible. I learned this the hard way on a project in Reeds Spring; I thought I could hold the board with one hand and scribe with the other. Halfway through, the board kicked out, and I ended up with a gap wide enough to swallow a smartphone. Now, I always use heavy-duty clamps or a few sacrificial screws to keep everything dead still. While you’re setting up, this is also the best time to check your structure. If you’ve followed the joist spacing secret for a solid-feeling composite surface, you’ll have a rock-solid foundation that won’t bounce while you’re trying to trace the stone’s texture.
How to Set Your Compass Without Overthinking It
You don’t need a fancy laser level for this; a simple $5 carpenter’s compass is your best friend. Open the compass so the distance between the metal point and the pencil lead is exactly equal to the widest gap between your board and the stone. This is your ‘magic number.’ Keep the compass perfectly perpendicular to the board as you drag the metal point along the irregular face of the stone. The pencil will mirror every bump, dip, and crag onto the surface of the wood or composite. If you are working with dark materials, I recommend laying a strip of blue painter’s tape down first. It makes the pencil line pop and prevents the graphite from smudging. 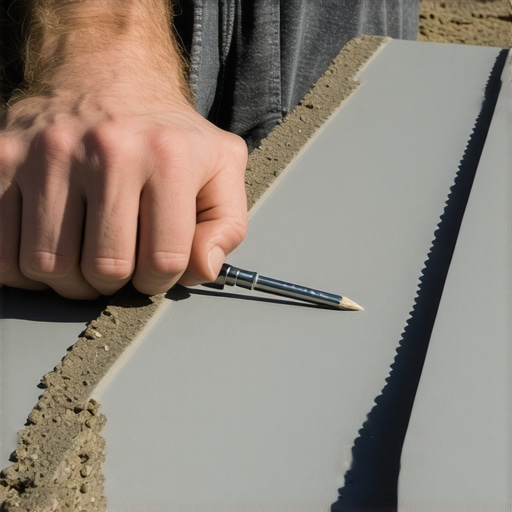
The Art of the Cut and the Final Fit
Once your line is drawn, it’s time for the jigsaw. This is where most people panic. Don’t try to cut exactly on the line; cut just a hair on the ‘waste’ side of it. I prefer using a reverse-tooth blade for composite because it prevents the surface from chipping. If you are worried about the finish, you might also consider how to install deck fascia boards so they dont buckle in the heat, as the same principles of material expansion apply here. Stone doesn’t move, but your deck will. To make the joint look even more professional, I often use a wood rasp or a belt sander to back-bevel the cut. By thinning the underside of the board where it meets the stone, the top edge can sit tighter against the uneven surface without the bottom of the board getting hung up on a hidden protrusion.
Protect the Connection for the Long Haul
After the board is cut and dropped into place, don’t just walk away. The area where wood meets stone is a moisture trap. Before I screw the board down, I always paint the tops of my joists black before installing composite. This serves two purposes: it protects the framing from rot where debris might collect, and it creates a dark shadow line that hides any microscopic gaps in your scribe. This attention to detail is the secret to scribing deck boards against an uneven stone wall that separates a weekend warrior from a master craftsman. If you find a spot that’s still a bit tight, don’t force it. A quick pass with a hand plane or coarse sandpaper is usually all it takes to achieve that ‘grown-in’ look.While most people think the goal of a scribe is to create a vacuum-sealed fit, seasoned pros know that’s a recipe for disaster. Everyone tells you to get it ‘tight,’ but in my experience, a ‘shadow gap’ works much better. Composite decking is essentially a living, breathing material that grows and shrinks with the Missouri seasons. According to technical data from the American Wood Council, composite planks can expand up to 1/32 of an inch per foot. If you jam that board right up against a solid stone chimney with zero room to move, the board will eventually buckle or, worse, pop your fasteners right out of the joists. I’ve seen beautiful installs ruined because the builder didn’t respect the thermal expansion. Avoid the hidden clip mistake that leads to buckling deck boards by leaving a consistent 1/8-inch gap. It sounds counterintuitive, but that tiny sliver of space creates a consistent shadow line that actually hides imperfections better than a forced, tight fit. 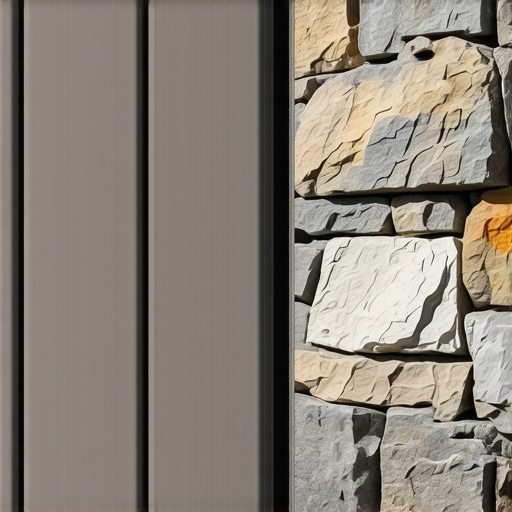
Don’t let your stairs become an afterthought
One of the biggest ‘oops’ factors I see occurs when a scribe meets a vertical transition, like a set of stairs. Beginners often focus so much on the horizontal boards that they forget the stairs are a different beast entirely. If your stone wall continues down past the deck level, you have to scribe the risers too. A common trap is failing to account for the landing. I’ve gone back to fix many DIY jobs where the builder ignored why your deck stairs need a concrete landing pad at the bottom, causing the whole stringer to shift and ruin that beautiful scribe work within six months. When the foundation moves, your precision cuts move with it, turning your hard work into a jagged mess.
How do you maintain a perfect scribe when the stone is extremely deep?
If you’re dealing with boulders or deep-set Ozark fieldstone, a standard compass might not reach. This is where advanced builders use a ‘tick-sticking’ method or a long-reach scribing tool. The nuance here is that you aren’t just tracing a line; you are translating a three-dimensional plane. If you don’t get the angle of your tool exactly right, you’ll end up with the stair stringer measurement mistake that ruins your stride because you’ve had to trim too much material away to make the board fit. Always keep your scribing tool perfectly level—if you tilt it up or down, the line you draw will be longer or shorter than the actual gap. This is also the hidden reason your deck stairs are pulling away from the frame; the tension from a poorly fitted board can actually leverage the framing apart over time.
Keep your masterpiece clean without the damage
Once you’ve finished this high-level craftsmanship, the worst thing you can do is blast it with high pressure. I’ve seen homeowners try to clean the construction dust out of their new scribed joints and end up fuzzying the edges of the composite. This is why you should never use a pressure washer on composite decks. A soft brush and a garden hose are all you need to keep that edge looking sharp. When you see how how a skilled deck builder can turn your garden into a private oasis, you realize the magic is in these tiny, protected details. Have you ever fallen into the ‘tighter is better’ trap and ended up with buckled boards? Let me know in the comments below!Every time I am finishing up a complex scribe, I reach for a tool that most people keep in their kitchen drawer: a simple plastic putty knife. I use it to tuck a bead of high-performance sealant into the shadow gap we discussed earlier. But before you even get to the finish, your tool kit dictates your success. While a standard compass works, I personally swear by the FastCap AccuScribe. Unlike a school compass, it locks into place and has a flat base that stays flush against your board. If you are serious about [transforming your outdoor living with custom composite decking ideas](https://deckdesignbuild.com/transform-your-outdoor-living-with-custom-composite-decking-ideas), this tool is non-negotiable. It allows you to maintain a consistent angle even when the stone is wildly irregular. For the actual cut, I use a Bosch barrel-grip jigsaw because it gives me more control over the blade’s orbital action, which is vital when you are navigating the tight turns of a fieldstone chimney. I’ve found that using a high-quality tool prevents the ‘wandering blade’ syndrome that ruins so many expensive planks.
Don’t let moisture ruin your hard work
Precision is pointless if the structure underneath rots away in three seasons. When you scribe a board against stone, you’re creating a high-moisture zone where leaves and dirt love to settle. This is exactly [the best way to seal the end cuts of pressure-treated-lumber to prevent rot](https://deckdesignbuild.com/the-best-way-to-seal-the-end-cuts-of-pressure-treated-lumber-to-prevent-rot) by applying a copper naphthenate solution to every fresh cut. Even if the top of the board is composite, the core or the framing beneath it is vulnerable. According to the USDA Forest Products Laboratory’s General Technical Report FPL–GTR–190, wood-to-masonry contact points are the most frequent sites of fungal decay in residential structures. To combat this, I often slide a thin piece of flashing or joist tape behind the scribe line to ensure water sheds away from the ledger. If you are [choosing the right composite decking for durable low-maintenance outdoor areas](https://deckdesignbuild.com/choosing-the-right-composite-decking-for-durable-low-maintenance-outdoor-areas), don’t skip these hidden steps. A beautiful joint that causes a structural failure is just a expensive mistake waiting to happen.
How can you keep a scribed deck looking brand new?
Maintenance for these custom areas is all about prevention. Once a year, take a shop vac with a narrow crevice tool and suck out the debris from the 1/8-inch expansion gap. If you let organic material build up, it holds moisture and creates a bridge for ants. I also recommend checking [how to pick a deck color that doesnt show every footprint](https://deckdesignbuild.com/how-to-pick-a-deck-color-that-doesnt-show-every-footprint) because darker colors can make the dust from the stone appear more prominent over time. If you notice the board has shifted slightly, don’t reach for the hammer. Instead, use [the best tool for removing a single stripped deck screw](https://deckdesignbuild.com/the-best-tool-for-removing-a-single-stripped-deck-screw) to loosen the board and realign it before the summer heat causes it to bind. 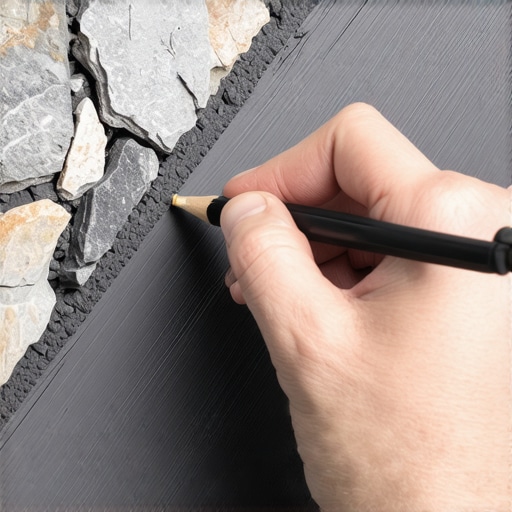
Where custom deck building is headed in 2025
I predict that within the next few years, the manual compass will be replaced by handheld LIDAR scanners. We are already seeing [innovative stairs solutions for safe outdoor deck access](https://deckdesignbuild.com/innovative-stairs-solutions-for-safe-outdoor-deck-access) that utilize 3D modeling to pre-cut boards before they even arrive at the job site. This level of tech will make [the hidden benefit of using steel deck framing instead of wood](https://deckdesignbuild.com/the-hidden-benefit-of-using-steel-deck-framing-instead-of-wood) even more apparent, as a perfectly straight steel frame is the only way to match the precision of a laser-cut board. However, until that tech is in everyone’s hands, your ability to handle a jigsaw and a pencil remains your greatest asset. If you want to elevate your craftsmanship today, try back-beveling your next scribe at a 45-degree angle. It creates a razor-thin contact point that looks like it was fused to the stone by magic. Give it a shot on your next project and see the difference it makes.
The Hardest Lesson I Learned While Scribing Around Ozark Rock
Early in my career, I thought a perfect fit meant the board had to be physically touching every single stone. I didn’t realize that a tiny, consistent 1/8-inch ‘shadow gap’ is actually the hallmark of deck builder insights designing your dream outdoor space. This gap isn’t a mistake; it’s a strategic move that allows for natural expansion and prevents the board from buckling when the sun hits. Another lightbulb moment for me was realizing that your scribing line is only as good as your lighting. If you’re working in the shade, use a headlamp to see the exact point where your compass meets the rock face. Finally, remember that stone is often undercut; always check the profile at the height of your deck board, not just at the very top. If you follow these nuances, you’ll avoid the heartbreak of a wasted plank and achieve a finish that looks like it was precision-engineered by a machine.
The Small Tool Kit That Makes You Look Like a Master
You don’t need a truck full of specialized gear to get this right, but a few specific items will change your life. I never start a project involving transforming your outdoor living with custom composite decking ideas without my Bosch Barrel-Grip Jigsaw. The low center of gravity gives you way more control than a standard D-handle saw when navigating tight stone curves. I also swear by the FastCap AccuScribe because it stays locked in place—there is nothing worse than a cheap school compass widening mid-scribe. To finish the edge, keep a set of 80-grit sanding blocks nearby to smooth out the jigsaw marks. These tools are the bridge between a ‘weekend project’ look and the high-end results you’d expect from the the benefits of working with a professional deck builder in your outdoor projects.
Go Ahead and Make That First Cut
Taking a saw to an expensive piece of composite decking is always a bit nerve-wracking, even for the pros. But remember, craftsmanship isn’t about being perfect on the first try; it’s about having the patience to adjust and the tools to get it right. Whether you are dealing with a complex stone chimney or innovative stairs solutions for safe outdoor deck access, the scribe is your signature. It’s the detail that guests will notice and the one that will give you the most pride every time you step outside. You’ve got the technique down—now it’s time to stop measuring and start creating. Your dream deck is only a few precise cuts away. #IMAGE_PLACE_HOLDER_D# Have you ever tried to hide a massive gap with caulk only to have it fail a year later? Let me know your scribing wins or horror stories in the comments below!