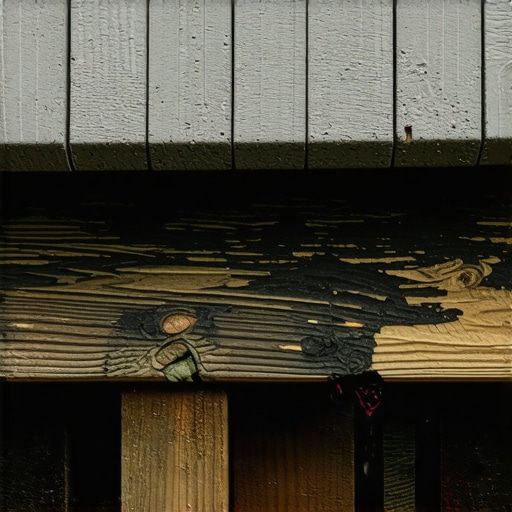
I’ll never forget the smell of damp, fermented sawdust the first time I pulled back a piece of siding on my own house. I had spent weeks building what I thought was a masterpiece of outdoor living, only to realize that I’d essentially built a slow-motion wrecking ball against my own foundation. I was young, I was eager, and I made the classic rookie mistake: I bolted the deck ledger board tight against the house without a single millimeter of breathing room. Three years later, the “sturdy” connection was a sponge. [IMAGE_PLACE_HOLDER]
Don’t let your house siding turn into a sponge
Most folks think that as long as they use composite decking, the rot worries are over. But the truth is, the deck boards aren’t the problem; it’s where the structure meets your home. When you trap leaves, dirt, and rainwater between your deck and your siding, you create a microbial party that never ends. I’ve seen deck builder veterans and DIYers alike skip the drainage gap because it feels like extra work. Today, I’m going to show you exactly why your ledger board needs a gap from the house siding and how that one simple change can save you ten thousand dollars in framing repairs down the line.
Is this tiny gap really worth the extra hardware?
I get it. You’re worried that a gap means a weaker connection or a place for your keys to fall through. You might even think it looks a little “unfinished.” But here is the reality: according to data from the International Association of Certified Home Inspectors, deck failures often occur not because of the weight on the deck, but because the wood behind the siding has rotted away so much that the bolts have nothing left to grip. That “gap” isn’t just a design choice; it’s a structural necessity. When I first started out, I thought “tight was right,” but that’s a dangerous myth in the world of outdoor decks.
The mistake I made so you don’t have to
Early in my career, I ignored the flashing and spacing because I was in a rush to get to the stairs. I figured the house was waterproof enough. I was wrong. Water is patient, and it loves capillary action. It will crawl behind your siding and sit there for weeks. If you’ve ever noticed a musty smell near your back door or seen “ghosting” on your interior drywall after a heavy storm, you might already be dealing with this. Have you ever checked the space behind your deck ledger, or are you living in blissful ignorance like I used to?To get this right, you have to stop thinking of your house wall as a solid barrier and start seeing it as a layered system. If you just slap a piece of pressure-treated lumber against your vinyl or wood siding, you have created a pocket where gravity stops working and capillary action takes over.
Strip the siding and reveal the truth
First, you cannot just bolt through your siding. I tried that once on a small landing for some modern outdoor stairs, thinking the siding was tough enough. Within two seasons, the siding had cracked under the pressure and water was siphoning straight into the rim joist. You need to cut away a strip of siding slightly larger than your ledger board. This gives you a flat, solid surface on the house’s sheathing to work with. Think of it like clearing a surgical site before an operation; you need to see the ‘bone’ of the house.
The flashing sandwich that saves your framing
Once the siding is gone, you need a high-quality Z-flashing. I am partial to stainless steel or heavy-gauge aluminum. You tuck the top flange under the house wrap or building paper and let the bottom drip edge hang over the ledger. This is where most people stop, but you are better than that. You should also be using joist tape over the top of the ledger to prevent water from sitting in the screw holes. #IMAGE_PLACE_HOLDER_B#
Create the air gap with stackable spacers
Now for the core technique. To create that life-saving gap, I use specialized stackable spacers or even just a series of oversized stainless steel washers. On a job in Reeds Spring last summer, the homeowner was skeptical. ‘Won’t the deck wobble?’ he asked. I showed him how the tension of the bolts against the spacers actually creates a rock-solid connection while leaving a half-inch air chimney. This gap allows the wood to dry out after a storm. Without it, the moisture stays trapped like a wet towel in a gym bag.
Ditch the lag bolts for structural screws
In the old days, we spent half our time pre-drilling for massive lag bolts. It was a pain, and it often split the wood, creating even more places for rot to hide. These days, I use structural screws instead of lag bolts. They are thinner, stronger, and have a specialized coating that won’t react with the chemicals in pressure-treated wood. When you drive these through your ledger, through your spacers, and into the house rim joist, you are creating a connection that is significantly safer than any flush mount.
The drainage move that protects your foundation
While you are focusing on the ledger, do not forget the ground below. If you do not have a plan for where that water goes once it falls through the gap, you are just moving the problem. I always recommend a drainage move that saves your footings by ensuring the water is channeled away from the house foundation. It is the difference between a deck that lasts ten years and one that lasts forty.
Air is better than caulk for a dry ledger
Most DIYers and even some ‘pros’ think they are being clever by running a thick bead of caulk along the top of the ledger board. They believe they are sealing out the moisture. In my experience, this is the quickest way to guarantee a rot repair in five years. No matter how well you caulk, water will eventually find a way in—whether through a microscopic crack or through capillary action from below. Once that water is trapped behind a line of caulk, it can’t evaporate. You’ve essentially created a terrarium for wood-destroying fungi. The North American Deck and Railing Association (NADRA) emphasizes that proper flashing and ventilation are the primary defenses against ledger failure, not sealants. You want that air chimney I mentioned earlier to be completely unobstructed.
The hidden clip mistake that ruins your finish
If you are moving on to the surface and choosing the right composite decking for durable low-maintenance outdoor areas, don’t assume the fastening is ‘dummy-proof.’ I’ve seen beautiful builds ruined by the hidden clip mistake that leads to buckling deck boards. People tighten the clips too much or too little, not accounting for the thermal expansion of the material. Composite boards grow and shrink significantly with the seasons. If you don’t leave the prescribed ‘breathing room’ at the butt joints, the boards will eventually hump up like a camel’s back in the July sun. 
What happens when you build over old, brittle siding?
This is a question I get from homeowners in older neighborhoods all the time. If your siding is thirty years old, it’s going to shatter the moment you try to cut it for a ledger. In these cases, you need to learn the secret to a rock-solid deck-to-house connection on old siding, which often involves a specialized mounting block or even a free-standing deck design to avoid touching the house altogether.
Why I never use standard wood for deck railings anymore
It’s tempting to save a few hundred bucks by using pressure-treated 2x4s for your rails, but why I never use standard wood for deck railings anymore comes down to the ‘twist.’ Railings are the most visible part of your outdoor living space. Standard wood will warp, check, and splinter within two seasons, making the whole deck look cheap. I always point clients toward aluminum or high-end composite rails that stay straight as an arrow. Also, remember that a poorly managed ledger can lead to unsightly streaks on your home; knowing how to stop your deck from staining your house siding starts with that drainage gap we’ve been discussing. Have you ever fallen into this trap or discovered a rot surprise behind your siding? Let me know in the comments—I’d love to hear your horror stories or success fixes.
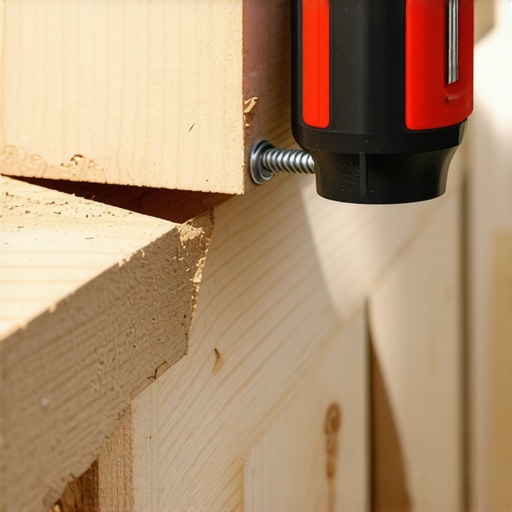
I’ve learned the hard way that a tool is only as good as the hand holding it, but the right equipment makes the difference between a weekend project and a lifetime investment. When I’m working on innovative stairs solutions for safe outdoor deck access, I reach for a 1/4-inch impact driver, not a standard drill. The percussive force of an impact driver prevents the bit from camming out—that’s when the bit slips and mangles the screw head—which is crucial when you are using high-torque structural fasteners. If you do mess up, knowing the best tool for removing a single stripped deck screw can save your sanity before you start hacking at the wood.
How do I maintain my deck ledger over time?
It is a simple question with a non-negotiable answer: you have to keep the air moving. Every spring, I take a thin putty knife or a blast of compressed air and clear out any pine needles, spider webs, or leaf litter that has settled into that half-inch ledger gap. If that debris stays there, it acts like a sponge, holding moisture against the house sheathing. Even if you are choosing the right composite decking for durable low-maintenance outdoor areas, the wood substructure remains the ‘heart’ of the build. Technical data from the USDA Forest Products Laboratory shows that wood decay fungi thrive when wood moisture content consistently exceeds 20%. By keeping that air gap clear, you are ensuring your ledger stays dry and your home stays rot-free.
My secret for a substructure that outlives the boards
One trick I always use is applying a copper naphthenate solution to every single piece of lumber I cut. I’ve written before about the best way to seal the end cuts of pressure-treated lumber to prevent rot, and I stand by it. When you make a cut, you’re exposing the less-treated interior of the wood. If you don’t seal it, you’ve just created an entry point for water. This attention to detail is one of the benefits of working with a professional deck builder in your outdoor projects; we look for the vulnerabilities that aren’t visible once the beautiful composite boards are screwed down.
The future of smart outdoor living structures
I suspect we are only a few years away from ‘smart’ decks where moisture sensors embedded in the ledger can alert your smartphone if the humidity levels behind your siding stay high for too long. We’re already seeing this in commercial building envelopes, and it’s only a matter of time before it hits the residential outdoor living market. Until then, the best defense is your own eyes and a commitment to proper spacing. I want you to try this: on your next repair or build, ditch the lag bolts and use structural screws instead of lag bolts. Once you feel how much more control you have when pulling a ledger tight against your spacers with an impact driver, you will never go back to the old, bulky hardware again.
Hard-Won Truths from a Decade of Deck Rot
After years of tearing down decks that were only ten years old, a few things have become crystal clear. First, never assume the house wrap is enough protection; it is a secondary defense, not a raincoat for your ledger. Second, if you aren’t using a level at every single step, you are just inviting water to pool in places you can’t see. Third, the most expensive mistake you can make is trying to save fifty dollars on flashing—it will eventually cost you five thousand in rim joist repairs. I’ve learned that a successful deck builder isn’t the one who works the fastest, but the one who respects the power of a single drop of water.
Build Smarter with These Favorites
When I am planning a project, I always consult the DCA6 Prescriptive Residential Wood Deck Construction Guide; it is essentially the bible for safe framing. For my hands-on work, I never step onto a job site without a high-torque impact driver specifically for driving those structural screws we talked about. I also highly recommend looking into choosing the right composite decking for durable low-maintenance outdoor areas if you want the surface to match the longevity of your newly protected frame. These tools and resources aren’t just suggestions; they are the foundation of a deck that stays safe for decades.
Go Build Something That Lasts
Building a deck is more than just adding square footage; it is about creating a safe harbor for your family to enjoy the best of outdoor living. It might feel like a lot of extra steps to cut siding and install spacers, but that peace of mind when the rain starts pouring is worth every second of effort. You have the knowledge now—don’t let the fear of a little extra work stop you from doing it the right way. Have you ever found a rot surprise when peeling back your home’s siding? Let me know in the comments below!