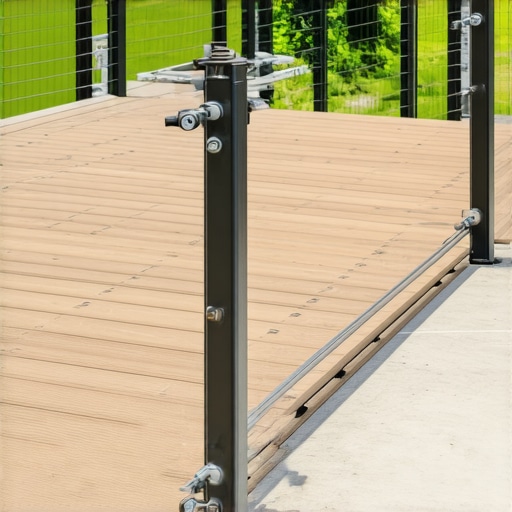
I remember standing on my deck three years ago, watching my neighbor’s kid lean on my brand-new cable railing. My heart sank. The middle cable didn’t just give a little; it bowed like a wet noodle. It was embarrassing. I had spent days measuring, drilling, and tensioning, yet there it was—the dreaded ‘cable sag.’ It made my beautiful new composite decking look like a cheap DIY project gone wrong. I realized then that I hadn’t just made a mistake; I had ignored the physics of tension. We are going to fix that for you today. I am sharing the exact method I used to rebuild that railing so it stays tight enough to play a tune on, even years later. Have you ever walked out to your deck only to realize your ‘modern’ railing looks more like a sagging clothesline? [image_placeholder]
The Brutal Truth About Post Deflection
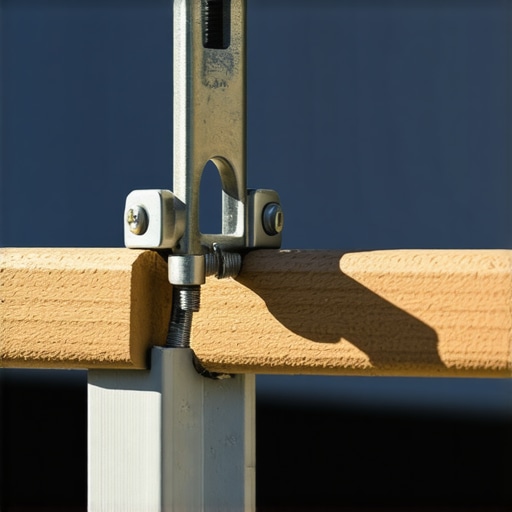
When I first started, I thought the secret was just ‘pull harder.’ I cranked those tensioners until my knuckles were white. The result? I actually pulled the end posts toward each other. That is the irony of cable railing: the tighter you pull, the more you risk ruining the structural integrity of your outdoor living space. I did not account for post deflection—the way a 4×4 or even a metal post bows under the immense pressure of ten or twelve high-tension lines. In fact, according to the ASTM E935 standards for permanent metal railing systems, the structural requirements are rigorous, but installers often underestimate the cumulative load of tensioned cables. A single cable can exert over 200 pounds of force, and when you multiply that by a dozen cables, you are looking at over a ton of pressure trying to fold your deck railing like a lawn chair. I learned the hard way that you need the bracket that keeps your railing from wobbling forever to provide the necessary internal support before the first cable even gets threaded.
Wait, Will My Posts Snap Under Pressure?
It is a valid fear. I have seen posts crack and welds fail because someone tried to compensate for poor planning with pure muscle. If your foundation isn’t rock solid, no amount of tightening will save you. This is why the joist spacing secret for a solid feeling deck is just as important for your railing as it is for your walking surface. Everything is connected.
Why I Stopped Trusting Standard Wood Posts Alone
Early in my career, I tried to mount cables directly to standard 4×4 pressure-treated posts without any reinforcement. Big mistake. Wood shrinks, it swells, and it yields. Within six months, the cables were loose again. Now, why I prefer powder-coated aluminum over vinyl railings comes down to that rigidity. Aluminum or steel does not ‘relax’ the way wood does. If you are sticking with wood, you need a sub-frame or a top rail that acts like a skeleton to resist that inward pull. Without it, you are just fighting a losing battle against nature. We are about to dive into the bracing techniques that actually work, but first, we need to talk about the ‘pull’ factor and why your sequence of tightening matters more than your strength.
Brace the frame like a skyscraper
If you want your outdoor living space to look professional, you have to stop thinking of the railing as a decorative element and start treating it like a structural bridge. Before you even unpack the stainless steel wire, you must install a solid top rail. This acts as a ‘compression member.’ Without it, as you tighten the cables, the posts will naturally want to pull toward each other. This is especially critical on innovative stairs solutions for safe outdoor deck access where the angles already create uneven tension. I once saw a DIYer try to skip the top rail entirely for a ‘clean look,’ and the posts bent so far inward they looked like a set of parentheses. It wasn’t just ugly; it was dangerous and a waste of expensive materials.
Start in the middle and work your way out
The biggest mistake I see—and one I definitely made on that neighbor’s deck—is tightening cables from the top down. Think of it like tightening the lug nuts on a car tire. You don’t go in a circle; you go in a pattern to distribute the pressure. If you start at the top, you are applying maximum leverage to the highest point of the post, which is where it is most likely to deflect. Instead, find the two cables in the center of the run. Tighten those to about 50% of their final tension. Then, move to the cables immediately above and below them. This ‘center-out’ method ensures the post remains plumb as the cumulative load increases slowly across the vertical span.
#IMAGE_PLACE_HOLDER_B#
Why your bottom cable always feels loose
Have you ever finished a whole section, felt proud of the tension, only to realize the bottom cable is suddenly floppy? This is the ‘hourglass effect.’ As you tighten the top cables, the post slightly compresses or bows, which actually reduces the distance between the holes at the bottom. To combat this, I always use a ‘pre-tension’ phase. I get all the cables snug—just finger-tight—before I pull out the wrenches for the final torque. This is where the joist spacing secret for a solid feeling deck comes into play again. If your posts are mounted to joists that are too far apart, the whole rim joist will roll as you tighten the cables, making it physically impossible to keep the bottom run tight no matter how hard you crank.
The trick to the final turn
I learned a hard lesson during a build on a sloped yard in the Ozarks where I was using structural screws instead of lag bolts for stairs. I did my final tensioning in the heat of a 95-degree afternoon. Metal expands in extreme heat. When the temperature dropped forty degrees that night, the cables contracted and the tension spiked so high it actually pulled the mounting bracket right out of the end post. Now, I always aim for ‘firm but flexible.’ You should be able to pull the cable no more than 3 or 4 inches out of alignment in the center of a 4-foot span with moderate hand pressure. Anything more, and you’re failing the ‘toddler test’—the same one my neighbor’s kid unintentionally taught me. Using designing safe and stylish stairs for outdoor decks in 2025 as a guide for safe clearances, I make sure the gaps never exceed four inches even when the cable is pushed, ensuring your deck remains a safe oasis for everyone without putting unnecessary stress on your frame.
Most people think the tighter the cable, the safer the railing. This is a dangerous myth that I see debunked on job sites every month. Everyone says you need that ‘ping’ sound when you pluck the wire, but in my experience, over-tensioning is the fastest way to turn a high-end outdoor living project into a structural nightmare. A study by the American Society of Civil Engineers (ASCE) emphasizes that guardrail systems must withstand a concentrated load of 200 pounds applied in any direction at the top of the post. If you have already applied 200 pounds of tension just to get the cables tight, you are leaving zero margin for actual safety loads before the post starts to deform.
Stop over-tensioning your cables right now
The trap most DIYers and even some pros fall into is trying to compensate for a weak frame with more torque. If your composite decking looks like it is wavy near the railing, it is probably because you are literally crushing the deck’s rim joist. When you tighten a dozen cables, you are creating a massive amount of ‘cumulative compression.’ If you haven’t installed solid blocking between your joists at the post locations, the rim joist will ‘roll’ inward. This doesn’t just loosen your cables; it can actually cause the hidden clip mistake that leads to buckling deck boards elsewhere on your surface because the entire frame is being squeezed.
#IMAGE_PLACE_HOLDER_C#
Can I actually trust wood posts for a modern cable look?
I get asked this constantly. The ‘expert’ consensus is often that you must use steel or aluminum for cable railing. I disagree. You can absolutely use wood, but you have to treat it differently. Wood is a living material; it breathes. If you are using wood posts, you need to use the bracket that keeps your railing from wobbling forever to provide a rigid internal skeleton. I also recommend ‘through-bolting’ your hardware rather than using lag screws into the wood grain. This prevents the hardware from pulling out as the wood seasons over the first two years. This is one of those expert deck builder tips for stunning outdoor living that separates a project that lasts twenty years from one that looks tired after twenty months.
The stair transition trap you didn’t see coming
Stairs are where the physics of tension get really messy. Most people buy pre-drilled posts and assume they can just ‘pull through’ the angle. This is a mistake. Because the tension is pulling at a downward angle, it exerts a ‘shear force’ on the top of the post that is much higher than on flat sections. I often see the hidden flaw in pre-built deck stairs from big box stores manifest here—the wood simply isn’t thick enough to resist that specific angular pull. When I’m designing safe and stylish stairs for outdoor decks in 2025, I always double up the carriage at the transition point to ensure the ‘pull’ doesn’t cause the stairs to pull away from the main deck frame. Have you ever fallen into this trap or noticed your cables loosening specifically on your stairs? Let me know in the comments.
I’ve seen those stair transitions fail more times than I can count, usually because the installer didn’t account for the ‘kickback’ of the cable against the wood grain. To stop that sag for good, you need to look beyond the basic hardware kit you bought online. If you’ve run into a situation where a fitting has snapped or a screw has sheared off deep in the post, I’ve found that having the best tool for removing a single stripped deck screw in your belt is an absolute lifesaver. It’s better than spending two hours drilling out a hardened steel bolt while your client—or your spouse—watches with growing skepticism. When you are moving from those complex stair angles back to the flat runs, you’ll start to see the benefits of working with a professional deck builder in your outdoor projects, especially when it comes to the specialized equipment required for a permanent finish.
Upgrade your toolbox if you want professional results
Stop using those hand-squeezed crimpers that look like overgrown bolt cutters. If you want your tension to hold for a decade, you need a hydraulic swaging tool. I use a handheld 10-ton hydraulic press that ensures the stainless steel fitting literally flows into the wire strands. This creates a cold-weld bond that won’t slip under the 200 to 300 pounds of pressure required for a clean ‘ping.’ Professional installers often rely on a Loos & Co. Model PT-1 tension gauge to ensure every line is identical. According to technical documentation from Feeney, Inc., failing to achieve uniform tension across all lines is the primary cause of post-twisting in residential railing systems. If you’re serious about choosing the right composite decking for durable low-maintenance outdoor areas, you shouldn’t undercut that quality with a sagging, uneven railing system.
How do I maintain my cable railing tension over time?
Maintenance isn’t just about cleaning; it’s about monitoring the ‘settle.’ Wood posts will always compress slightly over the first two winters. I recommend a ‘quarter-turn check’ every spring. Take a small wrench and give each tensioner a tiny nudge. If it turns easily, the wood has seasoned and shrunk, and you’re just taking up the slack. While you’re down there checking the bottom cables, it’s a great time to implement the stainless mesh trick for keeping mice out of your deck substructure. It’s a small addition that prevents your beautiful new innovative outdoor living ideas with composite decking in 2025 from becoming a winter hotel for local rodents. Remember, stainless steel 316-grade cable won’t rust, but it can tea-stain if you live near the coast or use heavy salts on your deck. A quick wipe with a citric acid-based cleaner once a year keeps that silver shine from turning a dull brown.
The future of decks is more metal and less maintenance
As we look toward 2025, the trend is moving away from the ‘all-wood’ look. We are seeing a massive shift toward pre-engineered metal railing systems that integrate directly into the deck frame. This eliminates the post-deflection issues I mentioned earlier because the metal posts are bolted directly to the steel or reinforced joists. This evolution makes transform-your-outdoor-living-with-custom-composite-decking-ideas much more achievable for the average homeowner because the ‘structural physics’ are built into the product. Try this: Next time you’re installing a long run, ‘pre-stretch’ your cables by tensioning them 10% past your target, letting them sit for an hour, and then resetting them to the proper tension. It solves the ‘bedding-in’ sag before it even starts. If this sounds like more engineering than you bargained for, you can always contact us to walk through the specifics of your layout.
Hard-Won Secrets for a Sag-Free Railing
Over the years, I’ve realized that the small details often dictate whether a railing looks professional or like a DIY disaster. First, never underestimate the power of temperature. If you install your cables on a freezing morning, they will inevitably expand and sag when the July sun hits your outdoor living area. I also learned that 316-grade stainless steel is non-negotiable; cheaper grades might look the same on day one, but they will show tea-staining within a year in most climates. Finally, remember that your railing is only as strong as your end posts. If they aren’t rock-solid, no amount of tensioning will save you. [image_placeholder]
The Tools That Saved My Sanity
I stopped guessing once I started using a professional tension gauge. It transformed my process from guesswork to engineering. I highly recommend investing in a handheld hydraulic swaging tool; it makes a connection that simply won’t slip, unlike manual crimpers. If you’re tackling complex layouts, looking into innovative stairs solutions for safe outdoor deck access can provide pre-engineered hardware that takes the frustration out of the angles. For those who want the high-end look without the structural headache, the benefits of working with a professional deck builder in your outdoor projects often include access to industrial-grade tensioning systems that aren’t available at big-box stores.
Build the Outdoor Space You Deserve
Don’t let the fear of physics stop you from creating a stunning, modern look. Whether you are following composite decking trends 2025 or building a classic cedar escape, a crisp, tight cable railing is the perfect finishing touch. Take it slow, brace your frame, and enjoy the view you worked so hard to preserve. What’s the biggest headache you’ve faced with your railing project? Drop a comment below and let’s figure it out together!