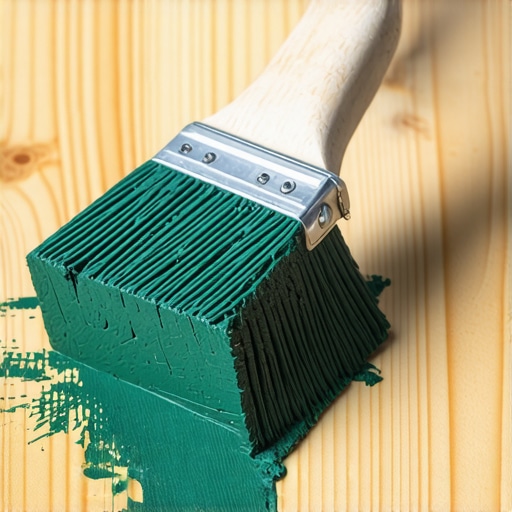
I remember the first set of stairs I ever built; I was so proud of those clean, 45-degree miters and the way the wood smelled fresh under the summer sun. But four years later, I poked the bottom of a stringer with a screwdriver and it sank in like it was hitting warm butter. The wood was practically hollow from the inside out, despite being ‘pressure-treated’ lumber. That was my ‘lightbulb moment’—a painful, expensive realization that the green tint we see on the outside of a 4×4 or a joist is just a thin skin of protection. When we make a cut, we’re essentially opening up a highway for moisture and fungi to drive straight into the heart of the wood. Today, I’m going to show you exactly why taking five seconds to brush some preservative on those raw ends is the difference between a deck that lasts thirty years and one that needs a [professional deck builder](https://deckdesignbuild.com/the-benefits-of-working-with-a-professional-deck-builder-in-your-outdoor-projects) to perform an emergency rescue in five.
The Hidden Vulnerability Inside Every Pressure-Treated Board
Most folks think that the pressure-treating process involves soaking a board until the chemicals reach the very center, but that’s rarely the case. For most residential lumber, the protection only penetrates about a quarter to a half-inch. When you cut that board to length or notch it for [innovative stairs solutions](https://deckdesignbuild.com/innovative-stairs-solutions-for-safe-outdoor-deck-access), you expose untreated heartwood that has zero defense against the elements. I made the mistake of skipping this step on my own home years ago, thinking it was overkill. It wasn’t. According to the American Wood Protection Association (AWPA), any field cuts or holes bored in preservative-treated wood must be treated with a topical wood preservative to maintain the integrity of the treatment.
Is that extra step really worth the hassle on a hot afternoon?
I get it—you’re tired, the sun is beating down, and you’re so close to finishing your project that the idea of stopping to paint every single cut end feels like a chore. But here’s the truth: rot doesn’t care about your schedule. If you are aiming for [durable low-maintenance outdoor areas](https://deckdesignbuild.com/choosing-the-right-composite-decking-for-durable-low-maintenance-outdoor-areas), your substructure has to be bulletproof. I’ve seen beautiful [composite decking](https://deckdesignbuild.com/transform-your-outdoor-living-with-custom-composite-decking-ideas) layouts fail because the wood frame underneath rotted away at the joints. Have you ever noticed a deck that feels ‘bouncy’ or looks uneven after just a few winters? Often, that’s because the joist ends were left raw, allowing water to wick into the end grain and expand. I’m curious—have you ever skipped this step and lived to regret it, or are you just now realizing why your old deck feels a bit soft underfoot? Knowing [the best way to seal the end cuts of pressure-treated lumber](https://deckdesignbuild.com/the-best-way-to-seal-the-end-cuts-of-pressure-treated-lumber-to-prevent-rot) is the most underrated skill in backyard construction.
Stop Treating Your Lumber Like It Is Waterproof
To understand why this step is non-negotiable, you have to think of wood fibers as a bundle of tiny, microscopic straws. In a living tree, these straws—the xylem—are designed to pull water and nutrients from the soil up to the highest leaves. When that tree is processed into a joist, those straws don’t go away; they just wait for a new source of moisture. If you leave the end grain exposed, those straws will suck up every drop of rain and dew, pulling it deep into the untreated core where it can’t evaporate. This is exactly how the best way to seal the end cuts of pressure-treated lumber becomes your most important line of defense. By capping those straws with a preservative, you’re essentially putting a lid on the bottle.
Pick the Right Sealer for Residential Projects
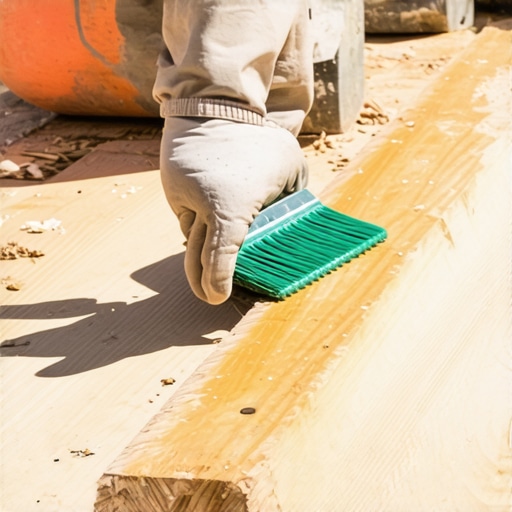
You don’t need a degree in chemistry to choose a sealer, but you do need to look for specific ingredients. The industry standard for field-treating cuts is a copper naphthenate-based preservative. It usually has a distinct green color, which is helpful because it shows you exactly where you’ve applied it and where you haven’t. If you are working on innovative stairs solutions where the wood is close to the ground, this is even more critical. I remember one job back in 2018 where I was framing a low-profile deck over a damp patch of clay. I was meticulous, dabbing every single cut with a copper solution. My hands were stained green for a week—I looked like I’d been wrestling a leprechaun—but that deck is still as rock-solid today as the day I finished it. Meanwhile, the homeowner’s neighbor, who skipped this step, had to call a professional deck builder just last summer to replace three rotted stringers that had turned to mush.
The Best Way to Apply Sealer Without a Mess
Practicality is key when you’re in the middle of a build. I keep a small, wide-mouth jar of preservative and a cheap 1-inch foam brush right next to my miter saw. Every time the blade comes up, the brush goes on. You want to saturate the end grain until it stops soaking up the liquid. This simple habit prevents the ‘wicking’ effect that leads to internal decay. If you’re worried about the green tint showing on visible parts of the deck, you can find clear versions, though they are often less potent. For hidden areas like the substructure, stick with the green stuff. To really bulletproof the frame, I also recommend looking into the hidden cost of skipping joist tape on a new build, as combining end-sealing with joist tape creates a nearly invincible moisture barrier. This is especially vital when you’re calculating the joist spacing secret for a solid feeling composite surface, as composite boards won’t rot, but the frame supporting them certainly will if ignored.
Seal Every Notch and Drill Hole
It’s not just the ends of the boards that need love. Every time you bore a hole for a bolt or notch a post, you’re creating a new entry point for fungi. When I am installing hardware and choosing why i use structural screws instead of lag bolts for stairs, I make sure to squirt a little preservative into the pilot holes. It sounds like overkill, but moisture has a way of finding the one spot you missed. Also, avoid the temptation to use shims to level things out unless they are properly treated; for instance, why i never use plastic shims for stair stringers is a topic I’m passionate about because stability and rot-resistance go hand-in-hand. Finally, ensure the area has air; learning how to vent the space under your deck to prevent mold and wood rot will ensure that even if a little moisture gets in, it has a way to get out.
Your Frame Needs to Outlast Your Composite Boards
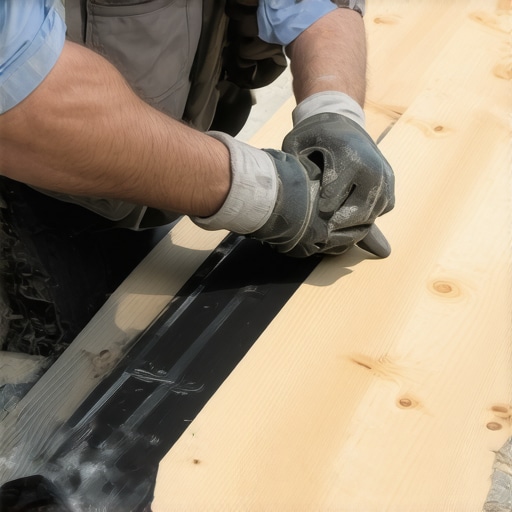
A common misconception in the DIY world is that ‘maintenance-free’ composite decking implies a maintenance-free frame. In reality, it’s quite the opposite. When you invest in composite decking trends for 2025, you are committing to a surface that can easily last 25 to 30 years. However, the standard pressure-treated pine frame underneath rarely makes it past fifteen if it isn’t hyper-protected. Most people think the decking is the most important part of the build, but in my experience, the substructure is where the real expertise shows. The Forest Products Laboratory (FPL) has documented that end-grain can absorb moisture up to ten times faster than the radial or tangential surfaces of the wood. This is why I always paint the tops of my joists black before installing composite; it’s not just for aesthetics to hide the wood—it’s an extra layer of moisture protection that matches the longevity of the boards above.
Why do some composite decks buckle even when using the right clips?
This is a question I get from advanced DIYers who followed the manual but still ended up with a wavy deck. The ‘trap’ here is failing to account for thermal expansion. Composite boards don’t expand much in width, but they expand significantly in length. If you install your boards on a 40-degree morning and butt them tight against the house or a rim joist, they will have nowhere to go when the sun hits 90 degrees in July. This leads to the hidden clip mistake that leads to buckling deck boards where the internal force of the expanding plastic actually bends the fasteners or the boards themselves. You have to leave that 1/8-inch to 1/4-inch gap, even if it looks ‘wrong’ during the cool hours of the morning.
Don’t Fall for the Big Box Stair Trap
When it comes to transitions, many people think they can save a Saturday by buying pre-cut stringers. This is a classic ‘oops’ factor that leads to a bouncy, unsafe mess. I have written extensively about the hidden flaw in pre-built deck stairs from big-box stores, which usually boils down to the use of inferior wood grades and standard rises that rarely match your specific site grade. If you want your stairs to feel like a permanent part of the home, why your deck stairs need a concrete landing pad at the bottom is a non-negotiable detail. Without a solid, level base, those stringers will eventually sink, pulling the entire staircase away from the deck frame and creating a major structural hazard. Have you ever fallen into the trap of using pre-cut materials only to find they didn’t fit your project? Let me know in the comments.
Ultimately, the benefits of working with a professional deck builder often come down to these invisible details—the way we manage the joist spacing secret for a solid feeling composite surface and how we seal every single vulnerability before the first board is even laid. A deck shouldn’t just look good in the reveal photo; it needs to be rock-solid when your grandkids are walking on it twenty years from now.
Tools That Actually Earn Their Keep
Over twenty years in the dirt has taught me that the most expensive tool isn’t the one with the highest price tag—it’s the one that fails when you’re three towns away from the nearest hardware store. If you want a result that looks like it was handled by a professional deck builder, you need to stop relying on a standard drill for everything. I switched to a dedicated high-torque impact driver for all my framing years ago. Why? Because an impact driver uses rotational force in bursts, which prevents the heads of your fasteners from stripping. This is crucial when you are using structural screws instead of lag bolts for stairs. These screws require immense force to seat properly into the rim joist, and a regular drill will likely cam out, leaving you searching for the best tool for removing a single stripped deck screw before you’ve even finished the first stringer.
How do I maintain composite decking over years of heavy use?
People often buy into the ‘zero maintenance’ myth, but even the highest quality durable low-maintenance outdoor areas need a little love to stay looking sharp. The biggest mistake I see? Someone pulls out a 3000 PSI pressure washer to blast off some spring pollen. Please, stop. Why you should never use a pressure washer on composite decks comes down to the integrity of the ‘cap’ layer; that high-pressure water can actually etch the plastic, creating tiny pores that trap dirt forever. Instead, use a soft-bristle brush and a specialized deck cleaner. If you had a summer BBQ mishap, knowing how to get grease stains off your composite deck immediately with a bit of Dawn dish soap and warm water can save you from a permanent reminder of that burger. According to the North American Deck and Railing Association (NADRA), a simple annual ‘check-up’—looking for loose fasteners and ensuring your drainage isn’t clogged—is what actually separates a 30-year deck from a 10-year headache.
Where Deck Building is Headed in 2030
I’ve been watching the industry shift, and I’m calling it now: the era of the all-wood frame is slowly winding down for high-end builds. As composite decking trends for 2025 continue to favor longevity, we are seeing more homeowners opt for light-gauge steel framing. It stays perfectly straight, never rots, and allows for much longer spans. This shift is also the reason i stopped using 4×4 posts for tall decks; the industry is moving toward more robust, engineered solutions that can handle the weight of modern innovative outdoor living ideas like outdoor kitchens and heavy stone fire pits. If you really want to level up your next project, I challenge you to try using a deck board bender (like a Bowrench) to straighten every single joist before you lay your first board. It’s an advanced move that ensures your gaps are laser-straight across the entire surface.
I remember the first set of stairs I ever built; I was so proud of those clean, 45-degree miters and the way the wood smelled fresh under the summer sun. But four years later, I poked the bottom of a stringer with a screwdriver and it sank in like it was hitting warm butter. The wood was practically hollow from the inside out, despite being ‘pressure-treated’ lumber. That was my ‘lightbulb moment’—a painful, expensive realization that the green tint we see on the outside of a 4×4 or a joist is just a thin skin of protection. When we make a cut, we’re essentially opening up a highway for moisture and fungi to drive straight into the heart of the wood. Today, I’m going to show you exactly why taking five seconds to brush some preservative on those raw ends is the difference between a deck that lasts thirty years and one that needs a professional deck builder to perform an emergency rescue in five.
The Hidden Vulnerability Inside Every Pressure-Treated Board
Most folks think that the pressure-treating process involves soaking a board until the chemicals reach the very center, but that’s rarely the case. For most residential lumber, the protection only penetrates about a quarter to a half-inch. When you cut that board to length or notch it for innovative stairs solutions, you expose untreated heartwood that has zero defense against the elements. I made the mistake of skipping this step on my own home years ago, thinking it was overkill. It wasn’t. According to the American Wood Protection Association (AWPA), any field cuts or holes bored in preservative-treated wood must be treated with a topical wood preservative to maintain the integrity of the treatment.
Is that extra step really worth the hassle on a hot afternoon?
I get it—you’re tired, the sun is beating down, and you’re so close to finishing your project that the idea of stopping to paint every single cut end feels like a chore. But here’s the truth: rot doesn’t care about your schedule. If you are aiming for durable low-maintenance outdoor areas, your substructure has to be bulletproof. I’ve seen beautiful composite decking layouts fail because the wood frame underneath rotted away at the joints. Have you ever noticed a deck that feels ‘bouncy’ or looks uneven after just a few winters? Often, that’s because the joist ends were left raw, allowing water to wick into the end grain and expand. I’m curious—have you ever skipped this step and lived to regret it, or are you just now realizing why your old deck feels a bit soft underfoot? Knowing the best way to seal the end cuts of pressure-treated lumber is the most underrated skill in backyard construction.
Stop Treating Your Lumber Like It Is Waterproof
To understand why this step is non-negotiable, you have to think of wood fibers as a bundle of tiny, microscopic straws. In a living tree, these straws—the xylem—are designed to pull water and nutrients from the soil up to the highest leaves. When that tree is processed into a joist, those straws don’t go away; they just wait for a new source of moisture. If you leave the end grain exposed, those straws will suck up every drop of rain and dew, pulling it deep into the untreated core where it can’t evaporate. This is exactly how the best way to seal the end cuts of pressure-treated lumber becomes your most important line of defense. By capping those straws with a preservative, you’re essentially putting a lid on the bottle.
Pick the Right Sealer for Residential Projects
You don’t need a degree in chemistry to choose a sealer, but you do need to look for specific ingredients. The industry standard for field-treating cuts is a copper naphthenate-based preservative. It usually has a distinct green color, which is helpful because it shows you exactly where you’ve applied it and where you haven’t. If you are working on innovative stairs solutions where the wood is close to the ground, this is even more critical. I remember one job back in 2018 where I was framing a low-profile deck over a damp patch of clay. I was meticulous, dabbing every single cut with a copper solution. My hands were stained green for a week—I looked like I’d been wrestling a leprechaun—but that deck is still as rock-solid today as the day I finished it. Meanwhile, the homeowner’s neighbor, who skipped this step, had to call a professional deck builder just last summer to replace three rotted stringers that had turned to mush.
The Best Way to Apply Sealer Without a Mess
Practicality is key when you’re in the middle of a build. I keep a small, wide-mouth jar of preservative and a cheap 1-inch foam brush right next to my miter saw. Every time the blade comes up, the brush goes on. You want to saturate the end grain until it stops soaking up the liquid. This simple habit prevents the ‘wicking’ effect that leads to internal decay. If you’re worried about the green tint showing on visible parts of the deck, you can find clear versions, though they are often less potent. For hidden areas like the substructure, stick with the green stuff. To really bulletproof the frame, I also recommend looking into the hidden cost of skipping joist tape on a new build, as combining end-sealing with joist tape creates a nearly invincible moisture barrier. This is especially vital when you’re calculating the joist spacing secret for a solid feeling composite surface, as composite boards won’t rot, but the frame supporting them certainly will if ignored.
Seal Every Notch and Drill Hole
It’s not just the ends of the boards that need love. Every time you bore a hole for a bolt or notch a post, you’re creating a new entry point for fungi. When I am installing hardware and choosing why i use structural screws instead of lag bolts for stairs, I make sure to squirt a little preservative into the pilot holes. It sounds like overkill, but moisture has a way of finding the one spot you missed. Also, avoid the temptation to use shims to level things out unless they are properly treated; for instance, why i never use plastic shims for stair stringers is a topic I’m passionate about because stability and rot-resistance go hand-in-hand. Finally, ensure the area has air; learning how to vent the space under your deck to prevent mold and wood rot will ensure that even if a little moisture gets in, it has a way to get out.
Your Frame Needs to Outlast Your Composite Boards
A common misconception in the DIY world is that ‘maintenance-free’ composite decking implies a maintenance-free frame. In reality, it’s quite the opposite. When you invest in composite decking trends for 2025, you are committing to a surface that can easily last 25 to 30 years. However, the standard pressure-treated pine frame underneath rarely makes it past fifteen if it isn’t hyper-protected. Most people think the decking is the most important part of the build, but in my experience, the substructure is where the real expertise shows. The Forest Products Laboratory (FPL) has documented that end-grain can absorb moisture up to ten times faster than the radial or tangential surfaces of the wood. This is why I always paint the tops of my joists black before installing composite; it’s not just for aesthetics to hide the wood—it’s an extra layer of moisture protection that matches the longevity of the boards above.
Why do some composite decks buckle even when using the right clips?
This is a question I get from advanced DIYers who followed the manual but still ended up with a wavy deck. The ‘trap’ here is failing to account for thermal expansion. Composite boards don’t expand much in width, but they expand significantly in length. If you install your boards on a 40-degree morning and butt them tight against the house or a rim joist, they will have nowhere to go when the sun hits 90 degrees in July. This leads to the hidden clip mistake that leads to buckling deck boards where the internal force of the expanding plastic actually bends the fasteners or the boards themselves. You have to leave that 1/8-inch to 1/4-inch gap, even if it looks ‘wrong’ during the cool hours of the morning.
Don’t Fall for the Big Box Stair Trap
When it comes to transitions, many people think they can save a Saturday by buying pre-cut stringers. This is a classic ‘oops’ factor that leads to a bouncy, unsafe mess. I have written extensively about the hidden flaw in pre-built deck stairs from big-box stores, which usually boils down to the use of inferior wood grades and standard rises that rarely match your specific site grade. If you want your stairs to feel like a permanent part of the home, why your deck stairs need a concrete landing pad at the bottom is a non-negotiable detail. Without a solid, level base, those stringers will eventually sink, pulling the entire staircase away from the deck frame and creating a major structural hazard. Have you ever fallen into the trap of using pre-cut materials only to find they didn’t fit your project? Let me know in the comments.
Ultimately, the benefits of working with a professional deck builder often come down to these invisible details—the way we manage the joist spacing secret for a solid feeling composite surface and how we seal every single vulnerability before the first board is even laid. A deck shouldn’t just look good in the reveal photo; it needs to be rock-solid when your grandkids are walking on it twenty years from now.
Tools That Actually Earn Their Keep
Over twenty years in the dirt has taught me that the most expensive tool isn’t the one with the highest price tag—it’s the one that fails when you’re three towns away from the nearest hardware store. If you want a result that looks like it was handled by a professional deck builder, you need to stop relying on a standard drill for everything. I switched to a dedicated high-torque impact driver for all my framing years ago. Why? Because an impact driver uses rotational force in bursts, which prevents the heads of your fasteners from stripping. This is crucial when you are using structural screws instead of lag bolts for stairs. These screws require immense force to seat properly into the rim joist, and a regular drill will likely cam out, leaving you searching for the best tool for removing a single stripped deck screw before you’ve even finished the first stringer.
How do I maintain composite decking over years of heavy use?
People often buy into the ‘zero maintenance’ myth, but even the highest quality durable low-maintenance outdoor areas need a little love to stay looking sharp. The biggest mistake I see? Someone pulls out a 3000 PSI pressure washer to blast off some spring pollen. Please, stop. Why you should never use a pressure washer on composite decks comes down to the integrity of the ‘cap’ layer; that high-pressure water can actually etch the plastic, creating tiny pores that trap dirt forever. Instead, use a soft-bristle brush and a specialized deck cleaner. If you had a summer BBQ mishap, knowing how to get grease stains off your composite deck immediately with a bit of Dawn dish soap and warm water can save you from a permanent reminder of that burger. According to the North American Deck and Railing Association (NADRA), a simple annual ‘check-up’—looking for loose fasteners and ensuring your drainage isn’t clogged—is what actually separates a 30-year deck from a 10-year headache.
Where Deck Building is Headed in 2030
I’ve been watching the industry shift, and I’m calling it now: the era of the all-wood frame is slowly winding down for high-end builds. As composite decking trends for 2025 continue to favor longevity, we are seeing more homeowners opt for light-gauge steel framing. It stays perfectly straight, never rots, and allows for much longer spans. This shift is also the reason i stopped using 4×4 posts for tall decks; the industry is moving toward more robust, engineered solutions that can handle the weight of modern innovative outdoor living ideas like outdoor kitchens and heavy stone fire pits. If you really want to level up your next project, I challenge you to try using a deck board bender (like a Bowrench) to straighten every single joist before you lay your first board. It’s an advanced move that ensures your gaps are laser-straight across the entire surface.
Hard Truths About Wood Rot That Most DIY Guides Ignore
After decades of building, I have realized that wood doesn’t rot because of the rain; it rots because of trapped moisture. The hardest lesson I learned was that ‘good enough’ is the enemy of ‘long-term.’ When you skip sealing a single cut end because you’ve run out of preservative, you aren’t saving ten minutes; you’re inviting a fungal colony to move in. Many people believe that once the deck is screwed down, the job is done, but the most critical work is what nobody sees. I have replaced entire substructures that looked perfect on the surface but were structurally compromised because the hidden reason your deck stairs are pulling away from the frame was simply neglect of the raw wood edges. My lightbulb moment was realizing that every fastener is a potential leak. If you aren’t protecting the wood where it is most vulnerable, you are essentially building a house on a foundation of sand. Always treat your frame as if it were the most expensive part of the project—because, eventually, it will be.
My Go-To Gear for a Bulletproof Substructure
To get professional results, you need a setup that makes precision easy. I never step onto a job site without a dedicated 1-inch foam brush and a sealed jar of copper naphthenate. For the mechanical side, I rely heavily on an impact driver paired with why i use structural screws instead of lag bolts for stairs because they pull the wood together with a force that standard hardware simply can’t match. I also recommend checking the NADRA website for updated safety standards; their checklists have saved me from minor oversights that could have turned into major liabilities. Finally, if you’re dealing with complex grades or heights, looking into designing safe and stylish stairs for outdoor decks in 2025 will give you the architectural blueprints needed to ensure your transitions are as sturdy as your main platform.
Build for the Future and Not Just for the Weekend
Your outdoor living space is an extension of your home, and it deserves the same care as your kitchen or living room. While it’s tempting to rush through the framing to get to the ‘pretty’ parts like the boards and railings, the true value of your deck is hidden in the joints and the cut ends. Whether you are tackling this yourself or hiring a professional deck builder, remember that longevity is a choice made in the small moments of construction. By sealing your lumber and planning for moisture management, you aren’t just building a platform; you’re creating a legacy of outdoor living that your family will enjoy for decades. Have you ever discovered rot in a place you thought was safe? Let me know in the comments below.