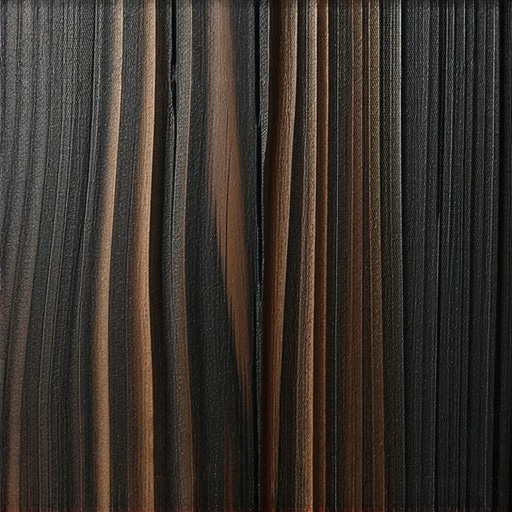
I’ll never forget the first time I hosted a dinner party on my brand-new composite deck. I’d spent weeks obsessing over the layout, picking out the perfect boards, and ensuring I was choosing the right composite decking for the long haul. But as the sun dipped below the horizon and I flipped the switch on my DIY lighting, my heart sank. Instead of the rich, textured sanctuary I’d imagined, my deck looked like a flat, sterile hospital wing. I’d made the classic amateur mistake of installing high-intensity overhead floodlights that completely obliterated the beautiful wood-grain pattern I’d paid a premium for. It was a total mood killer, and I spent the rest of the evening wondering why my expensive boards looked like cheap plastic under the stars. [image_placeholder]
Why My First Lighting Attempt Made My Deck Look Like Plastic
The truth is, even the most beautiful materials look cheap if you don’t treat them right with your light sources. Early in my journey, I thought more light always equaled a better view. I was wrong. By flooding the area from directly above, I was filling in all the tiny ridges and micro-shadows that give wood grain its organic character. This is especially true if you are experimenting with innovative outdoor living ideas where texture is the star of the show. I eventually realized that the secret isn’t how much light you use, but exactly which direction it’s coming from. When you blast a surface with light, you lose the story of the wood.
Does the Angle of the Light Really Make That Much Difference?
You might be skeptical. I get it. Light is light, right? But think of it like this: have you ever seen a mountain range at high noon? It looks flat and featureless. But at sunset, when the light hits from the side, every ridge and valley pops with drama. That’s exactly what we want to achieve on your floorboards and stairs designs for modern outdoor spaces. According to the Illuminating Engineering Society (IES), the “grazing” technique is specifically used to emphasize texture by placing light sources extremely close to a surface. Without that specific angle, you’re just lighting up a floor; with it, you’re creating a piece of art.
The Grazing Technique That Changes Everything
The “trick” is surprisingly simple but requires a bit of a shift in your deck builder insights. Instead of mounting lights high up on a post or the side of the house, you want to bring them down low. I mean really low. We’re talking inches from the surface. By positioning small, warm LED fixtures at the edge of your boards or under the handrail for a subtle glow, the light “grazes” across the wood. This creates tiny micro-shadows in the grain, making the texture look deep and three-dimensional. Have you ever felt like your outdoor space looks “flat” at night despite spending a fortune on materials? I’d love to know if you’ve run into this same frustration, so drop a comment below. Today, I’m going to show you exactly how to position these lights so your deck looks like a million bucks every time the sun goes down.To get this look right, you need to treat your deck like a high-end stage set rather than a construction site. Start with a reliable 12-volt system; it is safer for DIY installation and gives you much more control over the final intensity. I learned this lesson the hard way during my first renovation when I tried to tap directly into a high-voltage line and nearly fried my nerves. To avoid flickering lights that make your backyard feel like a haunted house, you must invest in one of the best low-voltage transformers for large outdoor lighting projects. A steady power flow ensures that the ‘grazing’ effect remains consistent across every board.
The Low-Angle Secret to Deep Wood Texture
When you are positioning your fixtures, think of them as delicate paintbrushes. You want the light beam to wash across the surface, not point up at the sky. I recommend using small surface-mount fixtures that sit flush against the perimeter. One Saturday night, I spent three hours moving a single LED fixture back and forth in half-inch increments. If it was too far from the boards, the light just dissipated into the night. If it was too close, it created a ‘hot spot’ that looked like a flashlight was duct-taped to the floor. The sweet spot is usually about two to three inches from the board you want to highlight. This level of precision is exactly what deck builder insights suggest for a high-end finish. 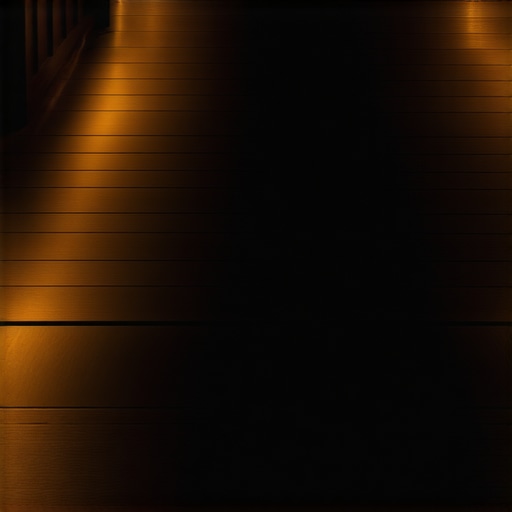
Choose Warmth to Avoid the Hospital Look
Nothing kills an outdoor vibe faster than ‘hospital white’ light. You want a color temperature between 2700K and 3000K to mimic the warm glow of a campfire. When I first started, I grabbed the cheapest LEDs I could find, and they had a clinical blue tint that made my expensive brown composite boards look like cold gray concrete. Learning how to pick the right deck lighting color temperature for a cozy feel transformed my backyard from a sterile platform into a living room without walls. That golden hue catches the ‘peaks’ of the wood grain while letting the ‘valleys’ fall into shadow, which is the entire point of the grazing technique.
Light Your Steps for Safety and Drama
The biggest challenge for any DIY-er is always the transition areas. You want people to see where they are stepping, but you do not want to blind them as they climb. I have seen too many homeowners install bright lights on the stair risers that point straight into their guests’ eyes. It is disorienting and actually makes the stairs more dangerous. Instead, focus on downward-facing lights that pool on the tread itself. While designing safe and stylish stairs for outdoor decks in 2025, I discovered that mounting tiny lights under the lip of the stair tread is the ultimate pro move. It provides a soft glow that marks the edge clearly without any glare. Applying the best way to light stairs for safety without creating a glare ensures that your architectural grazing continues seamlessly from the main deck down to the garden path.Most homeowners obsess over the weight their deck can hold, but they completely ignore lateral load—the side-to-side force that makes a structure feel shaky. Everyone tells you to focus on the joist spacing, but in my experience, the real secret to a high-end feel isn’t just the framing; it’s how you manage the ‘bounce.’ If your floor feels like a trampoline, it’s often because of a lack of mid-span blocking. This is the structural reason your deck feels bouncy when you walk, and it has nothing to do with the quality of the boards themselves. Even when choosing the right composite decking, if the skeleton underneath is flexible, the whole experience feels cheap.
The Expansion Gap Trap Most DIYers Ignore
Here is the ‘oops’ factor that ruins professional-looking installs: the thermal dance. Composite decking is an incredible material, but it expands and contracts significantly more than wood along its length. I have seen beautiful projects ruined because the builder didn’t leave enough room where the boards meet the house. If you don’t account for why your composite boards are expanding more than expected, they will eventually buckle or push against your vinyl siding, causing permanent damage. To avoid this, you need to master the spacing secret for installing composite decking in winter versus summer. Have you ever fallen into this trap of a ‘perfect’ tight fit that turned into a wavy mess by July? Let me know in the comments.
Why do some stairs feel rock-solid while others vibrate with every step?
It usually comes down to the stringer throat. Most people cut their stringers and call it a day, but the ‘throat’—the remaining wood after the notches are cut—is the weakest point. According to the North American Deck and Railing Association (NADRA), stair failures are one of the leading causes of deck-related injuries. To prevent this, I always tell people that double blocking the middle of a long stair run is the only way to achieve true stability. Without that extra bracing, the stringers can splay outward, leading to a ‘spongy’ feel that eventually causes the wood to crack. 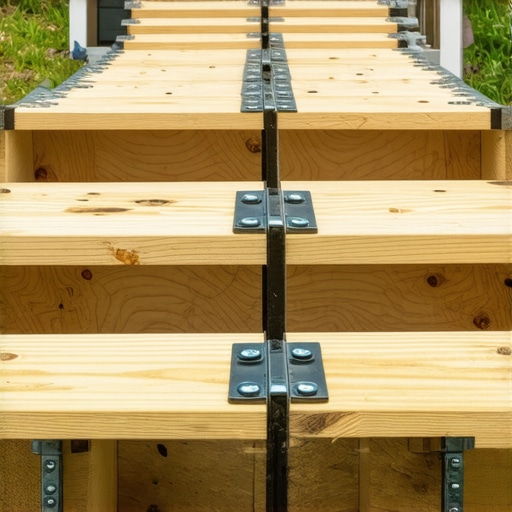
Stop Your Composite From Creaking in the Heat
Another nuance that separates a skilled deck builder from an amateur is how they handle fastener friction. On those 95-degree days, composite boards can get incredibly hot. This heat causes the boards to grow, and if they are pinned too tightly by the wrong clips, you’ll hear an annoying ‘ticking’ or creaking sound every time the sun comes out. Learning how to stop your deck boards from creaking in the summer heat involves using hidden fasteners that allow for a tiny bit of longitudinal movement. This ensures your innovative outdoor living ideas stay peaceful instead of sounding like a haunted house. This level of detail is exactly what you get when you understand deck builder insights for long-term durability.
I used to think that a pencil and a scrap piece of 2×4 were all I needed for planning, but that’s a fast track to expensive mistakes. When you are dealing with complex layouts, why a digital designer is the best move for planning a complex backyard deck becomes immediately clear. I personally switched to using Realtime Landscaping Architect because it allows me to see exactly how shadows fall across the grain before I ever buy a single board. This isn’t just about pretty pictures; it’s about ensuring your why a wrap-around staircase is the best choice for multi-level yards actually fits the topography of your land without creating a drainage nightmare.
Stop Guessing and Start Designing Digitally
Using specialized software helped me catch a major error on a recent project where the sun would have hit the boards at an angle that caused massive glare. Beyond the screen, the physical tools you choose matter just as much. I have a very specific rule for my builds: why we use hidden clips for the field but screws for the perimeter is the only way to ensure the deck looks seamless while remaining structurally anchored. I use the CAMO drive tool for the main field because it’s fast and easy on the back, but for those perimeter boards, I switch to color-matched Cortex screws to handle the higher stress points.

The Hidden Hardware That Saves Your Toes
According to the American Wood Council’s DCA 6 (Prescriptive Residential Wood Deck Construction Guide), the chemical reaction between modern pressure-treated lumber and standard zinc-plated fasteners can lead to rapid corrosion. This is why I am incredibly stubborn about using only high-grade stainless steel or double-galvanized hardware. If you don’t, those expensive boards will eventually pull loose as the screws disintegrate inside the joists. It’s a small detail that determines if your deck lasts 10 years or 30. For the ultimate pro finish, why I paint the tops of my joists black before installing composite is a trick I recommend to everyone; it makes the pressure-treated wood disappear into the shadows of the gaps, giving the whole structure a high-end, shadowy depth.
How do I maintain my composite deck year-after-year?
The most common question I get is how to keep that “just installed” glow. The biggest mistake is reaching for the power washer. I’ve seen homeowners shred the protective cap of their boards because they got too aggressive with the PSI. This is why you should never use a pressure washer on composite decks. Instead, a soft-bristle brush and a specialized cleaner like Corte-Clean are all you need. If you had a summer BBQ mishap, knowing how to clean grease stains off composite without ruining the finish is vital—dish soap and warm water are actually your best friends if you catch the spill quickly.
Where the Outdoor Living Trend is Heading Next
Looking forward, I predict we are going to see a massive shift toward “cool-deck” technologies. As we’ve seen, why dark brown decking gets significantly hotter than light gray boards is a real comfort issue for bare feet. Manufacturers are already developing infrared-reflective pigments that keep even the darkest boards much cooler. I also expect smart-home integration to move from the living room to the joists, with built-in sensors that can detect moisture levels or structural shifting before it becomes a problem. If you want to take your deck to the next level right now, I strongly suggest trying the black-painted joist trick on your next section—it’s the one “secret” that makes every guest ask who your professional builder was.
The Hard Truths About What Actually Makes a Deck Feel Expensive
After a decade of building, I have realized that the difference between a project that looks DIY and one that looks like a luxury retreat is found in the things you cannot see at first glance. While many look for inspiring deck and stair ideas for every budget, the true luxury feel comes from the small details I missed on my first try. Structural bounce is a vibe killer. You can buy the most expensive boards in the world, but if the floor flexes under your feet, it feels cheap. Always prioritize mid-span blocking. Lighting is about shadows, not just brightness. If you can see the lightbulb, you have failed the grazing test. You want the glow, not the glare. Never skip the tape. Applying joist tape is the only way to ensure you are learning how to protect your deck frame from rot for thirty years. Without it, the skeleton of your deck will fail long before the composite boards do.
The Only Gear I Carry When Results Matter
I am often asked what is in my literal toolbox for these projects. First, the CAMO Drive tool is my go-to for speed and hidden fastening; it saves my back and keeps the surface clean. For planning, I rely on Realtime Landscaping Architect because it allows me to play with light angles and custom composite decking ideas in a 3D space before cutting a single board. If you are ready to get started, I always recommend checking out composite decking trends 2025 to see where the market is headed. These resources ensure that your technical execution matches your creative vision.
Transform Your Backyard Into the Sanctuary You Deserve
Building an outdoor living space is about more than just square footage; it is about creating a stage for your life’s best moments. Whether you take the DIY route or decide to lean on the benefits of working with a professional deck builder, focusing on texture, lighting, and structural integrity will pay dividends for years. Take your time with the grazing lights, be obsessive about your spacing, and do not be afraid to experiment with the black-painted joist trick. Your future self, sitting on that deck with a cold drink at sunset, will thank you for the extra effort you put in today. Have you ever struggled with getting the lighting just right on your own outdoor project? Let me know in the comments below!