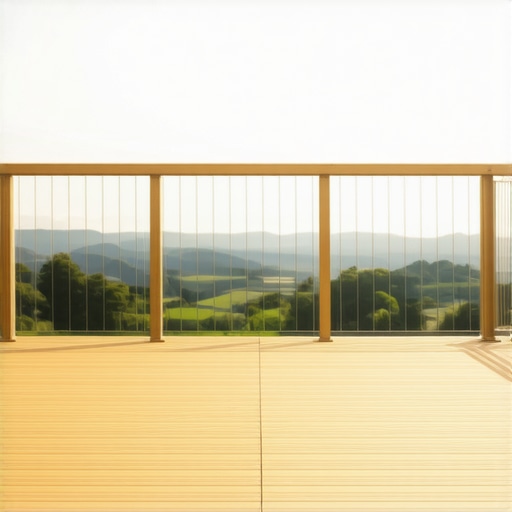
It was a breezy Saturday afternoon when I watched my three-year-old take a daring step toward the edge of my deck, her tiny fingers gripping the railing. My heart skipped a beat. The railing was only 30 inches high—too low, I realized, for safety or peace of mind. That lightbulb moment made me rethink everything about my outdoor sanctuary.
protect Your Loved Ones by Meeting the Minimum Height Standards
Many homeowners overlook the importance of railing height, assuming it’s a mere design choice. But years of hands-on experience have taught me that a safe, compliant deck railing is at least 36 inches tall. Not only does this meet building codes, but it also provides a sturdy barrier that keeps kids, pets, and guests safe from accidental falls. When I updated my own deck, I discovered that the difference in height isn’t just about safety—it’s about confidence and peace of mind.
Is a Higher Railing Truly Worth the Hype?
Initially, I wondered if bumping up my railing would be worth the extra effort and expense. I thought, “Maybe a little lower is okay; after all, I don’t want the view blocked or the design compromised.” But that was a mistake I paid for when my daughter leaned over and wobbling the railing slightly, causing a near-miss. What I didn’t realize then is that building codes across many regions, like those detailed by local authorities, are directly informed by safety studies. According to the Consumer Product Safety Commission, falls are one of the leading causes of injury among children—most of which could be prevented with proper railing height.
Early in my project, I also made the mistake of assuming all decks are the same. My oversight was ignoring the importance of adhering to local regulations and the latest standards for outdoor safety. Wanting my deck to look sleek, I initially decided to build lower rails for aesthetics. That’s when I learned that a deck’s safety should never be compromised for style.
So, if you’re thinking of redesigning or building your outdoor space, ask yourself: Have I considered not just what it looks like, but how it protects those I love? If your current railing is less than 36 inches, it might be time for an upgrade. Coming up, I’ll walk you through the practical steps to ensure your railing meets these vital standards while complementing your outdoor aesthetic. For further insights on designing safe and stylish stairs, check out [this detailed guide](https://deckdesignbuild.com/designing-safe-and-stylish-stairs-for-outdoor-decks-in-2025). Let’s make sure our decks are not just beautiful but truly safe.
Design for Function and Safety from the Start
Begin by drafting your stair layout, ensuring the rise and run follow code guidelines—typically, a riser of 7-8 inches and a tread of at least 10 inches. I vividly recall measuring my first set of stairs, only to realize later that uneven risers caused wobbling—an easily avoided mistake if you pay attention to precise measurements and use a framing square for consistency.
Plan Your Materials Carefully
Choose durable, low-maintenance materials like composite decking for treads and aluminum or vinyl for balusters. During my project, I opted for composite because it mimics wood but withstands weather indefinitely. To get a clean look and prevent moisture pockets, I installed a drip edge along the stair stringers—similar to how I avoid trapped moisture on deck surfaces, as explained here.
Build a Strong Support Structure
Start with digging footings deeper than local frost lines to prevent shifting—this is crucial for stability. I learned this the hard way when I ignored depth specifications, and a year later, my steps sagged slightly. Use pressure-treated lumber for stringers, and secure them with galvanized or stainless steel fasteners to withstand the elements. Remember, improper framing can make stairs feel unstable, so ensure each stringer is level and securely anchored.
Cut and Assemble with Precision
Cut stringers using a jig or a saw guide to ensure uniformity, and test fit before nailing. I once miscut a stringer, causing uneven steps—embarrassing but a valuable lesson about measuring twice. Use a T-bevel or riser gauge to set consistent angles, and double-check each cut to maintain even risers and treads, which improves both safety and visual harmony.
Secure Treads and Handrails Properly
Pre-drill holes to prevent splitting and fasten each tread with corrosion-resistant screws. When installing the handrail, ensure it’s at a height that meets safety standards—about 34-38 inches—and use sturdy brackets that can handle lateral forces. For a sleek look and increased stability, consider hidden fasteners like those recommended here. I once added a handrail that was too low; testing it with a gentle push revealed instabilities I corrected before proceeding.
Finish with Safety and Style in Mind
Apply slip-resistant surface treatments or textured tread profiles for rainy days. Additionally, lighting integrated into the stairs enhances safety at night—think subtle LED strips under each nosing, similar to outdoor lighting ideas discussed here. After completing my stairs, I tested them during a rainstorm, and the textured surfaces prevented slips, validating my material choices and installation techniques.
When it comes to outdoor stairs and decking, many enthusiasts focus on the obvious—layout, material choice, and code compliance. However, behind the scenes lies a critical nuance: the subtle deformation and long-term stability issues that plague even well-constructed decks. Contrary to popular belief, choosing the right materials and following standards isn’t enough; understanding the microscopic interactions and advanced mistakes can save your project from disaster. For instance, many rely solely on pressure-treated lumber for framing, assuming it’s foolproof. Yet, without proper sealing, flashing, and venting, moisture traps can lead to rot and compromise structural integrity over time, a fact backed by a study from the Building Science Corporation showing that improper moisture management accelerates decay even in pressure-treated wood. Have you ever experienced a deck that developed creaks, wobbling, or uneven steps after only a few seasons? These issues often stem from inadequate framing support or overlooked drainage details. Moreover, a common myth is that composite decking is maintenance-free. While it indeed resists rot and pests better than wood, neglecting installation best practices—like ensuring proper gap spacing and avoiding trapping water—can lead to fading, mold, and warping prematurely. Advanced mistakes, such as miscalculating joist spacing or neglecting edge detailing, cause problems that are hard to fix once the deck is built. These nuances emphasize the importance of a comprehensive approach—one that integrates sophisticated design principles, material science, and a keen eye for detail. If you’re aiming for a durable, safe, and stunning outdoor space, collaborating with an experienced deck builder who understands these complex factors can make all the difference. Want to see how clever detailing elevates your project? Check out seamless transitions or top stair designs for inspiration. Recognizing these deeper factors ensures your deck isn’t just beautiful today but remains resilient for decades. Have you ever fallen into this trap? Let me know in the comments.
Keeping your outdoor deck and stairs functioning properly over the years requires more than just initial construction — it demands the right tools, maintenance routines, and an understanding of evolving best practices. As a seasoned deck builder, I rely on specialized equipment and thoughtful methods to ensure longevity and safety.
Invest in Precision Measuring Instruments
Accurate measurements are the backbone of a durable deck. I consistently use a digital laser measure for its speed and precision when determining joist spacing or railing heights. Unlike traditional tapes, laser measures reduce human error, helping me maintain consistent gaps that prevent issues like squeaks or misalignments in composite decking or stairs. When constructing stairs, I also use a digital angle finder to ensure consistent riser inclines, which is crucial for both safety and aesthetic harmony. These tools have become indispensable, especially when working on complex multi-level designs discussed in this guide.
Embrace Advanced Power Tools for Efficiency
High-quality cordless drills with multiple speed settings streamline installation, from fastening hidden fasteners in modern composite decking to securing handrails. I prefer brushless models for their durability and battery life, enabling me to work efficiently for longer periods. A good jigsaw is vital when customizing stair stringers or cutting intricate angles—precision that DIYers often struggle with, leading to uneven steps or weak joints. Additionally, I utilize a pneumatic nail gun for framing, reducing manual labor and ensuring nails are driven flush, which prevents tripping hazards and awkward gaps. Modern tools, like an oscillating multi-tool, also help clean cut edges and smooth out rough spots, directly extending deck lifespan.
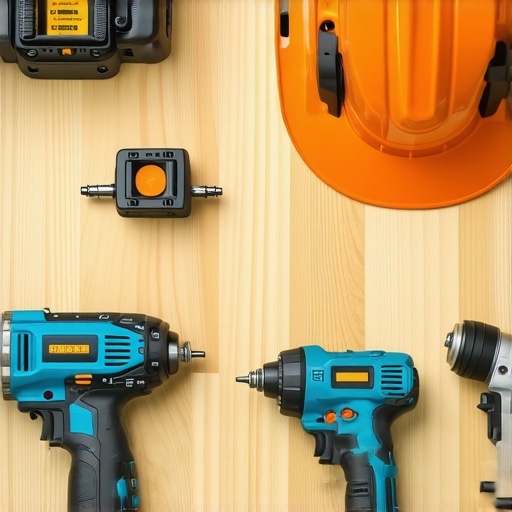
Image showing a cordless drill, laser measure, and oscillating multi-tool in action on a deck building site, emphasizing precision and efficiency.
Prioritize Long-Term Maintenance with Quality Materials and Techniques
Beyond tools, selecting the right materials ensures your deck withstands weather and time. Composite decking, for example, has advanced significantly, and choosing products with enhanced UV resistance and non-fading surface finishes can cut down maintenance. I recommend regularly inspecting for early signs of moisture trapping or loose fasteners, especially in critical areas like the fastening of stairs and railing attachments. Using a deck-specific fastener like hidden clips or corrosion-resistant screws, combined with proper flashing and drainage considerations, significantly extends your deck’s life, as discussed in this resource.
Future Trends in Outdoor Maintenance Tools
Looking ahead, I predict smart, IoT-enabled sensors will become standard for monitoring deck integrity, alerting homeowners to issues before they escalate. Additionally, robotic cleaning devices tailored for composite surfaces may simplify ongoing maintenance routines, diminishing the labor required to keep your outdoor living space pristine. Embracing these innovations now can prepare you for a more effortless, resilient outdoor area in the years to come.
How do I keep my deck working through the years?
Implement regular inspections, utilize high-quality materials, and equip yourself with precise measuring tools and durable power equipment. These investments and habits will save time and money down the line, ensuring your outdoor space remains safe and inviting. For advanced tips on integrating these techniques into your project, explore this in-depth guide.
What I Didn’t Know About Balance and Material Interactions
Early in my career, I underestimated how crucial precise measurements and understanding material properties are to a sturdy deck. I learned that even small miscalculations can lead to wobbling stairs or uneven surfaces, which compromise safety and aesthetics. This lightbulb moment pushed me to invest in advanced measuring tools and to study the science behind composite materials, ensuring my projects stand the test of time.
How Cutting Corners Can Cost More Than You Think
I once thought that skipping professional consultation or rushing measurements would save time and money. The reality? Poor framing or inadequate drainage caused my decks to deteriorate faster, leading to costly repairs. Partnering with experienced professionals and adhering strictly to safety standards isn’t just about compliance; it’s about building with confidence and avoiding future expenses. For insights on collaborating effectively, see this resource.
My Eye-Opener on Safety vs. Style Trade-offs
I used to believe that sleek, low-profile rails looked best, even if they didn’t meet the minimum height standards. My daughter’s close call with a lower railing proved that style should never outweigh safety. Now, I prioritize meeting or exceeding the safety regulations first and then finding aesthetic solutions that complement the design. Remember, a beautiful deck fails if it’s unsafe; safety must always come first.
Connections That Last: Staff, Materials, and Attention to Detail
Over the years, I discovered that investing in quality Fasteners, durable materials, and continuous staff training significantly extends deck life. Regular inspections and meticulous attention to details like flashing and moisture management prevent rot and structural issues. A well-supported, safe outdoor space results from a combination of good planning, high-quality materials, and inspired craftsmanship. Curious about the latest materials? Check out this guide.
Turning Vision into Reality: The Power of Proper Planning
Taking the time to draft detailed layouts and understand code requirements early on is a game-changer. I’ve seen projects where improvising led to uneven stairs, poor drainage, or unsafe handrails. Proper planning ensures your outdoor living space not only looks stunning but also performs flawlessly over time. Want to see how to design seamless transitions? Explore this article for expert tips.
Designed for Longevity: Materials and Maintenance
Choosing the right materials like composite decking with UV inhibitors, and applying protective finishes, makes maintenance easier and prolongs lifespan. I also advocate for regular inspections and cleaning routines to spot early signs of wear. Ignoring these can turn a beautiful deck into an eyesore or safety hazard faster than expected. For a deeper dive into materials, visit this resource.