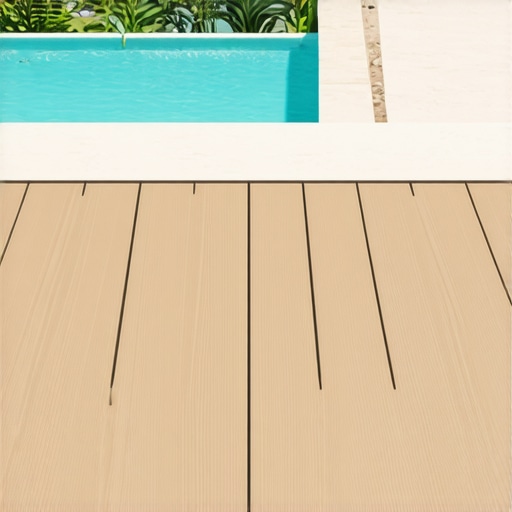
I vividly remember the first time I stepped onto a newly built poolside deck. The surface was uneven, squeaky, and—worse—one of the boards had a loose screw that kept catching my foot. That frustration hit hard. It was at that moment I realized how much of a difference hidden fasteners can make in outdoor decking. Since then, I’ve become an advocate for their use, especially around pools where safety and aesthetics matter most.
The Lightbulb Moment Behind Hidden Fasteners
In my early days as a deck builder, I made a classic mistake: I relied heavily on face-screwing each board. It seemed straightforward, quick even. But I soon learned that this approach often resulted in visible screw heads, which not only detracted from the sleek look but also exposed the wood to potential water damage and corrosion. Plus, the screws could loosen over time, leading to squeaks, wobbling, and safety concerns—especially near water where footing is crucial. According to a study by the Hardwood Council, exposed fasteners are a common point of failure in outdoor decks, often leading to costly repairs down the road.
This realization prompted me to explore better options—and that’s where hidden fasteners come in. By securing the boards from underneath or using clip systems, you achieve a clean, smooth surface that’s both safer and more durable. Ever since, I’ve recommended this approach to clients and fellow deck enthusiasts alike.
Have you ever faced a deck plagued with loose screws or unsightly screw heads? If so, you’re not alone. Many homeowners underestimate how much that can spoil the look and longevity of their outdoor space.
In the next sections, I’ll walk you through the practical steps to incorporate hidden fasteners into your poolside decking project, ensuring you end up with a beautiful, safe, and low-maintenance outdoor feature.
Preparing Your Deck Framework
Start by selecting durable framing materials like pressure-treated lumber or composite. Measure your deck dimensions precisely, ensuring consistent joist spacing—16 inches on center is standard for stability. When framing around pools, double-check that the layout allows for hidden fastening systems without gaps or misalignments. I once miscalculated the joist span, leading to uneven decking; reworking it saved the project from future bounces and squeaks.
Choosing the Right Hidden Fastener System
Opt for clip-based systems or under-deck fasteners compatible with your decking material. For composite boards, dedicated clips like the color-matched hidden fasteners create a sleek surface. When I installed a composite deck last summer, I used these clips, and the result was a stunning, screw-free aesthetic resistant to water and rot. This approach considerably reduces maintenance and improves safety around pools.
Installing the Fasteners — Step-by-Step
Begin by laying the first row of boards along the perimeter, ensuring they are perfectly aligned and level. Insert the clips into the grooved side of each board, then secure them underneath the joists with the provided screws, applying consistent pressure. Use a power drill with a depth setting to prevent over-tightening. During one installation, I overlooked the spacing and tightened too much, causing slight warping—testing with a scrap piece prevented repeated mistakes on primary boards.
Managing Cut Ends and Transitions
For the last row or irregular cuts, use a jig saw for precision, then cover the cut edges with matching trim or fascia boards. This hides any imperfections and maintains the clean look. When I faced a tricky corner, I used a template to mirror cut angles, achieving a tight fit that looked professional. Always sand the edges smoothly to avoid splinters, especially important when kids play nearby.
Final Touches for Safety and Aesthetics
After fastening all boards, check for any loose clips or uneven gaps. Fill voids with a suitable filler or trim excess material. Consider sealing the deck with a protective coating to extend lifespan, especially near water. I once neglected this step, and stains appeared within a year, emphasizing the importance of preventative care. For additional safety, add non-slip tape or textured finishes—particularly vital around wet pool areas.
Further Inspiration and Expert Tips
Looking for more creative ideas? Browse custom composite decking ideas to elevate your outdoor space, or consult a professional deck builder for expert guidance. Proper planning and execution of hidden fasteners ensure your poolside deck remains beautiful, durable, and safe for years to come.
Many homeowners believe that selecting the most popular decking materials or following basic construction tips guarantees a flawless outdoor space. However, this oversimplification can lead to costly mistakes and overlooked nuances that separate a good deck from a truly exceptional one. For example, a widespread misconception is that composite decking requires no maintenance; in reality, even the best materials need proper sealing and regular cleaning to prevent fading and staining. Discover how understanding these advanced details can elevate your project.
Are You Falling for the Biggest Deck Building Trap?
One common mistake is overestimating the importance of deck size without considering functional flow and the subtle nuances of stairs and transitions. Oversized decks might seem impressive, but they can hinder usability if not designed with thoughtful access points. Improper stair stringer spacing or incorrect tread dimensions, for instance, can make your stairs unsafe or uncomfortable—sometimes leading to slip hazards, especially around wet poolside areas. Consulting detailed guides like creating seamless transitions with stairs can help you avoid these pitfalls.
Another overlooked nuance involves the installation of stairs and their integration with the overall deck design. Many DIY builders neglect the importance of proper framing, which can cause wobbly steps or uneven heights. Advanced techniques, such as using a stringer template or ensuring exact riser heights, are essential to create a safe, durable staircase. Plus, proper flashing and weatherproofing around ledger boards and stair landings—backed by expert insights—prevent rot and structural issues that could compromise safety.
When choosing materials, many opt for dark-colored composite boards for aesthetic reasons. Yet, they often underestimate how heat absorption can lead to scorching barefoot hazards or quicker fading, which is detailed in why dark gray composite is tough to keep clean. Understanding these subtleties helps prevent future disappointment.
Finally, aspiring outdoor living enthusiasts sometimes overlook the importance of expert consultation. While DIY projects can be satisfying, the complexity of advanced deck design—especially around pools and multi-level arrangements—demands nuanced knowledge. Professionals can ensure proper spacing, load-bearing calculations, and code compliance, which are critical for safety and longevity. For a comprehensive approach, reviewing custom composite decking ideas and expert tips is invaluable.
Navigating the finer details of outdoor decking isn’t just about aesthetics; it’s an investment in safety, durability, and long-term enjoyment. Keep these advanced nuances in mind and steer clear of common pitfalls. Have you ever fallen into this trap? Let me know in the comments.
Keep Your Decks in Top Shape with the Right Tools
Proper maintenance starts with having the right equipment. I swear by my cordless impact driver, which makes securing hidden fasteners effortless and quick, especially when working on large surfaces. Its portability allows me to move freely around the deck, ensuring consistent torque without the hassle of cords. For cleaning, I always use a high-quality, stiff-bristled deck brush attached to a lightweight extension pole. This combo helps me scrub away dirt and algae without damaging the composite surface, prolonging its appearance and safety.
When it comes to sealing or staining, I prefer a quality sprayer with adjustable settings, like the Wagner Control Pro, which provides even coverage on large areas. Applying sealants properly ensures the longevity of your deck, especially in poolside environments where water and UV exposure accelerate wear. And don’t forget a good moisture meter—this small tool can save you from expensive repairs by indicating when your wood or composite is dry enough for maintenance or sealing tasks.
The Advantage of Using Digital Planning Software
Beyond physical tools, I recommend integrating digital project planning software such as deck visualization tools. These programs help you precisely model your deck layout, visualize material choices, and plan your project timeline. In my experience, this foresight reduces errors and rework, saving both time and money. As outdoor projects grow in complexity—like multi-level decks with intricate stairs—visual planning becomes invaluable.
Long-Term Results Require Consistent Care
Investing in durable materials like composite decking minimizes ongoing maintenance, but routine care is still essential. Regularly sweeping debris and inspecting fasteners prevent early deterioration. I recommend applying a protective finish every two to three years, depending on climate exposure. Using a power washer cautiously—on low pressure—can restore appearance without risking damage, provided you use the right nozzle and technique. Remember, often it’s the small, consistent efforts that preserve the beauty and safety of your outdoor spaces.
Scaling Your Outdoor Living to Fit Your Lifestyle
If you’re considering expanding your deck or building additional features, professional guidance can make a huge difference. A consult with a professional deck builder ensures your project is structurally sound and adheres to local codes. Advanced planning tools and quality equipment streamline scaling DIY projects while maintaining safety and aesthetics. Gradually upgrading your outdoor space with reliable tools and consistent maintenance allows you to enjoy your deck for years to come.
How do I keep my deck looking fresh over time?
Focus on routine cleaning, sealing, and inspections. Using a moisture meter can help you determine the right moments for sealing, preventing water damage. Regularly check fasteners and replace any that have loosened. Incorporate targeted cleaning with a deck-specific brush and a mild cleaning solution to avoid surface damage. For extensive projects, utilizing deck visualization tools can help plan upgrades without unnecessary trial and error. Start incorporating these practices today—your outdoor oasis will thank you in the long run. For more expert tips, explore creative composite decking ideas that blend durability with stunning aesthetics.
What I Didn’t Know About Hidden Fasteners Until It Was Too Late
One of my biggest lightbulb moments was realizing that meticulous attention to fastener placement and type can dramatically influence the safety and look of a poolside deck. Initially, I underestimated how a simple omission of hidden fasteners could lead to squeaks, water damage, and even safety hazards—especially in wet environments. This lesson taught me the importance of selecting the right fastening system early in the design process, which can save countless repairs and headaches later on.
Why Cutting Corners on Joist Spacing or Material Choices Can Cost You
Another invaluable insight came when I attempted to cut costs by reducing joist spacing or choosing cheaper materials. The result was a deck with unwanted bounce and uneven surfaces—disaster around pools where safety is paramount. I learned that prioritizing proper framing and durable, low-maintenance materials not only enhances longevity but also prevents frustration and accidents. Choosing quality over convenience is a lesson that stays with every successful deck project.
Mastering Transitions and Detail Work Transformed My Creations
Perfecting transitions between stairs and decks was initially challenging. It wasn’t until I started using templates for cuts and paying close attention to detail that my projects achieved a professional finish. Covering cut edges with matching trim and smoothing rough edges added that extra touch of finesse that elevates a simple deck into a stunning outdoor living space. It’s these small details that turn a good deck into a backyard masterpiece.
Choosing Tools That Make a Difference in Building and Maintenance
Investing in quality tools like impact drivers, moisture meters, and professional-grade sealers revolutionized my workflow. These tools not only made construction more efficient but also ensured that decks stayed pristine longer. For example, a reliable impact driver speeds up fastening hidden fasteners, while a moisture meter prevents premature sealing. I wholeheartedly recommend equipping yourself with these essentials to achieve lasting outdoor beauty and safety.
Insights from Digital Planning That Saved Time and Resources
Incorporating deck visualization software and precise planning tools radically changed my approach. Visualizing layouts, material options, and elevations in advance minimizes errors and rework. When designing multi-level decks or incorporating intricate stairs, digital planning becomes your best ally—saving money and ensuring your vision translates perfectly into reality. Learning to leverage these tools has been one of my most valuable professional investments.