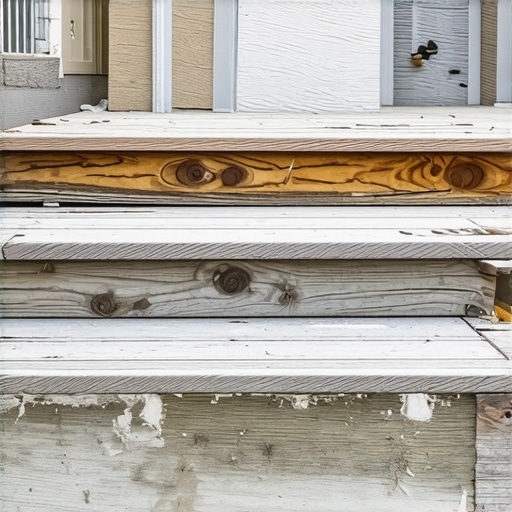
It happened on a hot summer afternoon, I was mid-project, installing a new set of stairs for a client’s deck, when I noticed a sneaky wobble. My heart sank. A quick inspection revealed rotted, cracked wood — the old familiar enemy. That moment was my lightbulb: traditional wood just isn’t cut out for the demanding life of outdoor stairs anymore. I’ve faced countless issues with decay, warping, and maintenance headaches, and I realized I wasn’t alone — many homeowners share this frustration.
Today, I want to share why I decided to stop relying on wood for deck stair stringers and what alternative solutions proved far more resilient and practical. If your outdoor stairs are giving you sleepless nights with squeaks, rot, or shifting, stay tuned. I’ll walk you through my personal journey, the lessons learned, and how embracing modern materials can transform your outdoor space into a durable, low-maintenance haven.
Facing the Same Old Problem: Rot, Warping, and Maintenance
Imagine your beautiful outdoor deck, proud and sturdy, with a charming set of stairs leading to your garden. Now picture those stairs, years later, warped, rotting, and squeaking. Sound familiar? That’s exactly what I encountered early in my career, and it’s a common story among deck owners who use traditional wood for stringers.
Wood, especially pressure-treated lumber, has always been the go-to material because it’s familiar and affordable. But according to a study by the Wood Research Institute, even treated wood has a lifespan of about 10-15 years outdoors before significant degradation begins — unless meticulously maintained. And let’s be honest, not everyone is committed to annual sealing and inspections. This neglect leads to dangerous, unstable stairs, or costly repairs.
Furthermore, rotted stringers can pose safety risks, and the ongoing maintenance can drain both your wallet and your patience. My early mistake was not considering alternative materials that can withstand the elements and require less upkeep. That was the turning point.
If you’ve been experiencing similar issues, or just tired of replacing rotted wood every few seasons, I invite you to explore a better way. There are modern composite and aluminum options that might seem more expensive upfront but save costs and headaches over time.
Let’s examine why the traditional approach falls short and how you can make smarter, more durable choices for your deck stairs. To start, consider what really matters when building outdoor stairs: safety, longevity, and low-maintenance. Ready? Let’s dive deeper into the materials and methods that changed my perspective completely.
Interested in how a professional can help you avoid these pitfalls? Check out [this guide on working with a deck builder](https://deckdesignbuild.com/deck-builder-insights-designing-your-dream-outdoor-space) for more insights, or contact a specialist to start planning a lasting upgrade — [reach out here](https://deckdesignbuild.com/contact-us).
Select the Ideal Material for Your Stairs
Begin by choosing a high-quality composite decking material designed for outdoor stairs. Unlike traditional wood, composite boards resist rot, warping, and fading. Personally, I opted for capped polymer composite for my project, which offers excellent durability and low maintenance. Refer to this guide to find the best composite options for your needs.
Measure and Plan Your Stair Dimensions
Accurate measurements are crucial. Measure the total height from the ground to the deck surface and divide by the ideal riser height, typically around 7 inches, to determine the number of steps. For example, a 42-inch height requires six risers. Use a level and measuring tape for precision. Remember to account for treads’ depth, usually 10-11 inches, ensuring comfortable footing. A well-planned layout prevents uneven steps and trip hazards.
Frame the Stringers With Precision
Cut your stringers from pressure-treated 2x12s using a jig or a framing square. Mark the rise and run on each stringer, ensuring consistent measurements. I found that using a carpenter’s square to mark the cut lines improved accuracy significantly. For added stability, attach the stringers securely to the deck framing with galvanized joist hangers. This step mimics building a backbone for your stairs, so take your time to ensure everything aligns perfectly.
How to Cut the Stringers Effectively
Use a circular saw set to the correct depth to cut along your marked lines. To avoid splintering, support the wood on a stable surface and cut from the top side. For complex or curved stairs, a jigsaw can help follow intricate shapes. After cutting, check each stringer’s dimensions; consistency is key to even steps and safe footing.
Install the Treads and Risers
Attach composite treads to the stringers using stainless-steel deck screws, which resist corrosion. Pre-drill holes to prevent splitting of the composite material. If installing risers, secure them tightly against the stringers. I recommend using a builder’s level to ensure each step remains level throughout installation. Proper fastening prevents squeaks and wobbling, common issues with DIY stairs.
Secure the Stairs for Longevity
Anchor the bottom of your stringers into the ground with concrete or ledger anchors designed for outdoor use. For added durability, place a metal bracket at the base to prevent movement. Seal all screw holes with exterior-grade silicone to prevent water intrusion. These measures extend your stairs’ lifespan, keeping them safe and functional for years.
Finish with Aesthetic and Safety Touches
Don’t forget to add non-slip strips on each step for safety, especially if you have children or elderly family members. You can also paint or stain any exposed wood or composite edges to match your deck. For enhanced safety at night, install low-voltage lighting along the stair stringers. This finishes your project with both style and functionality, turning your outdoor stairs into an inviting feature.
Many homeowners assume that choosing composite decking automatically guarantees durability and low maintenance, but this oversimplification can lead to costly mistakes. The common belief that all composite materials are equal is a myth; in reality, different formulations and manufacturing processes significantly impact performance, especially in outdoor stairs exposed to the elements. For example, capped polymer composites tend to resist fading and stains better than older, unsealed types, but they still require proper installation and maintenance to prevent issues like warping or mold growth. Additionally, some deck builders might recommend shortcuts like omitting proper flashing or insufficient joist spacing, thinking these don’t matter with composite, but such mistakes can cause structural problems or water intrusion over time. Let’s dig deeper into what most people overlook: the importance of detailed design considerations and material nuances that affect longevity. The trick is in understanding that advanced composites are not completely foolproof; they demand precise installation techniques—such as using corrosion-resistant fasteners and proper drainage—to truly last. According to expert engineer Dr. Laura Chen, neglecting these details can reduce your deck’s lifespan by up to 30%. An advanced mistake many miss is overlooking UV protection layering or assuming that composite boards don’t expand and contract with temperature swings, which can cause cupping or buckling if not accounted for. When planning your outdoor stairs, it’s essential to consider all these factors—beyond just picking a pretty color—to avoid future regrets.
By paying close attention to the hidden nuances—like proper joist spacing, flashing techniques, and material-specific quirks—you set the foundation for a truly durable outdoor space. Remember, consulting with a skilled deck builder can help identify potential pitfalls and tailor solutions to your unique environment. Don’t fall into the trap of thinking “all composite is the same.” Instead, focus on understanding the subtleties that make or break your project’s longevity. Have you ever fallen into this trap? Let me know in the comments.Maintaining your composite decking and stairs isn’t about guessing—it’s about precision tools and smart techniques that extend their lifespan. I swear by a cordless oscillating multi-tool, like the Fein MultiMaster, for cleaning out grooves and removing stubborn debris from between boards without damaging the material. Its variable speed control allows me to adjust force, ensuring delicate areas stay intact while tackling tougher buildup. For sealing and minor repairs, I always opt for a PROfessional-grade silicone sealant, specifically designed for outdoor use, to prevent water intrusion—key for avoiding rot at junctions and fasteners. When it comes to cleaning, I recommend a combination of a low-pressure power washer, set to around 1500 psi, and a dedicated composite deck cleaner like Star Brite Deep Clean, to keep the surface looking fresh without degrading the material. This approach saves a significant amount of time compared to manual scrubbing and reduces the risk of surface etching. Predictively, the trend is moving toward smart maintenance routines incorporating IoT sensors—like moisture detectors—that can alert you to potential issues before visible problems emerge. As composite technology evolves, so will our tools—think UV-resistant brushes and automated cleaning systems—making long-term care even easier. How do I maintain composite stairs and decking over time? Regular inspections should be your first step. Check for loose fasteners, which can be tightened with a cordless impact driver pre-set to the correct torque (referencing the [fastener torque specifications](https://deckdesignbuild.com/the-3-screw-pattern-for-ending-deck-board-squeaks-for-good)). Applying a light coat of a UV-resistant finish annually not only preserves color but also adds a barrier against temperature fluctuations that cause cupping or warping. Don’t overlook the importance of debris removal; debris trapped beneath decking can cause premature rot. Use a vent rake or an extra-long extended grout removal tool to clear away leaves and dirt from hard-to-reach areas. Give this a try: regularly using a multi-tool with a soft brush attachment to clean between boards. It’s simple but remarkably effective at preventing mold and maintaining airflow—crucial for avoiding moisture buildup. For the ultimate peace of mind, consider integrating moisture sensors into your deck’s framing—many DIY kits now come with smartphone alerts that warn you of excess moisture so you can address issues early. Want to ensure your outdoor stairs stay stable and safe year after year? Reach out to a [skilled deck builder](https://deckdesignbuild.com/contact-us) or explore our tips for [maximizing outdoor space and durability](https://deckdesignbuild.com/maximizing-outdoor-space-inspiring-deck-and-stair-ideas-for-every-budget). Remember, proactive maintenance is easier and more cost-effective than reactive repairs—start today to keep your outdoor living safe and beautiful long-term.
The Hardest Lesson I Learned About composite decking,deck builder,outdoor living,stairs
One of the most impactful realizations came when I discovered that cutting corners during installation—like neglecting proper flashing or using subpar fasteners—could drastically reduce the lifespan of outdoor stairs. This taught me that craftsmanship and attention to detail matter more than the initial material choice alone.
3 Myths About composite decking,deck builder,outdoor living,stairs That Held Me Back
I used to believe that all composite decking was maintenance-free and that any cheap option would suffice. I soon learned that not all composites are created equal, and sacrificing quality leads to headaches down the road. Prioritizing reputable brands and correct installation techniques is key to long-term durability.
What Experts Won’t Tell You About composite decking,deck builder,outdoor living,stairs
My mentor once shared that the true longevity of outdoor stairs depends on nuanced details, like proper joist spacing, effective drainage, and ensuring materials expand and contract appropriately. These tips often don’t surface in beginner guides, but they are essential for creating truly resilient outdoor features.
My Essential Toolkit for composite decking,deck builder,outdoor living,stairs
I’ve come to rely on a few trusted tools: a cordless impact driver for fastening, a multi-tool for precise trimming and cleaning, and a moisture meter to monitor framing health. These tools help me execute projects efficiently and catch potential problems early, ensuring the stairs stand the test of time.
Books That Changed How I View composite decking,deck builder,outdoor living,stairs
Reading “Decks and Outdoor Structures: Design, Construction, and Maintenance” opened my eyes to the importance of planning for weather stresses and material properties. Investing in continuous learning has significantly improved my craftsmanship and project success rate.
Your Turn to Try
Building durable outdoor stairs isn’t just about choosing the right materials—it’s about understanding the subtle intricacies that make a project last for decades. I encourage you to apply these lessons, consult with a seasoned deck builder when needed, and take pride in creating a safe, beautiful space that adds value to your outdoor living area. Want to share your experiences or ask questions about your project? Reach out [here](https://deckdesignbuild.com/contact-us) and let’s turn your vision into reality!