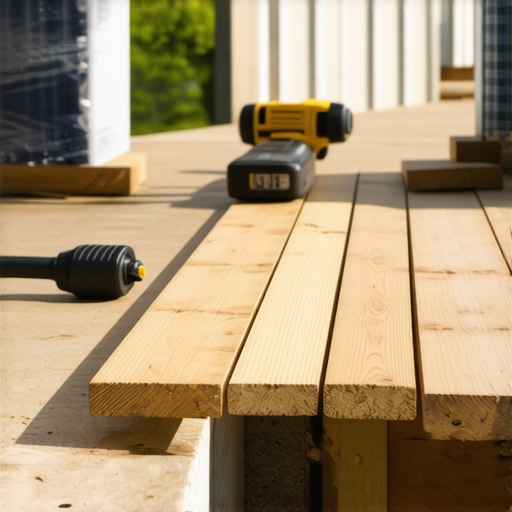
It was a warm Saturday morning when I stood in my backyard, staring at a half-finished deck that refused to cooperate. My hands were sore, my frustration mounting, and the entire project felt more like a battle than a labor of love. Have you ever experienced that moment where something you thought was simple turns into an unfixable mess? That’s exactly how I felt when I realized that nails, my old standby, were sabotaging my deck-building plans.
The Epiphany That Changed How I Build
Like many DIY enthusiasts, I started with nails because they seemed straightforward, quick, and familiar. But my early attempts revealed a nagging problem: my deck boards kept warping, popping up, or developing unsightly gaps. I blamed the wood, the weather, maybe even my skill—until I discovered the root cause: nails weren’t the right choice. That accidental realization was a lightbulb moment. Since then, I’ve transitioned to using hidden fasteners and innovative installation methods that truly secure the boards and improve the overall look.
Is Using Nails for Deck Boards Really That Bad?
Initially, I thought nails were a cost-effective and easy option, but my experience proved otherwise. The common mistake I made was underestimating the effects of wood movement and environmental factors on nails. Over time, the nails loosened, causing squeaks and creating potential safety hazards. Plus, visible nail holes marred the deck’s appearance. According to expert decking guides, hidden fasteners and secure installation techniques mean a longer-lasting, more attractive deck.
If you’ve faced similar issues or are just starting your deck project, understanding the pitfalls of traditional nailing can save you time, money, and headaches in the long run. Let’s explore why shifting away from nails has revolutionized my outdoor space and how it can do the same for you.
Choosing the Right Fasteners for Your Deck Boards
Start by selecting high-quality hidden fasteners designed specifically for composite decking; I recommend stainless steel or polymer clips that snap into place. During my project, I opted for screw-fastened hidden clips, which ensured a flush surface and prevented unsightly gaps. Carefully read the manufacturer’s instructions to ensure compatibility and correct spacing.
Preparing the Deck Frame
Ensure your underlying framing is level, solid, and properly spaced—typically 16 inches apart on center. Use a laser level for precision, and double-check measurements before installing. This foundation impacts the entire process, much like laying a strong base for a building; if the frame shifts, the surface follows suit. I once neglected this, leading to uneven boards that required rework.
Installing the Hidden Fasteners
Begin by measuring and marking the deck perimeter to align your first row. Attach the clips into the grooved edge of each board, pushing gently until they click into place. Then, drive screws through the clips into the joists; this holds the boards securely without visible hardware. I found that using a drill with a depth stop prevented over-penetration, protecting the surface. This method is akin to installing tiles with spacers; precision ensures a seamless appearance and longevity.
Managing Board Expansion and Contraction
Lay your boards with a consistent gap—commonly 1/8 inch—to account for wood movement. Using spacers helps maintain uniform gaps during installation. When I installed my deck, I used plastic wedges to keep gaps even as the boards expanded under sunlight, preventing buckling or warping. This small step is vital; think of it as giving each piece its breathing room, much like traffic lanes on a busy highway.
Sealing and Finishing
Once all boards are secured, apply a protective sealant if recommended, especially for wood surfaces. For composite decks, regular cleaning suffices to maintain appearance. During my project, I used a composite-specific cleaner and soft-bristle brush, which restored the color without damaging the surface. A clean surface not only looks better but extends the lifespan of your installation.
Enhancing Aesthetics with Seamless Transitions
Integrate stairs and deck extensions using matching fasteners and consistent spacing. Proper alignment creates a seamless flow, akin to a well-paved road guiding visitors naturally. For stairs, I used specialized connectors that blend into the deck’s design, improving safety and aesthetics. This detail makes a significant difference, as seen in professional outdoor spaces.
When it comes to enhancing your outdoor space, many homeowners fall into misconceptions that can compromise both safety and aesthetics. One prevalent myth is that choosing the cheapest or most straightforward materials, like basic nails, will suffice for a durable deck. However, seasoned builders know that this approach often leads to warped boards, squeaks, and an uneven surface over time. Instead, investing in high-quality hidden fasteners and proper installation techniques is essential for a long-lasting, beautiful deck.
Why do so many still rely on traditional nails? And is it really the best choice for modern decks?
The common mistake is underestimating how environmental factors—like moisture, temperature fluctuations, and wood movement—affect fasteners. For example, nails are prone to loosening or popping out, creating safety hazards and requiring costly repairs. According to industry experts, using stainless steel screws and concealed fasteners not only improves the aesthetic appeal but also enhances structural integrity. For intricate designs or multi-level decks, this nuance becomes even more critical, as it prevents shifting and maintains a seamless appearance.
Advanced builders ask: How can precise joist spacing and thermal expansion considerations prevent future issues?
Precision in framing and accounting for wood expansion are vital. For instance, implementing a 1/8-inch gap during installation allows for seasonal expansion, reducing buckling risks. Ignoring these details is a common oversight that leads to uneven surfaces or cracked boards down the line. Moreover, contemporary composite decking demands techniques that accommodate its unique behavior; experts recommend following manufacturer guidelines closely and incorporating features like flexibility gaps and specialized clip systems.
Furthermore, many underestimate the importance of seamless transitions—such as stairs—that align perfectly with the deck surface and surroundings. Properly designed stairs, using matching fasteners and consistent spacing, can significantly elevate both safety and visual harmony. I suggest exploring advanced ideas for creating cohesive outdoor spaces at creating seamless transitions.
Lastly, a common trap is neglecting proper drainage and moisture management, which can rot support posts and joists despite using the best materials. Incorporating flashing, drainage pipes, and protective coatings is essential to extend your deck’s lifespan. Remember, integrating these nuances ensures not just a beautiful outdoor area but a resilient one that withstands the test of time. Have you ever fallen into this trap? Let me know in the comments and share your experience!
Maintaining your outdoor living space, especially decks and stairs, requires more than just occasional cleaning. Investing in the right tools and establishing a regular maintenance routine can significantly extend the lifespan of your composite decking and ensure safety over the years. One essential tool I highly recommend is a quality power washer with adjustable pressure settings. I personally use the Sun Joe SPX3000, which offers dual tanks and variable nozzles—allowing me to gently clean delicate composite surfaces without causing damage.
Beyond cleaning, inspecting your deck and stairs periodically for signs of wear or loose fasteners is crucial. I utilize a magnetic debris picker to easily remove metal shavings and rust residues from fasteners, preventing long-term corrosion. Also, keep a stainless steel screwdriver set handy; I prefer the Wiha brand for its ergonomic grip and durability, making routine tightening or replacing of fasteners straightforward.
For long-term results, applying a protective coating designed for composite materials is invaluable. I recommend using a high-quality composite deck sealant annually, especially in exposure-prone areas. This helps prevent staining and UV degradation. Additionally, if your deck features stairs, installing weatherproof stair riser lights can enhance safety and aesthetic appeal, particularly at night.
How do I maintain my deck and stairs over time?
Establishing a routine of gentle cleaning, regular inspections, and timely repairs is vital. Schedule a thorough cleaning at least twice a year, using a soft-bristle brush and a composite-safe cleaner—avoiding harsh chemicals that can erode the surface. Keep an eye out for loose fasteners or warped boards, and address these issues promptly to prevent further damage. Applying protective treatments every year or two, based on exposure levels, preserves the finish and maintains appearance. With the right tools—like a powerful pressure washer, quality screwdrivers, and sealants—you can ensure your outdoor space remains safe, attractive, and durable for years to come.
As trends evolve, incorporating automation, such as remote-controlled lighting and smart moisture sensors, promises to streamline maintenance. In the future, I predict an increased adoption of self-healing coatings that repair minor scratches and abrasions automatically, reducing upkeep efforts significantly. But until then, disciplined routine maintenance with proven tools remains your best strategy to keep your deck and stairs in pristine condition. Don’t hesitate to try upgrading your maintenance toolkit today—investing in quality tools yields long-term benefits for your outdoor oasis.
The Hardest Lesson I Learned About Outdoor Living and Deck Building
Early in my journey as a DIY enthusiast, I underestimated the importance of planning for environmental factors, leading to warped boards and loose fasteners. That experience taught me that understanding wood behavior and proper fastener selection is crucial for durability and safety.
This Isn’t Just About Nails—It’s About Long-Term Vision
I used to think quick fixes were enough, but I’ve realized that investing in high-quality hidden fasteners and meticulous framing practices transforms a deck from a temporary setup to an outdoor sanctuary that lasts for years, even decades. Patience and quality materials save time and money in the long run.
Ignoring Seamless Transitions Can Break the Flow—and Your Budget
Connecting stairs and decks seamlessly isn’t just aesthetic; it’s functional and safe. Small details like matching fasteners and consistent spacing make a difference. My tip: never overlook the power of well-planned transitions—check out this guide for expert insights.
Master Maintenance or Prepare for Regret
Regular inspections, gentle cleaning, and timely repairs are the backbone of a lasting outdoor space. Using tools like a pressure washer with adjustable settings and a stainless steel screwdriver set can significantly simplify upkeep. Remember, a little maintenance now prevents costly repairs later.
Curated Recommendations for Elevated Decks
- Sun Joe SPX3000 Power Washer: Trusted for safe, effective cleaning without damaging composite surfaces. My go-to tool for routine maintenance.
- Wiha Screwdriver Set: An ergonomic, durable choice that makes tightening or replacing fasteners effortless, saving time over DIY projects.
- High-Quality Composite Sealant: Applying a protective coating annually preserves the look and extends the lifespan of your deck—especially in sun-exposed areas.
- Expert Resources on Seamless Transitions: For detailed design ideas, this article offers valuable tips.
Your Next Step Toward a Dream Deck
Building and maintaining an outdoor space that brings joy year-round requires knowledge, patience, and attention to detail. Don’t shy away from applying these lessons—they’re the secret ingredients to creating a deck and stairs that stand the test of time. Remember, your outdoor oasis is just a project away from realization. Ready to take the leap and design the deck you’ve always imagined? Share your plans or questions below—I’d love to hear about your journey toward outdoor perfection.