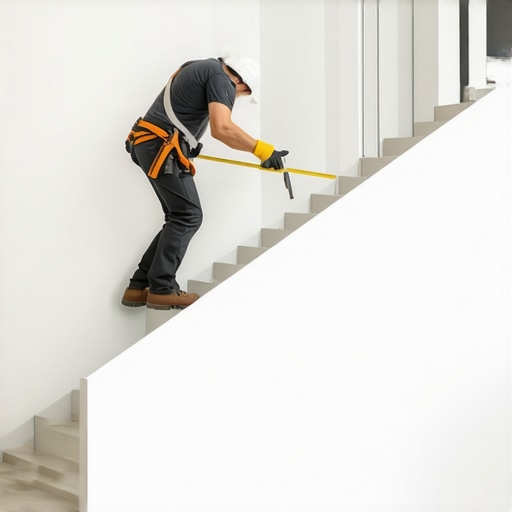
It wasn’t long ago when I realized my outdoor staircase was crying out for a little extra flair and safety—a simple upgrade that would make my backyard feel more inviting and secure. I had always admired those sleek, modern cocktail rails on contemporary decks, but the thought of installing one myself seemed daunting. Trust me, I hit a few snags, and at one point, I almost gave up altogether. But that lightbulb moment? I understood that a proper, well-executed installation was the key to achieving both style and safety without breaking the bank.
Why Installing a Cocktail Rail on Your Staircase Matters More Than You Think
Adding a cocktail rail isn’t just about aesthetics; it’s about creating a safer, more functional outdoor space. As I dove into my project, I realized my initial mistake was underestimating how crucial proper support and placement are. A sturdy rail acts as a handhold, especially for kids or guests. Plus, it can visually anchor your staircase, giving it a polished look that enhances the overall design of your outdoor space.
But here’s the deal: not all rails are created equal, and installation can be tricky if you’re not familiar with the process. The good news is, with some planning and the right tools, you can do it yourself and avoid costly mistakes. I promise, the satisfaction of completing this project is worth the effort—and your guests will immediately notice the upgrade.
If you’ve ever struggled with unstable or poorly constructed handrails, or hesitated because you thought it’s too complicated, you’re not alone. Many homeowners face this challenge, but you’ll be happy to know that a well-installed cocktail rail can transform your staircase into a safe, stylish feature. To get there, I’ll guide you through proven techniques that I’ve refined over my own DIY journey.
And just to build a little trust here—when I first attempted to install my own rail, I secured it with nails instead of the recommended screws. That decision led to wobbliness and eventually, a loose handrail. It taught me an important lesson: choosing quality fasteners and understanding the proper installation methods make all the difference in durability and safety. As noted by building experts, proper fasteners are essential to outdoor railing longevity and safety (source: https://deckdesignbuild.com/innovative-stairs-solutions-for-safe-outdoor-deck-access).
So, if you’re ready to learn how to install a cocktail rail that’s both sturdy and stylish, stay with me. I’ll walk you through each step, sharing tips that will save you time and headache, ensuring your staircase is safe and a true focal point of your outdoor living.
Prepare Your Materials and Tools Carefully
Before diving into installation, gather all required tools, including a drill, screwdrivers, measuring tape, level, and appropriate fasteners. Choose a durable material for your rail, such as stainless steel or composite, that withstands outdoor conditions. I once started without enough fasteners and ended up redoing part of the work—learning the importance of proper preparation firsthand. Verify your selected material aligns with your staircase’s style and safety standards.
Measure and Mark the Installation Points Precisely
Use your measuring tape and a pencil to mark where the support brackets will go. For a balanced look and optimal stability, position brackets about 4 inches from the top and bottom of each stair stringer. Double-check your measurements with a level to ensure the markings are even. I once assumed the first mark was correct and installed a crooked rail, which I had to fix later—it was a messy but valuable lesson in meticulous measurement.
Cut Support Components to Correct Lengths
If your support posts or handrail are adjustable, cut them to the measured lengths. Use a saw suitable for your material—metal or composite—making sure the cuts are clean and square. This step is like fitting jigsaw puzzle pieces; precise cuts prevent wobbliness. I once hurried through cutting, resulting in uneven ends that rocked, so I learned to measure twice and cut once.
Attach Support Brackets Securely
Position brackets on the marks you made, then drill pilot holes to prevent splitting. Fasten them tightly using corrosion-resistant screws, such as stainless steel. Ensure brackets are level and firmly anchored into the staircase framework. When I encountered resistance in drilling into the stringer, I realized I needed a sharper bit—sometimes, the proper tools make all the difference.
Install the Handrail and Verify Stability
Hook the handrail onto the mounted supports, then check for wobble by gently applying pressure. Use the level to confirm it’s perfectly horizontal. Secure the rail with screws into the brackets, tightening them evenly. During my first attempt, I didn’t double-check the level and ended up with a tilted rail—reminding me that attention to detail ensures both safety and visual appeal.
Finish with Safety and Aesthetic Touches
Sand any rough edges and apply weatherproof sealant if needed. Consider adding decorative caps or lighting for enhanced style and safety. I once left exposed screw heads, which caught on clothing and caused splinters—so I learned to hide or caps these fasteners confidently. Proper finishing not only boosts appearance but also extends the life of your installation, making it a worthwhile step.
Many homeowners jump into composite decking projects with excitement, but without understanding the subtle intricacies that can make or break the outcome. One common misconception is that all composite materials are equally forgiving; in reality, different brands and formulations have nuanced differences affecting durability, color stability, and installation requirements. For example, some composites are more prone to staining or scratching if not maintained properly, which is often overlooked during the planning phase. Neglecting these details can lead to unexpected expenses or aesthetic mismatches down the line.
Is Your Choice of Fasteners Costing You Longevity?
A frequently underestimated factor is the type of fasteners used during installation. Many assume standard nails or screws suffice, but expert advice suggests stainless steel or polymer-coated fasteners dramatically improve lifespan and resistance to corrosion, especially in humid climates. Using inferior fasteners can result in premature loosening, warping, or even deck collapse—an oops that no homeowner wants to face. This mistake underscores the importance of selecting high-quality, compatible hardware during your project, something a seasoned deck builder would emphasize. 
Another key nuance involves the direction in which you install your deck boards and stairs. Many DIYers overlook the impact of board orientation on drainage, heat absorption, and visual alignment with the house. Properly planning the layout ensures water runoff flows towards proper drainage points, reducing slip hazards and water damage. Competent deck builders often incorporate this consideration into their designs, ensuring long-term functionality and safety. For style and safety, a well-thought-out stair design also plays a vital role, and consulting external resources like [designing safe and stylish stairs](https://deckdesignbuild.com/designing-safe-and-stylish-stairs-for-outdoor-decks-in-2025) can provide valuable insights.
Advanced enthusiasts should recognize that even the best composite decking requires precise installation techniques to prevent common pitfalls—such as uneven spacing, improperly secured boards, or inadequate support framing. These issues can lead to squeaks, warping, or even structural failure over time. Investing in professional guidance or partnering with expert contractors can elevate your outdoor project from basic to extraordinary, offering both beauty and longevity. To learn more about how a professional deck builder maximizes outdoor space and safety, visit [transform your space](https://deckdesignbuild.com/transform-your-space-expert-deck-builder-tips-for-stunning-outdoor-living).
Have you ever fallen into this trap of overlooking crucial nuances in your outdoor living plans? Let me know in the comments! Recognizing and addressing these subtle factors ensures your deck remains stunning and safe for years to come.
How Do I Keep My Outdoor Decks and Stairs Working Smoothly Over Time?
Maintaining a composite decking surface requires more than just occasional cleaning; it involves a well-curated toolkit and strategic methods to ensure longevity and safety. Personally, the most invaluable tool I rely on is a high-pressure washer equipped with a polymer-safe nozzle. Unlike standard power washers, this prevents damaging the deck’s surface while effectively removing dirt, mold, and algae that can accumulate over the years. I always start with a gentle rinse, then proceed to targeted cleaning, ensuring no area gets overly stressed.
Another essential piece of equipment I swear by is a digital moisture meter. Composite decks are less susceptible to moisture issues than wood, but for larger structures or newly installed decks, monitoring moisture levels helps spot potential trouble spots early, especially in shaded or poorly ventilated areas. Keeping an eye on these readings allows me to schedule sealant applications before deterioration occurs, saving significant repair costs later.
For ongoing maintenance, I recommend programming regular inspections facilitated by a compact, cordless LED inspection camera. This allows you to peer beneath the surface or into hard-to-visualize spots like post-to-beam connections, where debris or pests might set in. Early detection of issues like loose fasteners or accumulated debris is crucial. I personally perform these checks quarterly, aligning with seasonal changes, to catch any developing problems long before they affect safety or aesthetics.
The future of outdoor deck maintenance seems to be moving toward integrated smart systems. Think sensors embedded in support posts or joists that monitor structural integrity and moisture levels in real time, alerting you via smartphone when action is needed. This proactive approach minimizes unexpected failures and extends the lifespan of your decks exponentially.
What Are The Best Software or Planning Tools To Manage Your Deck Projects?
Beyond physical tools, digital planning software like deck design apps helps visualize modifications, order correct materials, and maintain project timelines. I’ve found that comprehensive software reduces errors, streamlines ordering, and allows for precise calculations of fasteners, support beams, and surface materials—saving time and money. Additionally, using project management platforms calibrated for construction, such as Trello or Asana, keeps my work schedule on track, especially when coordinating with contractors or scheduling maintenance sessions.
When it comes to long-term results, investing in quality tools and disciplined routines makes all the difference. Remember, even the best composite decking and stairs can falter without proper upkeep. Regular cleaning with the right equipment, timely inspections, and leveraging emerging smart technologies ensure your outdoor living spaces remain safe, beautiful, and functional for years to come. In fact, partnering with experienced professionals can further streamline this process—freeing you to enjoy your outdoor sanctuary instead of worrying about upkeep.
Want to step up your maintenance game? Try integrating a moisture meter into your routine and see how early adjustments can save your deck from costly damages. For personalized advice, don’t hesitate to reach out.
The Hard Lessons That Shaped My Outdoor Projects
One of the most humbling moments in my DIY journey was realizing that a simple support miscalculation could undermine my entire staircase upgrade. I learned that planning thoroughly and double-checking every measurement saved me time, money, and frustration later on. Nothing beats experience—especially when your mistakes teach you about the importance of support support, support, and support.
My second insight was understanding that quality materials and fasteners are not optional accessories but essentials. Using subpar screws or unsupported brackets can lead to dangerous wobbling or early failure, turning what should be a safe feature into a hazard. This realization pushed me to invest in durable, weather-resistant hardware, which has paid off in the longevity of my outdoor staircase.
Tools and Resources That Accelerate Success
For anyone tackling outdoor railing projects, I highly recommend tools like a level with laser accuracy—trust me, even a small tilt can turn your sleek railing into a crooked eyesore. Additionally, using a digital moisture meter before sealing or painting ensures your materials are properly conditioned, extending their lifespan. When planning my projects, I rely on deck design apps that visualize layouts, helping me avoid costly mistakes and achieve that professional look.
Your Next Step Could Be a Game-Changer
Now is the perfect time to elevate your outdoor living with a sturdy, stylish cocktail rail or a reliable staircase upgrade. Remember, mastering this craft is about continuous learning—embrace the process, respect the details, and don’t be afraid to reach out for expert guidance. Your outdoor space is a blank canvas waiting for your personal touch; take the leap and turn it into a safe, stunning retreat. For personalized advice or project ideas, contact me today—let’s make your outdoor vision a reality!