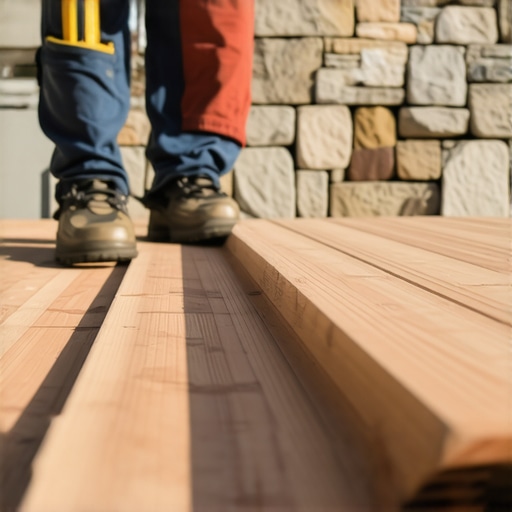
I’ll never forget the moment I set out to install a new deck next to a rugged stone wall, only to realize I had no idea how to make the deck boards sit perfectly flush against such an uneven surface. It was a small project, but that moment of frustration made me feel like I was staring at an insurmountable challenge. I’d spent years building decks, yet that seemingly simple task revealed how little I truly knew about working with irregular surfaces.
Why Even the Best Deck Builders Struggle with Uneven Surfaces
Dealing with outdoor walls made of natural stone or textured masonry can turn even experienced DIYers into skeptics. The irregularity of these surfaces makes it tricky to lay deck boards seamlessly, which not only impacts aesthetics but also safety and durability. I learned this lesson the hard way — a mistake I see many homeowners repeat: rushing the process without understanding how to properly scribe and cut the boards to fit snugly.
Fortunately, through trial, error, and plenty of research, I discovered effective techniques that make scribing around uneven walls manageable. Today, I promise to share proven strategies that will help you achieve a flawless fit, no matter how stubborn or irregular your surfaces may be. Whether you’re planning a new outdoor space or just want to fix an awkward corner, mastering this skill can elevate your entire project.
Are You Truly Ready to Tackle This Challenge?
Many people hesitate because they fear the process will be too complicated or time-consuming. I understand—I’ve been there. One early mistake I made was trying to force a straight cut on a board that had to contour around a jagged stone surface. It looked terrible, and I ended up wasting materials. That misstep taught me that patience, the right tools, and a clear method are essential. If you’ve faced similar setbacks, know you’re not alone, and the good news is that with proper techniques, you can get professional results yourself.
Before diving into the how-to, consider exploring trends in composite decking for durability and style, like those outlined in this guide on 2025 trends. Being informed can help you make smarter choices as you customize your outdoor space. Now, let’s look at what you need to do to turn that tricky wall into a seamless part of your deck—starting with understanding the importance of preparation and the right tools.
Prepare and Measure with Precision
Start by thoroughly inspecting the irregular wall surface, noting high and low spots. Use a long straightedge or a bathroom towel held against the wall to identify inconsistencies. In my last project, I clamped a long straightedge across the wall and marked the high and low points, which revealed a 1.5-inch variance. Knowing this helps you plan how to scribe your boards accurately and avoid gaps or overcuts. Always measure multiple points along the wall to get a comprehensive understanding rather than relying on a single spot.
Select the Right Tools for the Job
Invest in a high-quality hand scribe or a contour gauge. A contour gauge is like a flexible fingerprint scanner for your wall—press it against the surface to capture its unique shape. In one case, I used a contour gauge to trace around an uneven stone corner, which allowed me to cut the composite board to mirror the wall’s profile precisely. Combine this with a fine-tooth saw designed for composite materials, like the specialized saws for composite cutting. This prevents melting edges and ensures a clean cut. Keep your tools sharp and clean to avoid rough edges and ensure safety.
Mark and Transfer the Profile Accurately
Secure the board on sawhorses or the work surface. Place your contour gauge or scribe against the wall to trace the profile onto the board—think of it as creating a custom mold. Once marked, use a straight edge to connect your points, forming a clear cutting line. I once spent time perfecting a profile for a deck board around a jagged stone, and the result was a seamless fit—saving me time on adjustments during installation. Double-check your measurements before cutting to avoid waste and repetitions.
Cut with Care and Precision
Set your saw to the correct depth for composite material, typically just through the thickness of the board. Make slow, steady cuts to prevent chipping or melting. In my experience, using a fine-tooth blade and a dust extraction system helps keep cuts neat and reduces debris. When cutting, support the board properly to avoid flexing, which can lead to inaccuracies. Always wear safety gear—composite dust can irritate your lungs, and sharp tools pose hazards.
Test Fit and Fine-Tune
Place the cut board against the wall to check the fit. Expect slight adjustments—no wall surface is perfectly consistent. Use a hand sander or a rasp to gently refine the profile if needed. I once had to remove just a small sliver from the edge after a trial fit; this ensures a snug, flush finish. Repeat the process until the board conforms closely to the wall’s contours, creating a professional-looking result.
Secure and Seal the Edges
Once satisfied, fasten the board using corrosion-resistant screws, ensuring they sit flush—this prevents trip hazards and enhances aesthetics. Consider applying a compatible sealant or color-matched caulk along the edge if the gap remains. This prevents moisture intrusion, which can compromise your deck’s longevity. Proper sealing is especially important around irregular surfaces where water tends to pool, leading to rot or mold over time.
By following these detailed steps—careful measurement, precise marking, controlled cutting, and final fitting—you can master the challenge of installing composite decking around uneven walls. Remember, patience and attention to detail pay off with a flawless finish that elevates your outdoor space. For more insights into modern outdoor designs and how to maximize your deck’s potential, explore this resource.
Many homeowners and even seasoned deck builders believe that choosing the right composite decking material and installing stairs are straightforward tasks. However, there are nuanced pitfalls that often go unnoticed, leading to costly corrections down the line.
One common misconception is that all composite decking is created equal. While it might seem that opting for a popular brand guarantees durability and ease of installation, the reality is that subtle differences in manufacturing processes, core composition, and surface textures can significantly impact performance. For example, mineral core composites offer enhanced fire resistance and stability, an advanced feature that many overlook when comparing options—according to latest industry studies.
Are You Overlooking Advanced Decking Features That Save Money?
Many assume that ignoring these nuances won’t affect their long-term satisfaction. In reality, selecting a deck with a superior core material can reduce maintenance, prevent warping, and extend lifespan. Developers of 2025 trends in composite decking emphasize the importance of understanding these core differences to make informed purchases. Don’t fall into the trap of choosing based solely on aesthetics or initial cost without considering performance and longevity.
Another often-missed detail involves the installation of stairs. Conventional wisdom states that standard stringers and handrails are sufficient, but ignoring the intricacies of step safety and transition design can lead to hazards. For example, improper riser height or lack of graspable handrails not only violates building codes but also endangers users. Skilled deck builders incorporate precision calculations and thoughtful designs, such as integrating safe and stylish stairs that blend safety with elegance. Attempting a DIY approach without these considerations can result in uneven steps, posing trip risks, and aesthetic mismatches that detract from your outdoor space.
Advanced builders recognize the importance of seamless transitions between stairs and decks, especially in modern designs aiming for functional beauty. Incorporating features like hidden fasteners, careful riser-to-tread alignment, and detailed edge finishing results in safer, more refined outdoor areas. For guidance, reviewing transition design tips can elevate your project from amateur to expert level.
Moreover, the small details, such as proper flashing, moisture barriers, and correct fastener types, dramatically influence the longevity of your structure. Overlooking these advanced nuances can lead to premature degradation, warping, or even structural failure. Working with a professional deck builder that understands these critical aspects ensures that your outdoor living areas remain safe, durable, and visually appealing over the years. For more insights on collaborating with experts, check out this guide.
In my experience, the key to mastering outdoor projects lies in paying attention to these subtle yet impactful details. Don’t get complacent with surface-level choices—dig deeper to understand what makes some designs stand the test of time. Have you ever fallen into this trap? Let me know in the comments, and share your experiences or questions about avoiding these common pitfalls.
Keep Your Decks in Shape with the Right Tools and Routine Maintenance
Maintaining your outdoor living spaces, especially composite decks and stairs, requires a combination of precise tools and consistent care. Over the years, I’ve refined my toolkit to include equipment that saves time and ensures lasting quality. For example, I swear by a high-quality oscillating multi-tool fitted with a fine sanding attachment. This allows me to quickly sand down minor imperfections or smooth rough edges around cut boards without removing too much material, preserving the integrity of the composite surface. Pair this with a cordless, variable-speed drill with a depth-sensitive screw guide—it’s essential for consistently flush fasteners, preventing gaps or protrusions that can trip up users or trap debris.
Beyond tools, adopting a periodic cleaning regimen is crucial. I recommend a gentle cleaner specifically formulated for composite decking, like those containing sodium percarbonate. Regularly washing the surface with a soft-bristle brush prevents algae and mold buildup, which can compromise both appearance and safety. For stubborn stains or grease, employing a dedicated degreasing solution and a microfiber scrub pad works wonders. Remember, avoiding harsh pressure washing or steel wool prevents surface scratches and maintains the aesthetic appeal of your deck.
What’s the Best Way to Keep Outdoor Living Spaces Looking Sharp Long-Term?
Invest in protective sealants designed for composite and wood interfaces, especially around high-traffic areas like stairs and ledges. Applying a protective coat each year fortifies the surface against UV damage and moisture ingress, which are common culprits of warping and fading. Additionally, inspecting fasteners, railings, and flashing annually helps catch issues early before they escalate into costly repairs. I prioritize checking these elements in the fall, preparing my decks for winter and ensuring they’re winter-ready. Adopting a proactive maintenance approach not only extends the life of your structures but also keeps them looking stunning year after year. For a comprehensive overview of outdoor living improvement ideas, including renovations that seamlessly integrate with existing decks, check out this resource.
Future Trends in Deck Maintenance and Outdoor Living
Looking ahead, I believe automation and smart monitoring are poised to revolutionize outdoor space upkeep. Imagine sensors embedded in your deck that alert you via smartphone when moisture levels or structural movement exceed safe thresholds—akin to the tech outlined in recent industry studies. This shift towards predictive maintenance will empower homeowners to address issues proactively, vastly reducing repair costs and downtime. Trying out one advanced tip today—like implementing a regular inspection schedule paired with targeted cleaning—can set you on the path toward mastering the art of long-term outdoor living management. Remember, a well-maintained deck not only endures through seasons but becomes a cherished part of your home’s lifestyle. For expert insights on designing safe and stylish stairs, consider visiting this guide.
Lessons From the Trenches That Transformed My Deck Projects
- One of the biggest insights I gained was that patience is paramount; rushing often leads to miscuts and gaps that compromise safety and aesthetics. Taking extra time to measure and double-check profiles around uneven surfaces made all the difference.
- I learned that investing in the right tools, such as contour gauges and fine-tooth saws designed for composite materials, drastically reduces frustration and ensures a professional finish—saving time and materials in the long run.
- Understanding the unique characteristics of composite decking, like how certain brands handle irregular cuts, can prevent issues like melting edges or surface tearing. It’s worth doing thorough research before purchasing materials.
- Breaking the process into clearly defined steps—measurement, marking, cutting, and fitting—helps avoid costly mistakes that often stem from skipped or rushed stages.
- Lastly, I realized that small finishing touches such as gentle sanding and proper sealing around irregular edges enhance durability and visual appeal, making your outdoor space truly stand out.
Tools and Resources That Elevate Your Outdoor Living Game
- Contour gauges: These flexible tools are my go-to for capturing complex profiles around uneven walls. I trust them because they provide precise templates that fit perfectly every time. Check out options at your local hardware store or online.
- Fine-tooth saws: A quality saw designed for composite materials minimizes chipping and melting—that’s crucial for a clean edge. I recommend brands like Makita or Dewalt for reliable performance.
- Composite-specific sealants: Sealing irregular edges prevents moisture penetration and prolongs your deck’s lifespan. I personally prefer sealants with UV protection, which I’ve found significantly extend the vibrancy of my decks.
- Design inspiration and technical guides: For ongoing learning, I highly recommend exploring the latest trends in composite decking from this comprehensive trend guide. It broadens your perspective on high-performance materials and innovative design ideas.
- Professional consultation: Sometimes, chatting with a seasoned deck builder can save you from costly mistakes. Their insights on irregularities and best practices are invaluable—consider reaching out for a consultation through our contact page.
Your Growth in Outdoor Living Starts Today
Learning to confidently install composite decking around uneven surfaces is more than just a technical skill—it’s a step towards creating a resilient, beautiful outdoor haven. Embrace the process with patience and curiosity, knowing that each challenge you overcome adds to your experience and confidence. Remember, every master was once a beginner who didn’t give up. If you’re ready to take that next step, explore more expert tips and inspiration on advanced outdoor design at this resource. Your perfect outdoor space is within reach—start today!”}#}#}#}#}#}#}#}#}#}#}#}#}#}#}#}#}#}#}#}#}#}#}#}#}#}#}#}#}#}#}#}#}#}#}#}#}#}#}#}#}#}#}#}#}#}#}#}#}#}#}#}#}#}#}#}#}#}#}#}#}#}#}#}#}#}#}#}#}#}#}#}#}#}#}#}#}#}#}#}#}#}#}#}#}#}#}#}#}#}#}#}#}#}#}#}#}#}#}#}#}#}#}#}#}#}#}#}#}#}#}#}#}#}#}#}#}#}#}#}#}#}#}#}#}#}#}#}#}#}#}#}#}#}#}#}#}#}#}#}#}#}#}#}#}#}#}#}#}#}#}#}#}#}#}#}#}#}#}#}#}#}#}#}#}#}#}#}#}#}#}#}#}#}#}#}#}#}#}#}#}#}#}#}#}#}#}#}#}#}#}#}#}#}#}#}#}#}#}#}#}#}#}#}#}#}#}#}#}#}#}#}#}#}#}#}#}#}#}#}#}#}#}#}#}#}#}#}#}#}#}#}#}#}#}#}#}#}#}#}#}#}#}#}#}#}#}#}#}#}#}#}#}#}#}#}#}#}#}#}#}#}#}#}#}#}#}#}#}#}#}#}#}#}#}#}#}#}#}#}#}#}#}#}#}#}#}#}#}#}#}#}#}#}#}#}#}#}#}#}#}#}#}#}#}#}#}#}#}#}#}#}#}#}#}#}#}#}#}#}#}#}#}#}#}#}#}#}#}#}#}#}#}#}#}#}#}#}#}#}#}#}#}#}#}#}#}#}#}#}#}#}#}#}#}#}#}#}#}#}#}#}#}#}#}#}#}#}#}#}#}#}#}#}#}#}#}#}#}#}#}#}#}#}#}#}#}#}#}#}#}#}#}#}#}#}#}#}#}#}#}#}#}#}#}#}#}#}#}#}#}#}#}#}#}#}#}#}#}#}#}#}#}#}#}#}#}#}#}#}#}#}#}#}#}#}#}#}#}#}#}#}#}#}#}#}#}#}#}#}#}#}#}#}#}#}#}#}#}#}#}#}#}#}#}#}#}#}#}#}#}#}#}#}#}#}#}#}#}#}#}#}#}#}#}#}#}#}#}#}#}#}#}#}#}#}#}#}#}#}#}#}#}#}#}#}#}#}#}#}#}#}#}#}#}#}#}#}#}#}#}#}#}#}#}#}#}#}#}#}#}#}#}#}#}#}#}#}#}#}#}#}#}#}#}#}#}#}#}#}#}#}#}#}#}#}#}#}#}#}#}#}#}#}#}#}#}#}#}#}#}#}#}#}#}#}#}#}#}#}#}#}#}#}#}#}#}#}#}#}#}#}#}#}#}#}#}#}#}#}#}#}#}#}#}#}#}#}#}#}#}#}#}#}#}#}#}#}#}#}#}#}#}#}#}#}#}#}#}#}#}#}#}#}#}#}#}#}#}#}#}#}#}#}#}#}#}#}#}#}#}#}#}#}#}#}#}#}#}#}#}#}#}#}#}#}#}#}#}#}#}#}#}#}#}#}#}#}#}#}#}#}#}#}#}#}#}#}#}#}#}#}#}#}#}#}#}#}#}#}#}#}#}#}#}#}#}#}#}#}#}#}#}#}#}#}#}#}#}#}#}#}#}#}#}#}#}#}#}#}#}#}#}#}#}#}#}#}#}#}#}#}#}#}#}#}#}#}#}#}#}#}#}#}#}#}#}#}#}#}#}#}#}#}#}#}#}#}#}#}#}#}#}#}#}#}#}#}#}#}#}#}#}#}#}#}#}#}#}#}#}#}#}#}#}#}#}#}#}#}#}#}#}#}#}#}#}#}#}#}#}#}#}#}#}#}#}#}#}#}#}#}#}#}#}#}#}#}#}#}#}#}#}#}#}#}#}#}#}#}#}#}#}#}#}#}#}#}#}#}#}#}#}#}#}#}#}#}#}#}#}#}#}#}#}#}#}#}#}#}#}#}#}#}#}#}#}#}#}#}#}#}#}#}#}#}#}#}#}#}#}#}#}#}#}#}#}#}#}#}#}#}#}#}#}#}#}#}#}#}#}#}#}#}#}#}#}#}#}#}#}#}#}#}#}#}#}#}#}#}#}#}#}#}#}#}#}#}#}#}#}#}#}#}#}#}#}#}#}#}#}#}#}#}#}#}#}#}#}#}#}#}#}#}#}#}#}#}#}#}#}#}#}#}#}#}#}#}#}#}#}#}#}#}#}#}#}#}#}#}#}#}#}#}#}#}#}#}#}#}#}#}#}#}#}#}#}#}#}#}#}#}#}#}#}#}#}#}#}#}#}#}#}#}#}#}#}#}#}#}#}#}#}#}#}#}#}#}#}#}#}#}#}#}#}#}#}#}#}#}#}#}#}#}#}#}#}#}#}#}#}#}#}#}#}#}#}#}#}#}#}#}#}#}#}#}#}#}#}#}#}#}#}#}#}#}#}#}#}#}#}#}#}#}#}#}#}#}#}#}#}#}#}#}#}#}#}#}#}#}#}#}#}#}#}#}#}#}#}#}#}#}#}#}#}#}#}#}#}#}#}#}#}#}#}#}#}#}#}#}#}#}#}#}#}#}#}#}#}#}#}#}#}#}#}#}#}#}#}#}#}#}#}#}#}#}#}#}#}#}#}#}#}#}#}#}#}#}#}#}#}#}#}#}#}#}#}#}#}#}#}#}#}#}#}#}#}#}#}#}#}#}#}#}#}#}#}#}#}#}#}#}#}#}#}#}#}#}#}#}#}#}#}#}#}#}#}#}#}#}#}#}#}#}#}#}#}#}#}#}#}#}#}#}#}#}#}#}#}#}#}#}#}#}#}#}#}#}#}#}#}#}#}#}#}#}#}#}#}#}#}#}#}#}#}#}#}#}#}#}#}#}#}#}#}#}#}#}#}#}#}#}#}#}#}#}#}#}#}#}#}#}#}#}#}#}#}#}#}#}#}#}#}#}#}#}#}#}#}#}#}#}#}#}#}#}#}#}#}#}#}#}#}#}#}#}#}#}#}#}#}#}#}#}#}#}#}#}#}#}#}#}#}#}#}#}#}#}#}#}#}#}#}#}#}#}#}#}#}#}#}#}#}#}#}#}#}#}#}#}#}#}#}#}#}#}#}#}#}#}#}#}#}#}#}#}#}#}#}#}#}#}#}#}#}#}#}#}#}#}#}#}#}#}#}#}#}#}#}#}#}#}#}#}#}#}#}#}#}#}#}#}#}#}#}#}#}#}#}#}#}#}#}#}#}#}#}#}#}#}#}#}#}#}#}#}#}#}#}#}#}#}#}#}#}#}#}#}#}#}#}#}#}#}#}#}#}#}#}#}#}#}#}#}#}#}#}#}#}#}#}#}#}#}#}#}#}#}#}#}#}#}#}#}#}#}#}#}#}#}#}#}#}#}#}#}#}#}#}#}#}#}#}#}#}#}#}#}#}#}#}#}#}#}#}#}#}#}#}#}#}#}#}#}#}#}#}#}#}#}#}#}#}#}#}#}#}#}#}#}#}#}#}#}#}#}#}#}#}#}#}#}#}#}#}#}#}#}#}#}#}#}#}#}#}#}#}#}#}#}#}#}#}#}#}#}#}#}#}#}#}#}#}#}#}#}#}#}#}#}#}#}#}#}#}#}#}#}#}#}#}#}#}#}#}#}#}#}#}#}#}#}#}#}#}#}#}#}#}#}#}#}#}#}#}#}#}#}#}#}#}#}#}#}#}#}#}#}#}#}#}#}#}#}#}#}#}#}#}#}#}#}#}#}#}#}#}#}#}#}#}#}#}#}#}#}#}#}#}#}#}#}#}#}#}#}#}#}#}#}#}#}#}#}#}#}#}#}#}#}#}#}#}#}#}#}#}#}#}#}#}#}#}#}#}#}#}#}#}#}#}#}#}#}#}#}#}#}#}#}#}#}#}#}#}#}#}#}#}#}#}#}#}#}#}#}#}#}#}#}#}#}#}#}#}#}#}#}#}#}#}#}#}#}#}#}#}#}#}#}#}#}#}#}#}#}#}#}#}#}#}#}#}#}#}#}#}#}#}#}#}#}#}#}#}#}#}#}#}#}#}#}#}#}#}#}#}#}#}#}#}#}#}#}#}#}#}#}#}#}#}#}#}#}#}#}#}#}#}#}#}#}#}#}#}#}#}#}#}#}#}#}#}#}#}#}#}#}#}#}#}#}#}#}#}#}#}#}#}#}#}#}#}#}#}#}#}#}#}#}#}#}#}#}#}#}#}#}#}#}#}#}#}#}#}#}#}#}#}#}#}#}#}#}#}#}#}#}#}#}#}#}#}#}#}#}#}#}#}#}#}#}#}#}#}#}#}#}#}#}#}#}#}#}#}#}#}#}#}#}#}#}#}#}#}#}#}#}#}#}#}#}#}#}#}#}#}#}#}#}#}#}#}#}#}#}#}#}#}#}#}#}#}#}#}#}#}#}#}#}#}#}#}#}#}#}#}#}#}#}#}#}#}#}#}#}#}#}#}#}#}#}#}#}#}#}#}#}#}#}#}#}#}#}#}#}#}#}#}#}#}#}#}#}#}#}#}#}#}#}#}#}#}#}#}#}#}#}#}#}#}#}#}#}#}#}#}#}#}#}#}#}#}#}#}#}#}#}#}#}#}#}#}#}#}#}#}#}#}#}#}#}#}#}#}#}#}#}#}#}#}#}#}#}#}#}#}#}#}#}#}#}#}#}#}#}#}#}#}#}#}#}#}#}#}#}#}#}#}#}#}#}#}#}#}#}#}#}#}#}#}#}#}#}#}#}#}#}#}#}#}#}#}#}#}#}#}#}#}#}#}#}#}#}#}#}#}#}#}#}#}#}#}#}#}#}#}#}#}#}#}#}#}#}#}#}#}#}#}#}#}#}#}#}#}#}#}#}#}#}#}#}#}#}#}#}#}#}#}#}#}#}#}#}#}#}#}#}#}#}#}#}#}#}#}#}#}#}#}#}#}#}#}#}#}#}#}#}#}#}#}#}#}#}#}#}#}#}#}#}#}#}#}#}#}#}#}#}#}#}#}#}#}#}#}#}#}#}#}#}#}#}#}#}#}#}#}#}#}#}#}#}#}#}#}#}#}#}#}#}#}#}#}#}#}#}#}#}#}#}#}#}#}#}#}#}#}#}#}#}#}#}#}#}#}#}#}#}#}#}#}#}#}#}#}#}#}#}#}#}#}#}#}#}#}#}#}#}#}#}#}#}#}#}#}#}#}#}#}#}#}#}#}#}#}#}#}#}#}#}#}#}#}#}#}#}#}#}#}#}#}#}#}#}#}#}#}#}#}#}#}#}#}#}#}#}#}#}#}#}#}#}#}#}#}#}#}#}#}#}#}#}#}#}#}#}#}#}#}#}#}#}#}#}#}#}#}#}#}#}#}#}#}#}#}#}#}#}#}#}#}#}#}#}#}#}#}#}#}#}#}#}#}#}#}#}#}#}#}#}#}#}#}#}#}#}#}#}#}#}#}#}#}#}#}#}#}#}#}#}#}#}#}#}#}#}#}#}#}#}#}#}#}#}#}#}#}#}#}#}#}#}#}#}#}#}#}#}#}#}#}#}#}#}#}#}#}#}#}#}#}#}#}#}#}#}#}#}#}#}#}#}#}#}#}#}#}#}#}#}#}#}#}#}#}#}#}#}#}#}#}#}#}#}#}#}#}#}#}#}#}#}#}#}#}#}#}#}#}#}#}#}#}#}#}#}#}#}#}#}#}#}#}#}#}#}#}#}#}#}#}#}#}#}#}#}#}#}#}#}#}#}#}#}#}#}#}#}#}#}#}#}#}#}#}#}#}#}#}#}#}#}#}#}#}#}#}#}#}#}#}#}#}#}#}#}#}#}#}#}#}#}#}#}#}#}#}#}#}#}#}#}#}#}#}#}#}#}#}#}#}#}#}#}#}#}#}#}#}#}#}#}#}#}#}#}#}#}#}#}#}#}#}#}#}#}#}#}#}#}#}#}#}#}#}#}#}#}#}#}#}#}#}#}#}#}#}#}#}#}#}#}#}#}#}#}#}#}#}#}#}#}#}#}#}#}#}#}#}#}#}#}#}#}#}#}#}#}#}#}#}#}#}#}#}#}#}#}#}#}#}#}#}#}#}#}#}#}#}#}#}#}#}#}#}#}#}#}#}#}#}#}#}#}#}#}#}#}#}#}#}#}#}#}#}#}#}#}#}#}#}#}#}#}#}#}#}#}#}#}#}#}#}#}#}#}#}#}#}#}#}#}#}#}#}#}#}#}#}#}#}#}#}#}#}#}#}#}#}#}#}#}#}#}#}#}#}#}#}#}#}#}#}#}#}#}#}#}#}#}#}#}#}#}#}#}#}#}#}#}#}#}#}#}#}#}#}#}#}#}#}#}#}#}#}#}#}#}#}#}#}#}#}#}#}#}#}#}#}#}#}#}#}#}#}#}#}#}#}#}#}#}#}#}#}#}#}#}#}#}#}#}#}#}#}#}#}#}#}#}#}#}#}#}#}#}#}#}#}#}#}#}#}#}#}#}#}#}#}#}#}#}#}#}#}#}#}#}#}#}#}#}#}#}#}#}#}#}#}#}#}#}#}#}#}#}#}#}#}#}#}#}#}#}#}#}#}#}#}#}#}#}#}#}#}#}#}#}#}#}#}#}#}#}#}#}#}#}#}#}#}#}#}#}#}#}#}#}#}#}#}#}#}#}#}#}#}#}#}#}#}#}#}#}#}#}#}#}#}#}#}#}#}#}#}#}#}#}#}#}#}#}#}#}#}#}#}#}#}#}#}#}#}#}#}#}#}#}#}#}#}#}#}#}#}#}#}#}#}#}#}#}#}#}#}#}#}#}#}#}#}#}#}#}#}#}#}#}#}#}#}#}#}#}#}#}#}#}#}#}#}#}#}#}#}#}#}#}#}#}#}#}#}#}#}#}#}#}#}#}#}#}#}#}#}#}#}#}#}#}#}#}#}#}#}#}#}#}#}#}#}#}#}#}#}#}#}#}#}#}#}#}#}#}#}#}#}#}#}#}#}#}#}#}#}#}#}#}#}#}#}#}#}#}#}#}#}#}#}#}#}#}#}#}#}#}#}#}#}#}#}#}#}#}#}#}#}#}#}#}#}#}#}#}#}#}#}#}#}#}#}#}#}#}#}#}#}#}#}#}#}#}#}#}#}#}#}#}#}#}#}#}#}#}#}#}#}#}#}#}#}#}#}#}#}#}#}#}#}#}#}#}#}#}#}#}#}#}#}#}#}#}#}#}#}#}#}#}#}#}#}#}#}#}#}#}#}#}#}#}#}#}#}#}#}#}#}#}#}#}#}#}#}#}#}#}#}#}#}#}#}#}#}#}#}#}#}#}#}#}#}#}#}#}#}#}#}#}#}#}#}#}#}#}#}#}#}#}#}#}#}#}#}#}#}#}#}#}#}#}#}#}#}#}#}#}#}#}#}#}#}#}#}#}#}#}#}#}#}#}#}#}#}#}#}#}#}#}#}#}#}#}#}#}#}#}#}#}#}#}#}#}#}#}#}#}#}#}#}#}#}#}#}#}#}#}#}#}#}#}#}#}#}#}#}#}#}#}#}#}#}#}#}#}#}#}#}#}#}#}#}#}#}#}#}#}#}#}#}#}#}#}#}#}#}#}#}#}#}#}#}#}#}#}#}#}#}#}#}#}#}#}#}#