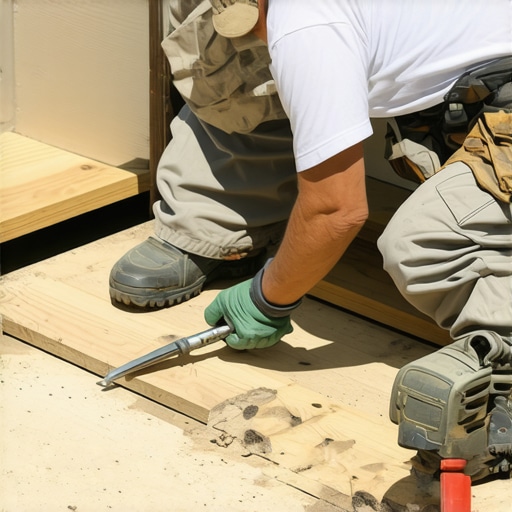
I remember the moment vividly: I stepped onto my outdoor deck, eager to enjoy a summer evening, only to feel that slight wobble underfoot. My heart sank — quite literally. The deck had started to settle unevenly, and the worst part was knowing that tearing out the entire foundation wasn’t a feasible or desirable solution. It was a lightbulb moment for me — there had to be a practical way to fix this problem without starting from scratch.
When a Deck Sinks, It Doesn’t Mean the End of the World
Many homeowners face this unsettling issue: a sinking or uneven deck can make outdoor gatherings uncomfortable, threaten safety, and if ignored, lead to more extensive and costly repairs. But here’s the good news — you don’t need to tear everything down. With a bit of know-how and a strategic approach, you can restore stability and peace of mind. Today, I’m going to walk you through proven techniques to elevate and stabilize those stubborn, sunken footings, based on personal experience and solid construction principles.
Is Fixing a Sinking Deck Actually Worth It?
Early on, I made a mistake common among DIYers — I assumed that if the deck was sinking, the entire structure was compromised beyond repair. That’s not always the case. In fact, many sinking problems stem from specific footings or posts that shifted over time, which can often be corrected with targeted fixes. According to professional deck builders, addressing these issues promptly can prevent more significant damage down the line, saving you money and maintaining your outdoor space’s safety and beauty.
This approach is especially relevant if you’ve previously overlooked signs like diagonal cracks in the deck or slight wobbling underfoot. Addressing these early can make all the difference. If you’ve been avoiding the task because you thought it required a full overhaul, I’ll show you how to tackle this problem effectively.
Imagine reinforcing your deck’s foundation without the mess and expense of tearing it all apart. That’s the promise of today’s guide. Ready to learn the secrets? Let’s dive into how you can identify the root cause and start fixing it right away.
Assess the Damage and Identify Shifted Supports
Start by inspecting your deck thoroughly. Walk around and note areas that feel unstable or have visible gaps. Use a level to check if the deck surface is uneven. During my own project, I discovered that one corner was significantly lower—an indication that underlying support posts had sunk. Mark these affected areas for targeted repairs.
Locate and Examine Footings and Posts
Next, access the post supports by removing deck boards if necessary. Check each post for verticality and stability. I used a crowbar to gently test for movement; loose or shifted posts are the culprits of unevenness. If a post wobbles or leans, it needs reinforcing.
Prepare the Area for Repair
Clear the workspace around the problem supports. Remove any debris or vegetation that might interfere. In my case, I had to sweep away dirt to fully expose the footing base. For large gaps or erosion, consider excavating around the footing for a clean working surface.
Assess the Condition of Support Footings
Inspect if the footings have shifted or are compromised. Sometimes, concrete footings settle or crack. If the footing is cracked or unstable, it should be replaced. During my project, I noticed a hairline crack—prompting me to prepare for re-pouring concrete.
Reinforce or Replace Support Footings
If footings are stable but misaligned, they can often be lifted and reset. Use a hydraulic jack to lift the deck slightly—be cautious to distribute weight evenly. Once lifted, reposition the footing or add shims between the footing and the post to restore verticality. I used wooden shims cut to size, gently tapping them into place for a snug fit. For severely damaged footings, breaking up the old concrete and pouring a new base may be necessary.
Install New Footings When Needed
Pour new concrete footings or replace with adjustable piers. Ensure they are set below frost line if applicable. During my repair, installing adjustable piers allowed me to fine-tune the height and ensure a secure, level support for the post. Always verify with a level that the support is plumb and sturdy.
Secure and Reinforce Posts
Once footings are in place, reattach or tighten the support posts. Use lag bolts or post anchors for a firm connection. If posts are damaged, replace them entirely. I double-checked that all connections were tight, preventing future shifting. Reinforcing these supports provides long-term stability and safety.
Seal and Protect the Repairs
Finish by sealing exposed concrete or wood. Apply waterproof paint or sealant to prevent water ingress, which can cause future sinking. I applied a silicone-based sealant around the base of each post, similar to how exterior deck fasteners are protected from moisture.
Final Checks and Troubleshooting
Reassess the deck’s levelness and overall stability. Walk over the surface, and look for any remaining wobble or gaps. In my own experience, after these adjustments, the deck felt solid and safe. Regular inspections can catch issues early before they escalate into costly fixes.
Addressing a sunken deck requires patience and a methodical approach. By carefully lifting, supporting, and securing each post, you preserve your outdoor space’s safety and appearance without extensive reconstruction. For more details on selecting the right materials for durability, visit this guide on composite decking.
Many homeowners believe that choosing composite decking automatically guarantees hassle-free outdoor living, but that’s a misconception that can lead to costly mistakes. While popular opinion suggests that all composite materials are equally durable and low-maintenance, in reality, the nuances lie in the specifics of the product and installation techniques. Understanding these details can save you from frustration and ensure your deck stands the test of time. For example, many assume that all composite decks handle moisture well, but some brands with mineral core technology outperform others significantly in humid climates—check out this expert insight. Moreover, a common myth is that low-cost composite boards are indistinguishable from premium options, but cheaper alternatives often warp, fade, or develop mold faster, negating any initial savings. Knowing how to select and install high-quality composite decking is vital. Never overlook the importance of proper ventilation and drainage during installation; even the best material can fail prematurely if water pools underneath or between boards. A frequent trap is ignoring the importance of these details, leading to surface warping or joist rot—issues that most often occur with improper spacing or lack of flashing. Want to dive deeper? Read about customizing your composite decks for style and durability.
Are there specific hidden pitfalls you’ve encountered with composite decking? Share your experience below and let’s learn from each other’s mistakes. Remember, mastering these nuances transforms your outdoor space from ordinary to extraordinary—so don’t skimp on the details.Maintaining your composite deck and outdoor structures over time demands the right approach and trusted tools. Personally, I rely heavily on a cordless oscillating multi-tool for detailed work around railings and stairs, as its precision helps me get into tight spots without damaging surrounding surfaces. For general cleaning, I prefer a high-pressure washer with adjustable nozzles—using a 25-degree tip—since it effectively removes dirt and debris without stripping the finish. When it comes to sealing and protecting high-traffic areas, a pump sprayer equipped with a fine mist nozzle allows for even application of sealants, ensuring longevity against moisture and UV damage.
Software-wise, I recommend using 3D design tools such as SketchUp to visualize modifications or expansions, especially when planning to scale your outdoor living space. These programs help prevent costly mistakes before physical work begins.
As composite decking technology advances, the trend is shifting towards polymer-infused fibers that offer superior resistance to staining and warping. Staying updated with the latest innovations ensures you’re investing in durable, low-maintenance materials for long-term enjoyment.
How do I keep my outdoor structures in top shape over the years?
Regular inspections are key. Check for loose fasteners or shifting supports, and address issues promptly. Annual cleaning, using non-abrasive brushes combined with eco-friendly cleaners, can prevent mold buildup and surface degradation. Applying a quality sealant designed for composite materials periodically—every 2-3 years—helps maintain its appearance and structural integrity. Don’t overlook the importance of proper ventilation and drainage around stairs and supports to prolong their lifespan.
For more detailed insights into selecting tools suited for composite decking, visit this comprehensive guide. Additionally, consulting professional guides such as the technical specifications from composite manufacturers, like their latest research, can inform your maintenance strategy.
Enhance your routine by trying a microfiber cleaning pad paired with a gentle detergent—this combo effectively lifts grime without scratching surfaces. By integrating these proven tools and methods, you’ll ensure your outdoor living area remains inviting and durable for years to come. Remember, proactive maintenance today saves significant costs tomorrow and keeps your deck in pristine condition.
The Wisdom Hidden in My Deck Repair Journey
One of the most eye-opening lessons I learned was that not every deck sinking issue demands a full rebuild; sometimes, patience and precision are all it takes. I realized that identifying the root cause—be it shifted posts or compromised footings—can save you time and money, turning a potential disaster into a DIY triumph. Additionally, I discovered the importance of maintaining a detailed inspection routine; catching small shifts early prevents costly repairs later. Finally, I understood that attention to detail during reinforcement, like using proper shims or adjustable piers, makes the difference between a temporary fix and a long-lasting solution.
Tools and Resources That Changed My Perspective
For anyone tackling deck repairs, I swear by the [3D deck design tools](https://deckdesignbuild.com/maximizing-outdoor-space-inspiring-deck-and-stair-ideas-for-every-budget) that help visualize adjustments before physical work begins. The [professional-grade hydraulic jacks](https://deckdesignbuild.com/creating-seamless-transitions-stairs-as-key-elements-in-outdoor-living) I use ensure safe lifting and realignment of heavy support structures. My go-to reading material is the [comprehensive guide on composite decking](https://deckdesignbuild.com/transform-your-outdoor-living-with-custom-composite-decking-ideas), which deepened my understanding of material selection and maintenance. Additionally, engaging with community forums, like the ones linked here, provides real-world insight and encouragement that most tutorials lack.
If I Can Do It, So Can You
Fixing a sunken deck might seem daunting at first, but with the right mindset, tools, and guidance, you can restore your outdoor space’s integrity and beauty. Think of it as an opportunity not just to repair but to learn and elevate your entire outdoor living experience. Embrace the challenge, and you’ll find that creating a safe, stunning deck is within your reach. Ready to give your deck the revival it deserves? Your outdoor oasis awaits! And remember, every proper repair adds value, safety, and enjoyment to your home—so don’t hesitate to start today.