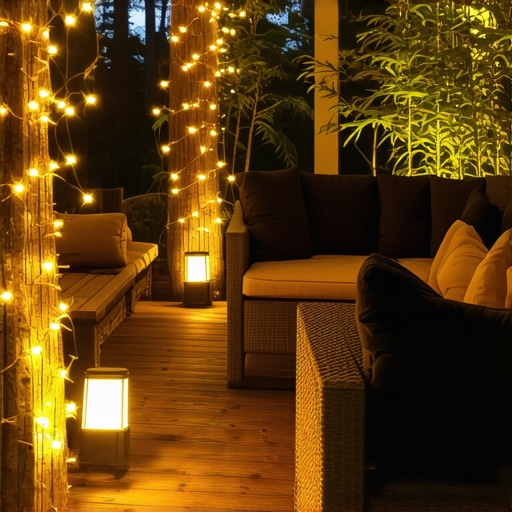
I remember the first night I finally finished my dream deck. I had spent weeks obsessing over the composite decking colors and making sure the stair tread depth was perfect for the kids. But when the sun went down and I flipped the switch on those new LED post caps, my heart sank. Instead of a warm, inviting retreat, my backyard looked like a sterile hospital hallway or a high-security parking lot. The light was harsh, blueish, and completely killed the vibe I had worked so hard to create. It was a classic rookie mistake, and it is one I see homeowners make all the time.
The Blue Ghost in My Backyard
That first night taught me that light isn’t just about being able to see where you are walking; it is about how the space makes you feel. I bought the brightest ‘Cool White’ bulbs I could find, thinking more light was better. I was wrong. That cold light made my beautiful brown boards look gray and lifeless. If you are currently figuring out how to run wire for deck lights, stop for a second and look at the Kelvin rating on your bulbs. Today, I am going to show you exactly how to find that ‘golden hour’ glow that makes your outdoor space feel like a five-star resort rather than a laboratory.
Does the light color really change the mood that much?
You might be thinking that light is just light, but there is a psychological and physical impact to the color temperature you choose. According to the American Lighting Association, residential outdoor spaces generally feel most comfortable when kept between 2700K and 3000K. Anything higher starts to feel industrial and can even disrupt your natural sleep cycles. Plus, there is a practical side to this: why your outdoor lighting is attracting too many bugs often comes down to that blue-spectrum light. Insects are naturally drawn to the cooler, brighter wavelengths, whereas the warmer amber tones of a 2700K bulb are much less interesting to them. Have you ever felt like your deck was just ‘off’ after dark but couldn’t put your finger on why? It is almost certainly the color temperature. We are going to dive into the Kelvin scale and how to coordinate your deck perimeter lighting so you never have to deal with that blue-ghost effect again.
Pick Your Vibe by Mastering the Kelvin Scale
Choosing the right bulb is like choosing the right seasoning for a steak—too much of the wrong thing ruins the whole experience. I always tell my clients to aim for that sweet spot between 2700K and 3000K. This range mimics the warm, comforting light of a sunset or a crackling fire. If you go up to 4000K or 5000K, you aren’t building a retreat; you are building a surgical suite. When you look at composite decking trends 2025, you will notice the most high-end designs lean heavily into these ‘amber’ tones because they make the grain of the boards pop without making them look plastic. 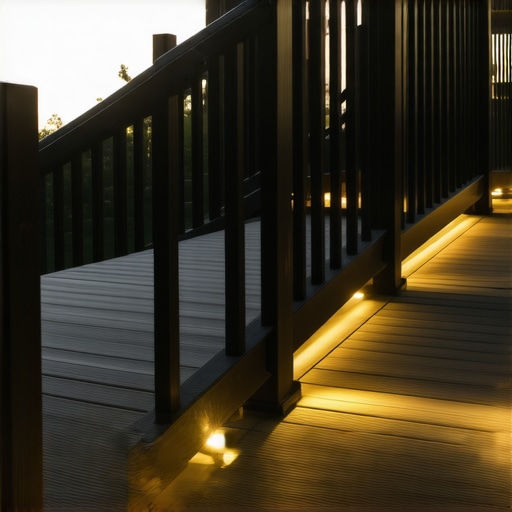
Keep the Light Down Where it Belongs
The biggest mistake people make is pointing lights directly into guests’ eyes. In the lighting world, we call this ‘glare,’ and it is the enemy of a good time. Instead of mounting huge floodlights on the back of the house, use low-voltage fixtures tucked under the railing or integrated into the stair treads. This creates a pool of light on the floor rather than a beam in your face. For example, the glare-free way to light your deck stairs for safety involves mounting small ‘eyebrow’ lights on the risers. This illuminates the actual path without blinding someone walking toward the deck from the yard. I remember one job in Reeds Spring where I accidentally installed the stair lights upside down—lesson learned! The guests were essentially walking into a spotlight. Once we flipped them, the stairs became a subtle, glowing feature of the landscape rather than a hazard.
Calculate Your Power Needs Before You Buy
You cannot just keep adding lights forever without a plan for power. This is where most DIYers get stuck. You need to know how to choose the right deck lighting transformer based on total wattage. If you are planning a massive setup with 20 or more fixtures, you really need to look at the best low-voltage transformers for large outdoor lighting projects to avoid the dreaded ‘dim-end’ effect. This happens when the lights at the end of the wire run do not get as much power as the first few, making your deck look lopsided at night. I once spent three hours troubleshooting a ‘broken’ light only to realize I had exceeded the transformer’s capacity by just five watts. It is a game of numbers, and getting it right ensures your stunning outdoor living space stays bright—but not too bright—all night long.
Protect Your Wiring from the Elements
Since you aren’t drilling huge holes, you need to be smart about where that wire lives. Do not just toss it on the ground and cover it with mulch. In high-traffic areas, like near the best composite decking for high traffic entryways, I recommend running the wire inside the railing channels or tucked behind the fascia boards. This keeps it safe from weed-whackers and curious squirrels. If you are working on a more complex layout, why a digital designer is the best move becomes clear; they can map out the wiring runs before you even buy a single foot of cable, saving you from a tangled mess under your joists.Everyone tells you that switching to composite means you will never pick up a hammer again. That is the first big myth. In my experience, composite requires more precision during the installation than wood ever did. Wood is forgiving; it shrinks and swells somewhat predictably. But composite? It moves like a living thing. If you do not understand why your composite boards are expanding more than expected, you will end up with buckled boards or sheared fasteners by the first July heatwave. I have seen beautiful decks literally push themselves away from the house because the builder did not leave enough ‘breathing room’ at the ends.
Why do my composite stairs flex even though I followed the manual?
This is where the ‘Oops factor’ really hits homeowners. Most builders use the same three-stringer setup they use for traditional wood, but composite material does not have the same structural stiffness. If you want a rock-solid feel, you need to look at the bracket that makes your deck stairs feel rock solid. According to data from the North American Deck and Railing Association (NADRA), stair failures are among the most common structural deck issues, often due to improper stringer spacing. If your stringers are more than 12 inches apart on center, those composite treads will flex, causing that annoying ‘trampoline’ effect. I always tell my clients that why stair treads need more than just screws to stay quiet often comes down to using high-quality construction adhesive in tandem with structural fasteners. 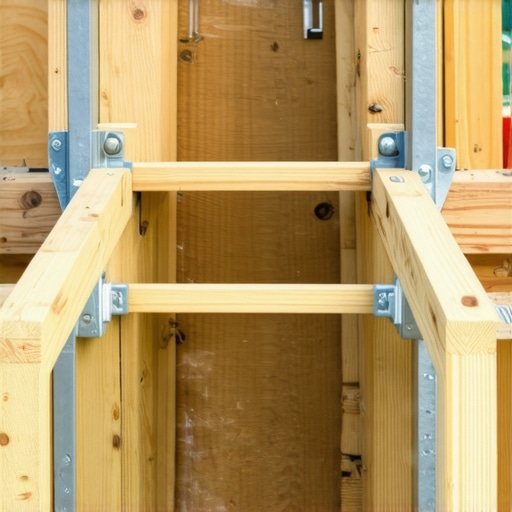 Another common trap is the ‘bouncy floor’ syndrome. Many people think they need massive, expensive beams to fix it, but why your deck feels bouncy and the affordable fix is usually just adding mid-span blocking. Without it, your joists can twist slightly under foot traffic, making the whole structure feel unstable even if it is technically safe. It is these tiny, hidden details that separate a DIY weekend project from a space that feels like a permanent part of your home’s architecture. If you are feeling overwhelmed by the technicalities, the benefits of working with a professional deck builder become obvious when you realize we have already mastered these nuances. Have you ever fallen into the ‘maintenance-free’ trap only to find your boards warping? Let me know in the comments.Everyone says composite is ‘set it and forget it,’ but that is exactly how you end up with a dingy, stained mess in five years. You still need to wash it. I always grab a soft-bristle brush—never a pressure washer on its highest setting—and a mild detergent. If you are a fan of backyard BBQs, you definitely need to know how to clean grease stains off composite without ruining the finish. One of my favorite secret weapons is a UV-inhibiting protectant for the railing caps; it keeps them from fading under that brutal summer sun. According to a 2023 technical bulletin from the Forest Products Laboratory, organic debris trapped in the gaps between boards is the leading cause of localized mold growth on capped composites.
How do I keep my composite deck looking brand new?
The secret isn’t a magic chemical; it is consistency. I recommend a deep scrub twice a year. If you have chosen those beautiful, deep espresso hues, you will want to check out the best way to clean bird droppings off dark brown composite boards because those white spots can actually etch into the surface if left in the direct heat. Also, keep an eye on the gaps. Leaves and pine needles love to rot in those small spaces, which traps moisture against your frame. 
Small Tools with a Massive Impact
I predict that in the next few years, we are going to see ‘smart’ composite boards with built-in sensors that alert your phone when moisture levels under the joists get too high. But until then, we rely on good old-fashioned prep. I never build without joist tape anymore. It is a simple peel-and-stick layer that prevents the frame from rotting. When looking for the best fastener for building a deck in a high-moisture area, I always point people toward 305 or 316-grade stainless steel. It is more expensive, but it is the difference between a 10-year deck and a 40-year deck. If you are still in the planning phase, consider maximizing space modern designs for composite decks to include a built-in storage bench or a hidden access panel. It is much easier to add these features now than to retro-fit them later. If all this technical talk has your head spinning, don’t hesitate to contact us. We have spent years refining these methods so you don’t have to learn the hard way. Try this today: go out and check your board gaps; if they are clogged, clear them out with a plastic putty knife. It is the easiest way to extend your deck’s life by five years.
Hard-Won Lessons from the Job Site
#IMAGE_PLACEHOLDER_E#
After years of getting my hands dirty, I have realized that a great deck isn’t just built in a shop; it is built in the tiny details that most people ignore. First, never underestimate the power of airflow. I have seen expensive frames rot from the inside out because the homeowner didn’t know how to vent the space under your deck to prevent mold and wood rot. Second, gravity is a patient enemy. If your ledger isn’t secure, the whole thing is a ticking clock, so take a minute to learn the simple way to check if your deck ledger is pulling away from the house before you host your next big gathering. Finally, remember that aesthetics and longevity are the same thing; choosing why picture framing your deck is more than just a style choice protects those vulnerable cut ends from the elements while making your project look professionally finished.
My Go-To Resources for a Flawless Finish
When I am stuck on a complex design, I don’t just wing it. I rely on a few specific resources that keep me from making costly mistakes. I never start a layout without digital tools; why I never start a complex deck project without a digital 3d walkthrough first is simply because it catches structural clashes before I buy a single board. For hardware, I am incredibly picky. I only use the only fastener we trust for high-moisture areas to ensure nothing rusts through, and I always consult innovative stairs solutions for any elevation changes. These tools are the backbone of a safe, durable build.
Start Building Your Backyard Sanctuary
Your outdoor space is more than just a collection of boards and screws; it is where your summer memories will live. Don’t be intimidated by the technical side—once you understand the fundamentals of outdoor living, the rest of the project becomes a rewarding challenge. Whether you are looking for transform your outdoor living with custom composite decking ideas or just trying to get your first stair stringer cut, remember that every expert was once a beginner. Take that first step today and start creating the retreat you deserve. Have you ever felt overwhelmed by the technical choices in a deck build? Let me know in the comments below!