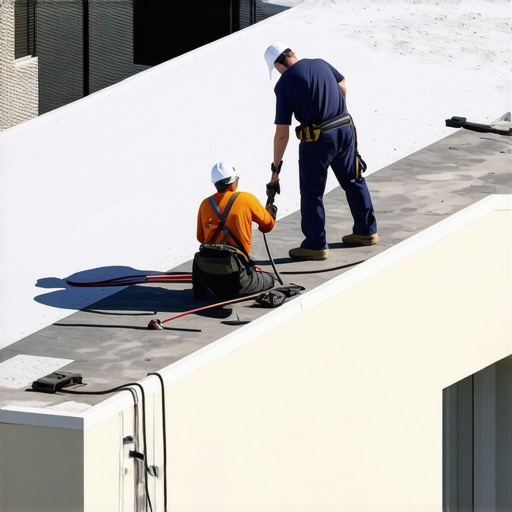
How to Locate a Commercial Roof Leak Under an Office Deck Without a Total Teardown
Finding a commercial roof leak is challenging under the best of circumstances. However, when that leak is buried beneath an expensive, high-traffic office rooftop deck, the challenge evolves into a high-stakes forensic puzzle. For business owners and facility managers, the sight of water dripping onto a conference table or a server rack is a nightmare scenario – one that traditionally suggested a massive, costly demolition of the outdoor amenity just to find a pinhole breach in the membrane.
I am Steven Thomas, owner of Roof Leak Detection. With decades of experience as a full-service roof consulting and testing expert, I have worked nationally and internationally to solve the most complex building envelope failures. My approach focuses on “forensic leak detection,” a methodology that prioritizes data and non-invasive technology over the “sledgehammer first” mentality. In this guide, I will walk you through the precise steps to identify the source of a leak beneath a commercial deck without authorizing a total teardown of your outdoor space.
The High Cost of “Guess and Check” in Commercial Roofing
In the world of commercial roofing, the “guess and check” method – where a contractor pulls up boards at random hoping to find a wet spot – is not just inefficient; it is financially reckless. Tearing up a commercial deck involves significant labor costs, potential damage to expensive composite materials, and, most importantly, business interruption. If your office rooftop lounge is closed for three weeks while workers hunt for a leak, you are losing the value of your investment every day.
Research, including data often cited by industry leaders like Juneau Odenwald, emphasizes that accuracy in the diagnostic phase is exponentially more cost-effective than rushing into repairs. A “total teardown” can cost five to ten times more than a targeted, non-invasive forensic investigation. When dealing with an Emergency Roof Leak for Office Building scenarios, the pressure to act fast often leads to poor decision-making. By utilizing advanced diagnostics, we can narrow the search area from 5,000 square feet to a specific 3×3 foot section, preserving the integrity of the deck and the budget of the property owner.
Step 1: The Internal Investigation (Working Uphill)
The first step in locating a commercial roof leak doesn’t happen on the roof; it happens inside the building. We begin by “working uphill.” Water is a master of deception; thanks to gravity and surface tension, it rarely drips directly beneath the point of entry. It may enter through a breach in the membrane, travel ten feet along a steel purlin, hop onto a conduit pipe, and finally drop through a ceiling tile in a completely different room.
When dealing with an Emergency Roof Leak for Office Building, start by removing ceiling tiles to inspect the structural deck from below. We look for moisture stains, rust on metal decking, or efflorescence on concrete. By mapping these internal exit points, we establish a “probable cause” zone. However, we must account for the slope of the roof. If the roof deck slopes toward the north, we know the entry point is likely “upstream” or south of the drip point. This internal mapping is critical before we ever step foot on the exterior deck boards.
During this phase, it is also wise to check for secondary issues. For instance, if the leak is occurring near the perimeter, the issue might not be the roof membrane itself but the transition where the deck meets the building. This is often a result of poor structural design, such as Why Your Deck Ledger Board Needs a One-Inch Air Gap to prevent water from being trapped against the siding and rot-prone framing.
Step 2: Non-Invasive Technology: The Professional’s Toolkit
Once we have a general idea of the leak’s location from the interior, we move to the roof surface. To avoid a teardown, we employ the “Big Three” of non-invasive leak detection: Thermal Imaging, Electronic Leak Detection (ELD), and Moisture Scanning.
Thermal Imaging (Infrared Thermography)
Thermal imaging is most effective at dusk. As the sun goes down, the dry sections of the roof cool quickly. However, wet insulation trapped beneath the roof membrane has a higher thermal mass; it holds onto the day’s heat longer. Using high-resolution infrared cameras, we can see “hot spots” glowing through the deck boards. This identifies exactly where water is trapped in the system without moving a single screw. This is a cornerstone of modern non-invasive leak detection.
Electronic Leak Detection (ELD)
ELD is the gold standard for finding breaches in waterproofing membranes, especially under overburden like decks or green roofs. By creating an electric field on the roof surface, we can use specialized sensors to find where the current “grounds out” through a hole in the membrane. Even a hole the size of a needle head can be located with sub-inch accuracy. This technology allows us to pinpoint the commercial roof leak source through the gaps in the deck boards or by temporarily removing only a few select panels.
Moisture Scanning
Nuclear or capacitance moisture meters allow us to “see” through the roofing assembly to determine the percentage of moisture in the substrate. By creating a grid over the deck, we can create a moisture map. If the moisture levels are 5% at the edges but 40% in the center, we have successfully narrowed our search area without any demolition. This data-driven approach is what separates a consultant from a general laborer.
Step 3: Mapping Reference Points Through the Deck
The biggest challenge with a deck-over-roof system is that the deck creates a “false floor.” To find the leak, we must translate our internal findings and our technological “hot spots” to the physical surface of the deck. This requires “Forensic Mapping.”
We identify “fixed points” that exist both inside and outside the building. These are typically HVAC curbs, plumbing vents, or the corners of parapet walls. By measuring the distance from a ceiling leak to an HVAC duct inside, we can replicate those coordinates on top of the deck. This allows us to say with confidence, “The leak is exactly 12 feet north and 4 feet west of this vent pipe.”
During this stage, we also evaluate the deck’s construction. Is it built on a pedestal system or sleepers? Knowing this helps us understand how water might be flowing beneath the boards. If the deck was built correctly, using The Secret to Building a Deck That Lasts Fifty Years, there should be adequate drainage paths that haven’t been clogged by debris, which is a common cause of standing water and subsequent membrane failure.
Step 4: Targeted Access and Board Removal
Only after the data from the internal investigation, thermal imaging, and ELD converge on a single point do we pick up the tools for board removal. Instead of a total teardown, we aim for a “surgical strike” – usually a 3×3 foot square.
If your office deck uses modern materials, you may need to know Choosing the Right Composite Decking for Durable, Low-Maintenance Outdoor Areas and how those specific fastening systems work. Many high-end commercial decks use hidden fasteners, which require a specific technique for removal to avoid breaking the tongues of the boards. We recommend following the steps in The Easy Way to Replace a Single Board in the Middle of Your Deck to ensure the outdoor area can be restored to its original condition once the repair is complete.
Once the boards are removed, we inspect the “usual suspects”:
- Penetrations: Check the flashing around deck posts or drains.
- Sleeper Damage: Ensure the deck supports haven’t punctured the membrane over time.
- Debris Buildup: Look for “dams” of leaves or dirt that are forcing water over the top of flashing.
If the damage is localized, you might be able to implement The Emergency Fix for Leaking Office Roof Decks to stop the water immediately before a permanent patch is heat-welded or adhered.
When to Call an Emergency Commercial Roofer
While the non-invasive process is designed to save money, there are times when DIY investigation or waiting for a scheduled consultant is dangerous. If you see water dripping near electrical panels, server rooms, or if you notice a “sagging” in the ceiling that suggests structural compromise, you need a professional immediately. In these cases, you should contact an Emergency Commercial Roofer like Peak to Peak Roofing & Exteriors.
Professional roofers have the safety equipment and the insurance necessary to handle high-risk leak scenarios. Furthermore, if the leak is caused by structural issues like a failing pier, you may need to consult a specialist on How to Fix a Sinking Deck Pier Without Tearing Down the Boards. Dealing with structural loads and waterproofing simultaneously requires a high level of expertise to ensure the building remains safe for occupancy.
For those in the Denver area or surrounding regions requiring immediate assistance with a commercial roof leak, you can find professional help here:
Conclusion: Protecting Your Investment
Locating a commercial roof leak under an office deck does not have to result in the destruction of your outdoor space. By shifting the focus from demolition to diagnostics, business owners can save thousands of dollars and avoid weeks of disruption. Utilizing thermal imaging, ELD, and forensic mapping allows us to treat the building with the precision of a surgeon rather than the blunt force of a demolition crew.
Before you sign a contract for a total deck removal, ensure you have exhausted all non-invasive options. A diagnostic scan is a small investment that pays for itself by preventing unnecessary repairs. If your deck was built with longevity in mind – perhaps utilizing The Flashing Tape Trick That Adds 10 Years to Your Joists – it is worth the extra effort to preserve that structure through smart, targeted leak detection. Protect your building, your budget, and your peace of mind by choosing science over guesswork.