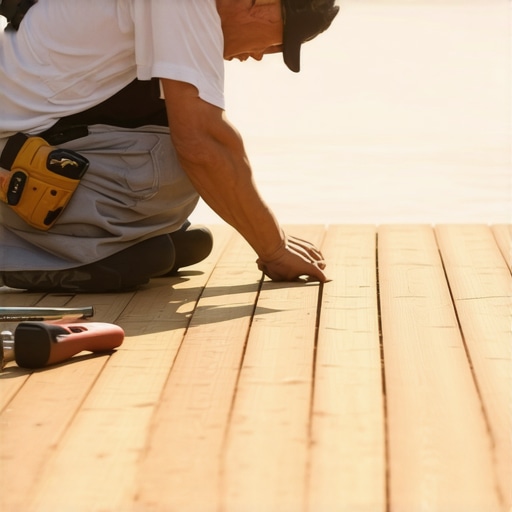
It was a sunny Saturday afternoon when I stepped onto my deck, expecting to enjoy a peaceful cup of coffee and watch the neighborhood come alive. Instead, I was greeted by a loud creak beneath my feet and a wobbly, unsightly gap where a single board had rotted away. That moment was a lightbulb—if I could replace one board easily, why was it such a headache, and how could I make it feel simple?
The Struggle of Fixing a Deck Spot No One Tells You About
As someone who loves enjoying outdoor spaces, I’ve faced my fair share of decking dilemmas. The worst? Worrying about damaging my beautiful deck further or making a repair that looks half-done. Over time, I discovered that replacing just one board doesn’t have to be a major project. With the right approach, you can fix that problem spot swiftly and seamlessly, maintaining your deck’s charm without tearing everything apart.
Is Replacing a Single Deck Board Really Worth the Effort?
At first, I wondered whether messing with the deck was worth it or if I should just wait for a complete overhaul. Honestly, I made a rookie mistake early on—trying to force a new board into place without careful measurements—and that only led to more issues. Now, I know that targeted repairs like replacing a single board are not only doable but can prolong the life of your entire deck. If you’re tired of the unsightly damage and just want a quick fix, I’ll guide you through the simple steps to get it right. Plus, understanding proper techniques can prevent further damage and save you money long-term. Want to see how I did it? Check out these innovative solutions to deck repairs — you’ll find this site full of tips that professional deck builders swear by: https://deckdesignbuild.com/deck-builder-insights-designing-your-dream-outdoor-space.
Have you ever faced a small deck repair that turned into a big hassle? If so, keep reading, because I’ll walk you through the straightforward process I wish I knew when I started. Trust me, with a little patience and the right tools, you can keep your outdoor oasis looking flawless—no heavy lifting or costly replacements required.
Prepare Your Tools and Materials
Before diving into the repair, gather the necessary tools: a circular saw or hacksaw, a pry bar, a drill with screwdriver bits, a measuring tape, a level, and safety gear like gloves and eye protection. Select a replacement board made from durable, low-maintenance composite decking to ensure longevity and compatibility with your existing deck. Having everything ready prevents interruptions and streamlines the process.
Remove the Damaged Board Carefully
Start by removing any fasteners holding the rotten board—pile them separately for reuse if they’re in good condition. Use the pry bar to gently lift the damaged board without damaging adjacent boards. Think of this step like removing a stubborn splinter; patience minimizes damage. I once inadvertently cracked an adjacent board during my first attempt, so take your time and work slowly.
Measure and Cut the Replacement Board
Measure the length of the old board accurately, accounting for any overhang or spacing. Mark the new composite board with a pencil, then cut it precisely using your saw. Double-check the measurements—precision here is like tailoring a suit; a small mistake can ruin the fit. In my experience, accurate cuts save a lot of headache during installation.
Prepare the Substructure
Inspect the joists beneath the opening; ensure they are solid, level, and free of rot. Use a level to confirm flatness and shim if necessary. Reinforce any weak spots, as a stable foundation guarantees your new board will sit flush and last longer. I learned the hard way that a wobbly substructure leads to squeaks and premature wear.
Install the New Board with Proper Fasteners
Position the new board onto the joists, aligning it carefully. Pre-drill holes slightly smaller than your fasteners—this prevents splitting and reduces installation effort. Use stainless-steel screws or hidden fasteners designed for composite decking, which resist corrosion and provide a smooth finish. Driving fasteners at the right depth is crucial—too deep and they bulge; too shallow and they’re loose. Think of these fasteners as the anchors holding your deck’s integrity.
Adjust for Expansion and Spacing
Leave a small gap (around 1/8 inch) between the board and adjacent planks to accommodate material expansion and prevent buckling, especially in hot climates. Remember, wood and composite expand with heat, like how a car tire might swell during summer. In cold weather, boards contract, so seasonal adjustments are important for longevity.
Finish and Secure the Repair
Check all fasteners for tightness and flushness, then clean any debris from the work area. Applying a sealant or protective coating suitable for composite decks can help maintain appearance over time. I once neglected this step, and the new board faded faster than surrounding ones. Regular maintenance extends your deck’s lifespan and keeps it looking fresh.
Evaluate Your Repair for Future Stability
Step back and view your work from different angles. Ensure the board is level and secure. If it feels loose or uneven, re-tighten fasteners or shim as needed. Remember, a well-done repair blends seamlessly with the existing deck, preserving both aesthetics and safety. For more tips on maintaining your deck’s structural integrity, visit this comprehensive guide.
Many homeowners jump into outdoor projects with enthusiasm but become wary when faced with common misconceptions. A major myth is that adding more decking or stairs automatically enhances outdoor aesthetics; however, ignoring design principles and proper planning can lead to cluttered or unsafe spaces. For instance, some believe that choosing cheaper materials saves money, but they often end up sacrificing durability and safety in the long run, especially with composite decking, which requires selecting high-quality options like those discussed in our guide on [choosing the right composite decking](https://deckdesignbuild.com/choosing-the-right-composite-decking-for-durable-low-maintenance-outdoor-areas).
Another nuanced mistake revolves around overlookingsafety standards and codes, which are often underestimated by DIY enthusiasts. Properly designed stairs and Railings are critical — not just for compliance but for everyday safety. For example, many don’t realize that the standard stair tread depth for outdoor decks should be at least 11 inches to prevent tripping hazards, an insight highlighted in [designing safe stairs](https://deckdesignbuild.com/designing-safe-and-stylish-stairs-for-outdoor-decks-in-2025).
Advanced Techniques That Most Overlook in Deck Design
For seasoned builders and aficionados, understanding the significance of seamless transitions between indoor and outdoor spaces can elevate a deck from average to extraordinary. Incorporating features like integrated stairs and hidden fasteners not only improves aesthetics but also enhances durability—avoiding common pitfalls such as uneven surfaces or exposed fastener corrosion. Experts emphasize that careful attention to detail pays dividends, as explored in [creating seamless transitions](https://deckdesignbuild.com/creating-seamless-transitions-stairs-as-key-elements-in-outdoor-living). Moreover, with climate considerations, materials like galvanized or stainless-steel fasteners, as discussed in [stainless steel fasteners](https://deckdesignbuild.com/why-stainless-steel-fasteners-are-non-negotiable-for-cedar), help prevent rust and maintain structural integrity over the years.
One of the most subtle errors that can sabotage the lifespan of your outdoor space is neglecting proper drainage and ventilation beneath the deck. This oversight can lead to moisture buildup, mold, and rot—issues that are often only discovered after significant damage has occurred. Proactive design choices, including appropriate ventilation gaps and waterproofing, make a crucial difference. For an in-depth review, visit [the drainage gap trick](https://deckdesignbuild.com/the-venting-trick-for-under-deck-storage).
Finally, collaborating with a professional deck builder might seem like an unnecessary expense, but experts argue that it saves time, money, and stress in the long run. Their nuanced understanding of materials, local codes, and design principles ensures that your outdoor space is not only beautiful but resilient. Learn more about the benefits of working with professionals at [how a skilled deck builder transforms your garden](https://deckdesignbuild.com/how-a-skilled-deck-builder-can-turn-your-garden-into-a-private-oasis).
Have you ever fallen into this trap of underestimating these details? Share your experiences in the comments. Let’s build smarter, safer, and more beautiful outdoor spaces together!
Keep Your Deck in Top Shape with the Right Tools
Maintaining a durable and beautiful outdoor deck requires more than just periodic cleaning; it demands the right tools that make repairs and routine upkeep efficient. I personally prefer using a cordless impact driver over a traditional screwdriver because its torque accelerates fastener insertion, reducing fatigue during larger projects. Additionally, a tub of high-quality composite deck cleaner—such as a solution containing sodium percarbonate—helps eliminate mold and stains without harsh chemicals, protecting both your family and environment.
In my experience, a handheld oscillating multi-tool is invaluable for detailed work, like smoothing out rough edges or reversing small squeaks in the joists. I recently used mine to cut back damaged composite fascia, and the precision saved me hours. For measuring and leveling, I rely on a laser level rather than traditional spirit levels; it provides consistent accuracy over long distances, especially on uneven surfaces, ensuring your repairs look seamless. Source: This detailed guide on outdoor maintenance emphasizes the importance of precise measurements for longevity.
Software and Planning for Long-Term Success
Beyond physical tools, planning your deck’s future is crucial. I use software like SketchUp to visualize modifications before committing. This helps prevent costly mistakes, such as misaligned stairs or uneven deck sections. Simulations allow me to experiment with different layouts and materials, aligning with the trends in modern deck design. Regularly updating your plans with new ideas or tech advances can enhance both safety and style, making your outdoor space more enjoyable year-round.
How Do I Maintain my Deck Over Time? Hire Professionals or DIY?
Long-term maintenance of your outdoor living space involves routine cleaning, inspecting fasteners for corrosion, and applying protective sealants suited for composite or wood decks. For larger repairs or upgrades like installing new stairs, I recommend consulting with skilled deck builders who can ensure safety compliance and durability. Remember, investing in professional maintenance can extend the lifespan of your deck significantly and save you from costly replacements down the line. Going forward, trends point towards integrating smart technology—like Wi-Fi enabled lighting and sensors—that requires periodic updates and specialized tools, making ongoing maintenance even more critical.
Try implementing a simple routine: set up a monthly inspection checklist using a quality flashlight, a wrench, and a moisture meter. Regular checks help catch issues early, preventing bigger problems. As your deck ages, consider upgrading your fasteners to stainless steel, which resists corrosion in harsh climates, or experimenting with innovative stairs solutions for safer access.
Lessons That Changed My Approach to Outdoor Living
One of the biggest surprises I had was realizing that small, targeted repairs can save you from costly complete replacements if done correctly. I used to think replacing an entire section was inevitable after a single rotten board, but understanding proper measurement and fastening techniques proved me wrong. That little breakthrough made me see repairs as an opportunity to enhance safety and durability instead of just patching issues. Additionally, I learned that investing in quality fasteners and sealing methods upfront dramatically extends the lifespan of your deck, saving money and headaches over time. Lastly, I discovered that proactive maintenance, like regular inspections and timely replacements, is key—waiting until damage worsens only complicates repairs and shortens your deck’s life. These insights came from hands-on experience and a lot of trial and error, but they transformed the way I care for outdoor spaces.