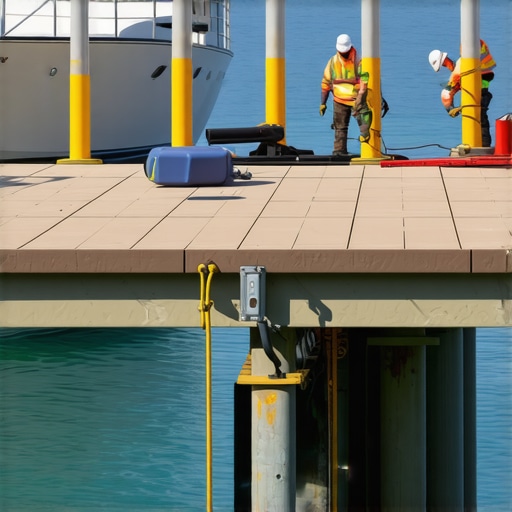
I remember the exact moment I stepped onto my deck and felt a strange wobble underfoot. It wasn’t just a minor annoyance; it was a real wake-up call. I had spent so much time dreaming about relaxing evenings and family barbecues that the uneven sensation made me realize something was seriously wrong. That sinking corner was more than a cosmetic issue—it posed safety risks and threatened the integrity of my outdoor space. It was a lightbulb moment that urged me to take action before the problem worsened.
If you’ve ever experienced a similar wobble or unevenness in your deck, you know how quickly worries can pile up. Are those loose boards about to give way? Is the entire structure compromised? That sinking pier or post might seem like a small fix, but ignoring it could lead to significant damage or costly repairs down the line.
Today, I want to share how I learned to tackle this challenge—specifically, how to fix a sinking deck pier without tearing apart your beautiful boards. Trust me, it’s possible to resolve this issue with patience, a few simple tools, and the right guidance. It’s not about replacing your entire deck or tearing out those gorgeous composite planks; it’s about restoring stability and peace of mind.
But first, why should you bother? Well, a sinking or uneven deck isn’t just unsightly. It can cause drainage problems, lead to further structural issues, and even compromise safety during outdoor gatherings. According to the Consumer Product Safety Commission, deck collapses and accidents are surprisingly common, often due to overlooked foundational problems. Recognizing and fixing these issues early can save you money and prevent accidents.
Identify the Root Cause Before You Start Fixing
Assess the Condition of the Sinking Pier
Start by inspecting the affected area. Use a carpenter’s level or a post level to determine the extent of unevenness. If the post is visibly tilted or the ground around it appears eroded, these are clear signs of foundational issues. Engaging in this initial assessment reminds me of when I first noticed my deck’s corner sinking — with a simple level in hand, I confirmed it was more than just a visual problem. This step ensures you identify the specific post or pier that needs attention – a crucial move before diving into repairs.
Dig and Clear the Area Around the Post
Carefully excavate the soil around the affected pier using a shovel or pry bar. Remove dirt, mulch, or debris to expose the concrete footing or post base. Think of this as unclogging a drain; clearing the surrounding material gives you a better view and access. In my experience, I once uncovered roots and compacted soil threatening the stability. Clearing the area is essential to assess the foundation and prepare for lifting or underpinning the post.
Add Support or Underpinning to Reinforce Stability
Use Concrete or Gravel for Base Support
Pour a concrete pad or place gravel beneath the post to increase ground support. Mix quick-setting concrete if needed, following manufacturer instructions. Applying concrete is like giving the post a firm new foundation; it distributes weight evenly and prevents sinking. I once mixed a batch in a wheelbarrow, poured it around the post, and stabilized my deck within hours, illustrating how concrete—like a sturdy anchor—restores balance.
Install a Post Jack for Lifting
Use a hydraulic or screw post jack to carefully lift the post back to its original level. Place the jack directly against the post or base plate, and steadily apply pressure. Just like tuning a guitar to perfect pitch, incremental adjustments prevent damage. During my project, I used a screw jack, raising the post slightly, checking with the level, and repeating until it was flush. This precise step is key to restoring the deck’s flatness without causing further stress.
Secure the Post and Prevent Future Sinking
Once leveled, secure the post by installing permanent supports such as metal post brackets or post anchors. Backfill the exposed area with soil or gravel, compacting it in layers to avoid future settling. Think of this as giving the foundation a sturdy embrace — a combination of support and reinforcement. I also added a touch of gravel to improve drainage and prevent water accumulation, which can erode soil and cause sinking again. Proper anchoring and drainage adjustments ensure your fix lasts for years to come.
Inspect and Maintain Regularly
After repair, revisit the area periodically, especially after heavy rains or seasonal changes. Check for signs of new sinking or shifting and address them early. This proactive approach is like routine health check-ups; catching issues early saves money and preserves safety. I learned this lesson firsthand when I neglected regular checks, only to find a different corner sinking months later. Consistent maintenance is vital for a stable deck that stands the test of time – especially when using innovative decking materials such as composite decking which combines beauty with resilience but still needs solid foundational support.When imagining the perfect outdoor space, many assume that selecting the most popular materials or following conventional design tricks guarantees longevity and style. However, **a closer look reveals nuanced pitfalls that even seasoned DIY enthusiasts and professionals often overlook**. For instance, the belief that composite decking requires no maintenance is one of the most persistent myths. While it’s true that modern composites like those discussed in [2025 trends](https://deckdesignbuild.com/composite-decking-trends-2025-the-ultimate-guide-for-outdoor-enthusiasts) are low-maintenance, neglecting proper installation or overlooking drainage can lead to warping or mold. Many think that simply choosing the thickest boards ensures durability, but without proper support and ventilation, thicker doesn’t necessarily mean better in the long run.
One widespread mistake headers build into is assuming that all stairs are safe if built according to generic guidelines. In reality, **stairs demand precise calculations of riser heights and tread depths**. Small deviations compound over long runs, creating hazards. Advanced builders know that materials like aluminum or steel for stringers outperform wood in resisting rot and deformation, especially near coastal environments. This insight underscores that a **deep understanding of climate-specific materials** makes a real difference, as explained in expert sources that emphasize material resilience [here](https://deckdesignbuild.com/why-stainless-steel-fasteners-are-non-negotiable-for-coastal-decks).
Another overlooked nuance is the importance of seamless transitions between different outdoor elements. Many underestimate how the harmony between stairs, decks, and privacy walls elevates both aesthetic appeal and accessibility. The significance of well-designed stairs as focal points is highlighted in [transformative tips](https://deckdesignbuild.com/transform-your-outdoor-living-with-custom-composite-decking-ideas) for creating cohesive outdoor environments.
But here’s the kicker: **it’s not just about choosing the right materials or following codes; it’s about understanding the environment-specific behavior of your choices**. For example, composite deck boards are popular for their low-maintenance promises, yet in shaded or damp areas, they can develop mold if not properly ventilated. This underscores the essentiality of proactive design, like incorporating adequate gaps or using anti-mildew coatings.
Have you ever fallen into this trap? Let me know in the comments. Remember, a truly functional outdoor living space is a blend of expert insights and attentive craftsmanship, ensuring that every step—from choosing materials to installing stairs—is optimized for your unique environment.
Keeping your outdoor deck and stairs in top condition requires the right tools and a strategic approach that ensures long-term durability. Over the years, I’ve found that investing in precision equipment and smart methods not only makes maintenance more manageable but also extends the lifespan of your entire outdoor setup. In this post, I’ll share the specific tools I personally rely on, along with insights into how they contribute to ongoing success.
Why a Laser Level Is Non-Negotiable
When adjusting deck posts or ensuring seamless transitions, I always use a high-quality laser level. Unlike traditional bubble levels, a laser level provides a 360-degree projection of a level line, which is invaluable for accurate measurements over large areas. It’s especially helpful for aligning composite decking boards and stairs, where minor deviations can lead to safety concerns or aesthetic issues. For instance, during a recent project, I used a laser level to adjust the height of a custom staircase, resulting in a flush and professional finish that would have been impossible with a standard level.
Power Tools That Save Time and Improve Precision
Power tools like cordless impact drivers, oscillating multi-tools, and cordless saws are my go-to equipment for repairs and installations. The impact driver, for example, allows me to swiftly install stainless steel fasteners—crucial for coastal environments where corrosion resistance matters. The oscillating tool is perfect for trimming composite boards or removing old fasteners without damaging the surrounding material. And a good circular saw with a fine blade ensures clean cuts for intricate patterns or custom-fit components, making your work look professional and consistent. These tools streamline the process and reduce fatigue, allowing for higher-quality results.
Software for Design and Planning
Beyond physical tools, I recommend leveraging design software like SketchUp or Deck Designer to visualize your project before starting. These programs help identify potential issues—such as drainage concerns or transition points—before any physical work begins. Proper planning, supported by accurate digital models, is key to scaling your outdoor space successfully, whether you’re considering adding composite fencing or expanding your deck area. For example, detailed plans enabled me to incorporate seamless stairs that blend with existing structures, enhancing both safety and style here.
Regular Inspection Tools for Long-Term Results
To maintain your outdoor structures over time, I suggest keeping a moisture meter and a post level handy. Moisture meters help detect hidden water intrusion that can lead to rot, especially in stairs and posts exposed to the elements. A post level ensures that any shifting or settling is caught early, allowing for timely adjustments. Using these tools periodically—especially after heavy rainfall or seasonal changes—can prevent minor issues from becoming major repairs. Remember, proactive maintenance preserves the safety and aesthetics of your outdoor space, reducing long-term costs.
Future Trends: Embracing Smart Maintenance
Looking ahead, I believe the integration of smart sensors that monitor structural health will revolutionize outdoor living maintenance. Skin-compatible moisture sensors already exist, but broader adoption could lead to real-time alerts when issues arise, much like your home’s security system. This evolution will help homeowners catch problems like sinking posts or termite activity early, translating to more efficient and targeted repairs. Investing in these innovative solutions now positions you ahead of the curve in outdoor space management.
How do I maintain my outdoor deck and stairs over time?
Implementing a regular inspection routine using tools like moisture meters and post levels, combined with scheduled cleaning and sealing, can dramatically extend the life of your composite decking, stairs, and framing. Incorporate smart monitoring devices as they become available to get early warnings of potential issues—saving you both money and safety concerns. Take my advice and try integrating a moisture meter into your maintenance toolkit; it’s a game-changer for catching hidden problems before they escalate. For further insights into how professionals plan for durable outdoor spaces, explore these design ideas.
Over the years, I’ve come to realize that the real secret to a lasting outdoor deck isn’t just in selecting the right materials but in understanding the subtle signs that hint at deeper foundational issues. One of the most invaluable lessons I learned was the importance of paying attention to small details—like a slight tilting post or a faint sag—that can spiral into major structural problems if overlooked. Recognizing these early warning signs allowed me to intervene promptly, saving time, money, and potential safety hazards. My experience taught me that proactive assessment, combined with the right tools, transforms a daunting repair into a manageable project. So, trust your instincts, stay vigilant, and remember: addressing foundational issues before they escalate is the key to enjoying your outdoor space safely for years to come.