It was a warm spring afternoon when I finally stepped onto my backyard deck, only to feel that unsettling wobble underfoot. A sense of dread washed over me—was all this effort going to waste? That moment made me realize how critical the choices my deck builder made actually are. If you’re like I was, you’ve probably faced similar worry about the longevity and safety of your outdoor space. Today, I’ll share why, in 2026, your deck builder’s insistence on double-rim joists isn’t just a trend but a necessity for durability and peace of mind.
Why Double-Rim Joists Are the Backbone of a Durable Deck
Is the Hype Around Double-Rim Joists Justified?
Early in my deck-building journey, I made the mistake of overlooking the importance of proper framing. I once trusted a contractor who cut corners on rim joists—thinking it wouldn’t matter much. That oversight led to a deck that sagged and showed signs of rot far sooner than expected. I learn from my mistakes, and now I advocate for a detail often dismissed by less experienced builders: double-rim joists. Their role in reinforcing the deck’s structure can’t be overstated, especially as composites and weather conditions become more demanding in 2026. For insights into the latest trends, check out [composite decking trends for 2025](https://deckdesignbuild.com/composite-decking-trends-2025-the-ultimate-guide-for-outdoor-enthusiasts). This knowledge helps confirm that investing in quality framing—like double-rim joists—is the way forward. Would you like your outdoor space to stand the test of time and weather? Then understanding the reinforcement techniques like double-rim joists becomes essential.
Secure the Foundation with Proper Joist Spacing
Start by measuring the span of your deck and refer to local building codes to determine the optimal joist spacing, typically 16 inches on center for standard decks. Use a chalk line to mark the precise placement on your ledger board and support beams, ensuring consistency across the entire frame. I once skipped detailed measurements and ended up with uneven spacing, causing some boards to wobble. Precise layout prevents future issues and simplifies installing double-rim joists.
Install the Inner Rim Joist with Tight Precision
Place the first rim joist flush against the ledger board, then secure it with galvanized framing nails. Use a level to ensure it’s perfectly horizontal before fastening. This step creates a solid reference point for the rest of your framing. I remember struggling with misaligned joists during my initial build, but using a carpenter’s square corrected the alignment and saved hours of rework. Accurate placement here guarantees the stability of your entire deck structure.
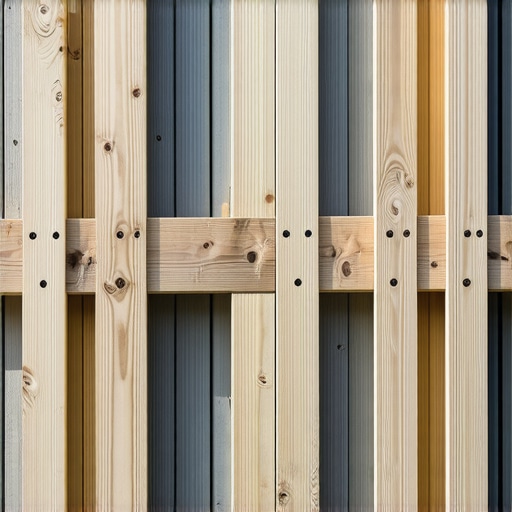
Reinforce with a Second Rim Joist for Added Durability
Position the second rim joist parallel to the first, offset by the desired width of the deck’s outer edge. Attach it to the joists with strength-rated fasteners, like Simpson Strong-Tie clips, which enhance lateral stability. Think of this as the bones in a spine—adding the second rim distributes load evenly and prevents lateral movement. During my project, I used a temporary brace to hold the second rim in place, which helped me visualize the final sturdiness, leading to a more confident install.
Use Anchors and Braces to Prevent Future Wobbling
Install post anchors anchored into concrete pads at each support point, then attach ledger and rim joists securely. Additional diagonal braces from support beams to the rim joists can stiffen the frame, much like braces in braces in buildings. I once omitted braces and later faced wobbly sections; adding braces after the fact was complex, so proactive reinforcement is key. For comprehensive guidance, check out [stop the wobble: 3 rock-solid bracing fixes for deck stairs in 2026](https://deckdesignbuild.com/stop-the-wobble-3-rock-solid-bracing-fixes-for-deck-stairs-2026). Doing this ensures your deck withstands heavy use and weather without shifting or sagging over time.Many homeowners assume that selecting premium composite decking or elegant stairs automatically guarantees outdoor durability and safety, but there’s a hidden nuance often overlooked. **Contrary to popular belief**, most think that fancy materials or modern designs can compensate for structural shortcomings or improper installations. In my experience, this misconception can lead to costly repairs and safety hazards down the line. For instance, choosing a stylish stair railing without considering slip resistance or load-bearing capacity can turn a beautiful feature into a liability. Similarly, relying solely on the aesthetic appeal of composite decking—believing it will never warp or stain—ignores the importance of proper maintenance and installation techniques. A common mistake is neglecting to account for the climate’s impact; not all composite boards are equal in heat resistance or UV stability, which can drastically affect their performance over time. An expert from the National Association of Home Builders emphasizes that detailed knowledge about material properties and installation procedures is crucial to avoid such pitfalls. Therefore, understanding the nuances, like ensuring correct joist spacing and using weatherproof fasteners, is vital. For example, integrating hidden fasteners not only enhances visual appeal but also reduces moisture intrusion—key to prolonging deck life. If you want your outdoor space to truly stand the test of time, focus on the details that separate expert craftsmanship from average building. Curious about more advanced pitfalls experts warn against? Check out how a skilled deck builder can transform your space into a safe, seamless retreat. Don’t fall into the trap of thinking material choice alone guarantees longevity—see why combining quality materials with proper techniques is essential for enduring beauty and safety. Have you ever fallen into this trap? Let me know in the comments.Maintaining a durable outdoor space requires more than just good construction; it hinges on using the right tools and methods that ensure longevity and ease in upkeep. Personally, I swear by a high-quality cordless impact driver like the Milwaukee M18 Fuel. Its power and compact design make fastening heavy-duty joist hangers and securing composite deck boards effortless, especially when working overhead or in tight spaces. The precision it offers reduces the risk of stripped fasteners and ensures tight connections, vital for long-term stability. Alongside this, I rely on a digital angle finder to double-check that all framing elements are perfectly aligned. Small deviations can cause uneven decking surfaces or water pooling, leading to rot and warping over time. Using an accurate angle finder streamlines the installation process and prevents costly corrections later. For safe and professional results, I recommend employing a moisture meter to assess the wood or composite materials before installation. Moisture content significantly impacts how these materials perform over years; high moisture levels promote mold, decay, and delamination, especially with composite decking in humid climates. Regularly testing your materials with a reliable meter helps you select the driest components and avoid future headaches. As outdoor living trends evolve, the focus shifts toward tools that boost efficiency while protecting your investment. Going forward, innovations like cordless power tools with integrated laser levels will make precise alignments even easier, leading to straighter stairs and perfectly spaced joists. Want to keep your deck performing beautifully over time? Start by incorporating a moisture meter into your toolkit for proactive maintenance — it’s a simple step that saves money and extends your deck’s lifespan.
Lessons from the Trenches: Realizations That Changed How I Build
- One of the toughest lessons I learned was the importance of meticulous framing, especially double-rim joists, which serve as the backbone of a resilient deck. Skipping these details might save time initially but costs dearly in longevity and safety later.
- Thinking materials alone could guarantee durability was a misconception I clung to until I saw the consequences of poor installation—warping, sagging, and even rot. Proper techniques and reinforcement, like strategic use of braces, truly make the difference.
- My biggest lightbulb moment came when I realized that proactive measures, such as using moisture meters and employing the right fasteners, are essential for preventing issues before they appear. Prevention beats repair every time.
Tools and Resources That Elevated My Craft
- Milwaukee M18 Fuel Impact Driver — Reliable and powerful, it streamlined fastening heavy-duty components, ensuring tight, long-lasting connections, especially when working overhead or in tight spaces.
- Digital Angle Finder — Precision in alignment saved hours of rework and prevented uneven surfaces, a small investment with huge payoff in quality.
- Moisture Meter — Regular testing of materials helped preempt decay, rot, and other moisture-related issues, extending the lifespan of the deck.
- Online Forums and Professional Guides — Staying updated with resources like composite decking trends for 2025 provided insights into emerging materials and techniques, keeping my work ahead of the curve.
Embrace the Power of Precision and Passion
Designing and building outdoor spaces that stand strong over time is both an art and a science. When you combine right techniques, quality materials, and a passion for craftsmanship, you create more than just a deck—you craft enduring memories and safe retreats for years to come. Now’s the moment to apply these insights and elevate your outdoor living projects. Curious about how expert builders transform spaces into personal oases? Take a look at this guide for inspiration. Remember, every detail counts in building a deck that survives the test of time. Are you ready to prioritize durability and safety in your next outdoor project? Let me know your biggest challenge below.