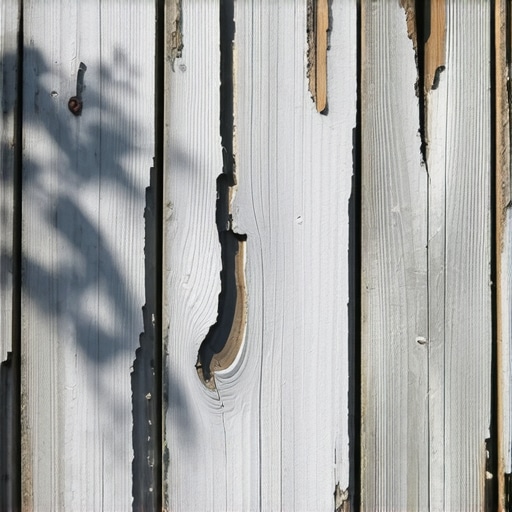
I still remember the feeling of absolute pride I had looking at my newly built, gorgeous wooden steps. It was a crisp Saturday morning, and I had just finished constructing a beautiful set of stairs designed to connect our back door to our lower patio. Eager to bring out the rich, warm wood grain, I did what any impatient DIYer might do: I grabbed a half-empty can of gorgeous, premium interior cherry stain sitting on my workshop shelf. It went on like a dream. For about three weeks, my backyard looked like a luxury retreat. Then, the first heavy autumn rains hit. Within a month, my beautiful handiwork looked like a peeling, graying, water-logged nightmare. I had made a rookie mistake that cost me days of sanding and scraping. If you are tempted to use leftover indoor finishes outside, let me be your cautionary tale. Today, we are going to dive into why interior stains are engineered for a completely different universe than your backyard, and how choosing the right outdoor-rated products saves your hard work from ruin. After all, if you are working with a professional deck builder to construct your dream space, or investing in premium materials, the last thing you want to do is sabotage the project with the wrong finish. Let’s make sure your investment actually lasts.
Is interior stain really that different from outdoor stain?
The short answer is a resounding, costly yes. When you are inside your home, the temperature is relatively controlled, the humidity is managed, and there is zero direct rainfall or ultraviolet radiation beating down on your wood. Interior stains are formulated to showcase deep color and hold up to light dusting or occasional cleaning, but they lack the heavy-duty chemical armor required to survive the harsh outdoor elements. In fact, according to wood science research from the USDA Forest Products Laboratory, untreated wood exposed to outdoor weathering can lose up to several millimeters of thickness per century just from rain erosion and UV breakdown—and using an interior finish offers virtually zero protection against this natural degradation. Outdoor stains are packed with specialized UV blockers, mildewcides, and water-repellent resins that act like sunscreen and a raincoat combined for your lumber. If you apply an interior product on your stairs as key elements in outdoor living, the lack of these protective additives means the sun will quickly bake the pigment, while moisture will seep deep into the grain, causing the wood to swell, warp, rot, and split. Have you ever tried to cut a corner on a home improvement project only to have it backfire spectacularly on your first try? Tell me about your biggest DIY facepalm moments in the comments below! If you want to protect your hard work, avoid the interior paint shelf entirely and invest in dedicated, weather-resistant formulas designed specifically for the punishing outdoors.
Skip the Short Cuts with a Smarter Prep and Seal Routine
Preparing and sealing your outdoor wood is a lot like laying the foundation for a home; if you rush the groundwork, everything you build on top of it will eventually sink or crumble. I learned this the hard way when working on a backyard renovation. I rushed through a hasty wash-and-stain job on a warm afternoon, only to watch the finish peel off in sheets because of hidden surface moisture. To prevent this, you have to approach the prep work systematically to ensure your new outdoor coat actually penetrates the wood fibers.
Clean and Open the Wood Pores First
Stains need an open highway into the cellular structure of the timber. I recommend a dedicated oxygen bleach wood cleaner over regular chlorine bleach, which can damage and discolor the natural wood fibers. Scrub the surface thoroughly to remove microscopic mildew spores and gray, dead wood cells. Let the entire structure dry completely for at least 48 hours in clear weather. Do not guess here; you can test the dryness of the wood by sprinkling a few drops of water on it. If the droplets bead up, the wood is still too wet or clogged to absorb anything. If they sink in quickly, you are ready to sand.
Sand to the Sweet Spot of 80 Grit
When dealing with stairs or flat surfaces, sanding is where many DIYers make critical errors. I used to think using ultra-fine 220-grit sandpaper would give me a beautifully smooth surface. It did, but it also polished the wood so smooth that the protective outdoor stain could not find any grip to hold onto, leading to a blotchy finish. For outdoor structures, stick to 80-grit sandpaper. This grit opens up the wood grain perfectly without leaving ugly swirl marks, allowing the preservative stain to lock deep into the lumber.
Apply Thin Coats with a High-Quality Brush
Once your wood is clean and sanded, it is time to apply your weather-resistant sealer or semi-transparent oil stain. Always use a high-quality natural bristle brush for oil-based stains, or a synthetic brush for water-based products. Never let the stain pool in the corners or on the screw heads, as this leads to sticky, soft spots that eventually peel. If you are working on modern materials, remember that different rules apply. For instance, while natural timber needs deep penetration, you might want to look into choosing the right composite decking for durable low maintenance outdoor areas if you want to skip the sanding and staining cycle altogether. For those using traditional lumber, paying special attention to structural elements is critical. Many builders forget to protect the hidden structural cuts during assembly. If you are building stairs, you can avoid early decay by learning why I always paint the cut ends of pressure treated lumber. Applying sealant to those fresh end-cuts is your ultimate defense against rot. 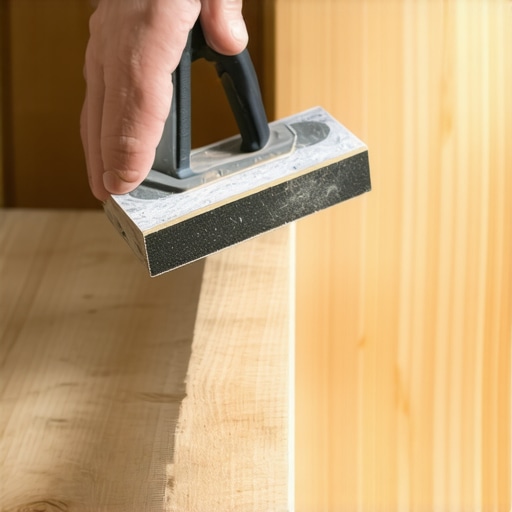
The Great Outdoor Finish Myth That Ruins Gorgeous Projects
Most DIY enthusiasts believe that buying an exterior-rated product means their work is fully protected. In my years of building and restoring outdoor structures, I have watched countless homeowners fall into the trap of assuming a higher price tag or a ‘one-size-fits-all’ exterior label guarantees a long lifespan. The reality is that the outdoor environment is a complex, aggressive ecosystem. The biggest mistake is treating flat walking surfaces and vertical supports with the exact same coat of finish, expecting them to age gracefully together.
While vertical posts shed water easily, stairs and deck boards endure standing water, foot traffic, and direct, overhead ultraviolet radiation. If you apply a standard thick-film exterior sealer on your treads, it will inevitably crack under foot pressure, trapping moisture underneath. Once water gets behind that protective film, it has nowhere to go but deep into the timber, rotting your structure from the inside out while looking deceptively sealed on the surface. When you are planning these critical transitions, consulting with an expert who understands these material interactions is key. You can discover how a professional approaches these challenges by reading about how a professional deck builder can elevate your design while ensuring structural longevity.
Why do solid color stains peel so much faster than semi-transparent ones?
It sounds counterintuitive, but solid color stains often fail far quicker on high-traffic areas than their lighter, semi-transparent counterparts. A study by the Forest Products Society highlights that solid stains behave similarly to paint, creating a thick, protective film on top of the wood rather than penetrating deep into the cellular structure. When micro-cracks form due to the natural expansion and contraction of wood during seasonal temperature swings, water seeps under the film. The sun then heats the wet wood, turning that trapped moisture into water vapor that pushes the solid film upward, causing unsightly bubbling and peeling.
In contrast, high-quality penetrating oil stains migrate deep into the wood fibers, allowing the timber to breathe and naturally release moisture without blistering the surface. This is why many experienced builders completely avoid solid color coatings on stairs, choosing instead to focus on prep work and breathable oils. If you are struggling with peeling finishes and want to learn more about this specific mechanical failure, check out my breakdown on why solid color stains peel and what to use instead.
Avoiding these common finishing traps requires an eye for detail and a willingness to step away from shortcut products. If you prefer to avoid the endless cycle of sanding, scrubbing, and resealing altogether, modern materials offer an excellent alternative. Transitioning to alternative products can save you decades of maintenance, which is why many homeowners are actively choosing the right composite decking for durable low maintenance outdoor areas. Have you ever fallen into this trap and watched your beautiful finish peel away after just one season? Let me know in the comments below!
My Personal Toolkit for Keeping Wood and Composites Flawless
Over the last decade, I have transitioned from using basic hand tools to relying on a highly specialized setup that guarantees structural longevity. When working with stairs or trying to transform your space with expert tips, the tools you use make or break the final product. I personally never step onto a job site without my Festool ROTEX RO 150 rotary sander; its dual-mode sanding action lets me switch from aggressive material removal on rough stair treads to a flawless finish-sanding sweep in seconds. I pair this with high-performance Norton Red Heat 80-grit sanding discs because they resist loading up with old sap or moisture, lasting up to three times longer than standard big-box sandpaper. For fastening, my go-to is the Camo Marksman Pro tool, which ensures automatic spacing and drives screws at a precise angle into the side of the boards, completely eliminating unsightly surface holes where water usually loves to collect.
How do I maintain my outdoor structures over time?
Maintaining high-traffic areas like stairs and landing pads requires a systematic approach rather than waiting for visible damage. Every spring, I perform a simple inspection: I check the structural connections under the frame and wash the surface using a soft-bristle brush with a mild, biodegradable oxygen bleach solution to remove winter grime without stripping the wood fibers. For timber elements, I recommend a light maintenance coat of a high-quality penetrating oil sealer every two to three years. If you are dealing with critical structural transitions, you must pay attention to the ground contact points. For instance, ensuring your stairs rest on a solid base is vital, which is why I always explain to homeowners why your deck stairs need a concrete landing pad at the bottom. This simple structural barrier keeps wet soil from wicking directly into the bottom of your stringers, saving you from premature rot repair.
Looking ahead, the future of outdoor living is rapidly shifting toward smart material science and structural integration. We are already seeing the rise of smart moisture-monitoring sensors embedded within joists, and I predict that within the next five years, self-healing bio-based sealants will become the industry standard. This technological shift is also driving homeowners toward ultra-low maintenance setups, such as composite decking trends for 2025, where synthetic materials mimic natural wood grain while offering lifetime resistance to rot. According to the structural guidelines from the American Wood Council (AWC), using engineered connectors alongside modern synthetic components is the most reliable way to design residential structures that safely withstand decades of regional weather anomalies. If you want to elevate your current project today, I highly recommend trying my advanced tip: swap out standard nails for structural wood screws on all your stair framing to instantly eliminate creaks and increase structural shear strength.
What Experts Won’t Tell You About Your Deck Stairs
Through years of dusty boots and trial by fire, I have realized that the real secret to outdoor woodworking isn’t just buying premium timber; it is understanding how gravity and water play together. If you are aiming to transform your space with expert tips, you must recognize that your stairs are the absolute hardest-hit zone of your entire deck. They catch every shoe scuff, every drop of water, and more direct sunlight than any vertical post ever will.
My biggest lightbulb moment came when I stopped treating my stair stringers and treads like standard deck boards. Because of the heavy angles involved, moisture runs down the wood and pools right where the tread meets the stringer. If you don’t use a highly breathable, high-performance penetrating sealer here, you are essentially sealing in water, which accelerates rot behind the scenes. Always pay attention to how your stairs are pitched, and never skip the end-grain sealant on those hidden structural cuts.
My Essential Toolkit for Perfect Outdoor Projects
Having the right tools means the difference between a finish that peels in six months and one that lasts for years. Over the seasons, I have refined my kit to these non-negotiable items:
- Festool ROTEX RO 150 Sander: This is my absolute favorite tool for prep work. It switches effortlessly from a gear-driven rotary mode for aggressive cleaning to an orbital mode for a perfectly uniform finish.
- Camo Marksman Pro: To keep moisture from invading the wood surface, I avoid face screws whenever possible. This tool helps you drive fasteners into the side of the boards, keeping the top completely smooth. You can see how this structural stability pays off by learning why I never nail deck boards and the screw advantage explained.
- Natural Bristle Stain Brush: Don’t buy cheap disposable brushes. A thick, high-quality natural bristle brush holds the right amount of oil and forces it deep into the wood pores instead of just laying it on top.
Make Your Backyard Last for Generations
Building a beautiful outdoor space is a labor of love, but keeping it beautiful requires walking away from shortcuts and embracing products engineered for the elements. Whether you are building the stairs yourself or collaborating with a professional deck builder to bring your ultimate vision to life, the effort you put into selecting the right weather-resistant finishes today determines how many summers you will enjoy your space tomorrow. Take your time, prep the wood properly, and protect your hard work from the start.
Have you ever had a wood stain peel away far sooner than you expected, or are you currently planning a new build? Let me know about your experiences in the comments below!