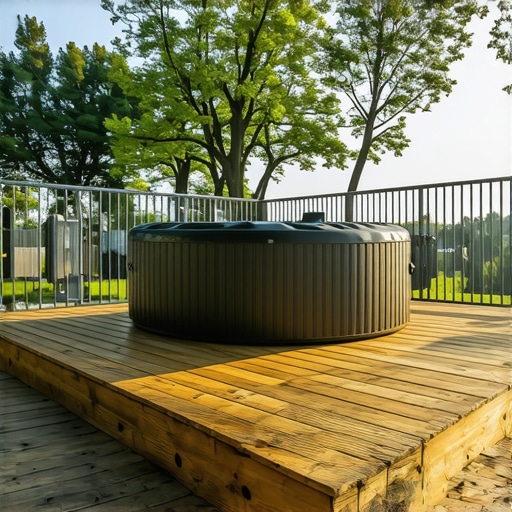
I remember the exact moment I realized I had made a mistake with my deck design. It was a sunny Saturday, and I was eagerly soaking in my hot tub, surrounded by friends, when suddenly I heard a loud creak. Looking down, I saw a flexing, uneven deck plank that was supposed to hold my hot tub’s weight. That moment was a lightbulb for me — traditional wooden framing just didn’t cut it when supporting heavy loads like hot tubs. From then on, I knew I had to rethink my approach. Today, I want to share why I turned to steel framing for my deck and how it transformed my outdoor living space into a safe, durable retreat.
Choosing the Right Foundation: Steel Framing as the Game-Changer
When building a deck that supports a heavy hot tub, the foundation is everything. Wooden framing was my initial go-to, but I quickly learned that wood can warp, bow, and sag over time, especially under the constant pressure of such weight. That’s when I discovered steel framing — a stronger, longer-lasting alternative that offers peace of mind. Steel is resistant to pests, rot, and moisture, which are common issues with wood, especially in outdoor environments. Plus, steel’s uniform strength means I can design a support structure that precisely handles the load of my hot tub without worry.
Early on, I made the mistake of ignoring the importance of proper load-bearing supports, assuming standard framing would suffice. I didn’t realize that, with heavy hot tubs, overlooking the structural materials could lead to dangerous sagging or even structural failure. Once I switched to steel, I noticed immediate improvements in stability and longevity. If you’re curious about creating a beautiful, lasting outdoor space, check out this guide to transforming outdoor living with composite decking for more inspiration on materials and design.
Have you faced issues with deck support when installing a hot tub? If so, you’re not alone. Many homeowners underestimate the importance of a robust foundation, leading to costly repairs down the line. But with the right knowledge and materials, you can prevent this. Next, let’s tackle some common fears about switching to steel and how to make sure your deck withstands the test of time — and loads.
Prepare Your Site with Precision
Start by clearing and leveling the area where your deck will sit. Use a laser level to ensure the surface is flat, preventing future stability issues. Mark the perimeter with stakes and string to visualize the layout accurately. I once overlooked this step and ended up with uneven supports, which caused wobbling when I finally installed the hot tub. Correcting this later took hours, so measure twice, cut once.
Design Your Support Structure
Calculate Load Requirements
Determine the weight of your hot tub when filled, plus the weight of water and people. A typical hot tub can weigh several thousand pounds when filled. Use this data to decide the thickness and spacing of your steel joists and beams. I used software and consulted a structural engineer to make sure my design could handle over 10,000 pounds safely.
Select Appropriate Steel Components
Choose galvanized or powder-coated steel beams and joists for rust resistance. Opt for doubled or reinforced steel supports at the hot tub’s location for extra strength. I sourced my steel from reputable suppliers, specifically selecting C-shaped joists compatible with my design plans. Confirm all dimensions and load ratings before purchase to avoid surprises during assembly.
Assemble the Steel Frame
Begin by laying out the perimeter beams on concrete footings or steel piers. Use a level and clamps to ensure everything is perfectly aligned. Secure the beams with heavy-duty bolts, tightening them to factory specifications. When I assembled my frame, I used a powered drill with a torque wrench to prevent over-tightening, which could warp the steel. Regularly check measurements to maintain square and level.
Connect Support Beams Securing the Main Frame
Attach cross-support beams perpendicular to the main joists to distribute weight evenly. Use specialized steel connectors and bolts designed for outdoor use. Welds are an option but require professional skills and equipment. I opted for bolted connections for easier future adjustments. Double-check that all connections are tight and supported with corrosion-resistant hardware. This step is crucial to prevent sagging under the weight of the hot tub and furniture.
Create Safe and Stylish Stairs and Railings
Design stairs with a rise of about 7 inches and a run of 10 inches for comfortable footing, adhering to local codes. Use composite decking for treads, which resist moisture and wear, and install non-slip nosing. For handrails, consider aluminum or steel options that stay cool and are durable. I installed LED lighting along the handrails for safety and ambiance after dark. Look into stair design ideas for outdoor decks to elevate your project.
Fasten Deck Boards with Precision
Lay composite decking perpendicular to the joists, leaving consistent gaps to allow for drainage. Use hidden fasteners to achieve a smooth surface and prevent corrosion — especially important near water features or coastal areas. I pre-drilled the ends of each board to minimize cracking and used a specialized screw pattern to prevent board curling, following best practices in deck fastening techniques.
Finish with Final Checks and Protective Measures
Inspect all bolts, supports, and connections for tightness. Seal or stain the composite boards to extend lifespan and maintain appearance. Consider adding a drainage gap between the deck and the house foundation to prevent water pooling, which can lead to rot or instability. Regular maintenance and inspection ensure your deck remains safe and beautiful for years to come.
While it’s common to focus on selecting quality materials like composite decking and designing stylish stairs, many homeowners overlook subtle pitfalls that can compromise their outdoor projects. One prevalent misconception is assuming that choosing premium materials alone guarantees durability; in reality, installation techniques and understanding material behavior under different conditions are equally critical. For instance, many DIYers fail to recognize that composite decking requires precise spacing during installation to accommodate thermal expansion, preventing warping or buckling. Furthermore, the myth that steel framing is invulnerable to corrosion ignores the importance of galvanization and proper weatherproofing, which are essential for long-term performance. Advanced builders know to include proper ventilation beneath the deck to prevent moisture buildup, a nuance often skipped but vital for preventing rot, especially near coastal areas.
Why do some composite decks fade faster than others, and can exposure to sunlight accelerate this process? A study by the Fiber-Lite Research Institute shows that UV exposure significantly impacts the longevity of composite materials, making proper sealing and UV-resistant formulations essential for maintaining color and structural integrity. Integrating this knowledge into your project can save you thousands on repairs or replacements down the line. Share your experiences—have you ever fallen into this trap? Let me know in the comments or visit our privacy policy for more insights. Remember, successful outdoor living design hinges on understanding both the visible elements and the nuanced details that make all the difference.
Ensuring your deck remains stunning and functional over the years hinges on the right tools and consistent maintenance routines. When it comes to keeping composite decking and outdoor stairs in top shape, I rely heavily on a few specialized pieces of equipment that make the job efficient and effective.
Power Scrapers for Deep Cleaning
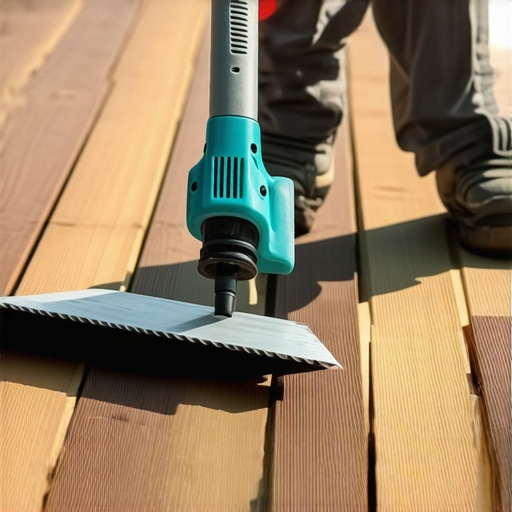
One of my go-to tools is a cordless power scraper. Unlike manual scrapers, it speeds up the process of removing stubborn dirt, algae, or mold that can accumulate on composite surfaces. I prefer models with adjustable speed settings to gently lift contaminants without risking damage to the decking material. Regular use keeps my surface looking new and prevents deterioration, especially in humid climates.
Pressure Washer with Variable Settings
A high-quality pressure washer with adjustable PSI is indispensable. I set mine to around 1000-1500 PSI for composite decks, ensuring I remove dirt without eroding the surface or pushing water into the joints. Using a wide fan spray prevents chipping and prolongs the deck’s lifespan. I schedule deep cleaning every year to tackle built-up grime and prevent mold growth. For delicate areas near stair railings or custom inlays, I switch to a softer spray setting.
Digital Level and Laser Distance Measurer
Proper alignment is critical, especially when installing stairs or reinforcing a supported area. I rely on a digital level to double-check the slope of stairs and joists, ensuring compliance with safety standards. The laser distance measurer helps me verify dimensions precisely, saving time and avoiding costly adjustments later. These tools are especially handy when doing renovations or expansions for larger outdoor living spaces.
Smart Software for Design and Projection
Modern design tools like SketchUp or DeckDesignPro have become integral to my workflow. They allow me to visualize complex layouts and simulate load distributions, helping prevent issues like uneven support or overextending materials. These programs can also predict how materials will age or fade under sun exposure, guiding choices for UV-resistant composites. Predicting long-term results saves money and effort.
Looking ahead, I predict the trend toward smart tools will accelerate. Imagine sensors embedded in your deck that monitor wood moisture levels or alert you when supports weaken. Staying on top of maintenance with these innovations will be key to enjoying outdoor living for decades.
How do I maintain deck safety and aesthetics over time?
The key is regularity and using the right techniques. I recommend scheduling annual inspections with a focus on fastener integrity, support stability, and surface condition. Applying a protective UV-resistant sealant to composite surfaces every few years can prevent fading and cracking. Also, investing in a quality LED lighting system, like the ones I installed along my stairs, enhances safety and adds ambiance without increasing maintenance — a simple upgrade that pays off.
Take this tip: try adjusting your pressure washer to a lower PSI and utilize a wide spray. It’s an advanced move that can dramatically extend the life of your deck. Want more insights? Visit this comprehensive guide on composite decking and maintenance strategies. Consistent care paired with the right tools ensures your outdoor space remains a cherished retreat for years to come.
Reflecting on my deck-building journey, one lesson stands out: trusting shortcuts or neglecting detailed planning can lead to costly setbacks. Early on, I underestimated the importance of precise measurements, which resulted in uneven stairs and support beams that wobbled under load. The real game-changer was investing time in accurate site assessments and understanding the nuances of steel versus wood framing—an insight that transformed my outdoor space from a simple deck to a durable, safe retreat. Remember, good craftsmanship lies in the details often overlooked by others, and embracing expert techniques can elevate your project beyond expectations.
Lessons You Won’t Find in Generic Guides
- Steel isn’t Always Foolproof: Galvanization and weatherproofing are essential to prevent rust, especially near coastal areas—a mistake I made early on by skipping protective coatings. Learning from others’ experiences saved me from future corrosion issues.
- Thermal Expansion Matters: Composite decking needs proper spacing during installation to prevent warping due to temperature changes. Small details here make a huge difference over time.
- Site Preparation is Non-Negotiable: Skipping leveling and site marking can lead to uneven support and hidden issues later. I now swear by laser levels and site prep checklists to ensure stability from the ground up.
My Go-To Resources for Outdoor Living Success
- Professional Support: Collaborating with experienced deck builders and structural engineers has been invaluable. Their insights prevent mistakes and help optimize material choices. Connect with skilled professionals for peace of mind.
- Trusted Reading Material: Books like “The Art of Outdoor Living” opened my eyes to design principles that ensure functionality and style coexist. I highly recommend it for DIY enthusiasts aiming for a polished finish.
- Online Communities: Forums and social media groups provide real-world tips and encouragement. Sharing experiences with fellow builders keeps motivation high and ideas fresh.
- Quality Suppliers: Choosing reputable sources for steel, composite materials, and hardware ensures durability. My success hinges on materials I can trust—don’t cut corners here.
Let Your Passion Drive the Next Step
Building an outdoor space that lasts requires more than just good intentions—it’s about embracing continuous learning and action. Every project offers lessons that refine your skills, turning a simple deck into an inviting sanctuary. Don’t shy away from exploring innovative materials like composite decking or experimenting with support structures; each step brings you closer to the outdoor oasis you envision.
What challenges have you faced during your deck or staircase projects? Share your experiences in the comments and let’s learn together!
Feeling inspired? Start planning your upgrade today, and remember that the key to success lies in your commitment to quality and attention to detail.