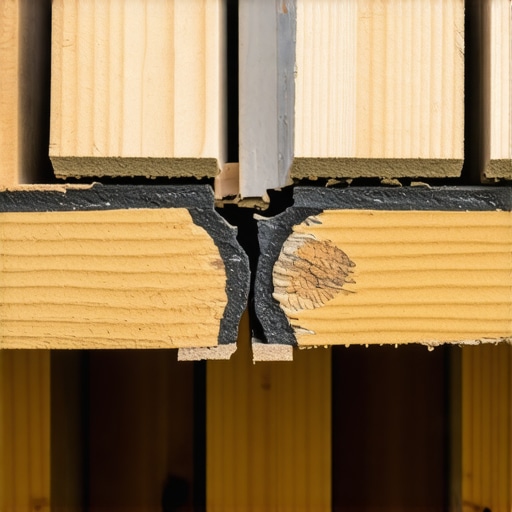
Imagine this: after spending hours installing a beautiful new deck, you eagerly step out to enjoy your outdoor oasis only to hear that dreaded creak or spot a tiny crack creeping along the surface. That’s a moment I know all too well—how a simple mistake in framing can turn a weekend project into months of headaches. It was during one such misstep that I discovered the secret weapon that transformed my deck’s durability and safety: consistently using double joists under every composite board butt joint.
The Weight of a Single Joist Can Surprise You
I used to think that a single joist was enough—after all, it’s standard practice, right? But I learned the hard way that in the world of composite decking, overlooking the importance of proper support can spell trouble. When I first installed my deck, I relied solely on single joists, assuming that they would handle foot traffic and the weight of furniture. However, within a year, some boards started showing signs of sagging and, worse, some ended up with unsightly gaps. The lesson? Composite boards require extra support at their joints, especially for structures exposed to sun, rain, and heavy use.
The Promise of a Stronger, Safer Deck
Today, I want to share the approach that has repeatedly saved my decks from premature wear—using double joists under every butt joint. This simple adjustment has made a world of difference, preventing those pesky gaps, cracking, and even squeaking noises. By the end of this post, you’ll understand exactly how to reinforce your deck’s framing properly, ensuring your outdoor space stays beautiful and safe for years to come. And if you’ve ever faced the frustration of uneven boards or unexpected repairs, keep reading. I’ll show you how to avoid those pitfalls with confidence.
Is Double Joisting Overkill or A Wise Investment?
Early in my DIY journey, I made the mistake of cutting corners—skipping the extra joist support to save time and cost. That was a costly error. Studies, like those from the deck construction experts, show that proper framing is crucial for load distribution and longevity. Reinforcing the structure with double joists at critical points isn’t just an extra step; it’s a vital upgrade that pays for itself in durability and peace of mind. Have you ever wondered if your deck’s framing could be saving you money in the long run? Well, I can tell you—it absolutely does.
Now that we’ve covered why this is such a game-changer, let’s dive into how you can implement this simple yet effective technique in your own projects. Trust me, once you see the difference, you’ll never want to go back to just single joists.
}
Position Your Double Joists Correctly
Start by marking the locations of your existing joists at each butt joint, where two boards meet end-to-end. Using a laser level helps ensure alignment across the entire frame, preventing uneven support. During my recent project, I used a laser and mark every second or third joint; this proved critical when I later installed the double joists, ensuring consistent positioning and load distribution.
Choose the Right Material and Size
Select spaced-appropriate lumber—typically, 2×8 or 2×10 pressure-treated joists are standard. For my deck, I opted for 2x8s because they provided enough strength without adding excessive weight. Remember, the material must match or exceed the size of your existing joists to maintain structural integrity. When I worked on my deck near the coast, I chose treated lumber with higher rot resistance, which extended the lifespan of support at vulnerable points.
Cut and Prepare the Double Joists
Measure and cut the double joists to span between the ledger board and the main beams, ensuring they are slightly longer to accommodate anchors. Use a saw with a fine tooth blade to achieve clean cuts. I learned the hard way that rough cuts lead to misalignment; hence, taking precision measurements saved me hours of rework. If you’re unsure about cuts, consult a deck builder or follow detailed guides on professional deck construction insights.
Install the Double Joists Securely
Position the double joists underneath the existing joists at each butt joint, making sure they are flush and level. Use heavy-duty galvanized metal joist hangers to anchor them into the ledger and main beams. Tighten all fasteners to prevent any wobbling. I secured my double joists with multiple screws per hanger, which prevented squeaks and shifted support that I noticed on my first deck. For added support, consider blocking between the double joists, similar to techniques discussed in structural blocking methods.
Check Your Support and Levelness
After installation, double-check the levelness and alignment across the entire deck surface. Use a spirit level or laser line to identify any uneven support that could cause future issues. Last year, I found that a corner was slightly sagging, but re-tightening my joist hangers and shimming with pressure-treated wedges fixed the problem. This step ensures future boards won’t sag or crack prematurely.
Seal and Protect Your Joists
Finally, treat the double joists with a water-repellent or sealant designed for outdoor lumber. This protects against moisture, especially if your deck is exposed to rain or humidity. For a coastal setup, I used a marine-grade sealant that I apply annually, significantly extending the support’s lifespan. Remember, maintaining your framing components is crucial for long-term durability, as emphasized in support for outdoor furniture.
Many outdoor enthusiasts and even seasoned DIYers fall prey to widespread myths that can undermine the durability and safety of their decks. One of the most persistent mistakes is relying solely on standard framing practices, assuming that basic support is sufficient. In reality, overlooking nuances like load distribution, material choices, and advanced support techniques can lead to cracks, wobbling, or even structural failure over time. Recent studies from experts like those at deck design specialists highlight how precise framing, including the use of double joists and reinforced supports, dramatically extends a deck’s lifespan.
Another common misconception involves the use of composite decking without proper consideration for expansion, contraction, and underlying support. People often assume composite boards are maintenance-free and will behave flawlessly in all conditions, but neglecting to understand how thermal movement affects joints can cause gaps and buckling. An advanced mistake is ignoring the importance of properly sealed and vented framing, which can trap moisture and accelerate deterioration. To master these subtleties, consulting detailed expert guides on composite decking is invaluable.
Why do some decks develop dangerous cracks or sway unexpectedly?
This often results from neglecting the nuances of support placement and the importance of bespoke reinforcement. Standard framing might suffice for small, sheltered decks, but larger or exposed areas require specialized solutions like strategic blocking, adjustable supports, and the right fasteners to prevent uneven settlement. While many believe that larger beams alone can compensate for support issues, research indicates that precise support spacing and reinforcement at critical points are essential. For a deeper understanding, see how top-tier stairs and railings support the overall safety and aesthetic integrity of outdoor spaces.
Applying these advanced insights ensures your deck can withstand the demands of use and weather, saving you money and stress in the long run. Remember, every seemingly small support detail matters—it’s the secret that separates a resilient outdoor space from one riddled with problems. Have you ever fallen into this trap? Let me know in the comments, and stay tuned for more expert tips to elevate your outdoor living experience.
Keeping your outdoor decking in top shape requires more than just initial installation; it involves diligent maintenance and the right set of tools. As a seasoned deck builder, I’ve honed my toolkit to include a few specialized items that make ongoing care efficient and effective. One indispensable tool I rely on is a electric power washer with adjustable pressure settings. I use this for regular cleaning—using a gentle setting that avoids damaging the composite surface—ensuring dirt, mold, and grime don’t compromise the deck’s appearance or longevity. For precision work around tight corners or intricate stair railings, a powered detail sander with variable grit options helps remove stubborn stains or splinters without risking surface damage. Additionally, I invest in high-quality, corrosion-resistant screws and fasteners, specifically stainless steel, to prevent rust that can weaken the structure over time. When it comes to inspecting support structures, a magnetic stud finder paired with a laser level has become my go-to for detecting framing issues and ensuring deck surface alignment. Looking ahead, I predict smart maintenance will increasingly incorporate IoT sensors that monitor moisture and structural integrity in real time, providing early warnings for potential problems.
How do I maintain my deck’s support over time?
Regularly inspecting and sealing your joists and support beams is crucial. Applying a water-repellent sealant annually, especially after cleaning, protects timber from moisture infiltration that causes rot and warping. For decks near water or in humid climates, consider protective coatings with higher rot resistance, like those available in [pressure-treated lumber](https://deckdesignbuild.com/why-your-composite-fascia-boards-are-warping), which prolong support lifespan. Periodic checks of fasteners and joist hangers are equally essential; tightening or replacing corroded hardware prevents structural failures. Using a quality sealant and fasteners isn’t just about appearance—it’s an investment in your deck’s safety and durability.
To make maintenance even more manageable, I recommend adopting a routine schedule—think seasonal check-ups that include power washing, sealing, and visual inspections. Incorporating simple, yet specific tools like a moisture meter helps monitor hidden issues, especially in support structures prone to moisture accumulation. I personally select tools that sustainably extend the lifespan of my decks, knowing that a well-maintained structure saves money and stress down the road. In the future, expect innovations like remote sensor systems and automated cleaning tools to ease this process further. Start by trying out a high-quality water-repellent sealant this season—it’s a game-changer for long-term care. For more insights on maintaining support systems, check out how structural blocking can improve durability. Ready to level up your deck maintenance routine? Invest in a good moisture meter and see how early detection can prevent costly repairs.
What I Didn’t See Coming About Deck Support
One of the toughest lessons I learned was how crucial proper framing support is, especially in exposed areas. I used to believe that standard framing was enough, but real-world experience taught me that overlooking double joists at critical points can lead to costly repairs and safety issues. The lightbulb moment came when I realized that paying attention to detail from the outset saves time and money later. Small modifications, like reinforcing support at stress points, can dramatically improve your deck’s lifespan and safety.
Tools and Books That Elevated My Craft
Over the years, I’ve come to rely on a set of trusted resources that help me deliver durable outdoor spaces. My top pick is the comprehensive guide on seamless transitions and stairs, which deepened my understanding of integrating stairs smoothly into deck designs. Additionally, I swear by a high-quality moisture meter—it’s a game-changer for early detection of hidden issues. For inspiration and industry standards, the ‘custom composite decking ideas‘ article provides innovative design ideas that expand what you thought possible in outdoor living.
Create Your Own Decking Success Story
Embarking on your outdoor living journey can be both exciting and daunting, but remember, every expert was once a beginner. The key is to stay curious, keep learning, and not shy away from applying new techniques like double joists support. Your outdoor space can become a personal retreat, a family gathering spot, or a stylish extension of your home—all it takes is a bit of confidence and informed decision-making. Start today with a little research or a consultation, and turn your outdoor dreams into reality. Do you have a project in mind already? Share your ideas below and let’s chat about how to make them shine!
,