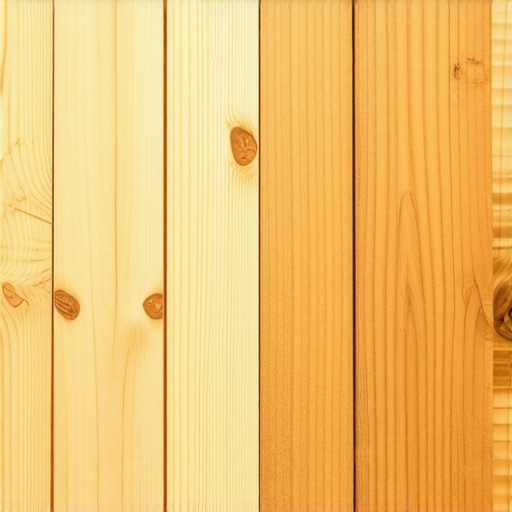
It was a hot summer afternoon when I finally stepped back to look at my newly built deck. As I brushed off sweat and satisfaction, I noticed a small, almost imperceptible warp creeping along one of the pressure-treated joists. My heart sank. That moment was my lightbulb realization: not all woods are created equal, especially when it comes to outdoor living spaces. If you’ve ever wondered whether pressure-treated wood truly stands the test of time against natural cedar, you’re not alone. Millions of homeowners face this dilemma every season, often without fully understanding the long-term consequences.
Choosing Between Pressure-Treated Wood and Cedar: What’s the Real Difference?
For years, pressure-treated lumber has been the go-to material for deck framing. It’s affordable, readily available, and designed to resist rot and pests. But the truth is, recent advancements and increased awareness about environmental and health concerns have led many to reconsider whether it’s the best choice. On the other hand, cedar—particularly Western Red Cedar—offers a naturally beautiful look and impressive durability without chemical treatment, but it comes at a higher initial cost.
When I first started building decks, I made a critical mistake: I focused solely on budget and ignored the nuances of each material’s performance over time. I wish I had known earlier that pressure-treated wood, while resistant to rot initially, can warp, crack, and even decay if not properly maintained. Studies, such as those published by the University of Maine, indicate that untreated cedar can last longer under certain conditions because it’s naturally resistant to insects and rot without chemical additives.
If you’re trying to decide what material will give you the best bang for your buck in the long run, you’re in the right place. Today, I’ll break down the pros and cons of each option, backed by personal experience and expert insights, so you can make an informed choice for your outdoor living investment. Want to avoid costly mistakes? Keep reading, and you’ll find the practical advice you need.
Is the hype about cedar truly warranted, or is pressure-treated still King?
One trap I fell into early on was assuming that pressure-treated meant a guaranteed lifetime solution. That isn’t quite the case. While it’s true that pressure-treated lumber resists pests and decay better than untreated wood initially, it often requires more maintenance—like staining and sealing—to truly last. Cedar, being naturally resistant, can often take care of itself, especially when properly sealed and maintained. Still, many skeptics worry about the chemicals in pressure-treated wood, and rightfully so. Especially for those with environmental considerations or children playing nearby, cedar appears more appealing.
Of course, quality matters. Not all cedar is equal—grain, treatment, and sourcing all play roles in longevity and appearance. I learned the hard way that choosing subpar cedar can lead to warping and unsightly surfaces sooner than expected. A significant mistake I made early was assuming that all cedar was equally durable without checking for chemical treatments or growth region.
If you’ve faced similar doubts or have had a backyard project go sideways because of material choice, I’d love to hear your story. Transitioning from my experiences, I’ll guide you through the key considerations that will help you decide which wood fits your needs and expectations—and how to care for it for years to come.
Prepare Your Site Before Building
Start by clearing the area thoroughly, removing all debris, roots, and uneven patches. Use a transit level to mark the perimeter and ensure your deck will sit level, especially on uneven ground. For example, I once spent a full Saturday leveling the ground with a rented compacter, which prevented future settling issues. Consider installing a gravel base for drainage, which helps prevent water from pooling beneath the deck and causing rot. This step is crucial for longevity and stability.
Design with Purpose and Strength
Sketch your deck layout, focusing on optimal stair placement and access points. Use design principles that maximize space and functionality. When I built my first deck, I opted for a straightforward rectangular shape, but I customized my stairs to run along a corner for easier access, significantly improving usability. Incorporate proper framing techniques, spacing joists tighter if you’re planning to install composite decking, which requires less flex and prevents bouncing.
Lay Foundations Securely and Precisely
Dig footings according to local code, typically one or two feet below frost line. Use a post-hole auger for efficiency, ensuring each footing is perfectly square and leveled. In my experience, using a laser level during post placement prevented future alignment issues. Install concrete forms around the footings, pour, and let cure fully before attaching ledger boards or framing. Don’t forget to use a vapor barrier under the post pads to prevent moisture wicking.
Frame with Reinforced Precision
Build the perimeter frame first, checking diagonals to confirm squareness. Use galvanized or stainless-steel fasteners to resist corrosion, especially in coastal areas. When attaching ledger boards, ensure proper flashing to prevent water ingress, which can cause decking failure. A small tip from my experience: sealing end grains with a silicone-based wood preservative before assembly reduces moisture absorption. For critical joints, reinforce with metal brackets to add strength, especially around stairs and high-traffic zones.
Install Sturdy and Safe Stairs
Design stairs with a riser height of about 7-8 inches for comfort. Use stringers cut precisely with a circular saw guided by a speed square to maintain consistent rise and run. Secure stringers to the deck framing with sturdy hardware, and reinforce treads with hidden fasteners for a clean look. In one instance, I miscalculated stair height, leading to an awkward step that I had to redo. Afterward, I made a template to quickly replicate accurately on other projects.
Finish with Thoughtful Details
Seal or stain your deck and stairs to enhance durability and appearance. Use slip-resistant coatings on stair treads and walkways, especially in rainy climates. Position lighting fixtures strategically to enhance safety and ambiance. I installed low-voltage LED lights along the stair risers, which dramatically increased safety during evening gatherings. Remember, proper sealing and lighting not only extend lifespan but also improve the overall outdoor experience.
Even among seasoned outdoor enthusiasts, there’s a widespread misconception that composite decking is entirely maintenance-free and impervious to common issues like warping or staining. But let’s dig deeper—composite materials, while offering low maintenance and durability, come with nuances that can trip up even experienced builders if overlooked. For example, many assume that all composite decks will stay cool underfoot during summer, yet, as recent studies have shown, darker capped composites can absorb and retain heat more than traditional wood, leading to uncomfortable surfaces.
Can improper installation techniques be the silent culprit behind composite deck failures?
Indeed, a common myth is that choosing quality materials is enough to guarantee longevity. However, ignoring proper joist spacing, inadequate drainage, or insufficient framing support can accelerate issues like cupping, warping, or mold growth. An article by leading decking experts emphasizes that an overlooked drainage gap, especially under decks in shaded or humid areas, can trap debris and moisture, fostering decay despite composite’s resistance to rot. Furthermore, many underestimate the importance of using stainless-steel fasteners instead of cheaper alternatives. Corrosion from rusting fasteners can cause deck boards to loosen or warp prematurely, compromising safety and aesthetic appeal. While I once installed a large composite deck without considering local climate factors, I faced extensive warping within just a few years. Don’t let this happen to you—consult a professional or visit expert resources to choose the right products and techniques. Moreover, advanced builders often incorporate clever design elements, like embedding hidden drainage channels or reinforcing joist supports, to enhance performance. To explore grand staircase designs that complement modern composites, check out this inspiring guide. Remember, successful outdoor living spaces are crafted through meticulous planning and an understanding of the materials’ real behavior, not just their promises on the box. Have you ever fallen into this trap? Let me know in the comments.
Keep Your Deck in Top Shape with the Right Tools and Techniques
Maintaining a durable and beautiful outdoor deck requires more than just seasonal cleaning; it demands the right set of tools and a strategic approach. One of my top recommendations is investing in a high-quality cordless drill with variable speed settings. I personally prefer the DeWalt DCD796D2 because its lightweight design reduces fatigue during extensive fastening tasks, and its brushless motor provides reliable torque—crucial when attaching composite fascia boards or securing hidden fasteners for a flush finish. Using the right fasteners and tools ensures not only aesthetic appeal but also longevity, especially when dealing with corrosion-resistant stainless-steel screws, which are worth the extra investment for coastal or humid climates.
Beyond power tools, having a moisture meter is invaluable for long-term care. I rely on the
In terms of software, I recommend using deck design software like SketchUp or specialized apps like Punch! Home & Landscape Design. These programs enable precise planning, allowing you to visualize structural updates or expansions before breaking ground—saving time and materials. For example, I recently expanded my deck area by simulating different layouts and visualized how installing additional stairs would impact flow and safety. This foresight is crucial when scaling your outdoor living area safely and aesthetically.
How do I maintain outdoor living structures over time?
Consistency is key. Schedule seasonal inspections to identify loose fasteners, worn paint, or sealant deterioration. For ongoing upkeep, I use a cordless impact wrench like the Makita XDT14Z, which simplifies removing and tightening hardware without damaging the wood or composite material. Also, applying a high-quality sealant every 2-3 years, especially after cleaning with gentle cleaners like a mixture of vinegar and water or a commercial deck cleaner, helps preserve the materials’ integrity and appearance. Remember, tools like a pressure washer—used with caution—are effective for deep cleaning, but avoid high-pressure settings that can damage wood fibers or composite finishes.
Looking ahead, innovations such as smart deck monitoring sensors—measuring moisture, temperature, or structural shifts—are on the horizon. These advancements will enable proactive maintenance, extending the lifespan of decks significantly. For now, mastering routine inspections with reliable tools and proper maintenance techniques will keep your outdoor living space working for years to come. Want to see how integrating advanced tools can elevate your deck maintenance routine? Give one of these tips a try today!
The Hidden Lessons That Changed My Decking Journey
One of the most surprising lessons I learned was the danger of underestimating material sources. I once purchased cedar from a local supplier without checking its origin, only to find it warping within a year. Quality and sourcing go hand in hand, and cutting corners on these aspects can cost you dearly. Another lightbulb moment was realizing that existing misconceptions about composite decking — like its supposed maintenance-free nature — could lead to premature wear if installation details aren’t perfect. These experiences taught me that success in outdoor decking isn’t just about choosing the right material but understanding its quirks and handling it with respect.
Moreover, I discovered the importance of detailed planning—skipping proper site preparation or framing can undermine the entire project. Even the most beautiful deck can wobble or warp if the foundation isn’t solid. Lastly, I realized that maintenance is a proactive process—regular inspections, timely sealing, and hardware checks prevent minor issues from becoming major headaches. These personal insights have shaped a more mindful approach to my outdoor projects, reinforcing that craftsmanship, patience, and learning from mistakes are key to building decks that last decades.
Tools and Resources That Elevated My Deck Building Game
- Laser Level – Precise alignment during framing is non-negotiable. My current favorite is the DeWalt DCE532N for its reliability. It saves me hours of rework and ensures everything sits perfectly.
- Moisture Meter – Knowing when your wood is dry enough for sealing makes all the difference. The Maverick MS490 has been a game-changer, helping avoid warp and mold issues.
- Deck Design Software – Visualizing your project beforehand prevents costly mistakes. I use SketchUp for its versatility and intuitive interface, making planning a breeze and ensuring every space fits perfectly.
- Specialized Guides and Articles – Continuous learning keeps me ahead. The articles on transforming outdoor spaces and composite decking selection provide inspiring ideas and practical tips I revisit often.
Step Into Your Decking Destiny Today
Building a durable, stunning outdoor deck is a rewarding journey—one that combines skill, patience, and a passion for outdoor living. Every detail, from foundation to finishing touch, matters immensely. Don’t hesitate to get started, armed with the right knowledge and tools; your ideal outdoor sanctuary awaits. The future of outdoor living is in your hands—craft it with confidence!
What has been your biggest challenge in creating your outdoor space? Share your story below and let’s help each other build better decks!