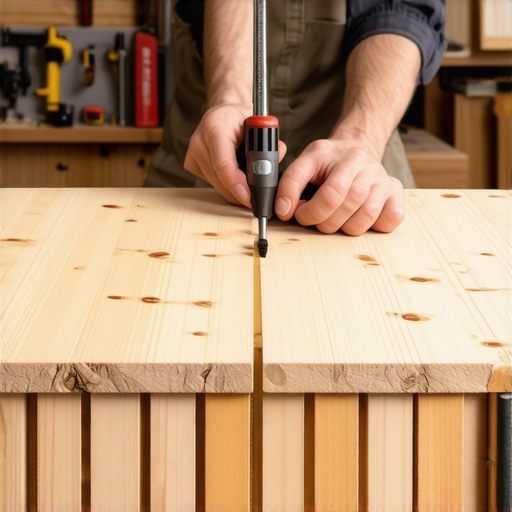
I remember the first time I tackled cutting deck stringers. I was in a rush, eager to finish my outdoor project, but I didn’t have a proper plan. Let’s just say, the result was a chaos of crooked cuts and wasted material—definitely not the professional look I was aiming for. That lightbulb moment hit me hard: without a precise technique, I was just spinning my wheels.
Why Cutting Deck Stringers Perfectly Matters Right from the Start
Getting your stringers right on the first shot isn’t just about aesthetics; it’s about safety, stability, and saving yourself time and frustration down the line. When stringers are cut too short or uneven, your entire staircase can feel unstable. Conversely, perfectly sized stringers create a seamless, sturdy foundation that looks great and lasts for years.
Understanding why this step is crucial can transform your approach. A well-cut set of stringers ensures your stairs are uniform, safe, and visually appealing—key elements of an outdoor space that invites family and friends. Moreover, taking the time to master this skill can prevent costly corrections later, especially if you plan to incorporate features like [composite decking trends for 2025](https://deckdesignbuild.com/composite-decking-trends-2025-the-ultimate-guide-for-outdoor-enthusiasts) into your design.
But here’s a common mistake I made early on—rushing the cuts without double-checking measurements. It seemed harmless at the moment, but one off cut meant redoing an entire stringer. This oversight not only delayed my project but also added unnecessary expenses. Trust me, precision here is worth every effort.
Are you frustrated with uneven stairs or unsure about how to get that perfect cut? You’re definitely not alone. Many DIY enthusiasts face these hurdles initially. In the upcoming sections, I’ll guide you through the exact steps to ensure your stringers are cut to perfection on your very first attempt. Stay tuned—your beautiful, safe stairs are closer than you think!
Measure Twice, Mark Clearly
Start by carefully measuring the height and run of your stairs. Use a pencil and a carpenter’s square to mark the stringer piece on a piece of scrap lumber first. This step helps you visualize the cut angles precisely before working on your actual material. I recall a time I mistakenly cut a stringer too short because I overlooked a small measurement extra—learning this simple trick saved me from re-cutting the entire piece. Double-check all measurements to avoid costly errors.
Saw the Bevels with Precision
Set your circular saw to the angle required for the staircase’s pitch—commonly around 42 degrees for typical stairs. Cut along the marked lines, keeping the saw steady for a clean bevel. For better control, clamp the stringer securely to your work surface. Remember, a steady hand results in more accurate cuts. Think of it like carving a sculpture: narrow, controlled movements yield the best shape. This ensures each stringer aligns perfectly when installed, contributing to a safe and uniform staircase.
Use a Jig or Pattern for Repetition
If you’re making multiple stringers, create a template or jig from your first cut. Transfer the measurements onto additional lumber, using your first stringer as a master guide. This guarantees all stringers are identical, which is critical for even steps and safety. I once built a set with uneven stringers because I didn’t implement this step—causing a wobbly staircase that needed fixing. Consistency in cuts not only saves time but also results in a professional-looking finish.
Test Fit Before Final Assembly
Always dry-fit the cut stringers against each other and the project footing or framing. This allows you to catch any inaccuracies and make minor adjustments before finalizing the cuts. I once thought I was done with perfect cuts, only to realize one stringer was slightly off when installing—it delayed my project. Precise measurement, controlled cutting, and fitting are the triad for success in making deck stringers.
Seal and Protect the Ends
After cutting, apply a sealant or end grain preservative to prevent water absorption, which can lead to rot over time—especially important if your deck is exposed to the elements. This small step prolongs the life of your stringers and maintains their stability. When I neglected this, one of my stringers started showing signs of wear within a year. Proper sealing preserves your efforts without extra work down the road.
Many enthusiasts believe that selecting composite decking is purely about choosing the right color and texture, but in reality, there’s a hidden nuance: understanding the material’s expansion and contraction properties. Unlike traditional wood, composite boards can expand significantly with temperature fluctuations, which many overlook during installation. This oversight can lead to warping, buckling, or gaps over time, compromising both safety and aesthetics. Experts from the industry emphasize the importance of leaving proper spacing and using specialist fasteners designed for composite materials to accommodate these movements. Neglecting these details is a common mistake that can turn a dream outdoor space into a maintenance nightmare.
How do thermal expansion properties of composite decking influence long-term durability?
Research indicates that without accounting for material expansion, decks may suffer from structural issues within just a few seasons. For example, a study published in the Journal of Building Engineering highlights that proper installation techniques, including allowances for expansion, extend the lifespan and preserve the integrity of the decking surface. So, while it may seem minor, understanding the underlying physics of your chosen materials can save you from costly repairs and replacements down the line. When designing your deck, consider consulting professional resources or experienced builders to ensure these subtleties are not overlooked. It’s a common misconception that modern composite decks are completely maintenance-free; in fact, mastering these nuances ensures your outdoor living area remains beautiful and functional for years to come. For further insights on how professional deck builders approach these challenges, visit [designing safe and stylish stairs in 2025](https://deckdesignbuild.com/designing-safe-and-stylish-stairs-for-outdoor-decks-in-2025) or reach out through [our contact page](https://deckdesignbuild.com/contact-us). Remember, paying attention to these hidden details can elevate your project from good to legendary. Have you ever fallen into this trap? Let me know in the comments.
Keep Your Deck in Top Shape with the Right Tools
Maintaining a beautiful and durable outdoor living space requires more than just good materials; it demands the right set of tools and a consistent routine. Over the years, I’ve refined my toolkit based on real-world experience and have found that investing in high-quality, specialized equipment pays dividends in long-term results. For instance, using a digital moisture meter allows me to assess wood and composite decks accurately, helping prevent premature rot or warping—especially crucial when dealing with composite materials that expand and contract with temperature changes.
One tool I personally swear by is the cordless impact driver paired with deep socket adapters. This combo speeds up the process of tightening or replacing railing posts and stairs connectors, reducing strain and ensuring a secure fit. Be sure to select fasteners designed specifically for composites, as traditional nails and screws can cause damage or loosening over time. For sealing and maintaining, I rely on a high-quality sprayer like the Wagner Flexio, which provides even application of sealants and preservatives. Proper sealing extends the life of your deck components and prevents water infiltration—key to long-term durability.
Planning to scale your outdoor space? Consider modular systems with adjustable fasteners and brackets. This flexibility makes future modifications or expansions smoother and less costly. Modern software like SketchUp or specialized deck design apps can help visualize your project, ensuring measurements and materials are spot-on before cutting or ordering supplies. Incorporating these tools into your routine sets a solid foundation for consistent results and fewer mistakes down the line.
Predicting future trends, I believe that integrated smart sensors and IoT solutions will become staples in outdoor maintenance, alerting homeowners to issues like moisture intrusion or structural stresses before visible damage occurs. This proactive approach could save thousands and prolong the lifespan of outdoor living structures—something enabled by advancements in sensor tech and data analytics.
How do I maintain outdoor tools to ensure longevity?
Proper maintenance is critical. Clean your impact driver after every use, especially if you’ve worked with sealants or preservatives. Store tools in a dry, temperature-controlled environment to prevent rust and wear. Regularly calibrate your digital moisture meters to ensure accurate readings. For power tools, replace worn brushes and check for loose connections seasonally, particularly before major projects. As I’ve learned firsthand, well-maintained tools not only perform better but also last for years, saving money and frustration. For more insights on optimizing your outdoor projects, visit this comprehensive guide.
If you’re serious about making your outdoor space last, try upgrading to a professional-grade impact driver and invest in a digital moisture meter. These small adjustments can streamline your workflow and prevent common issues like warping or loosening over time. Remember, the key to successful outdoor living projects lies in combining quality materials with the right tools and proper maintenance routines.
3 Surprising Truths I Discovered About Deck Stringer Precision
– The biggest mistake in my early deck projects was relying solely on calculators without double-checking the actual measurements on-site; physically verifying measurements can reveal unforeseen quirks in your yard that affect cuts.
– Overestimating the angle of your cuts might seem safe, but it can lead to uneven stair treads. Cutting slightly more than calculated and then fine-tuning ensures perfect fit every time.
– Using scrap pieces to test your bevel angles before cutting your actual stringers saves time and prevents costly re-cuts, which I learned from my first messy project.
Tools That Revolutionized My Outdoor Stairs Crafting
After years of trial and error, I trust a high-quality digital angle finder and a speed square for making precise cuts. These tools cut down measurement errors significantly. For guides and techniques, I often revisit resources like this comprehensive guide. Additionally, a good clamp and sturdy workbench elevate your control and safety.
Don’t forget, investing in reliable saw blades designed for composite and hardwood ensures clean cuts that won’t fray or scatter fibers, especially with bevel cuts that are critical for stair stability.
Turning Mistakes Into Masterpieces in Your Outdoor Space
My most valuable insight? Every error on a deck project is a lesson in disguise. For example, early on, I ignored comprehensive planning, which led to uneven stringers. Now, I survey the entire area meticulously, considering future expansions or landscaping features, like in this article.
Building outdoor stairs that are safe, attractive, and durable isn’t just about the cuts—it’s about craftsmanship, patience, and learning from every step you take. Embrace the process, and your outdoor living dreams will truly take shape.